Learning Multi-Block and Reduction Printing
Since coming home from my residency at Canyons of the Ancients National Monument, I’ve been concentrating on learning multi-block printing and reduction printing. I’ve been working with the block I carved during the residency, as well as an older block I carved some time ago of a beautiful beach scene in Newfoundland.
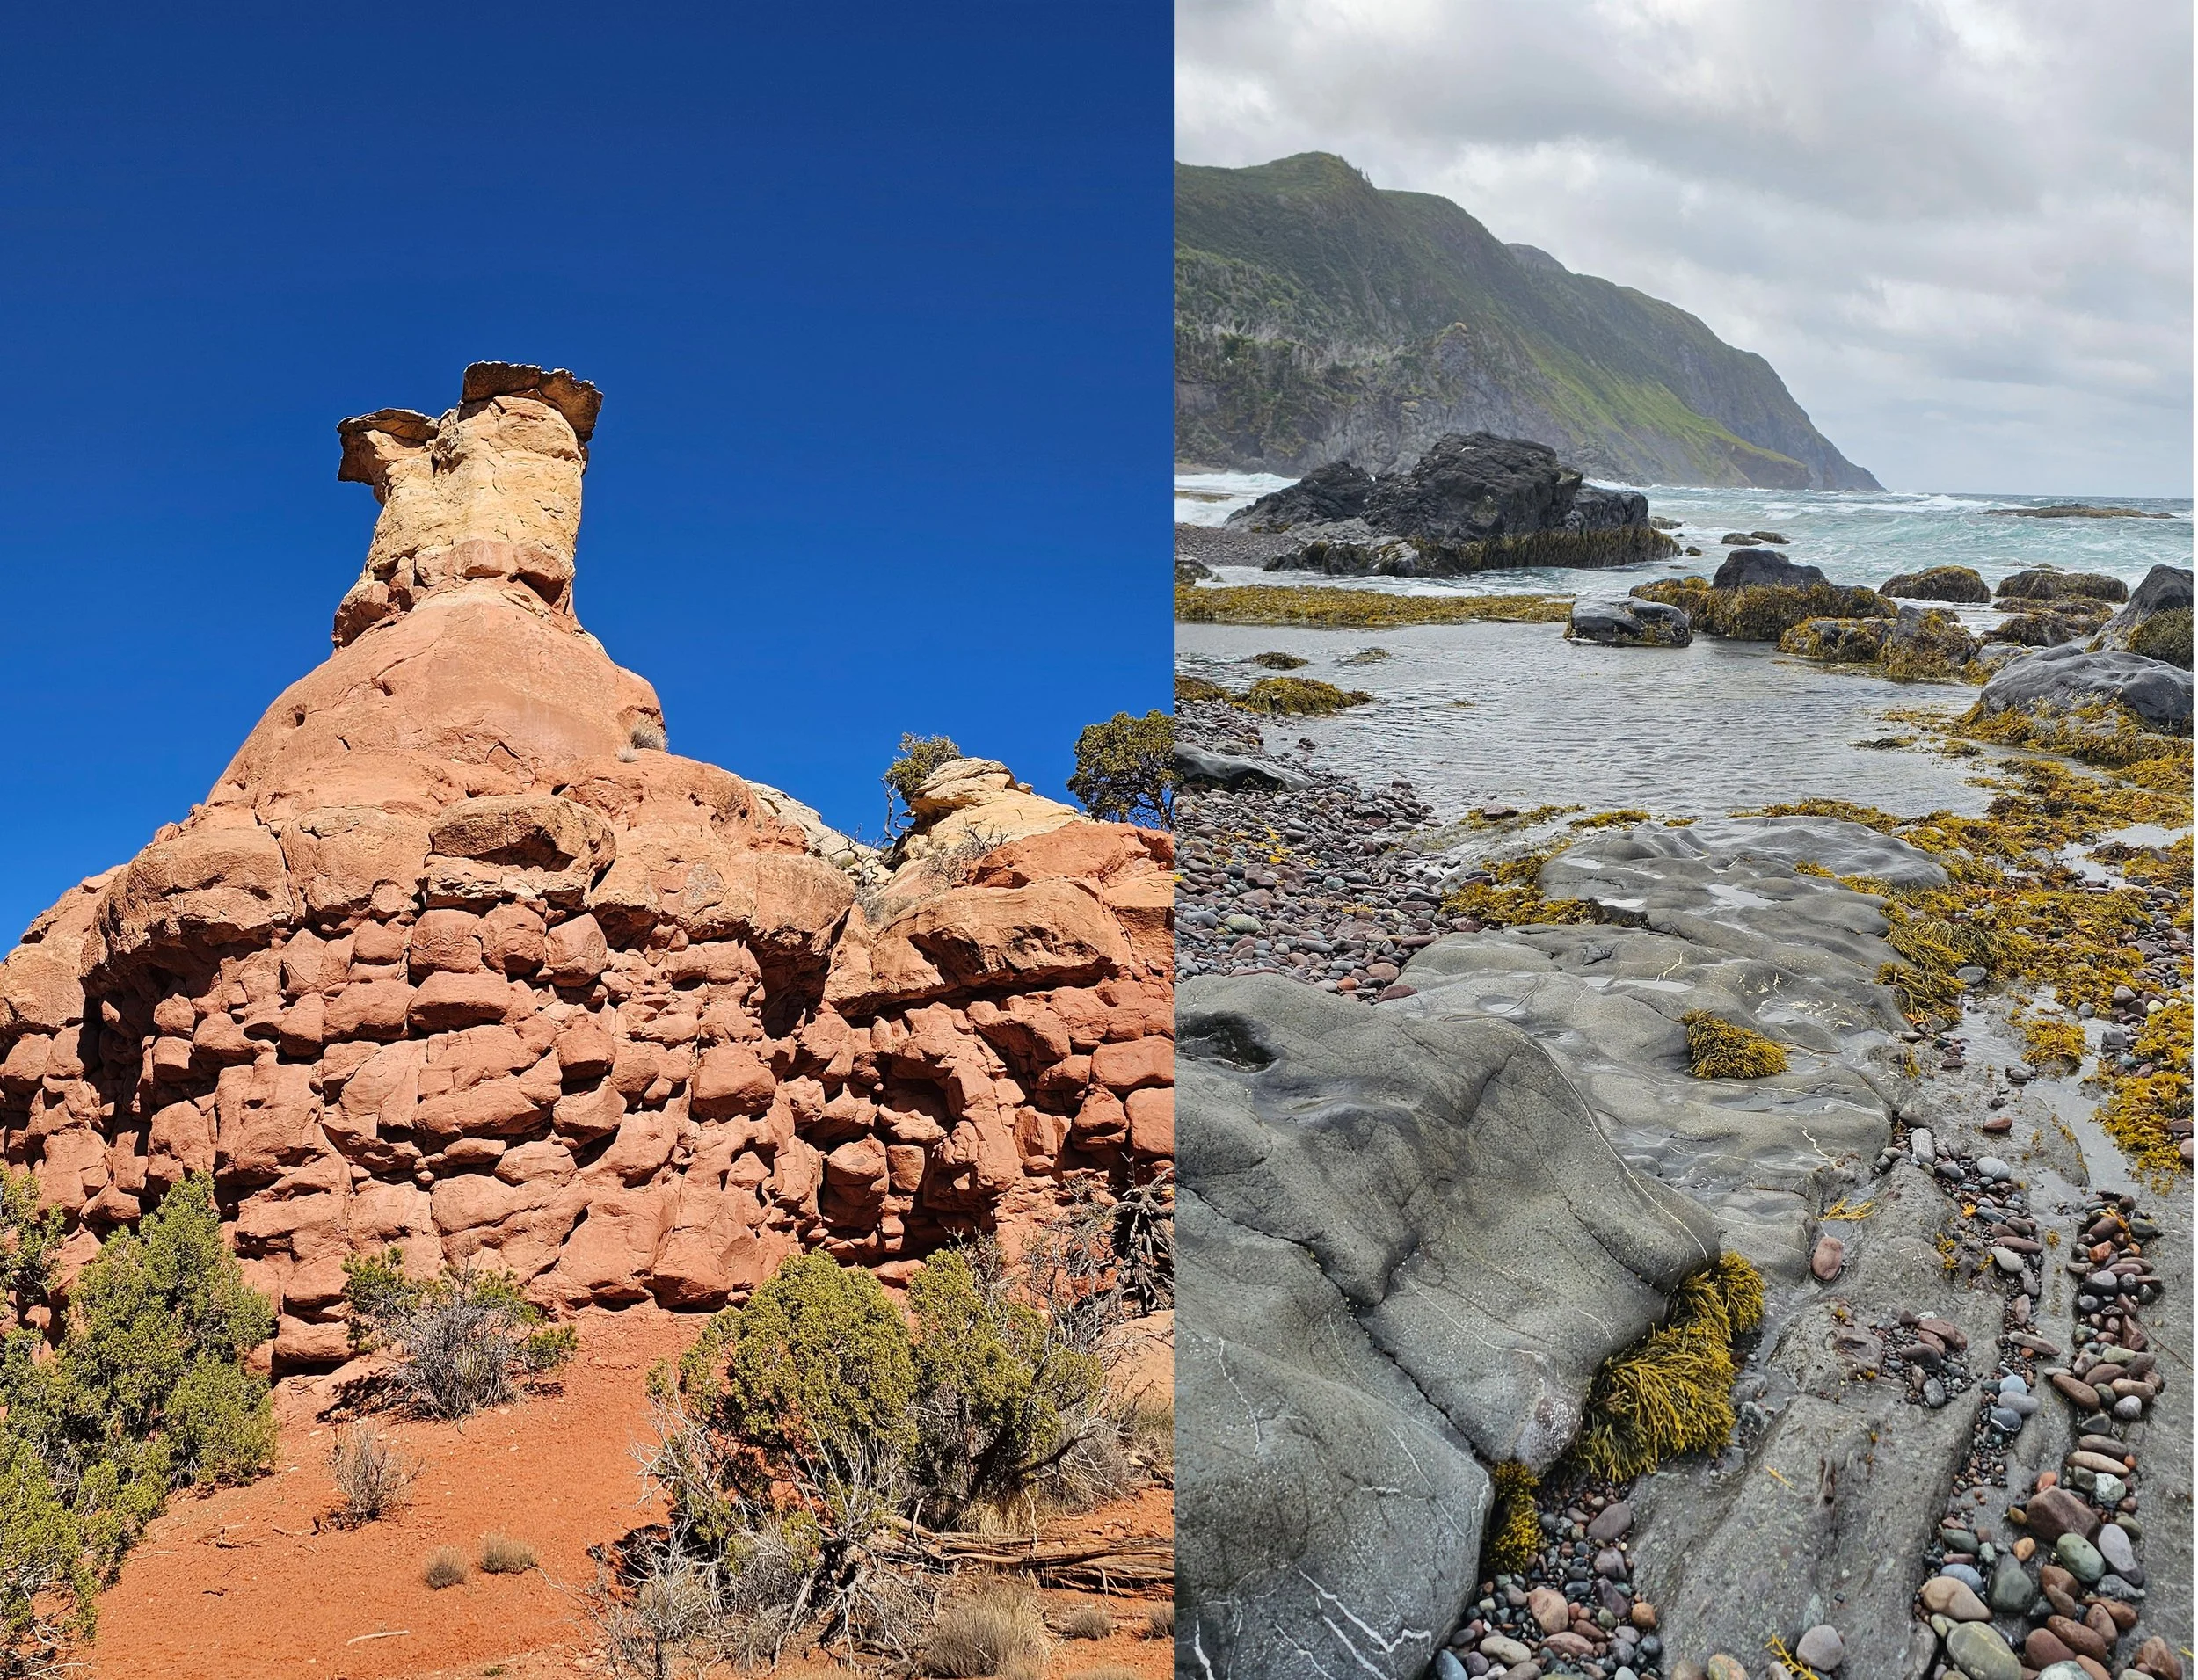
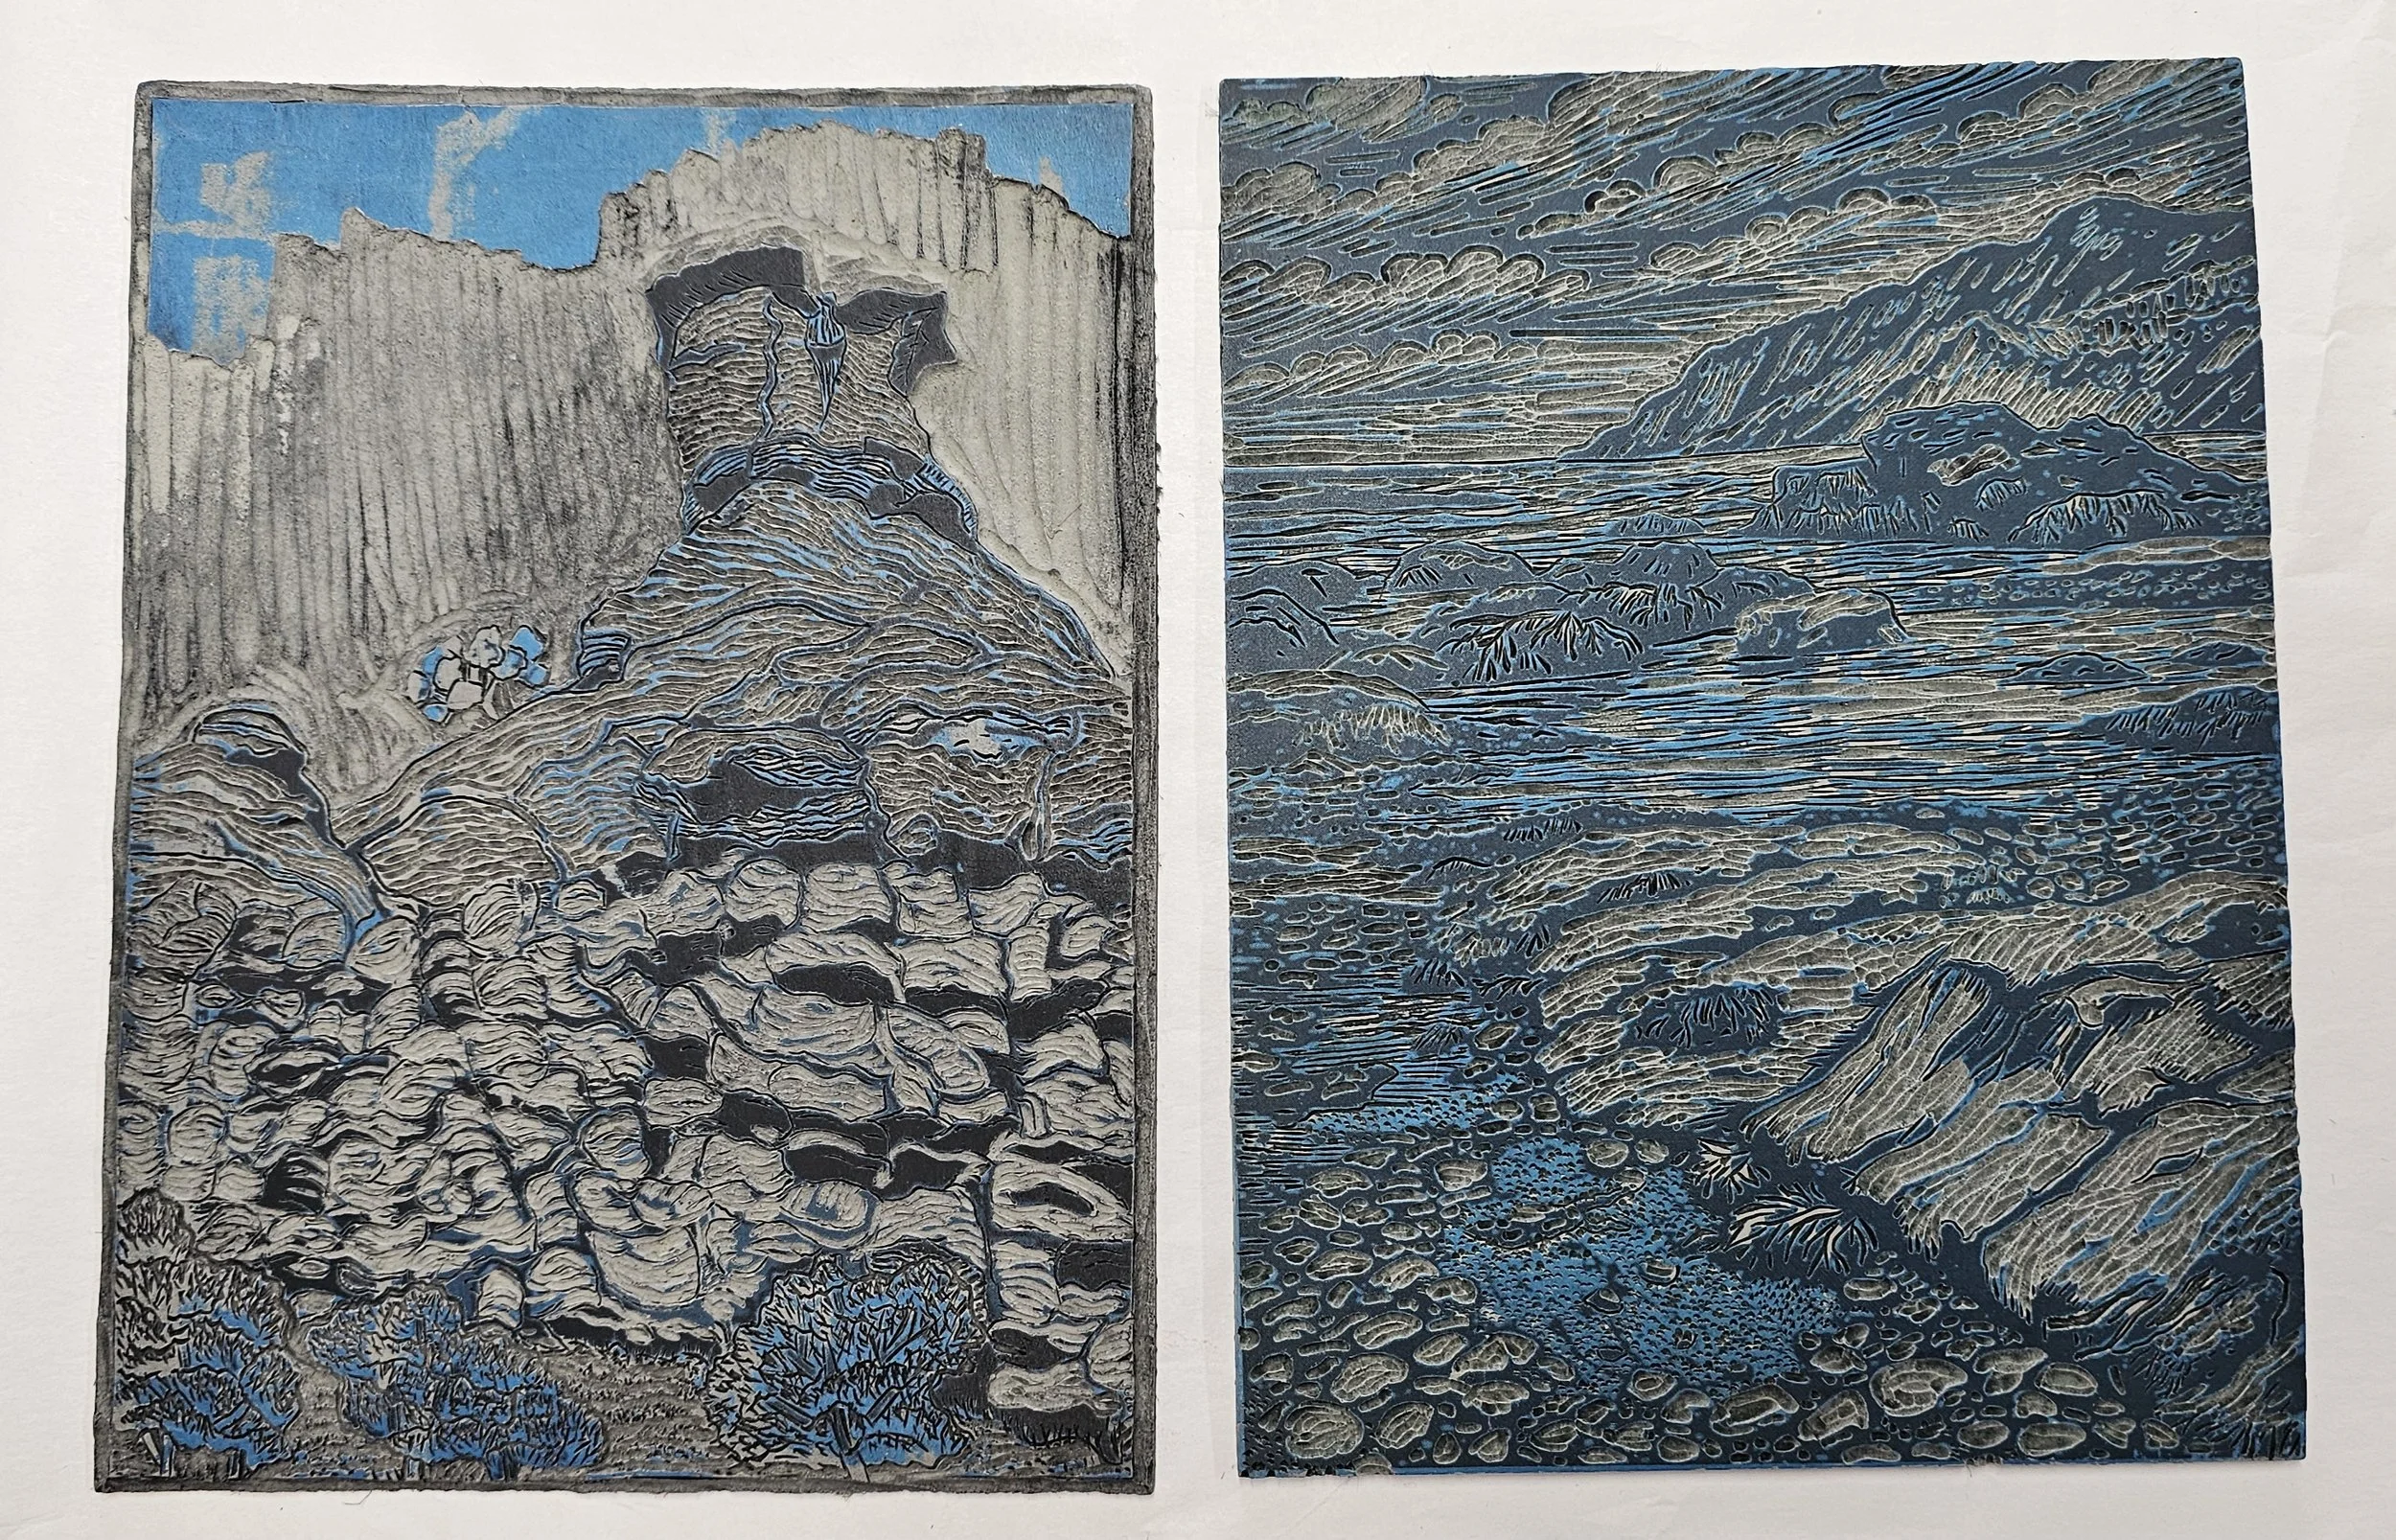
Key blocks for the CANM Rock and Low Tide
Both of these printmaking methods have been stretching my brain in all kinds of ways. There are so many moving parts—getting the registration lined up correctly, mixing ink colors that actually work, and figuring out which layers and colors need to come first. It’s definitely a process that requires patience, experimentation, and a willingness to make mistakes.
And I’ve made plenty of mistakes.
My very first attempts were honestly pretty terrible—but I learned so much from them. I’m finding that I can only really understand what a print needs by doing it, seeing what works, and then adjusting as I go. It’s a very hands-on way of learning, and each print teaches me something for the next one.
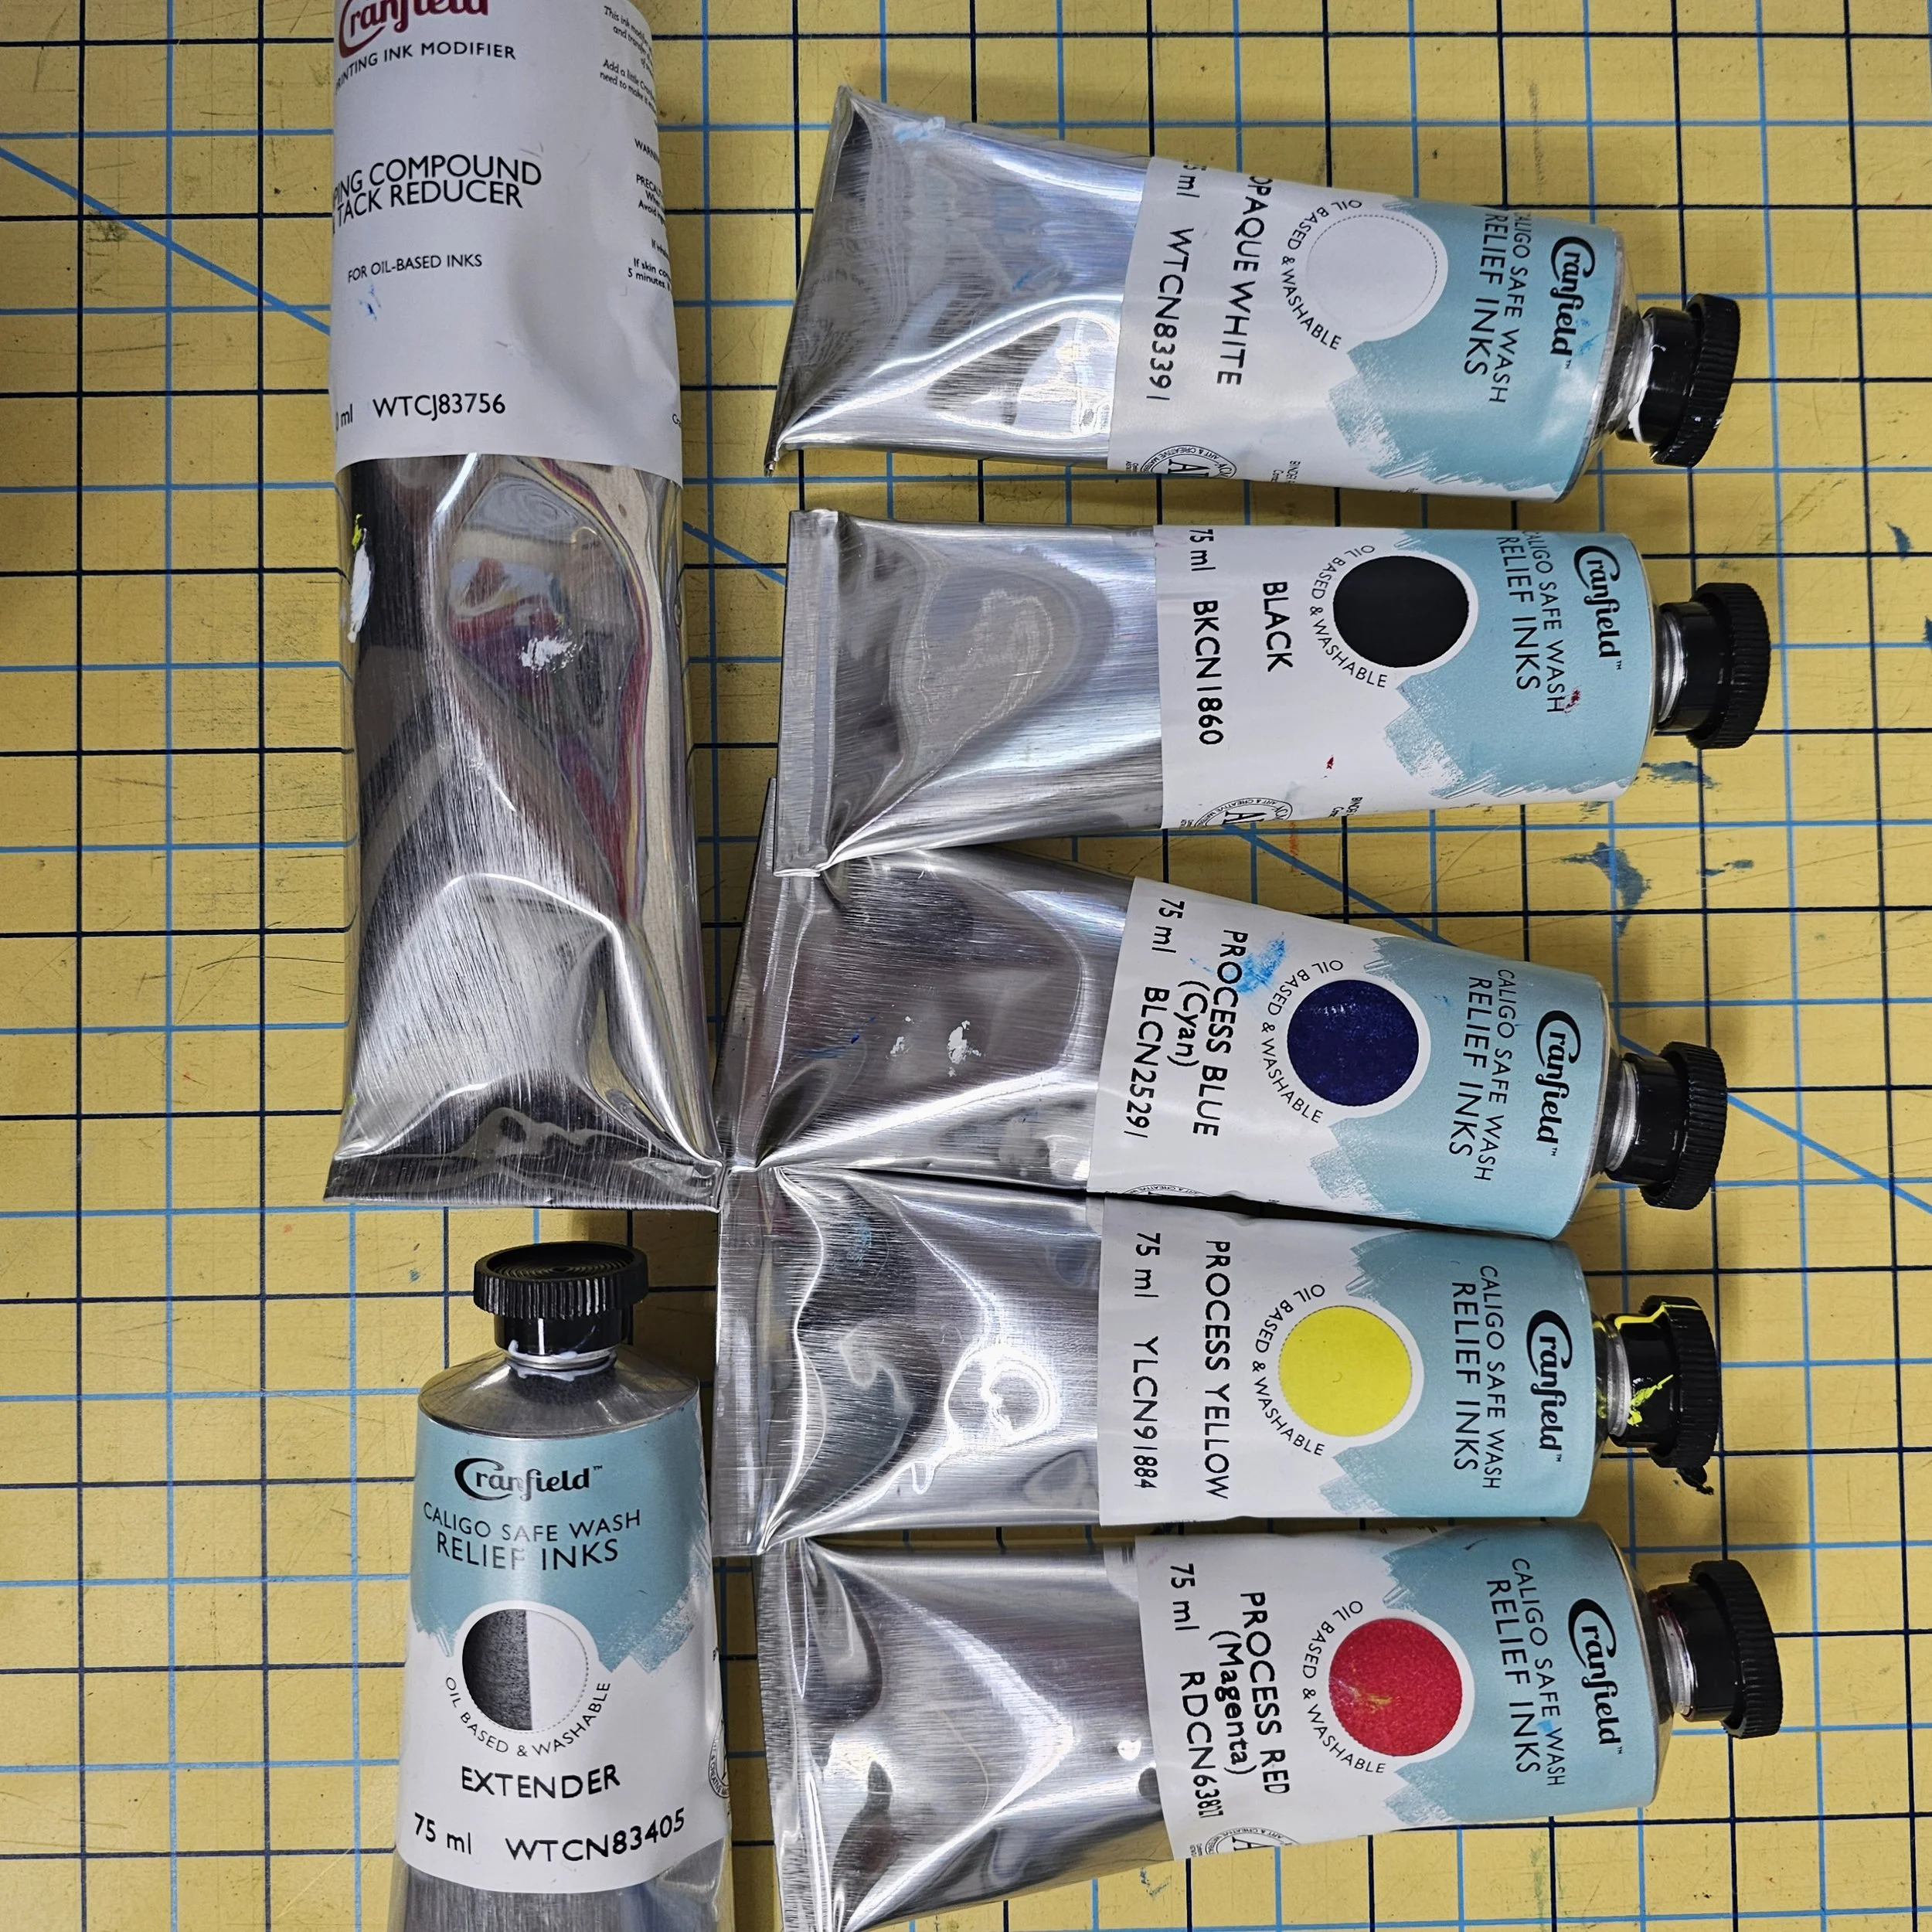
One of the biggest lessons has been about ink. At first, I thought rich, thick, saturated layers would make for stronger prints, but I quickly discovered the opposite. Heavy ink takes forever to dry and often looks muddy and heavy on the paper. Learning to use extender to create more transparent layers has made a huge difference. The prints feel lighter, more luminous, and much more layered in a good way.

3 Blocks for the CANM Rock
I’ve also learned that in some cases, it works better to carve away an area and print a new color cleanly, rather than trying to layer one color over another and hoping it behaves the way you want. Another possible solution is to use a more opaque ink when a strong color change is needed. These are the kinds of things you really only learn by trial and error.
Th rock formation is ready for the final printing of the key block!
Another challenge is simply deciding how many blocks are needed to get the effect I want. For the rock formation print I started at the residency, I ended up refining the original block and carving a couple of additional blocks to handle the different cliff colors and tree areas. That print now uses three plates and four colors.
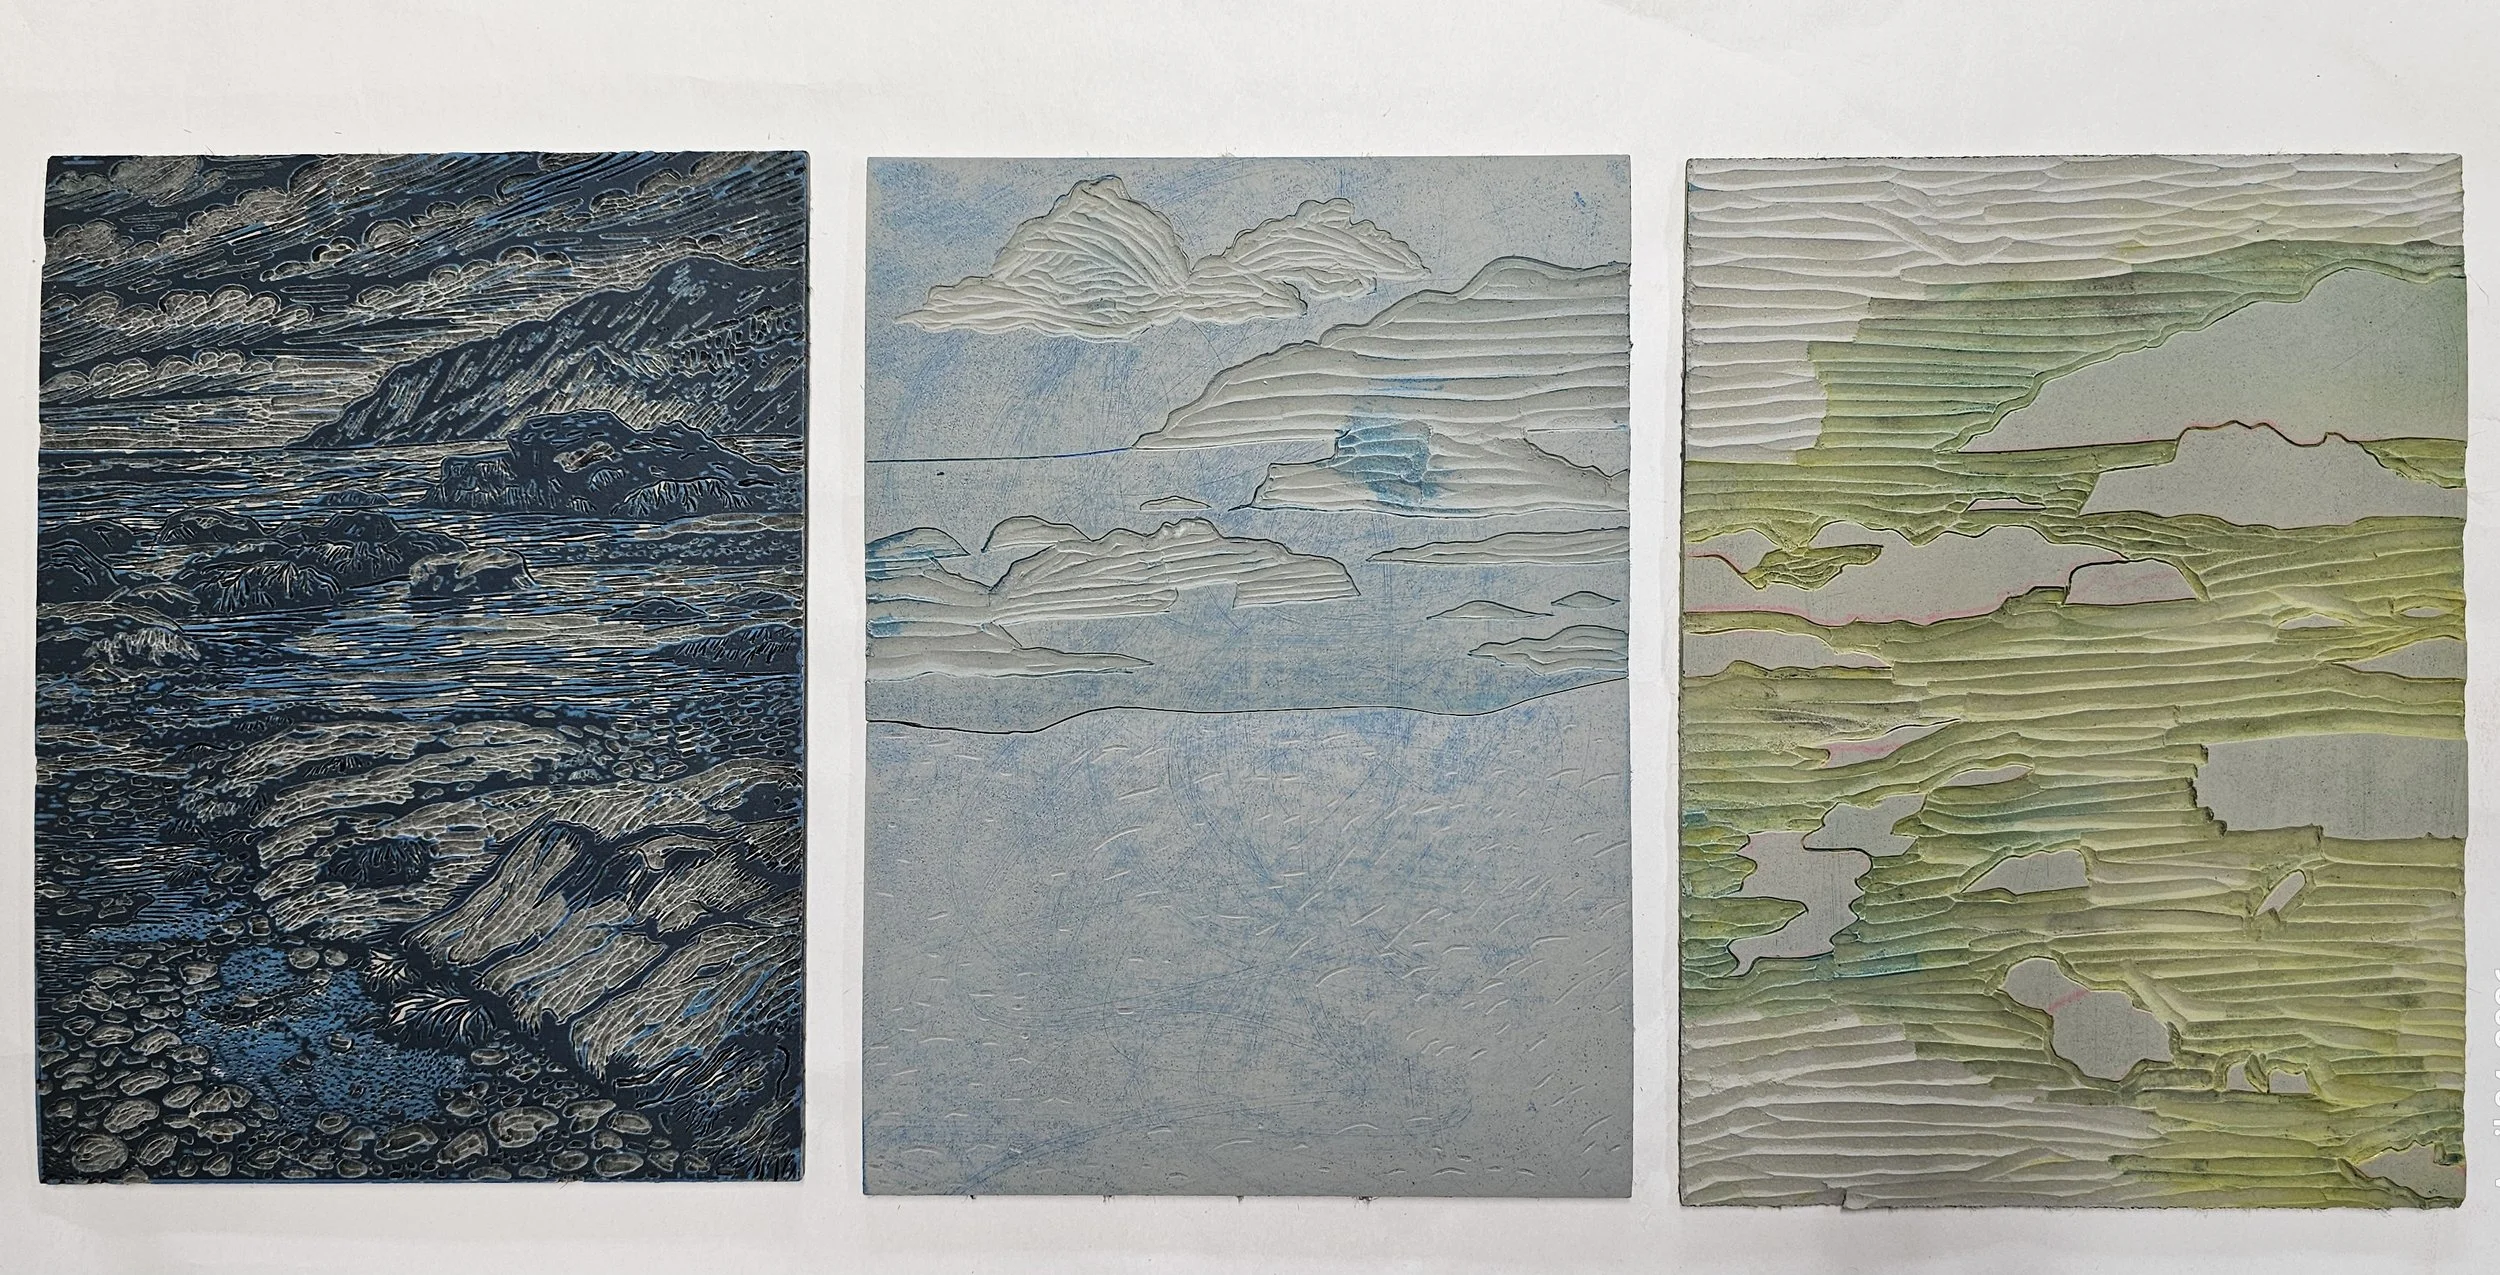
3 blocks for Low Tide
The Newfoundland beach scene has been even more ambitious. It also uses three plates, but some of the imagery is being developed through reduction printing, and in the end it will have ten colors altogether. Since I print just one color layer each day, it’s a slow process—but one that rewards patience.
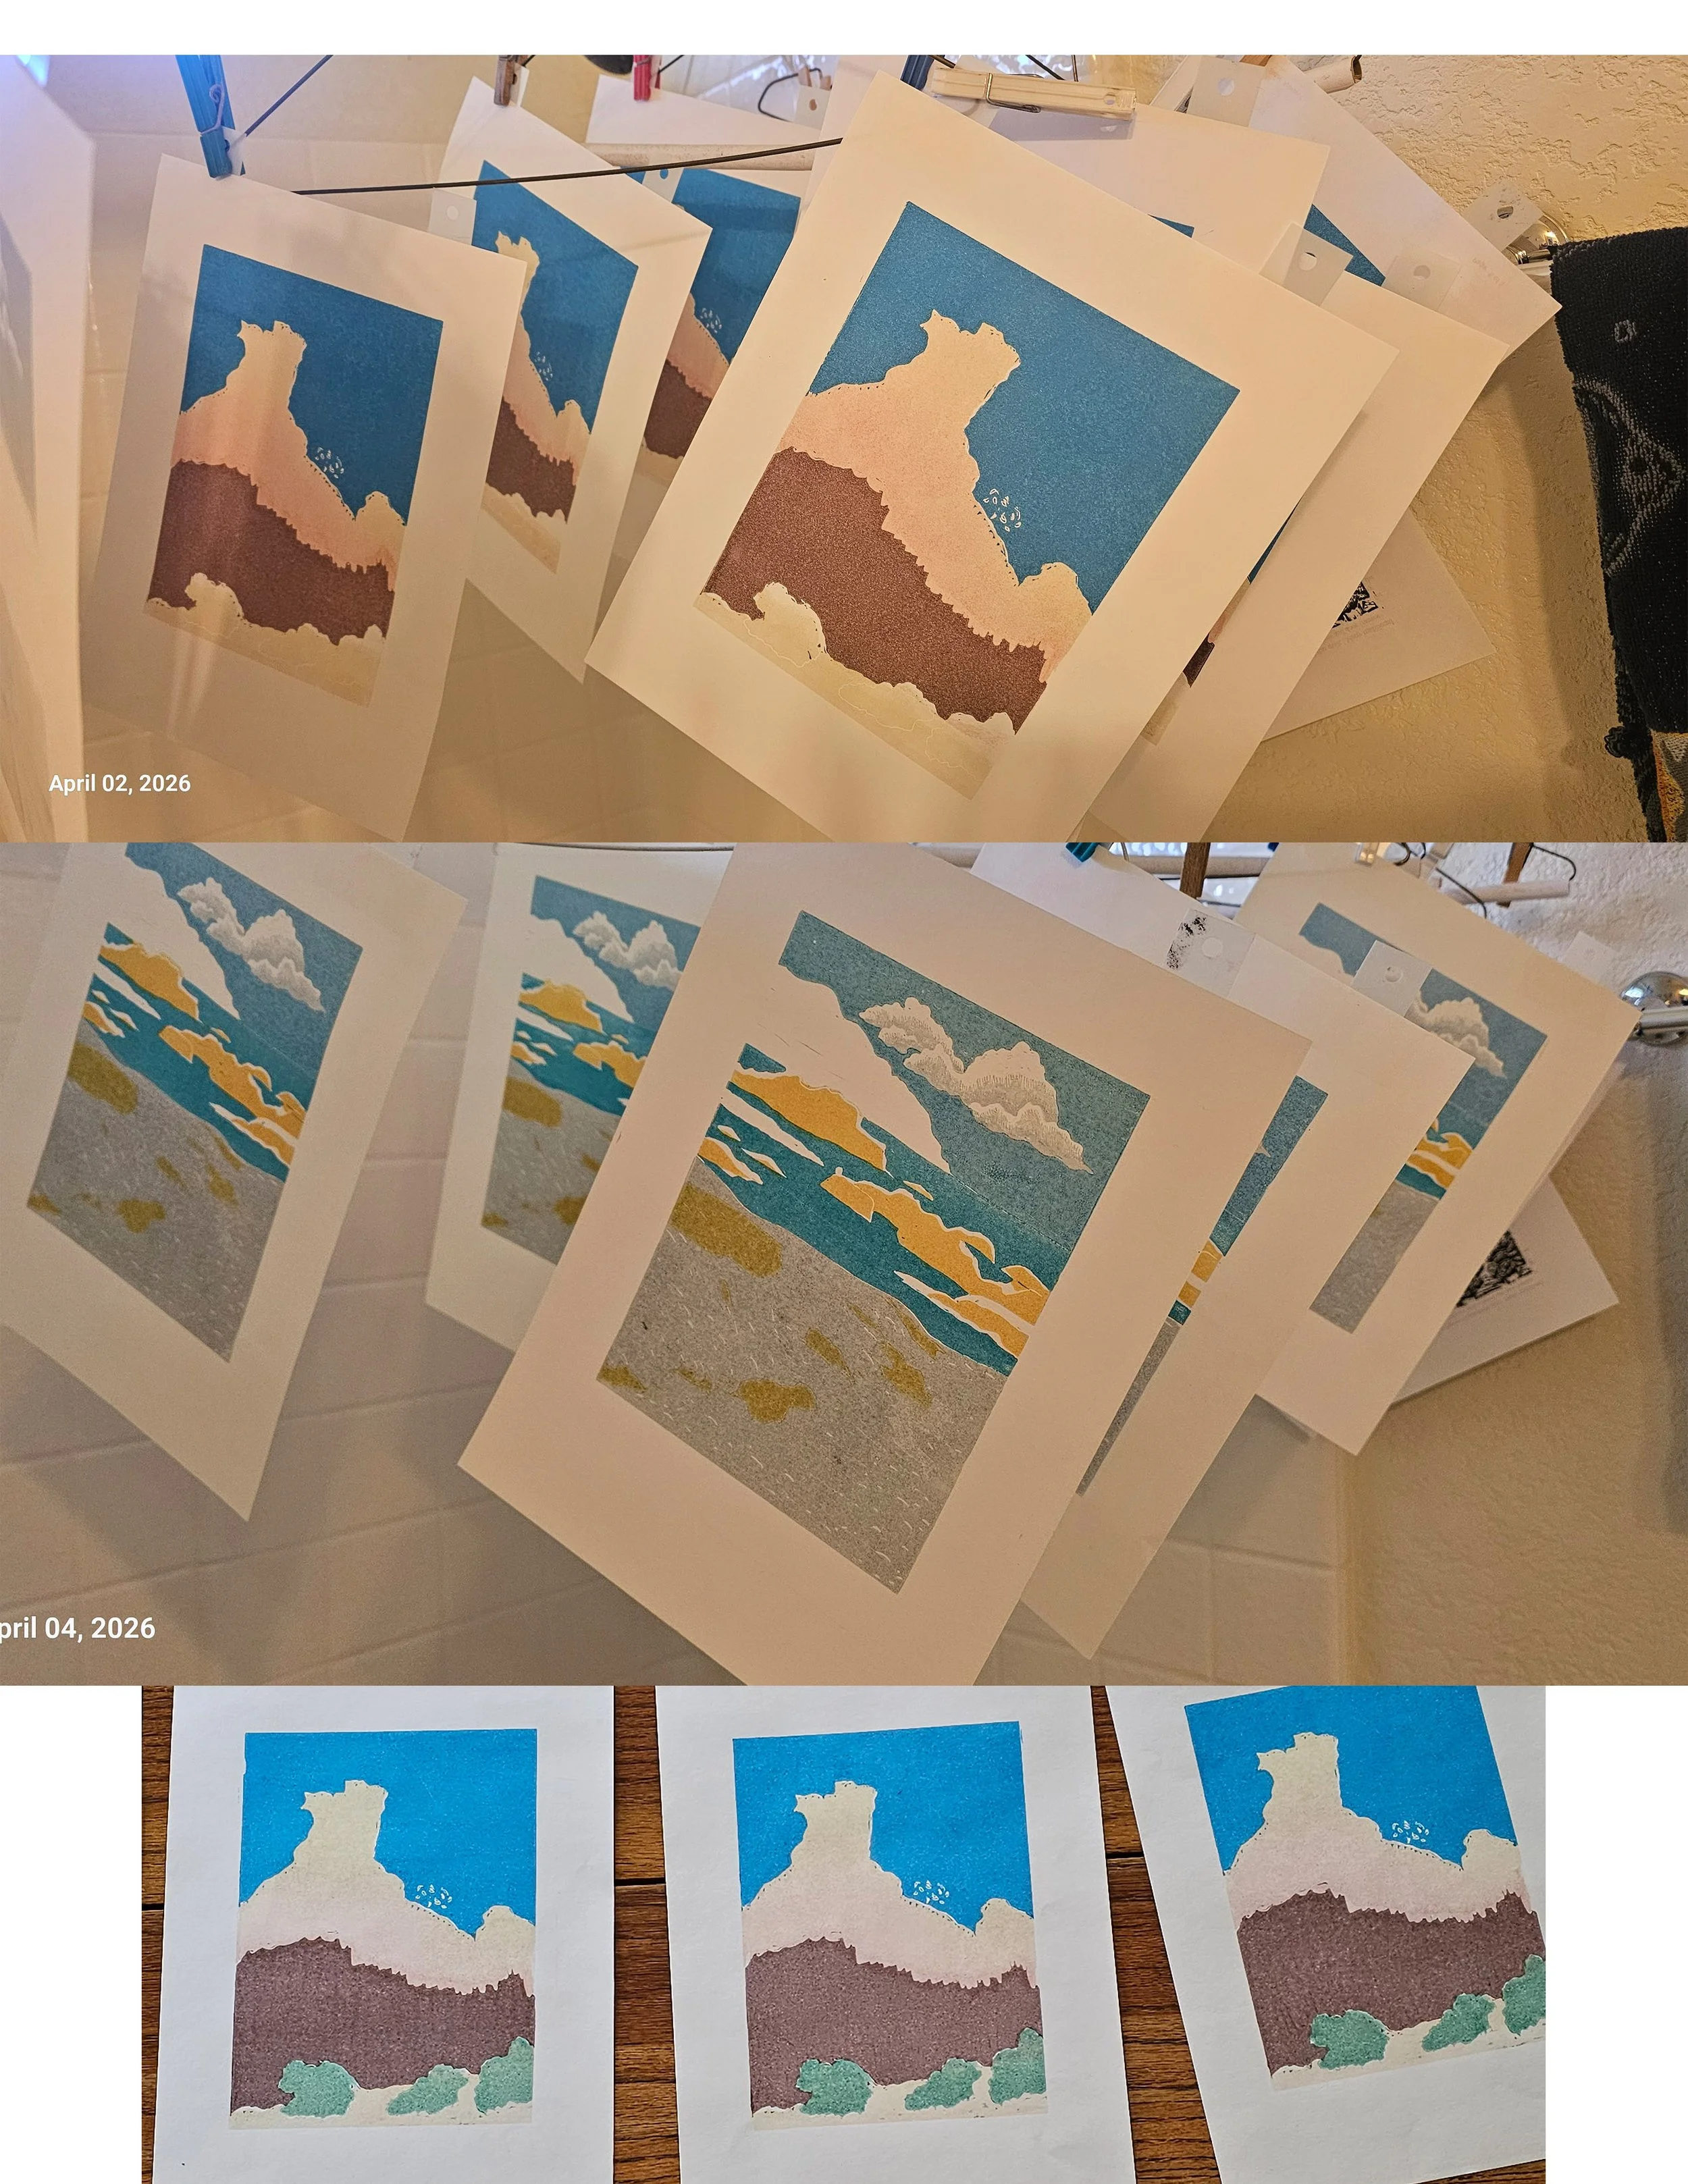
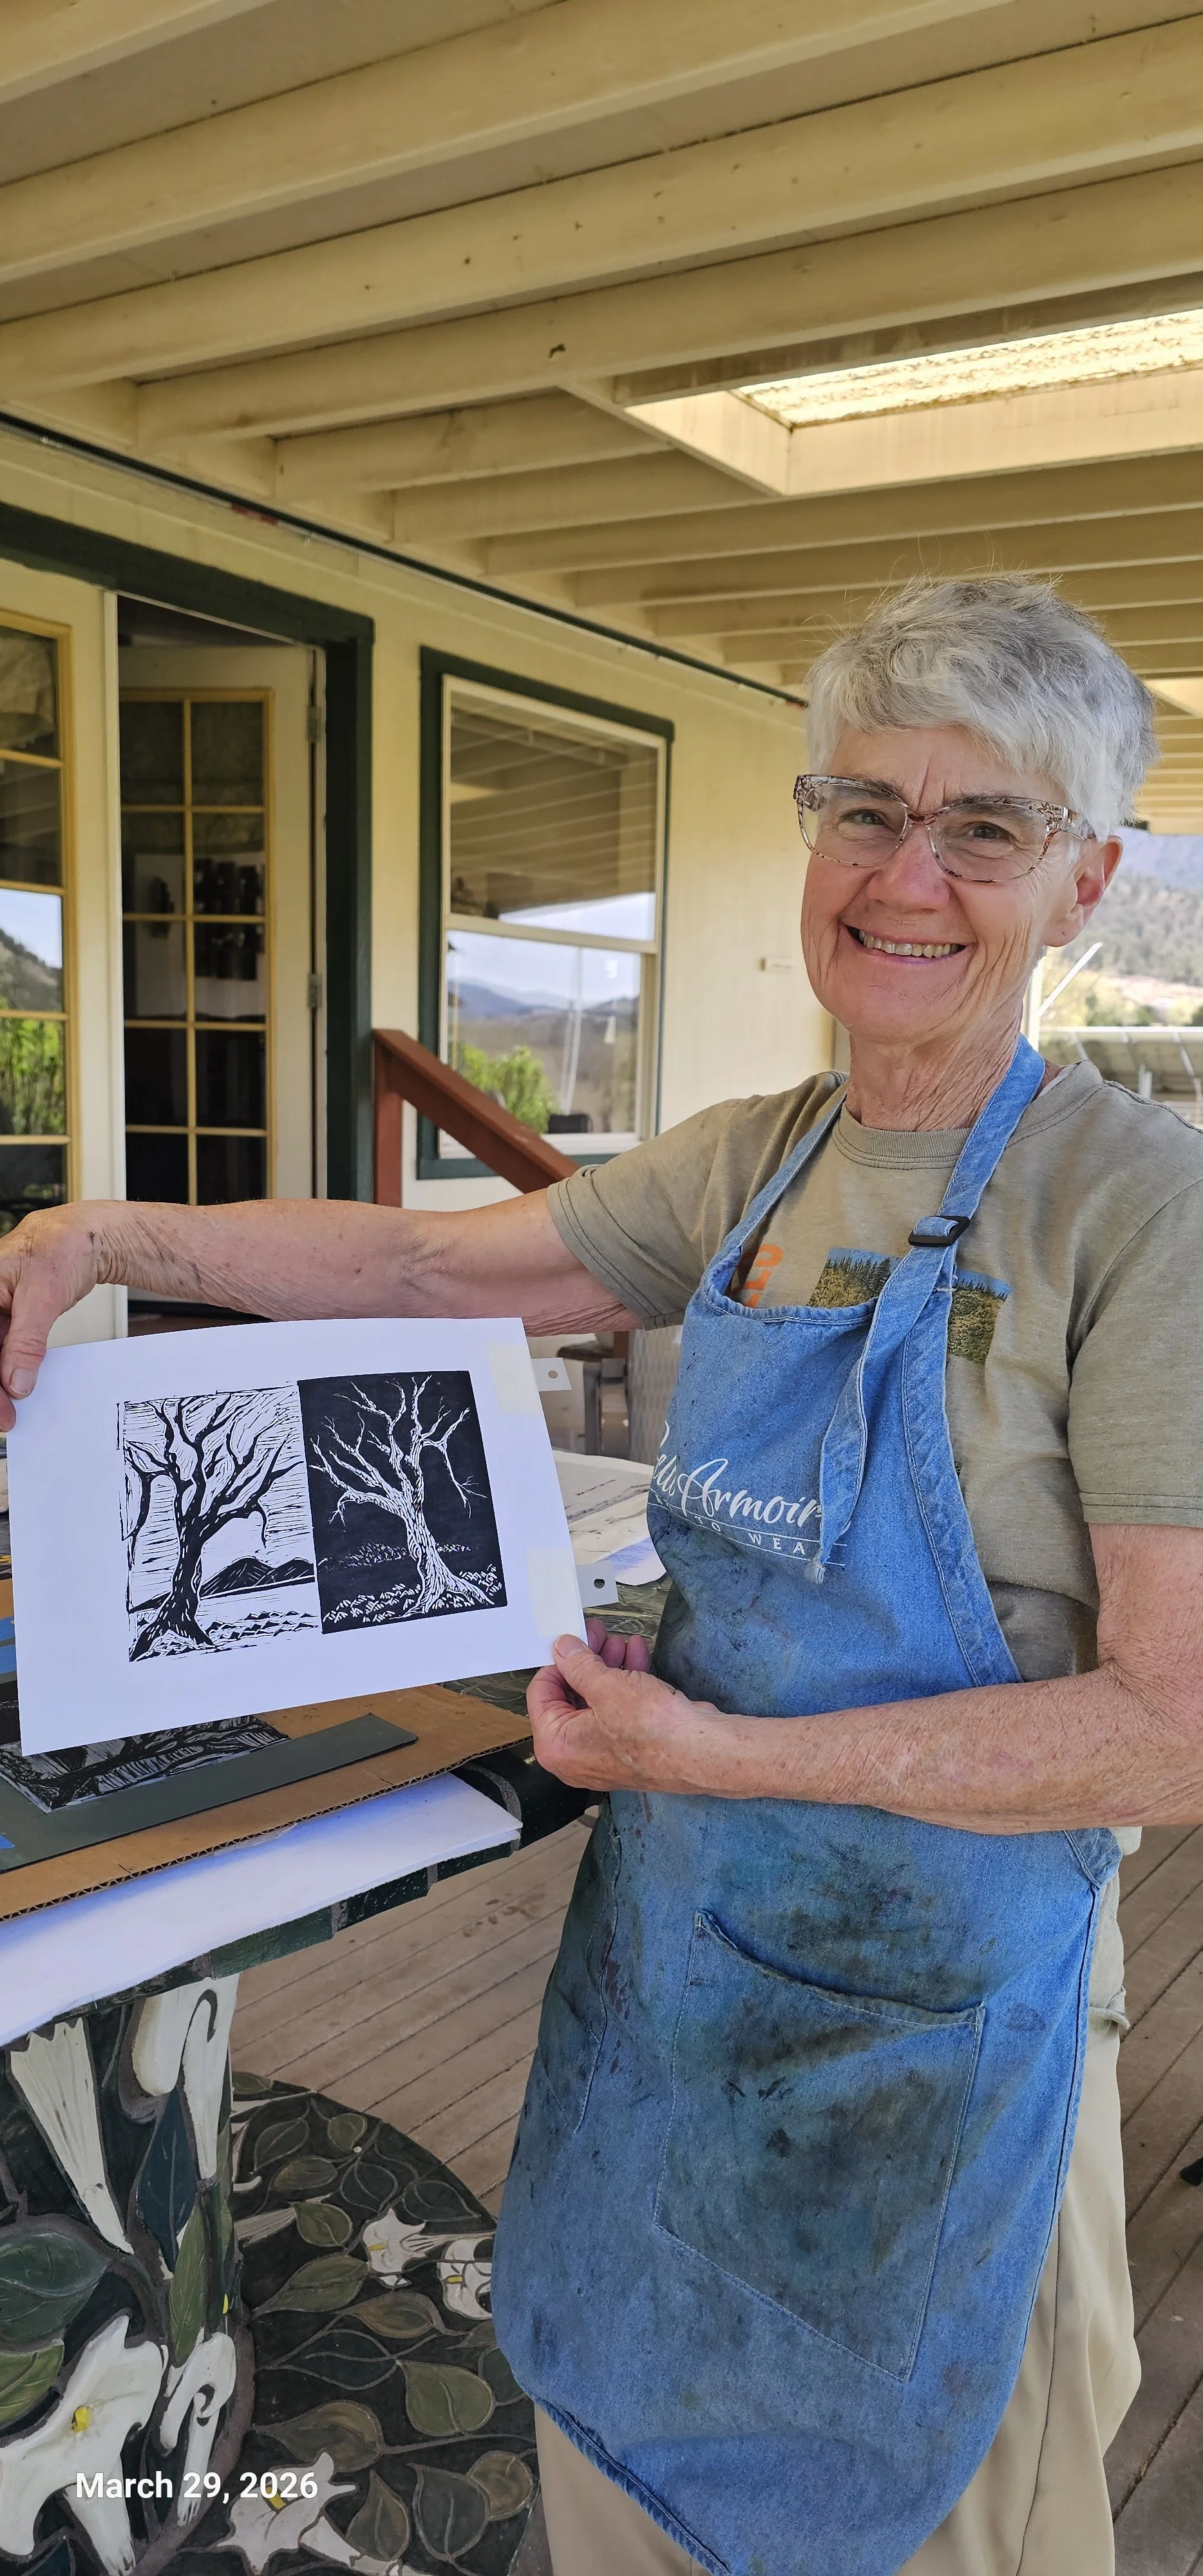
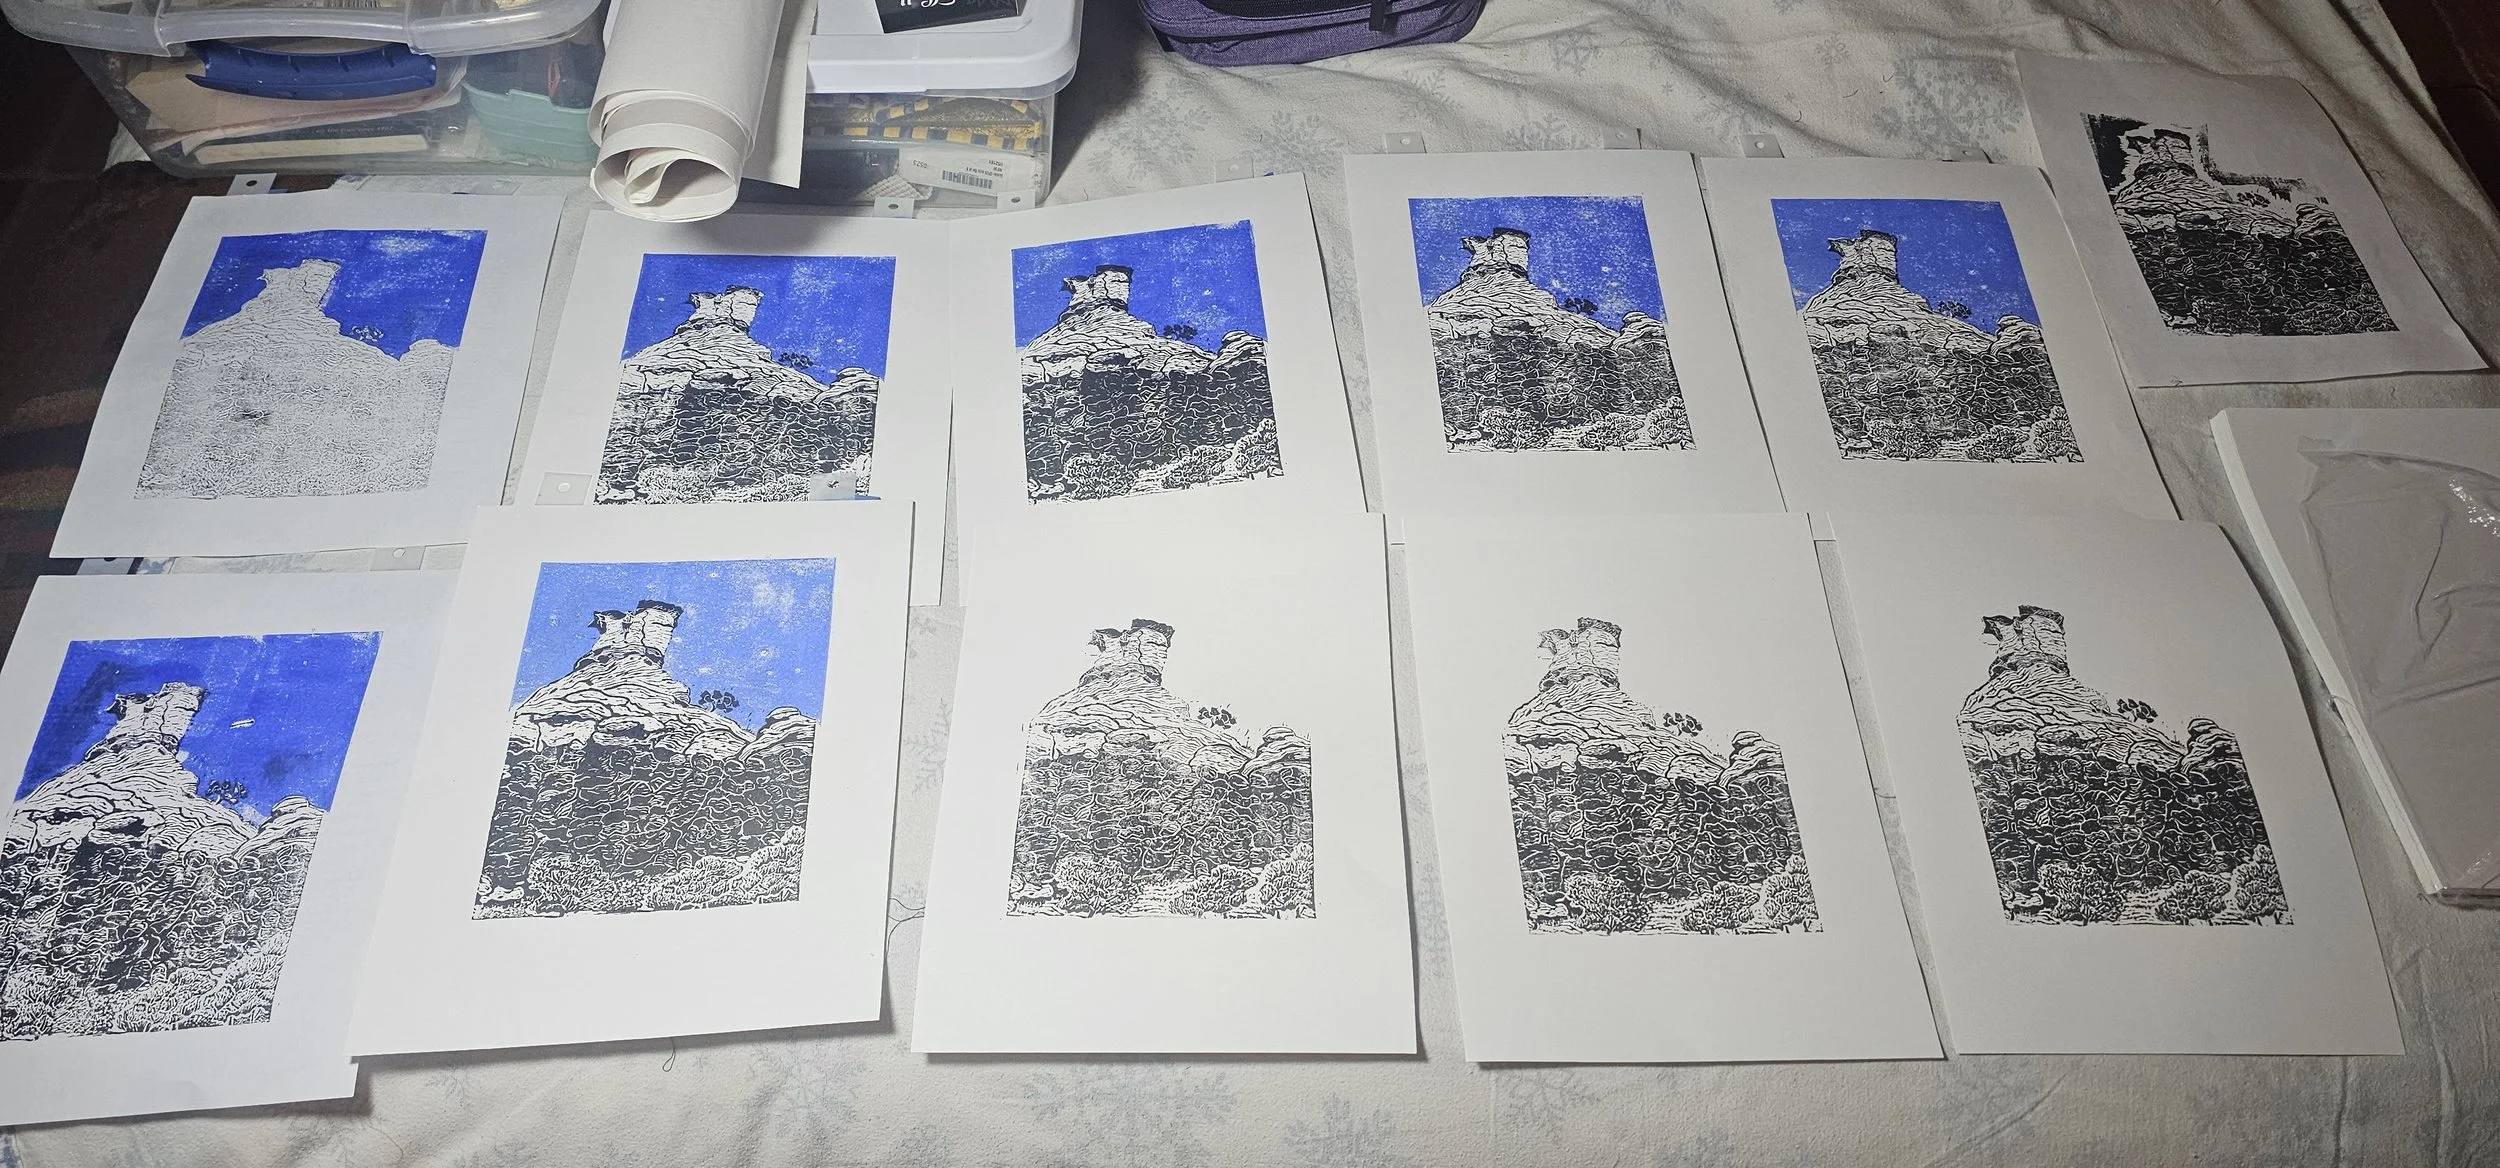
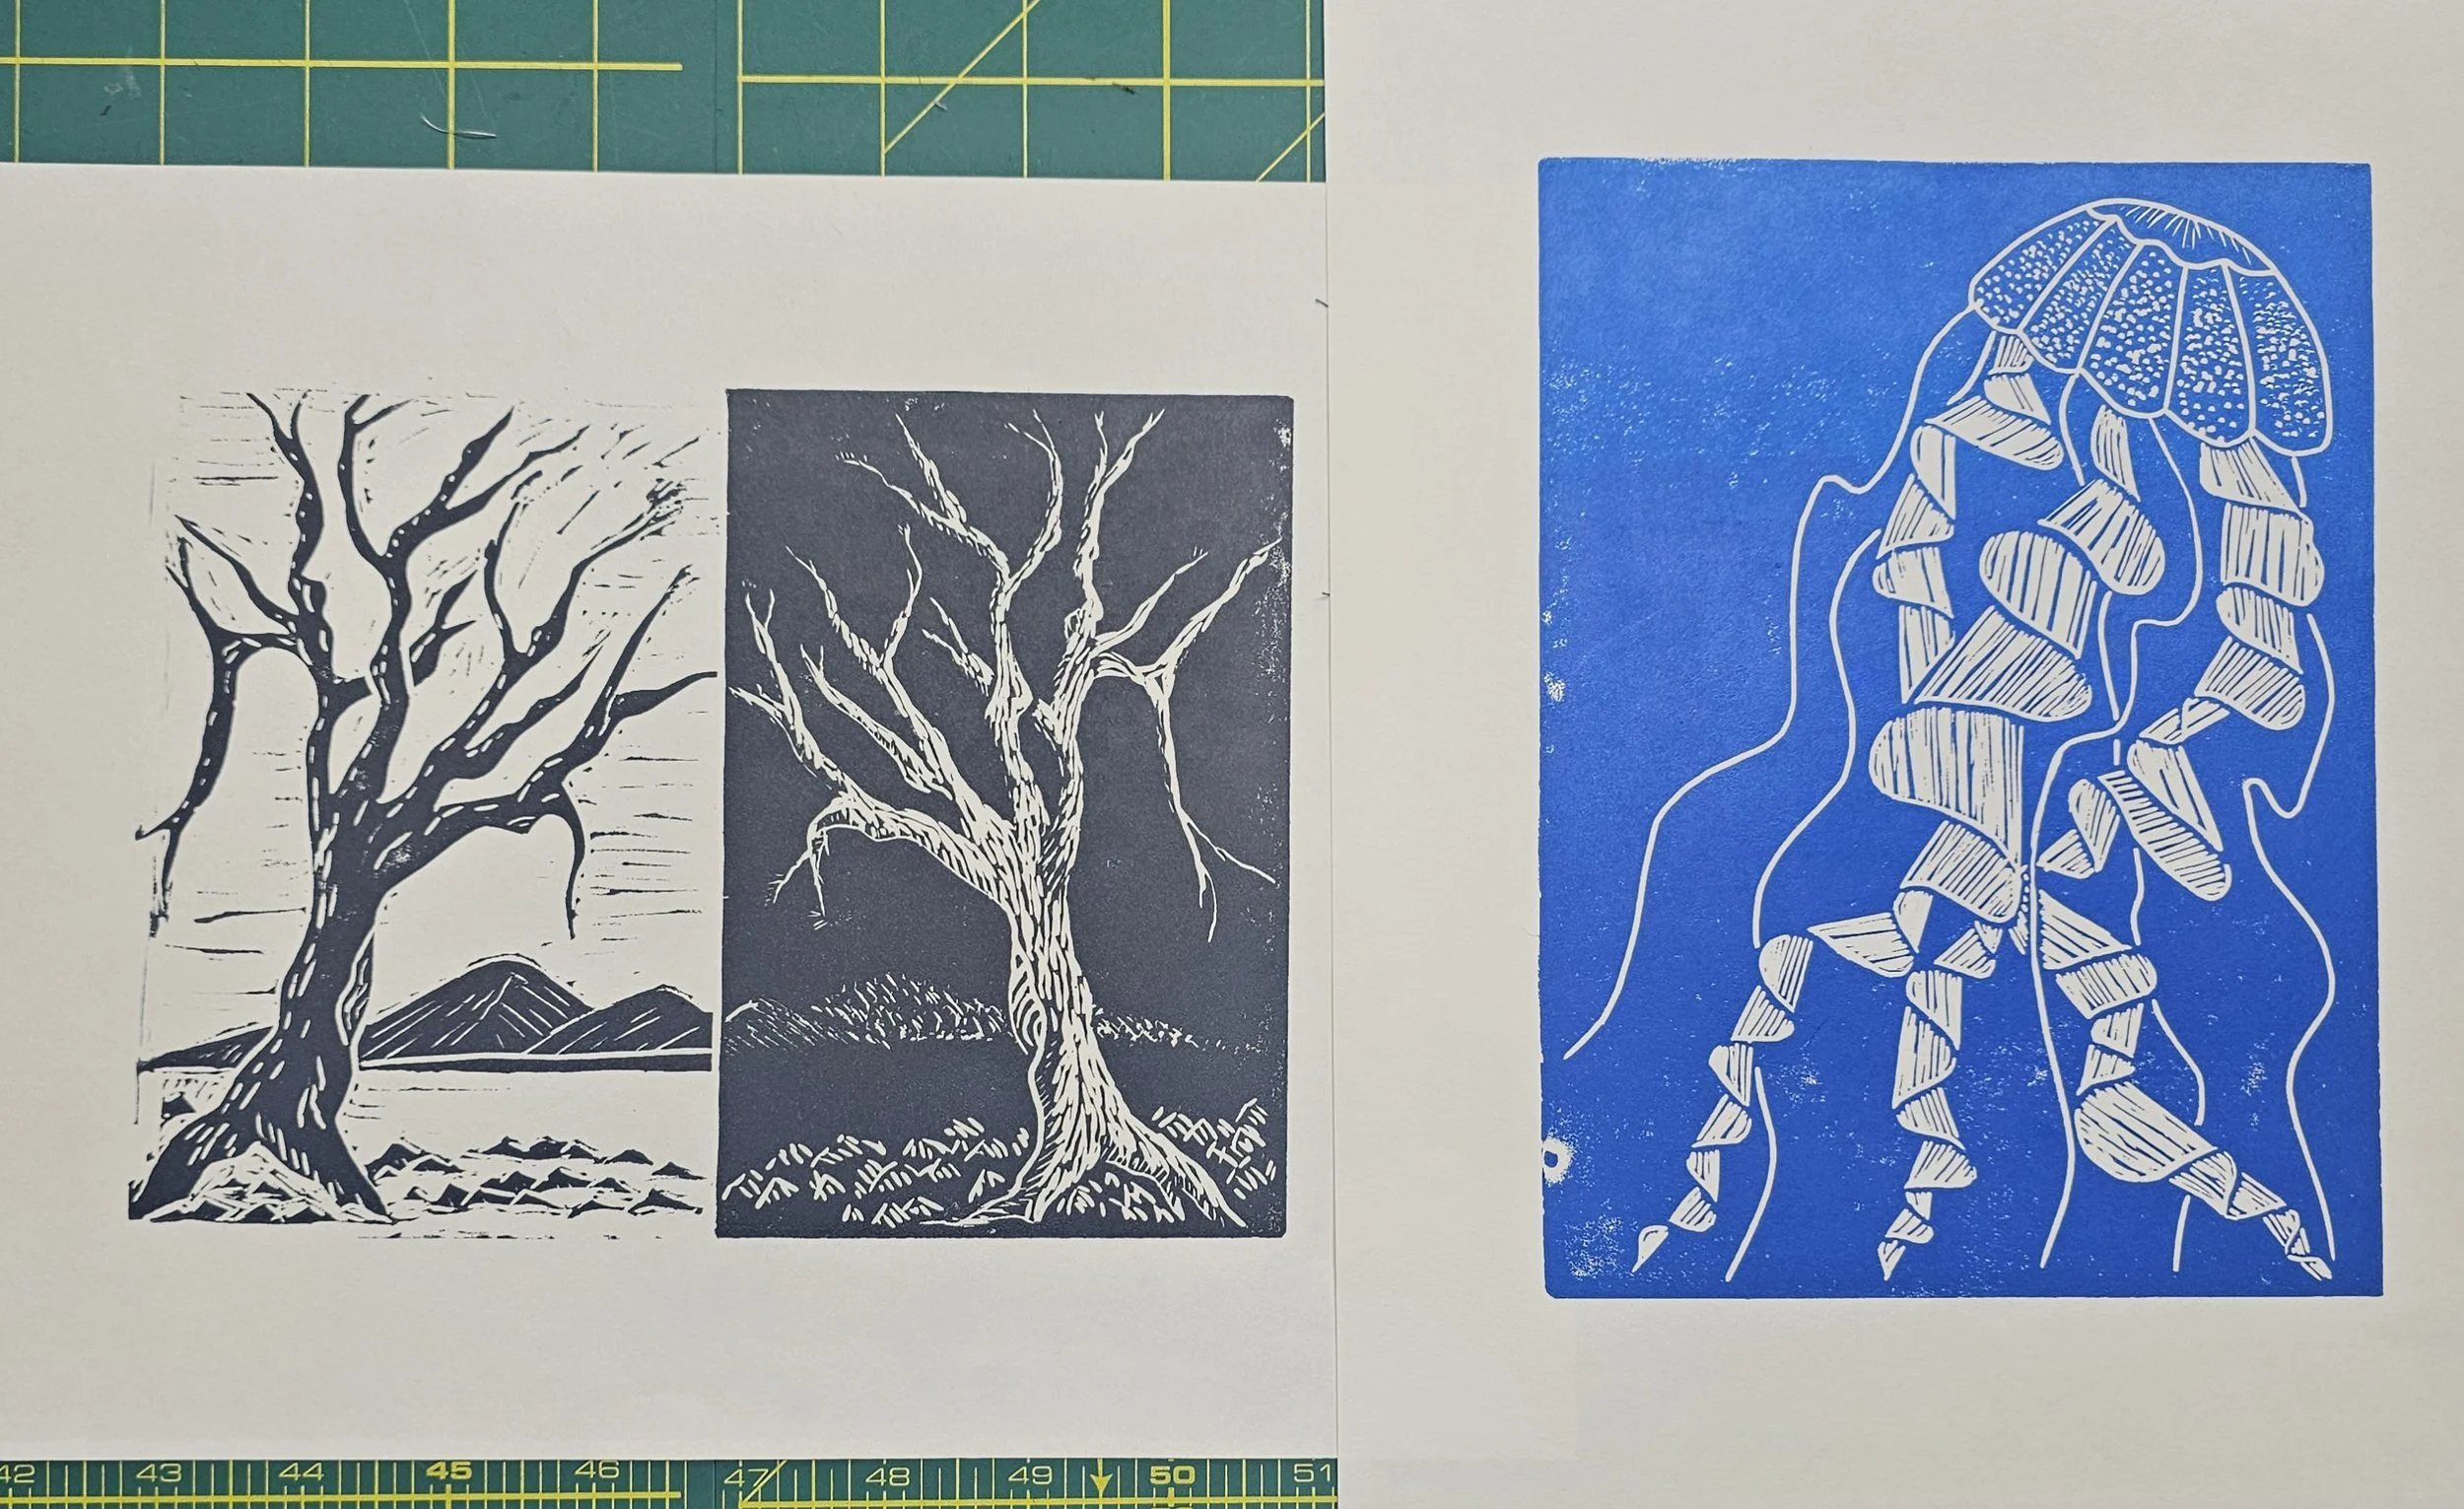
One of my biggest do-overs was the sky in the beach scene. In my first attempt, I absolutely hated it. I had even asked ChatGPT for some cloud ideas, and the results were not helpful at all. On top of that, the blue I chose was far too intense for the soft feeling I wanted in a beach landscape. So I scrapped it and redid the entire sky, this time challenging myself to create softer clouds and use much gentler colors in several transparent layers. It’s already a huge improvement.
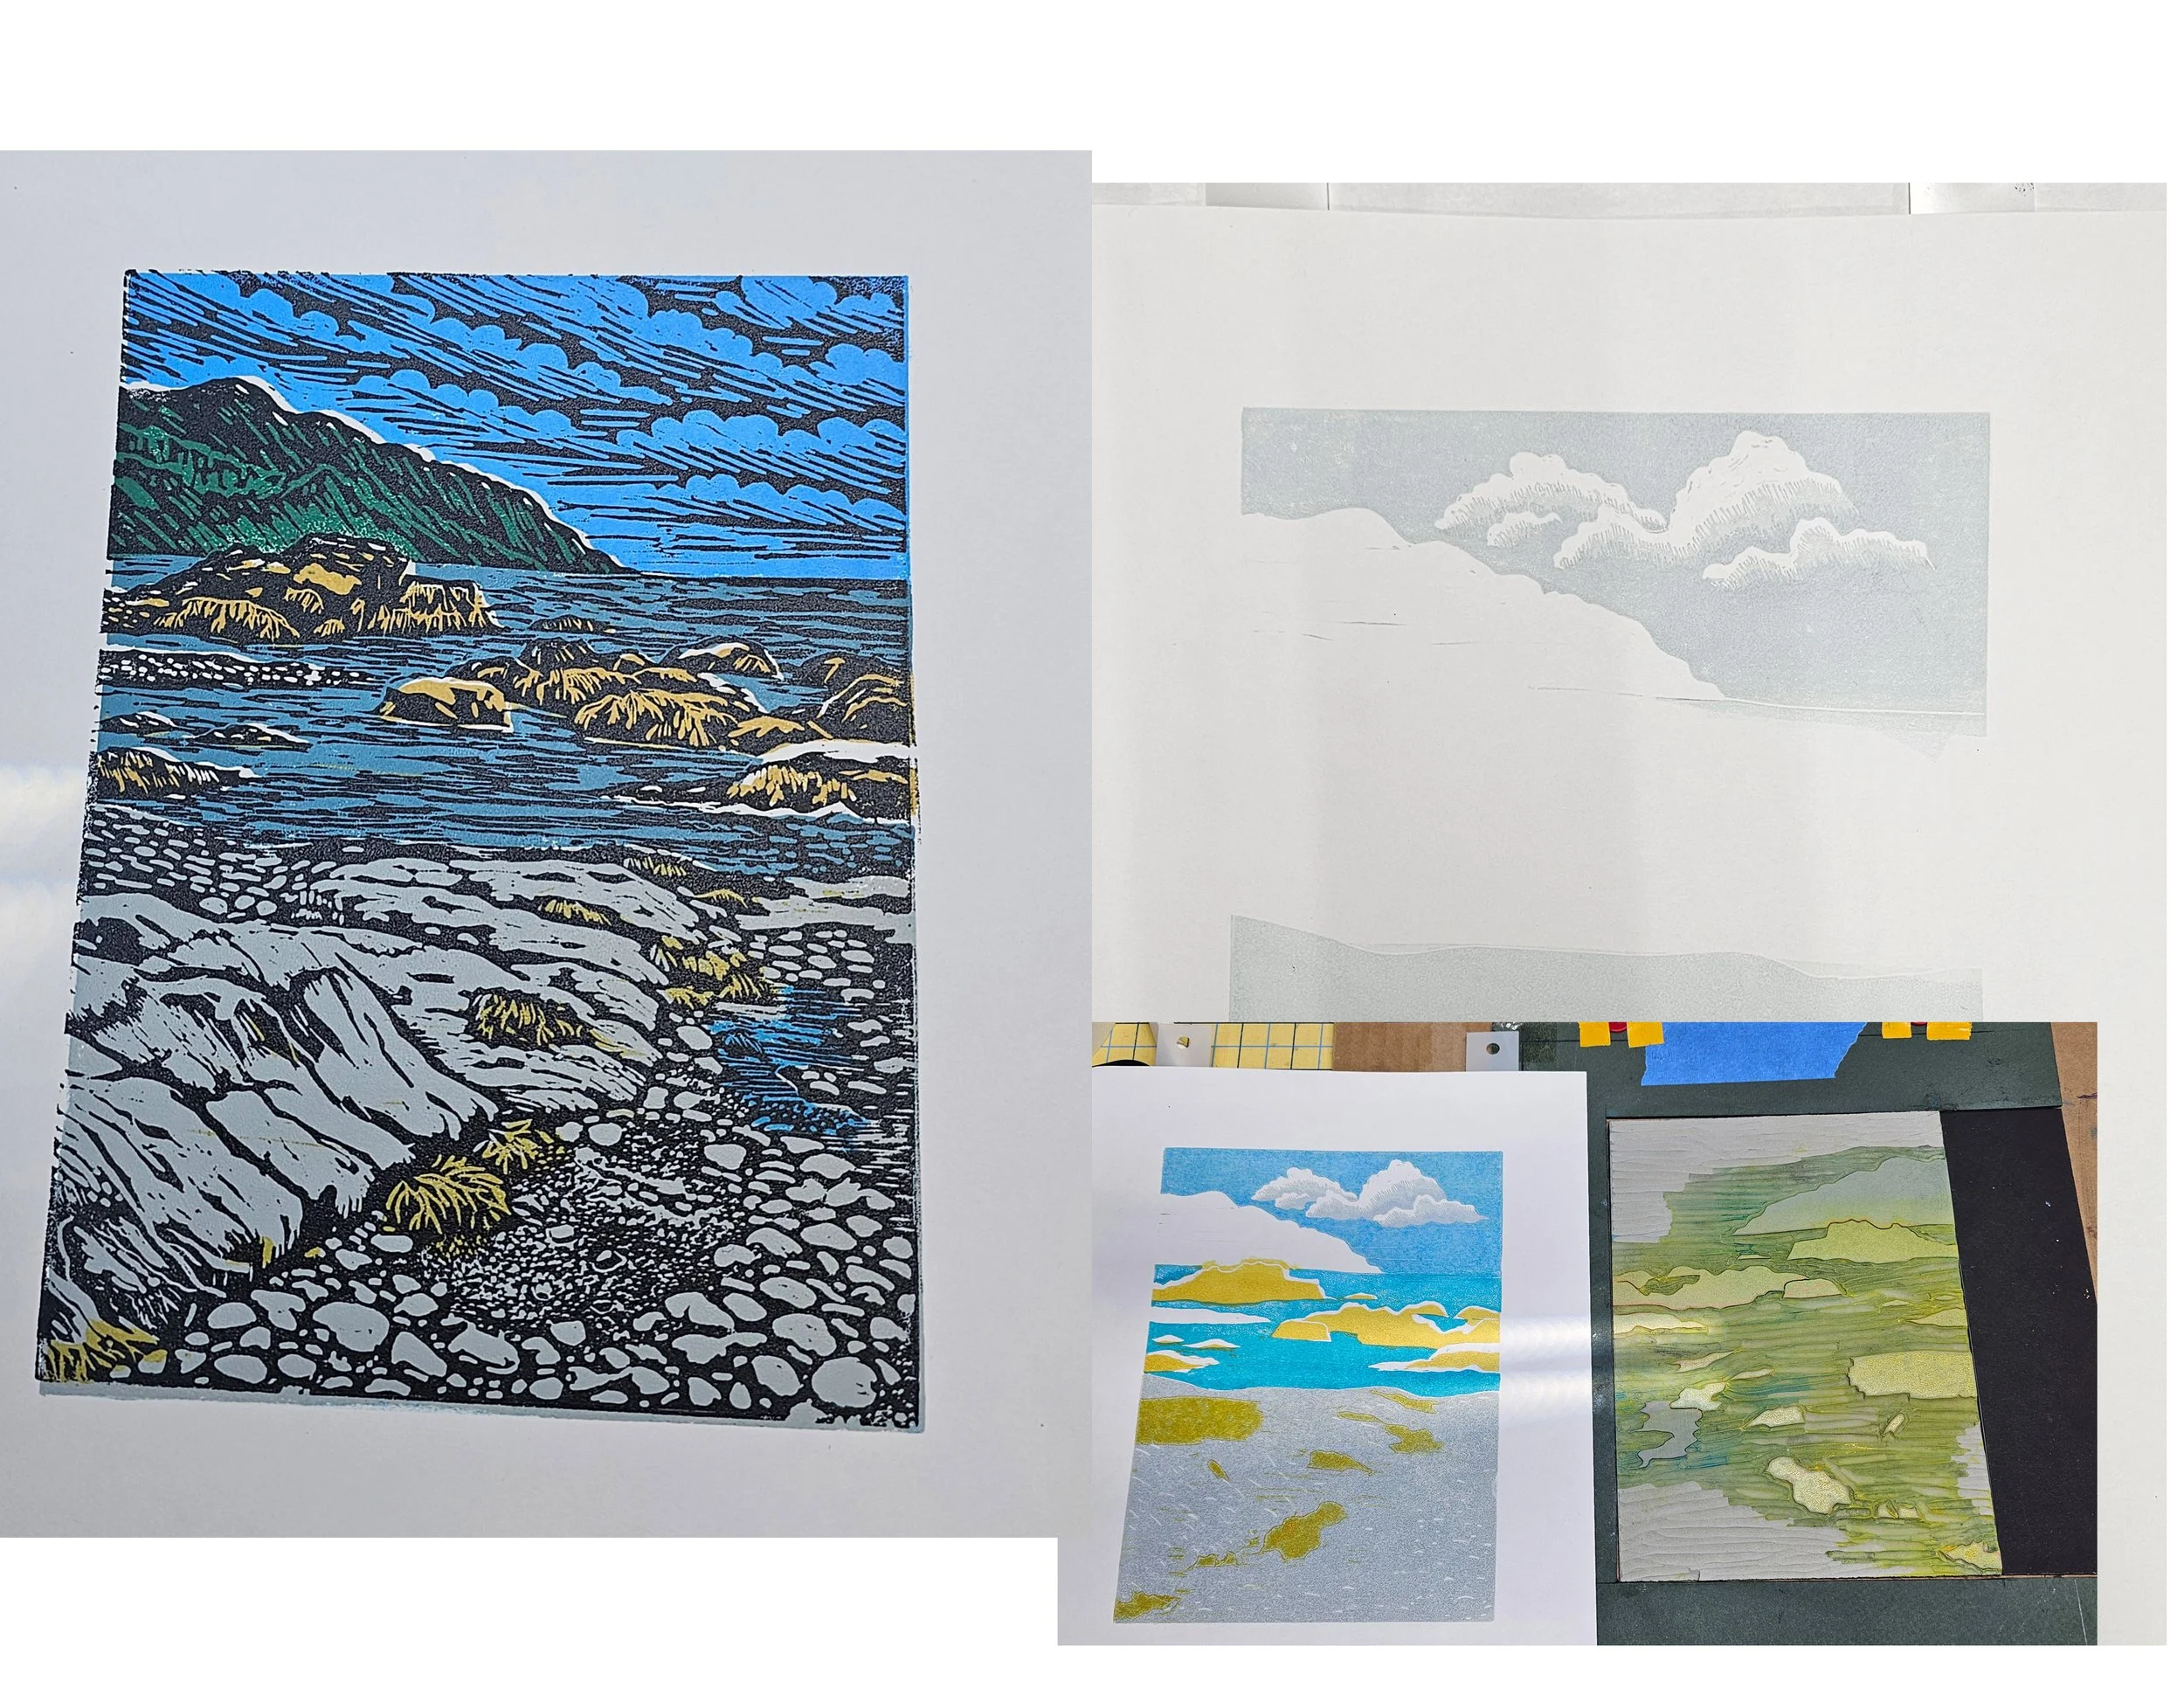
Left, Low Tide the first print with terrible sky/clouds. Right, some of the progression of prints showing the new sky/clouds
Paper choice has also been a learning experience. I discovered that mulberry paper was not the best choice for these multi-block landscapes. Some of the fibers interfered with the ink coverage and created little donut-shaped areas of unprinted paper. It’s a beautiful paper in many situations, but for this kind of layered landscape printing, it just didn’t give me the consistent surface I needed.
And I have to say—having the new printing press has made all of this so much easier and more enjoyable. I’m finally getting the hang of applying an even coat of ink, and I can print each piece in about three minutes. The press gives me such consistent pressure and beautiful, even ink transfer. Compared to hand burnishing, it feels like a whole new world.
This process is definitely humbling, but it’s also exciting. Every print is teaching me something, and I can feel myself getting better with each layer.
More to come as these prints continue to develop.
A New Life for an Old Press
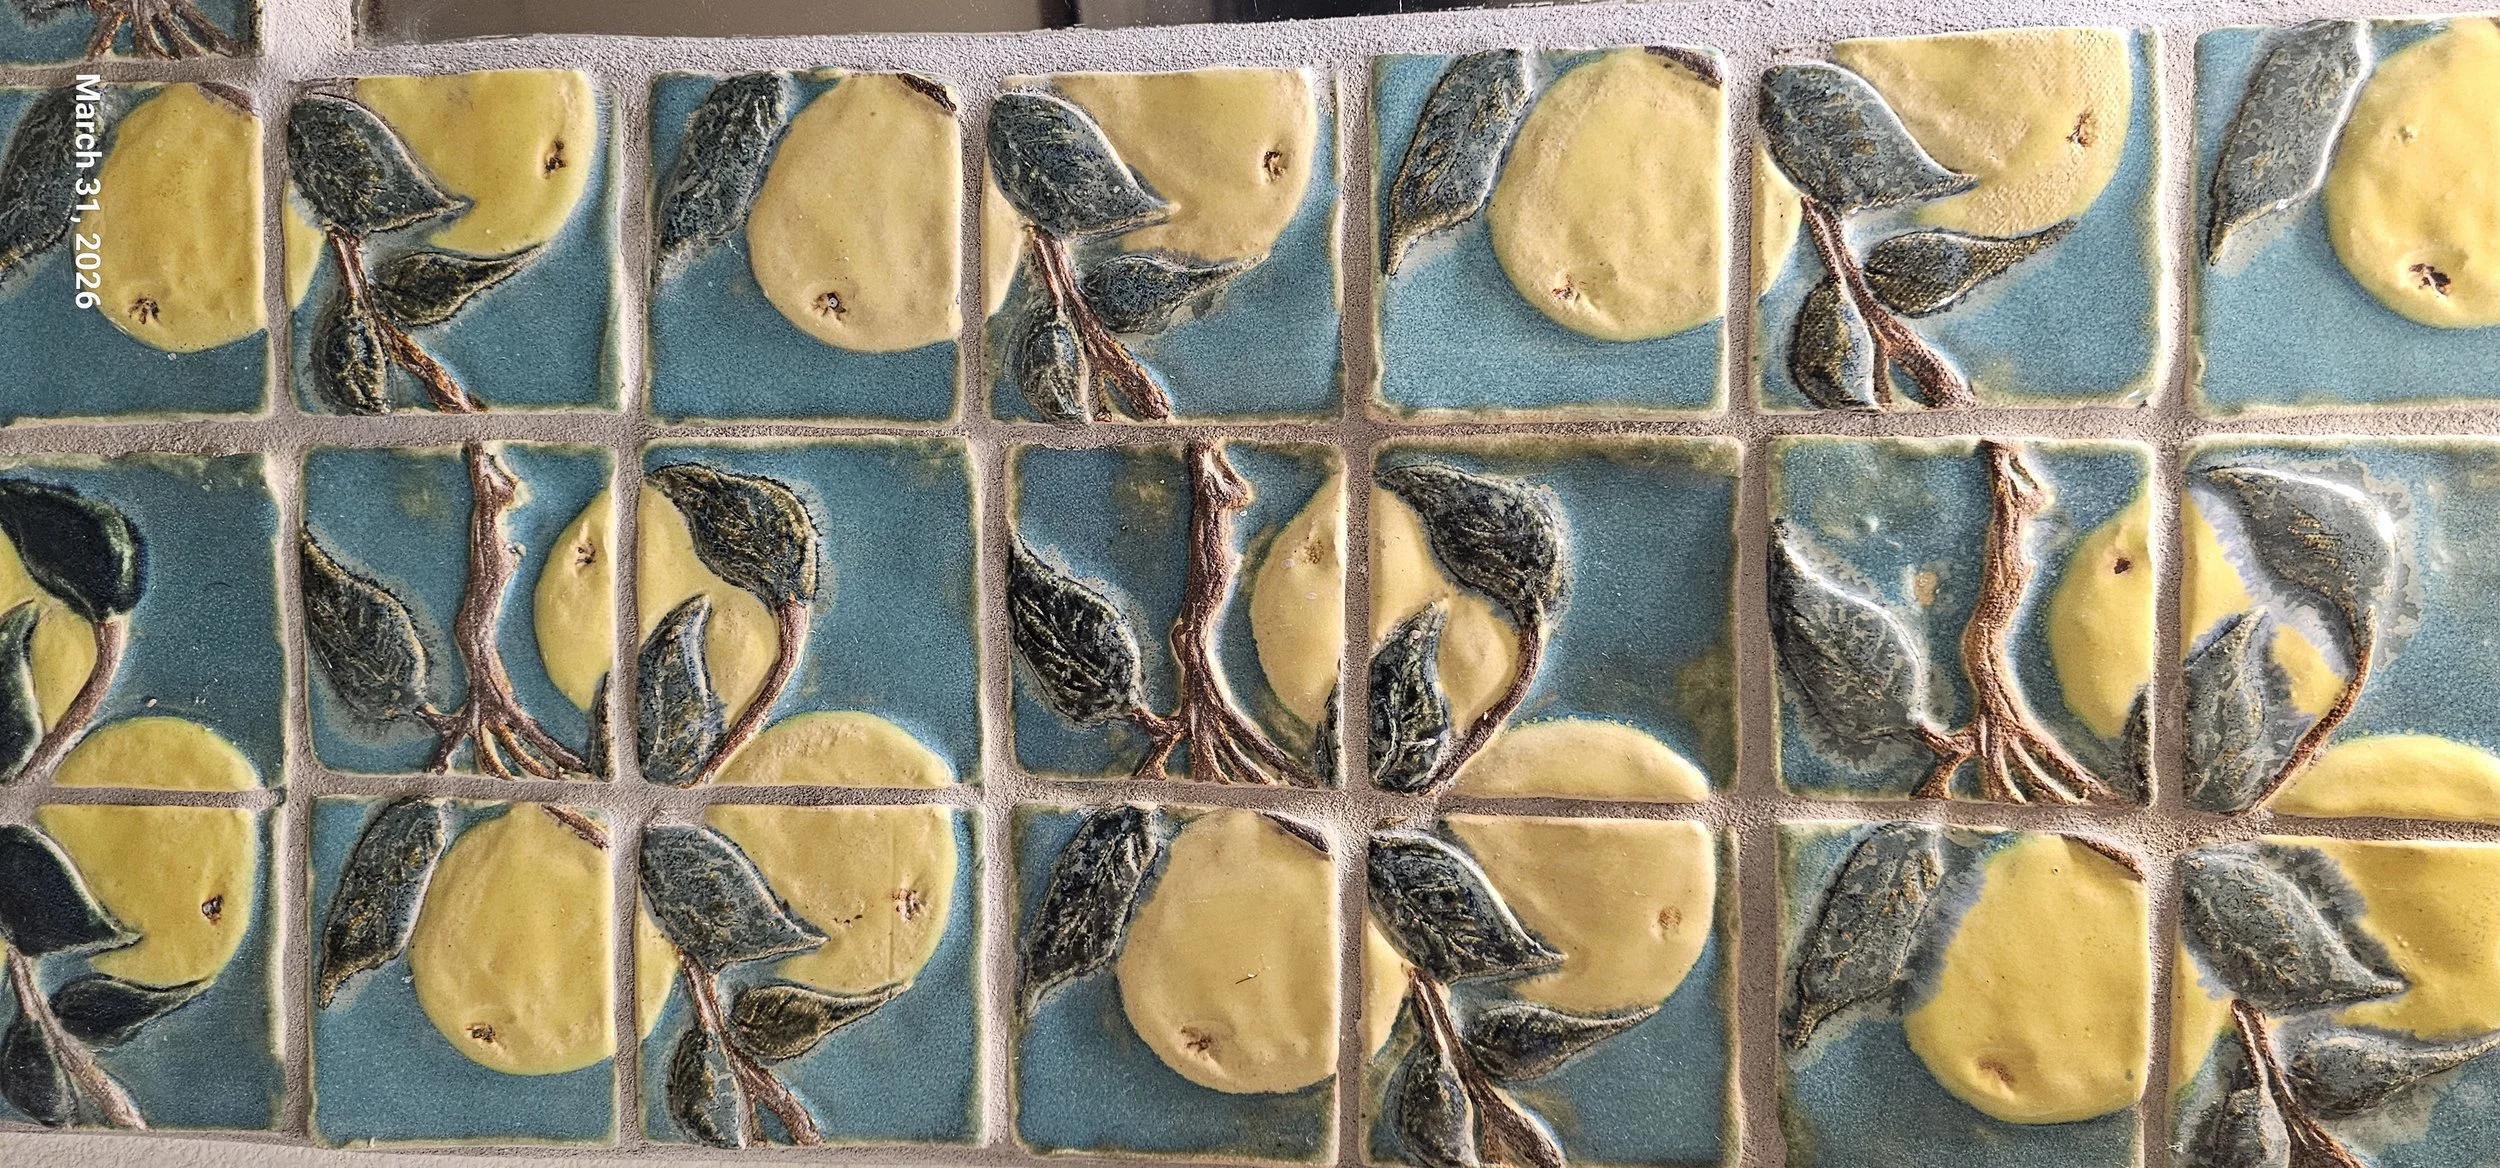
Years ago, my husband built me a shop press to create 3-D pressed tiles back when I was deeply immersed in my pottery studio. It was a wonderful tool then—but like many studio tools, it eventually found its way into storage as my work evolved.
Recently, I decided to give it a second life.
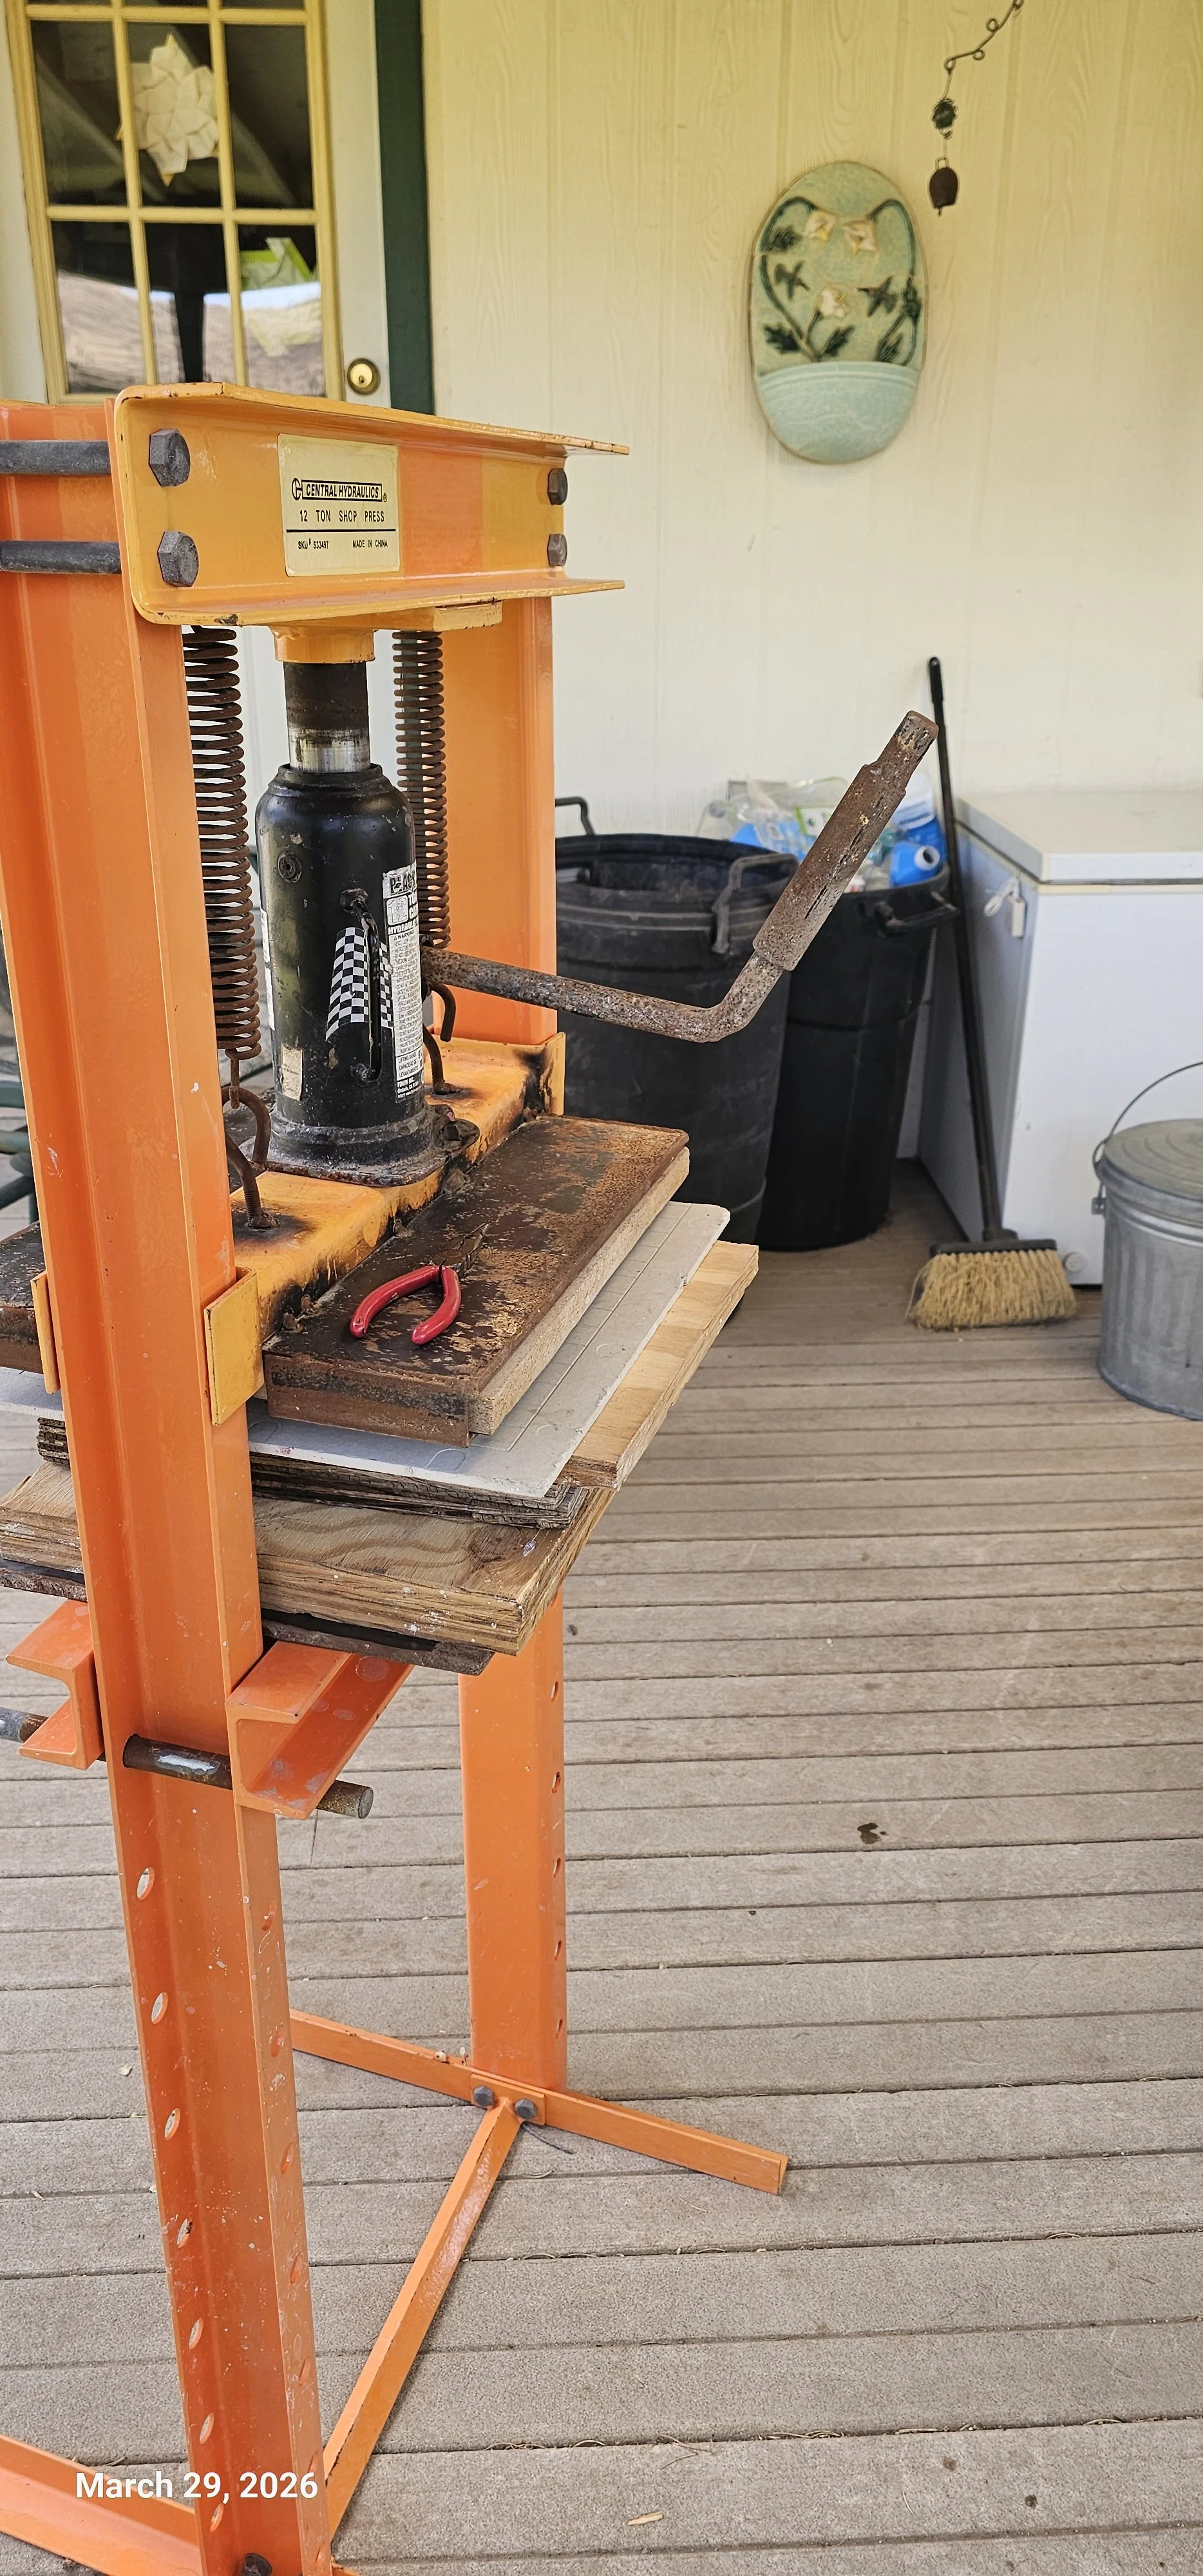
I had the idea to try using the press for printing my lino blocks, and of course, we couldn’t wait to test it. Our first run was outside (in the wind, no less!), which added a bit of challenge—but even so, the results were promising. The pressure was even, the prints were clean, and I could immediately see the potential.
We’ve since moved the press indoors, and I’ve been putting it to work. I’m now using it for multi-block prints and even experimenting with reduction prints—both of which come with their own set of challenges (more on that in my next post!).
What excites me most is how much time it saves and how consistent the results are. Before this, I was burnishing by hand with a spoon, and getting even pressure across the block was always a struggle. Now, the prints come out smooth and balanced, with far less effort.
It’s incredibly satisfying to rediscover a tool and find a completely new purpose for it. This press has officially earned its place in my printmaking studio.
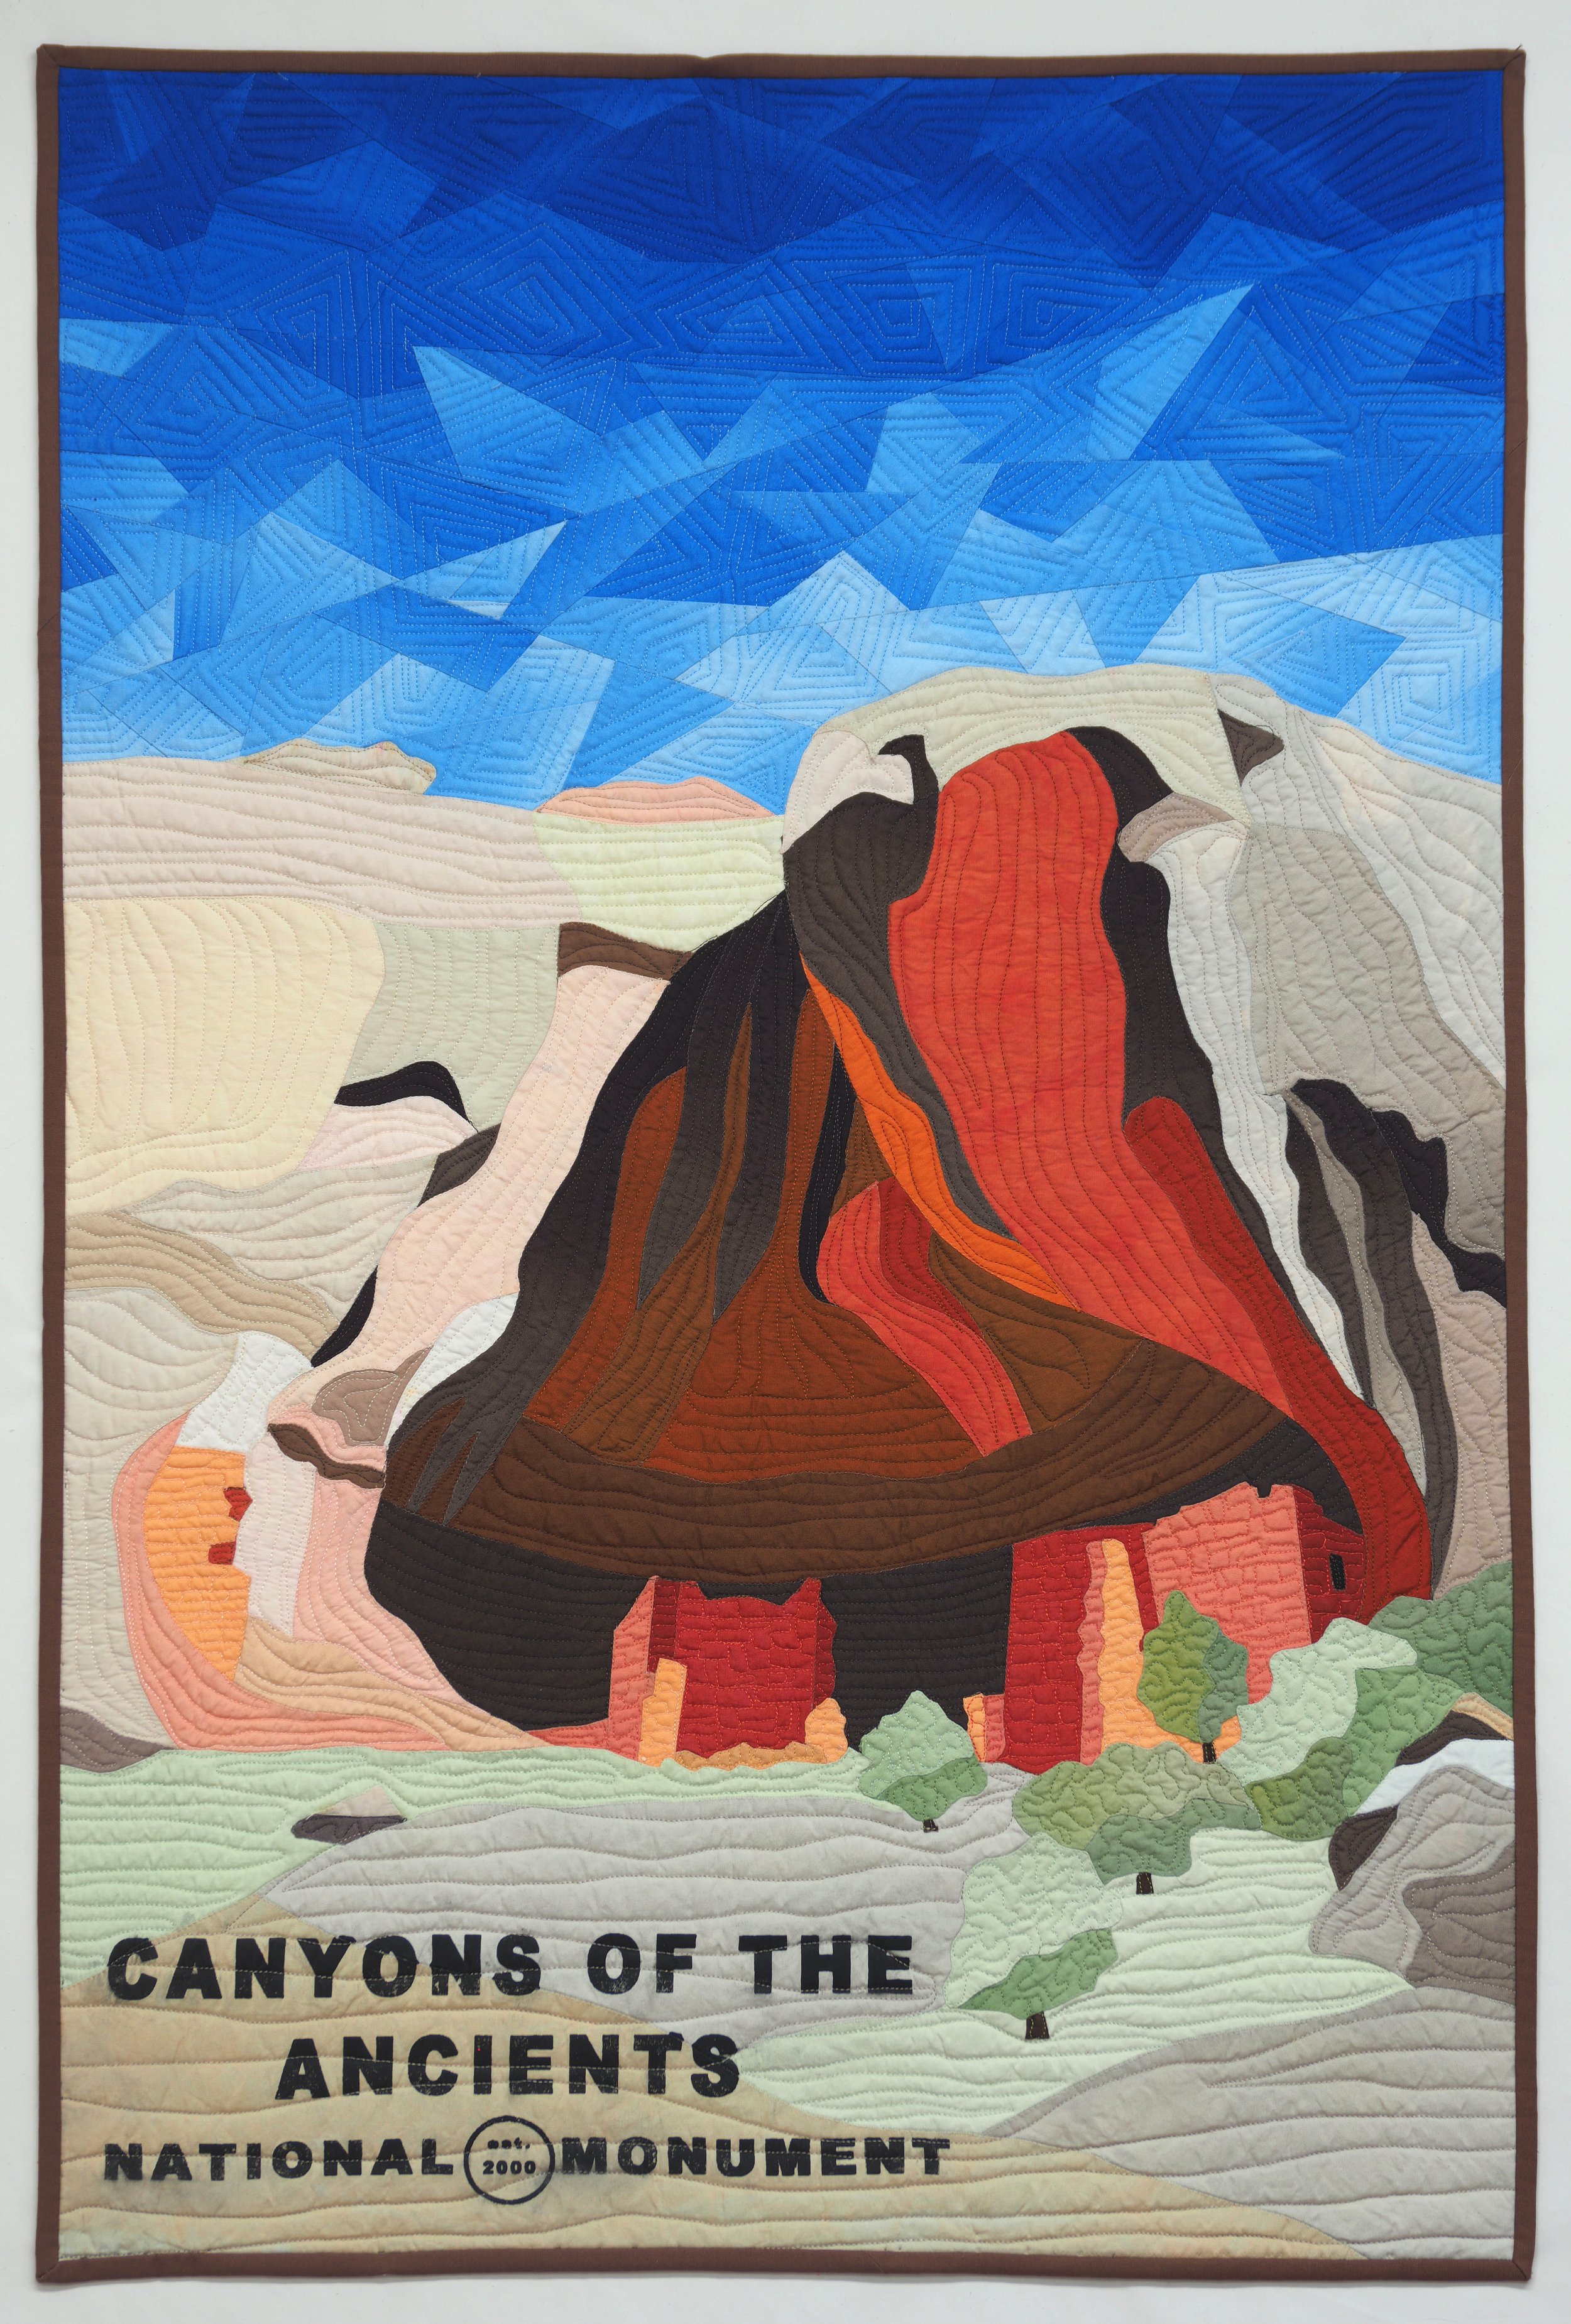
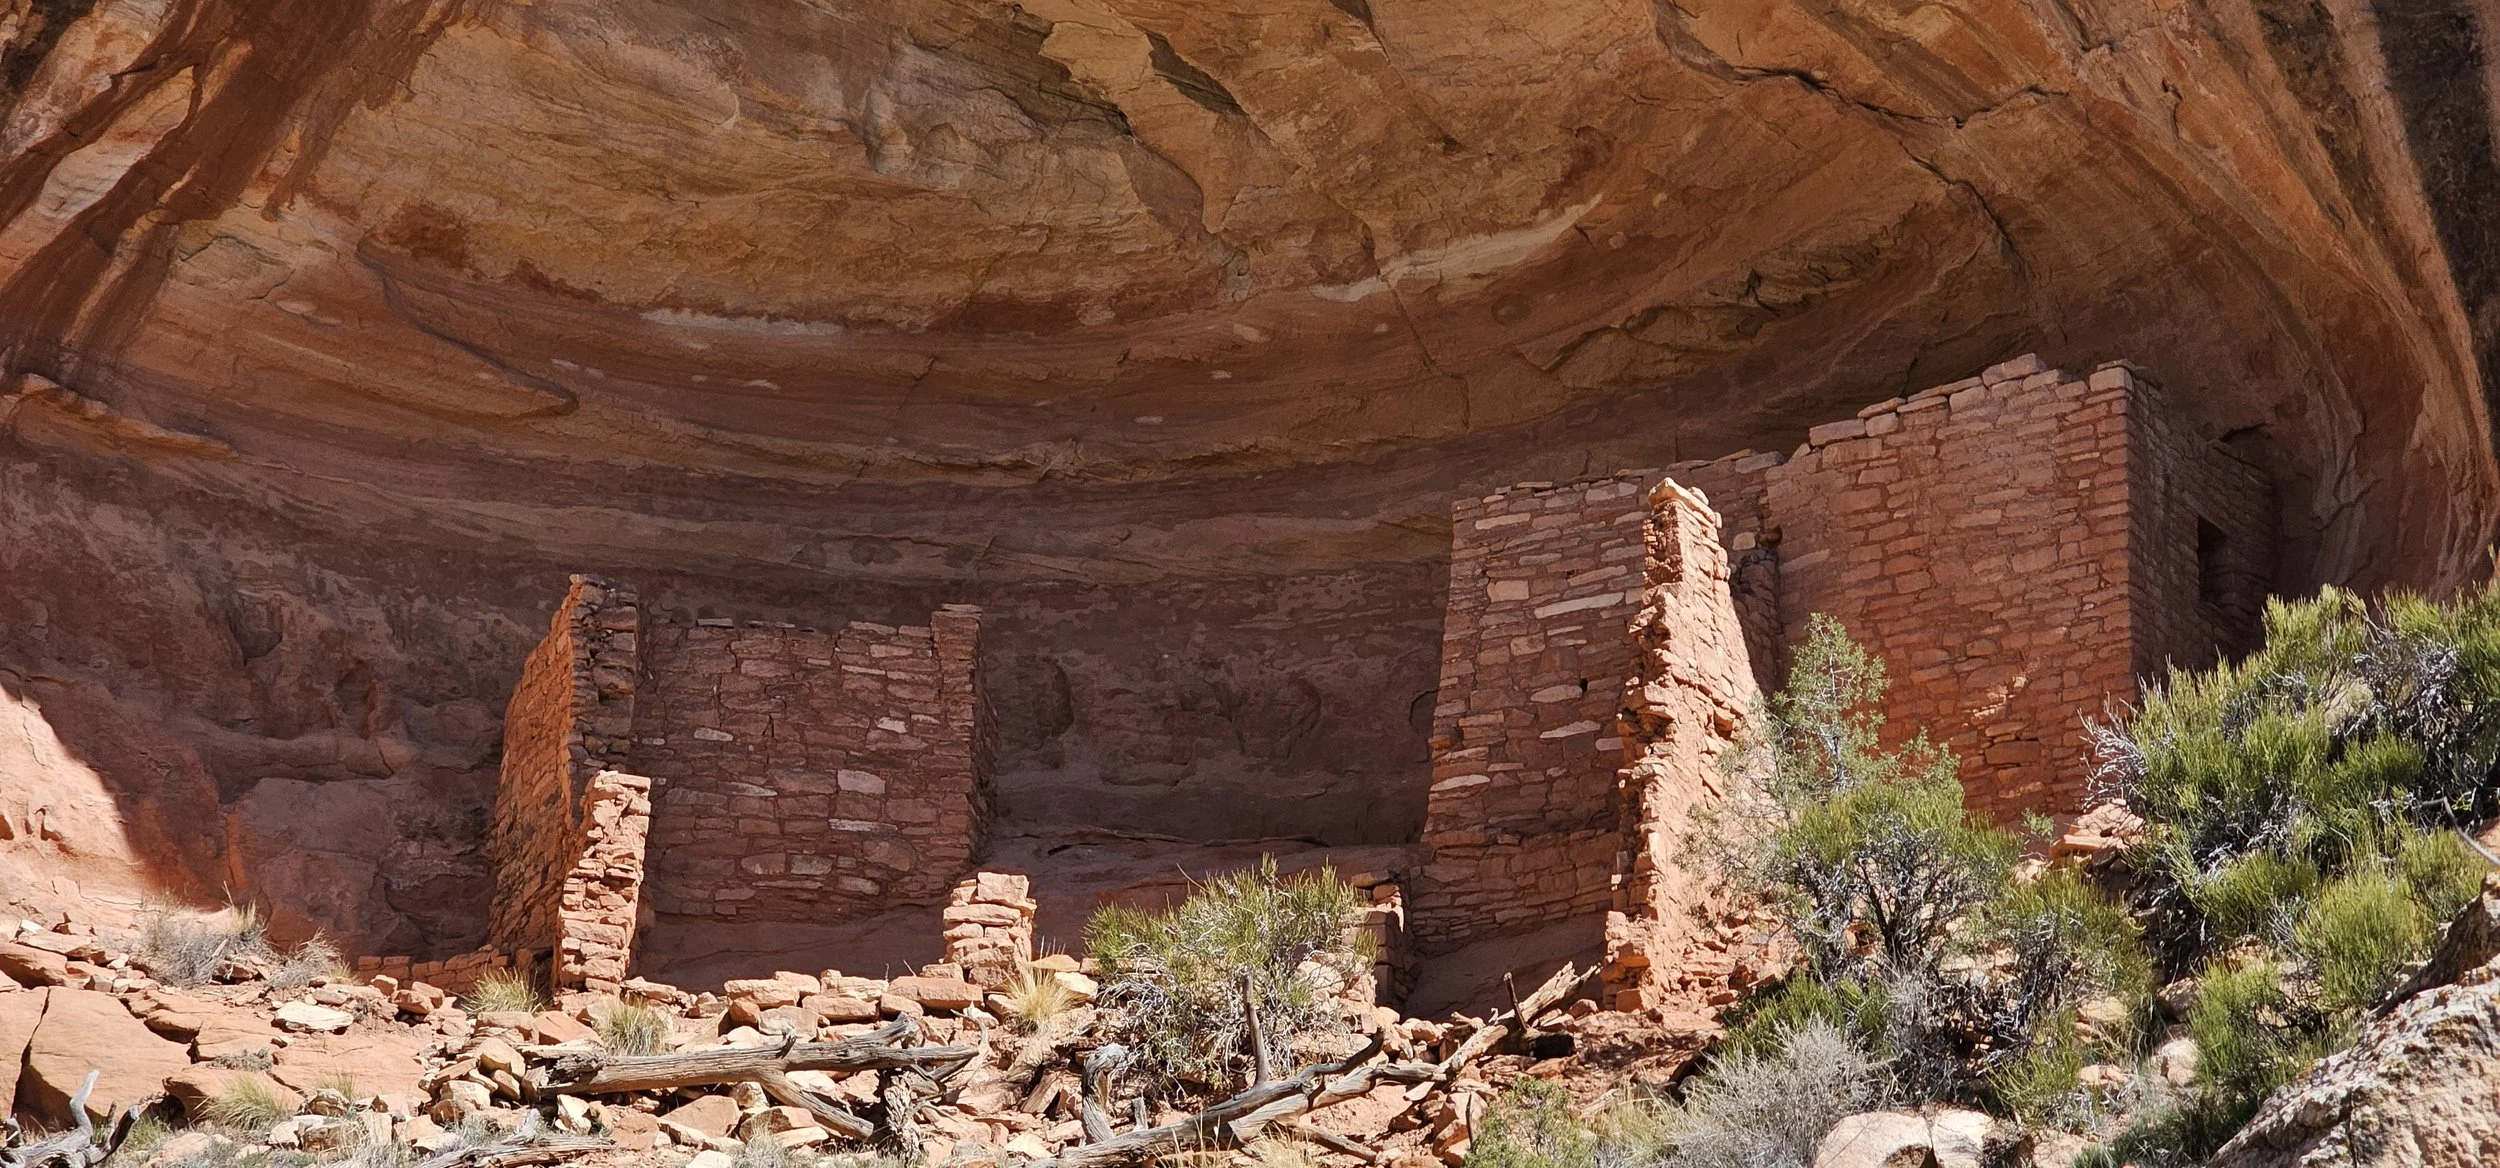
Sunny Alcove
When I returned from my artist residency, I went straight to work on my donation quilt.
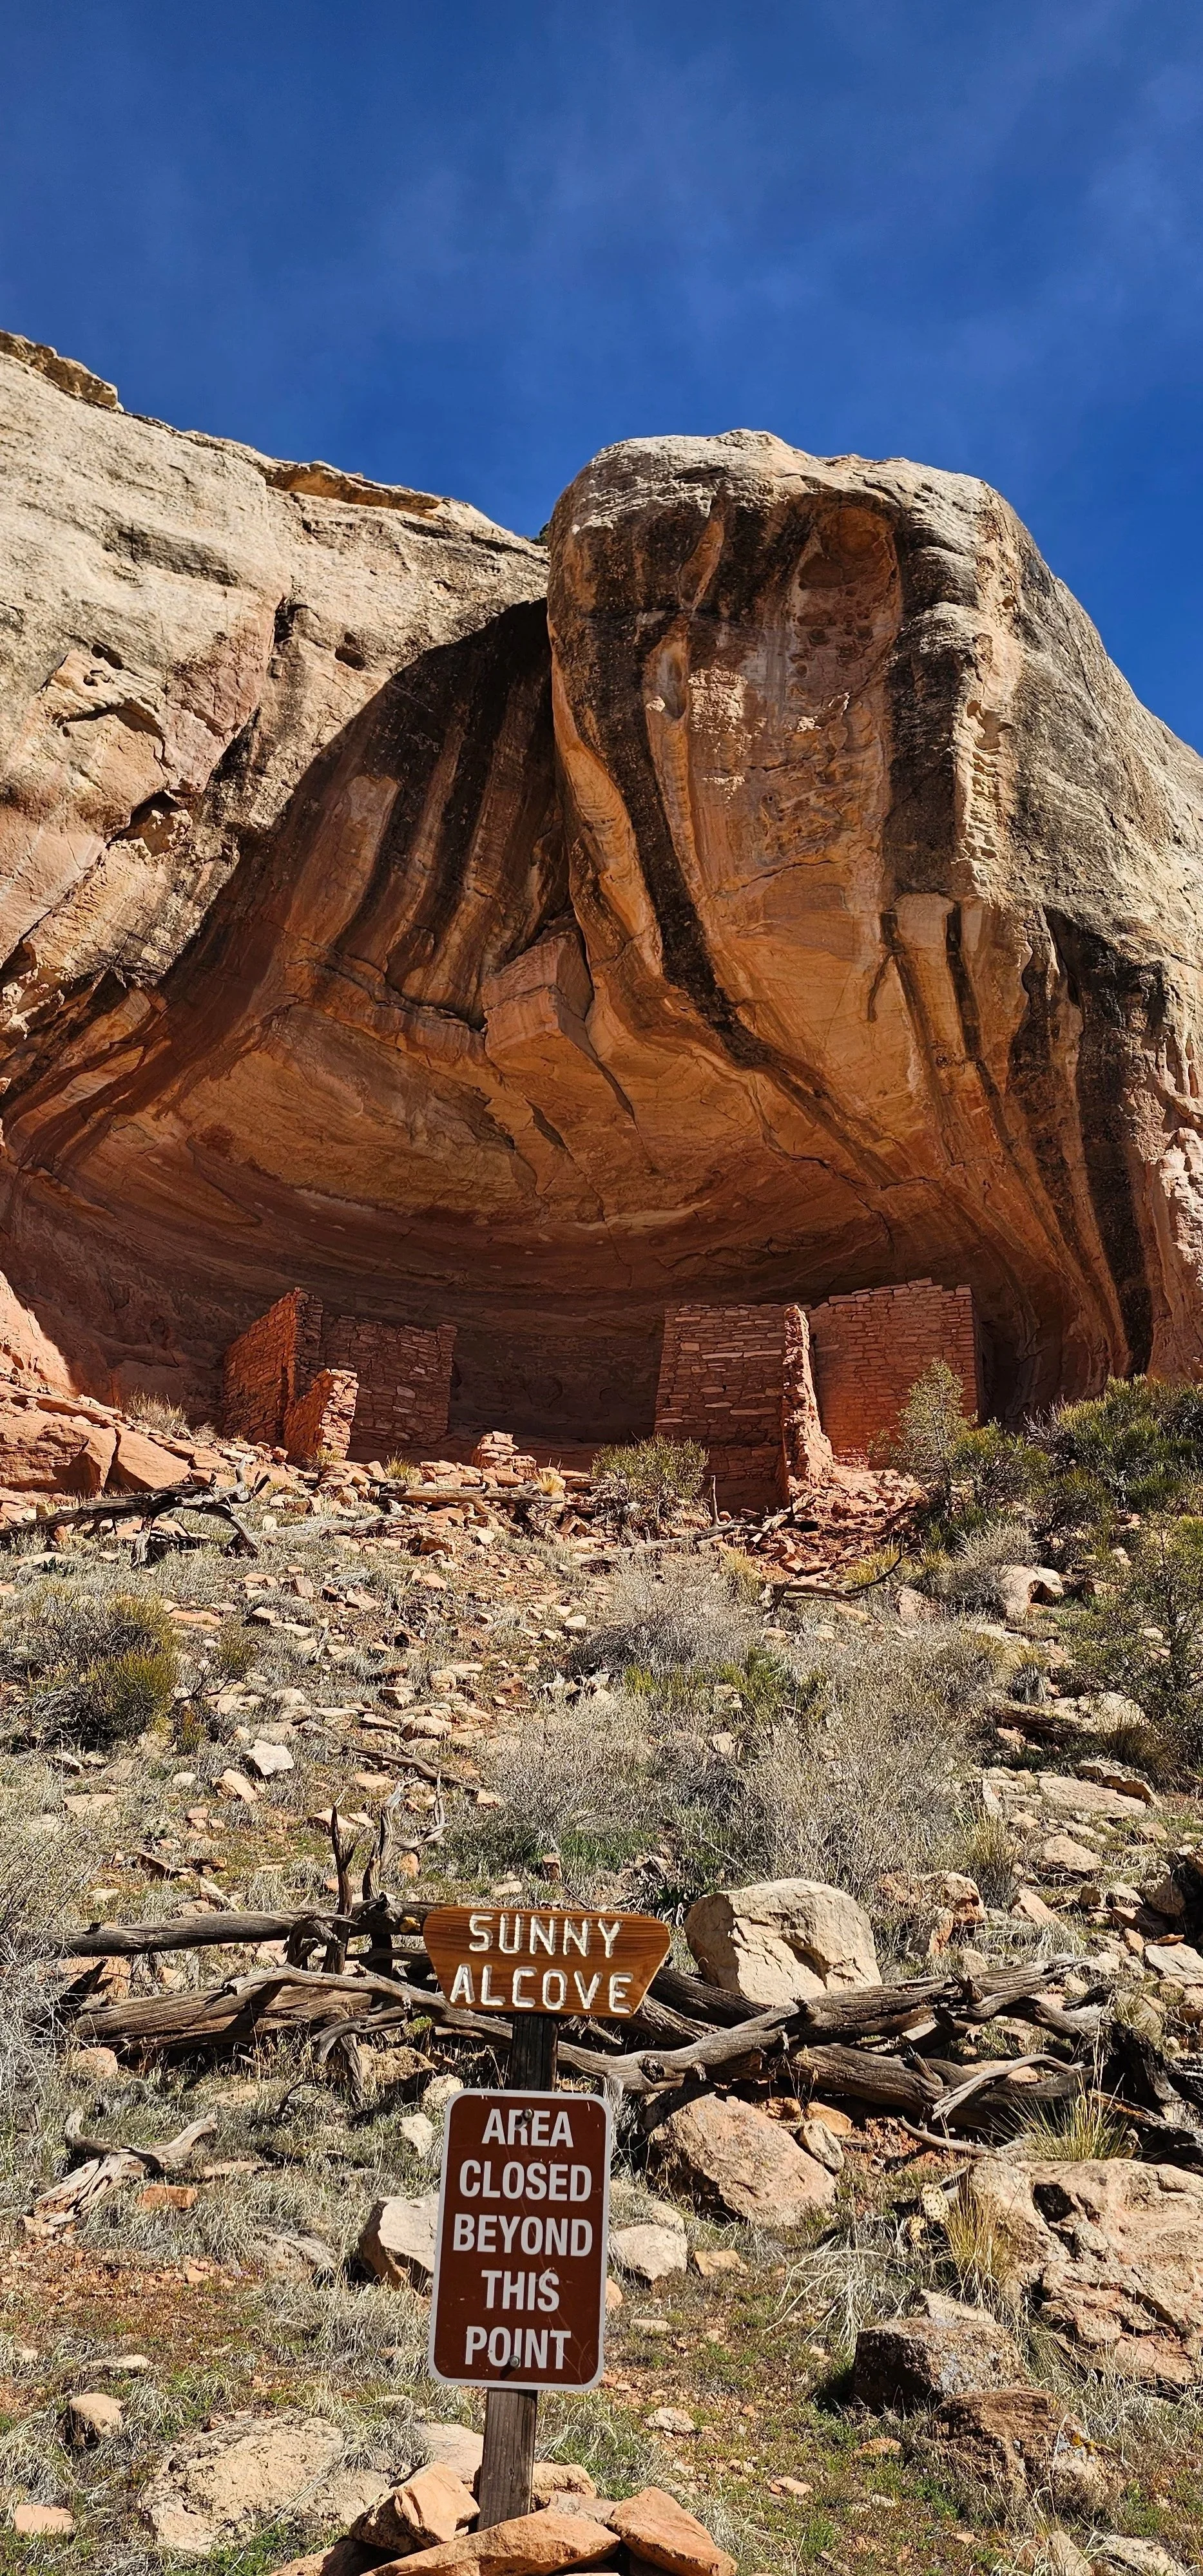
Amala asked me to choose one of the public sites for my artwork, and I selected Sunny Alcove. The day we hiked Sand Canyon was clear and bright, yet the structures remained in deep shadow beneath the cliff—creating a striking contrast with the sunlit canyon walls on either side.
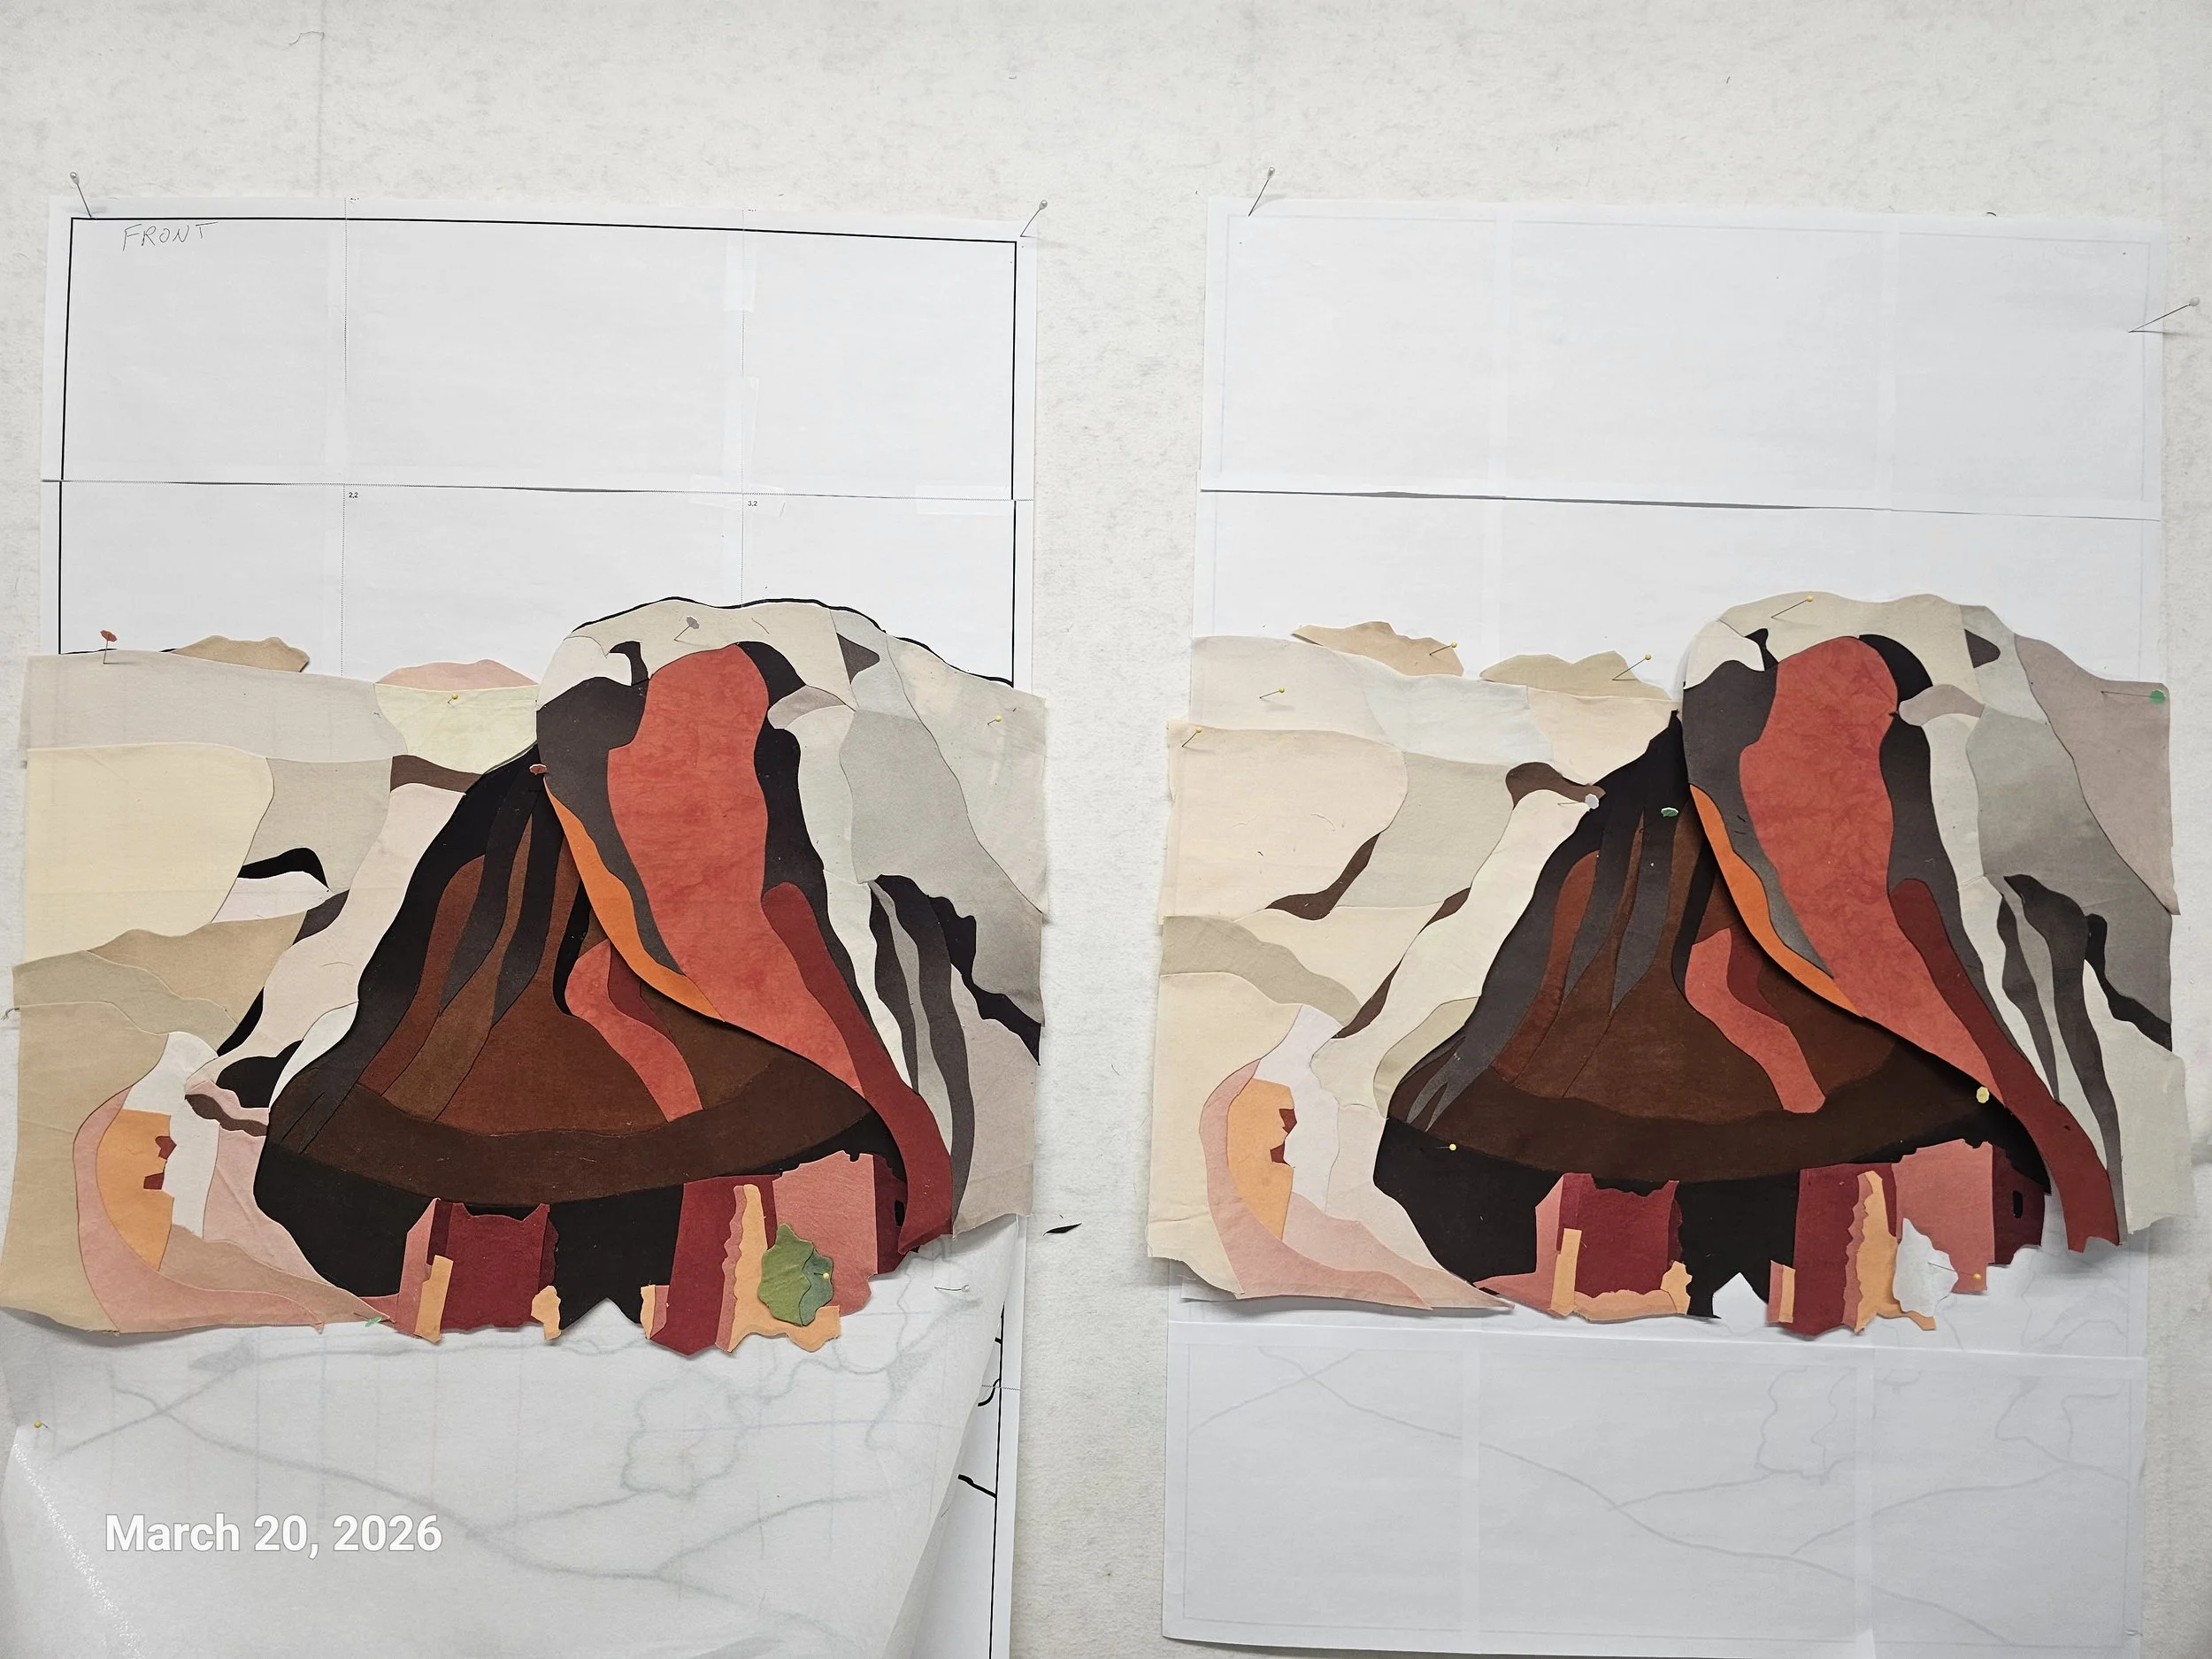
I decided it would be just as easy to make two quilts as one, allowing me to keep a piece for my own national park collection. This one marks number 19.
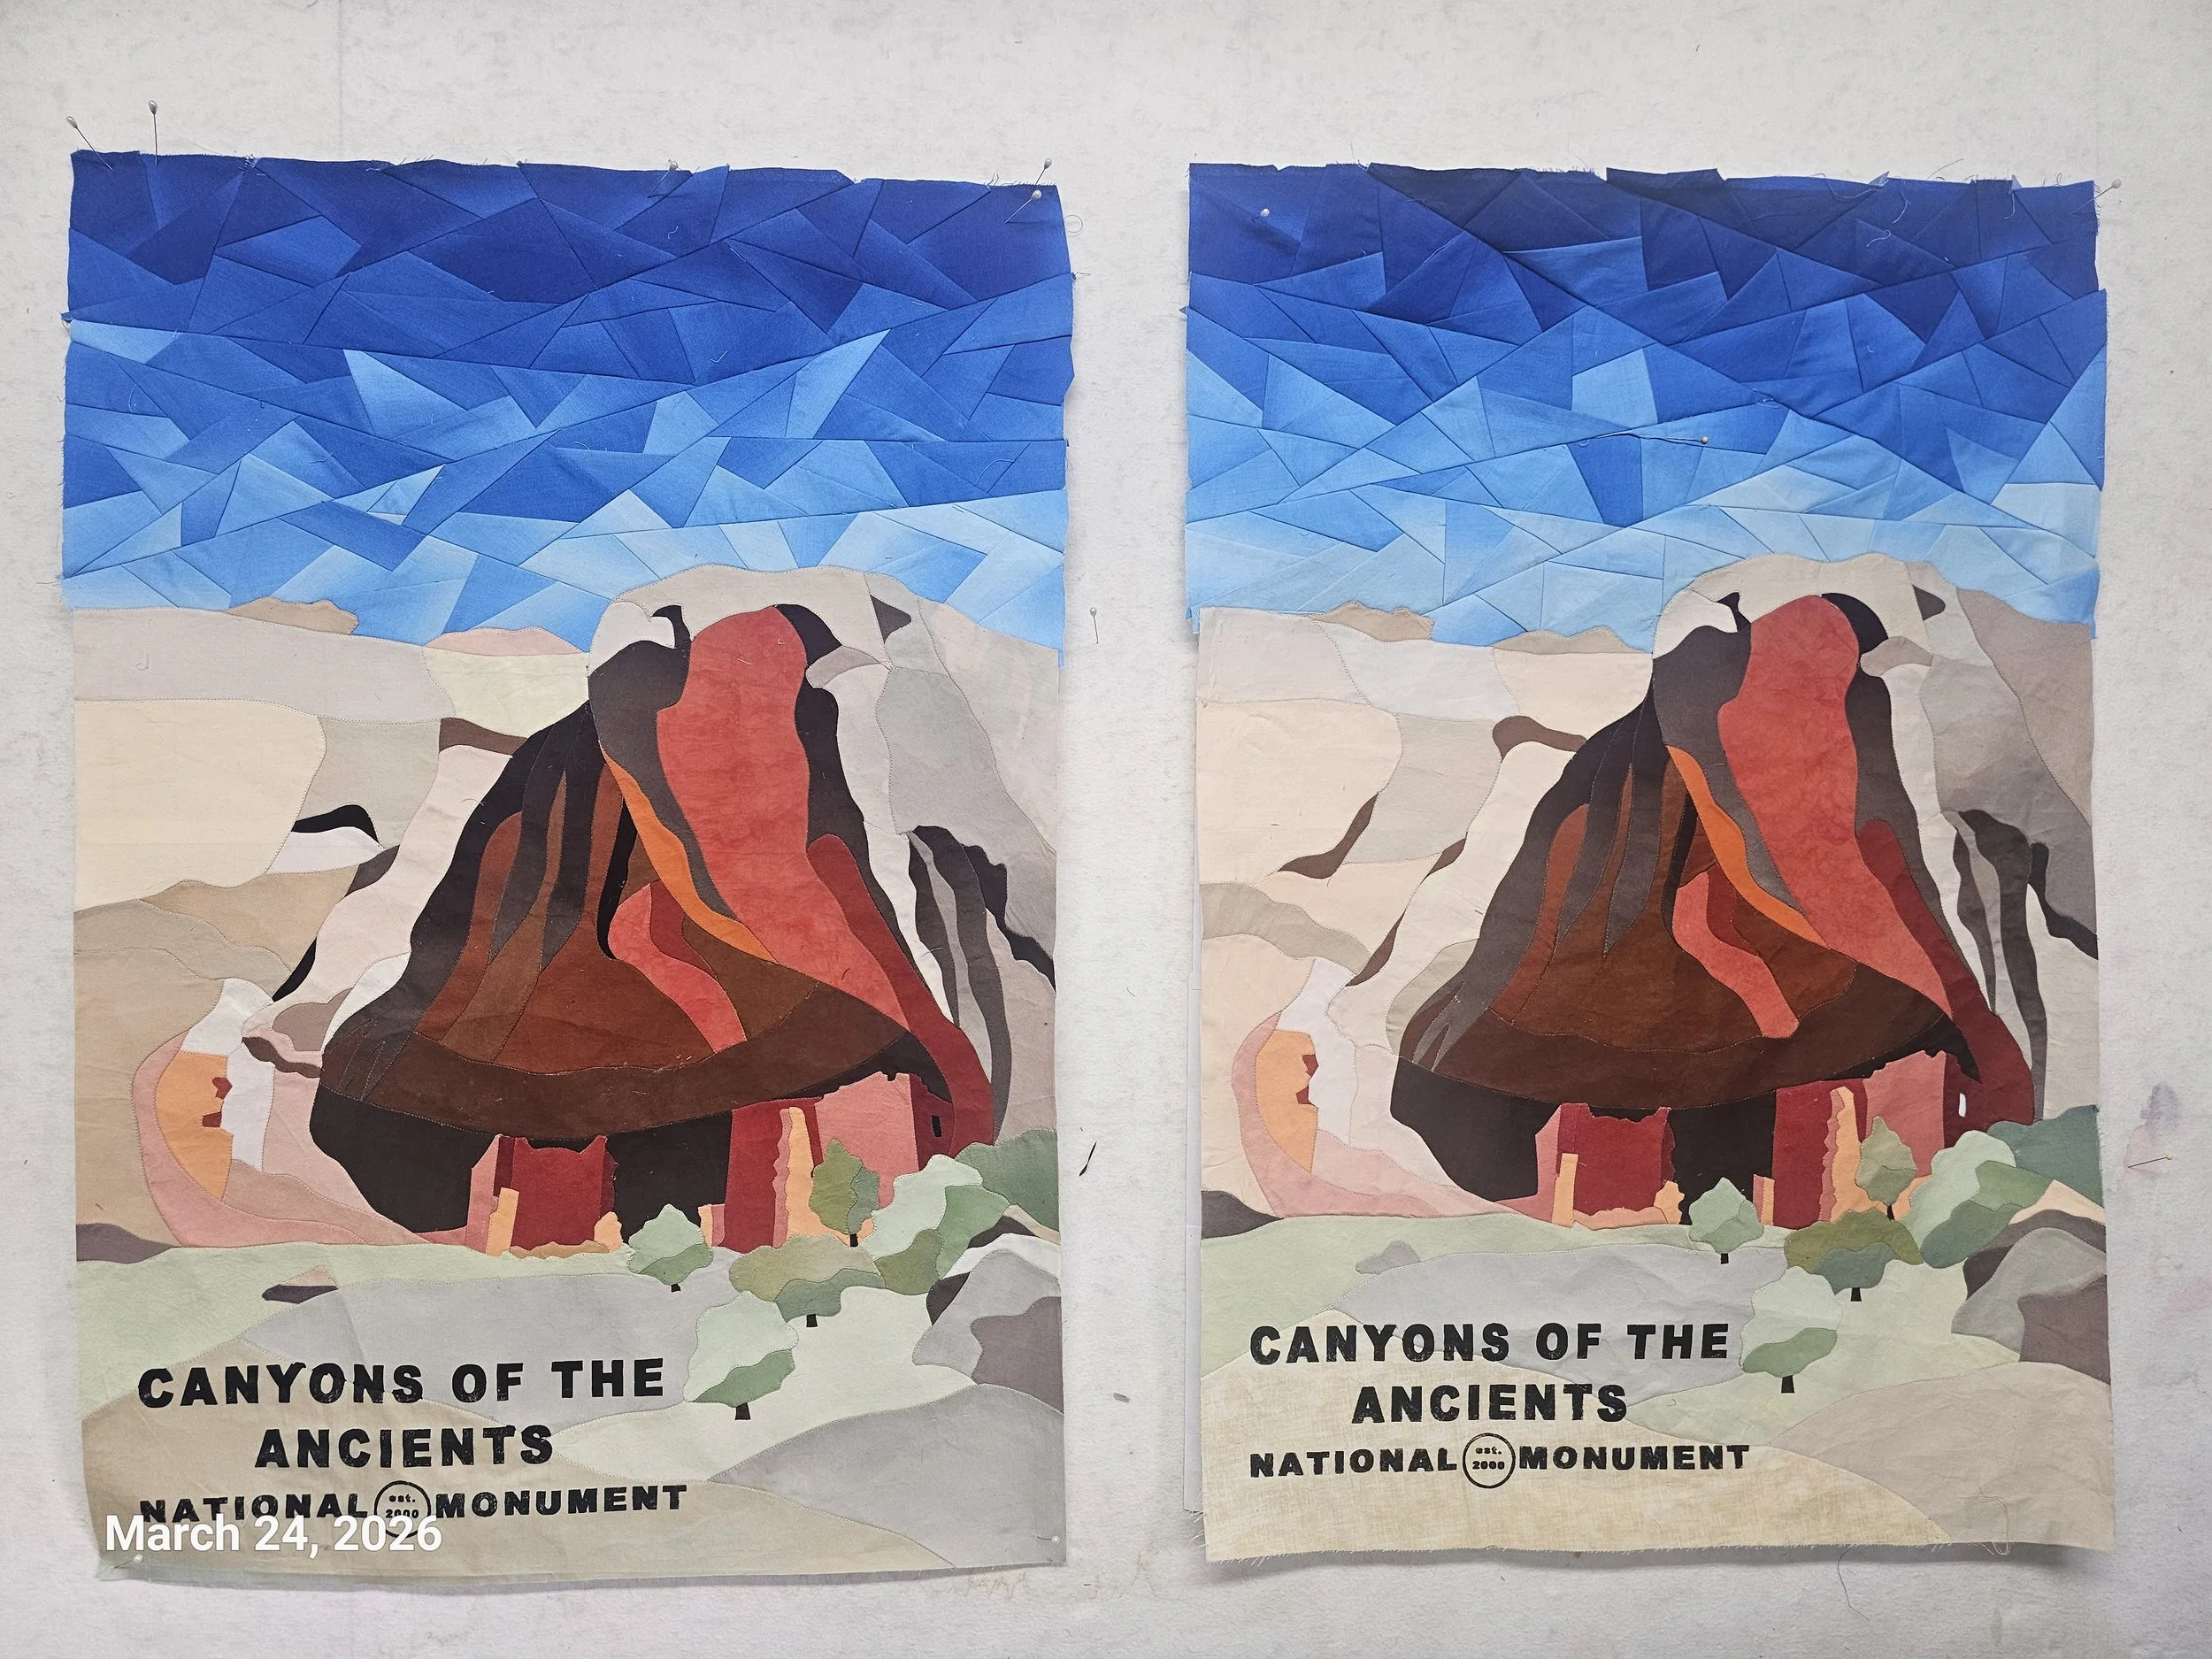
I plan to deliver the donation quilt to Canyons of the Ancients National Monument in late April when we return with friends.
Block Printing Workshop at CANM
I gave a class today in simple block printing. The participants used ideas that they had brought inspired by Canyons of the Ancients National Monument. We cut simple shapes out of sticky foam and stuck them onto a little blocks. They printed on card stock, fabric and a little patch that they could sew on a backpack. I think they all had a great time.
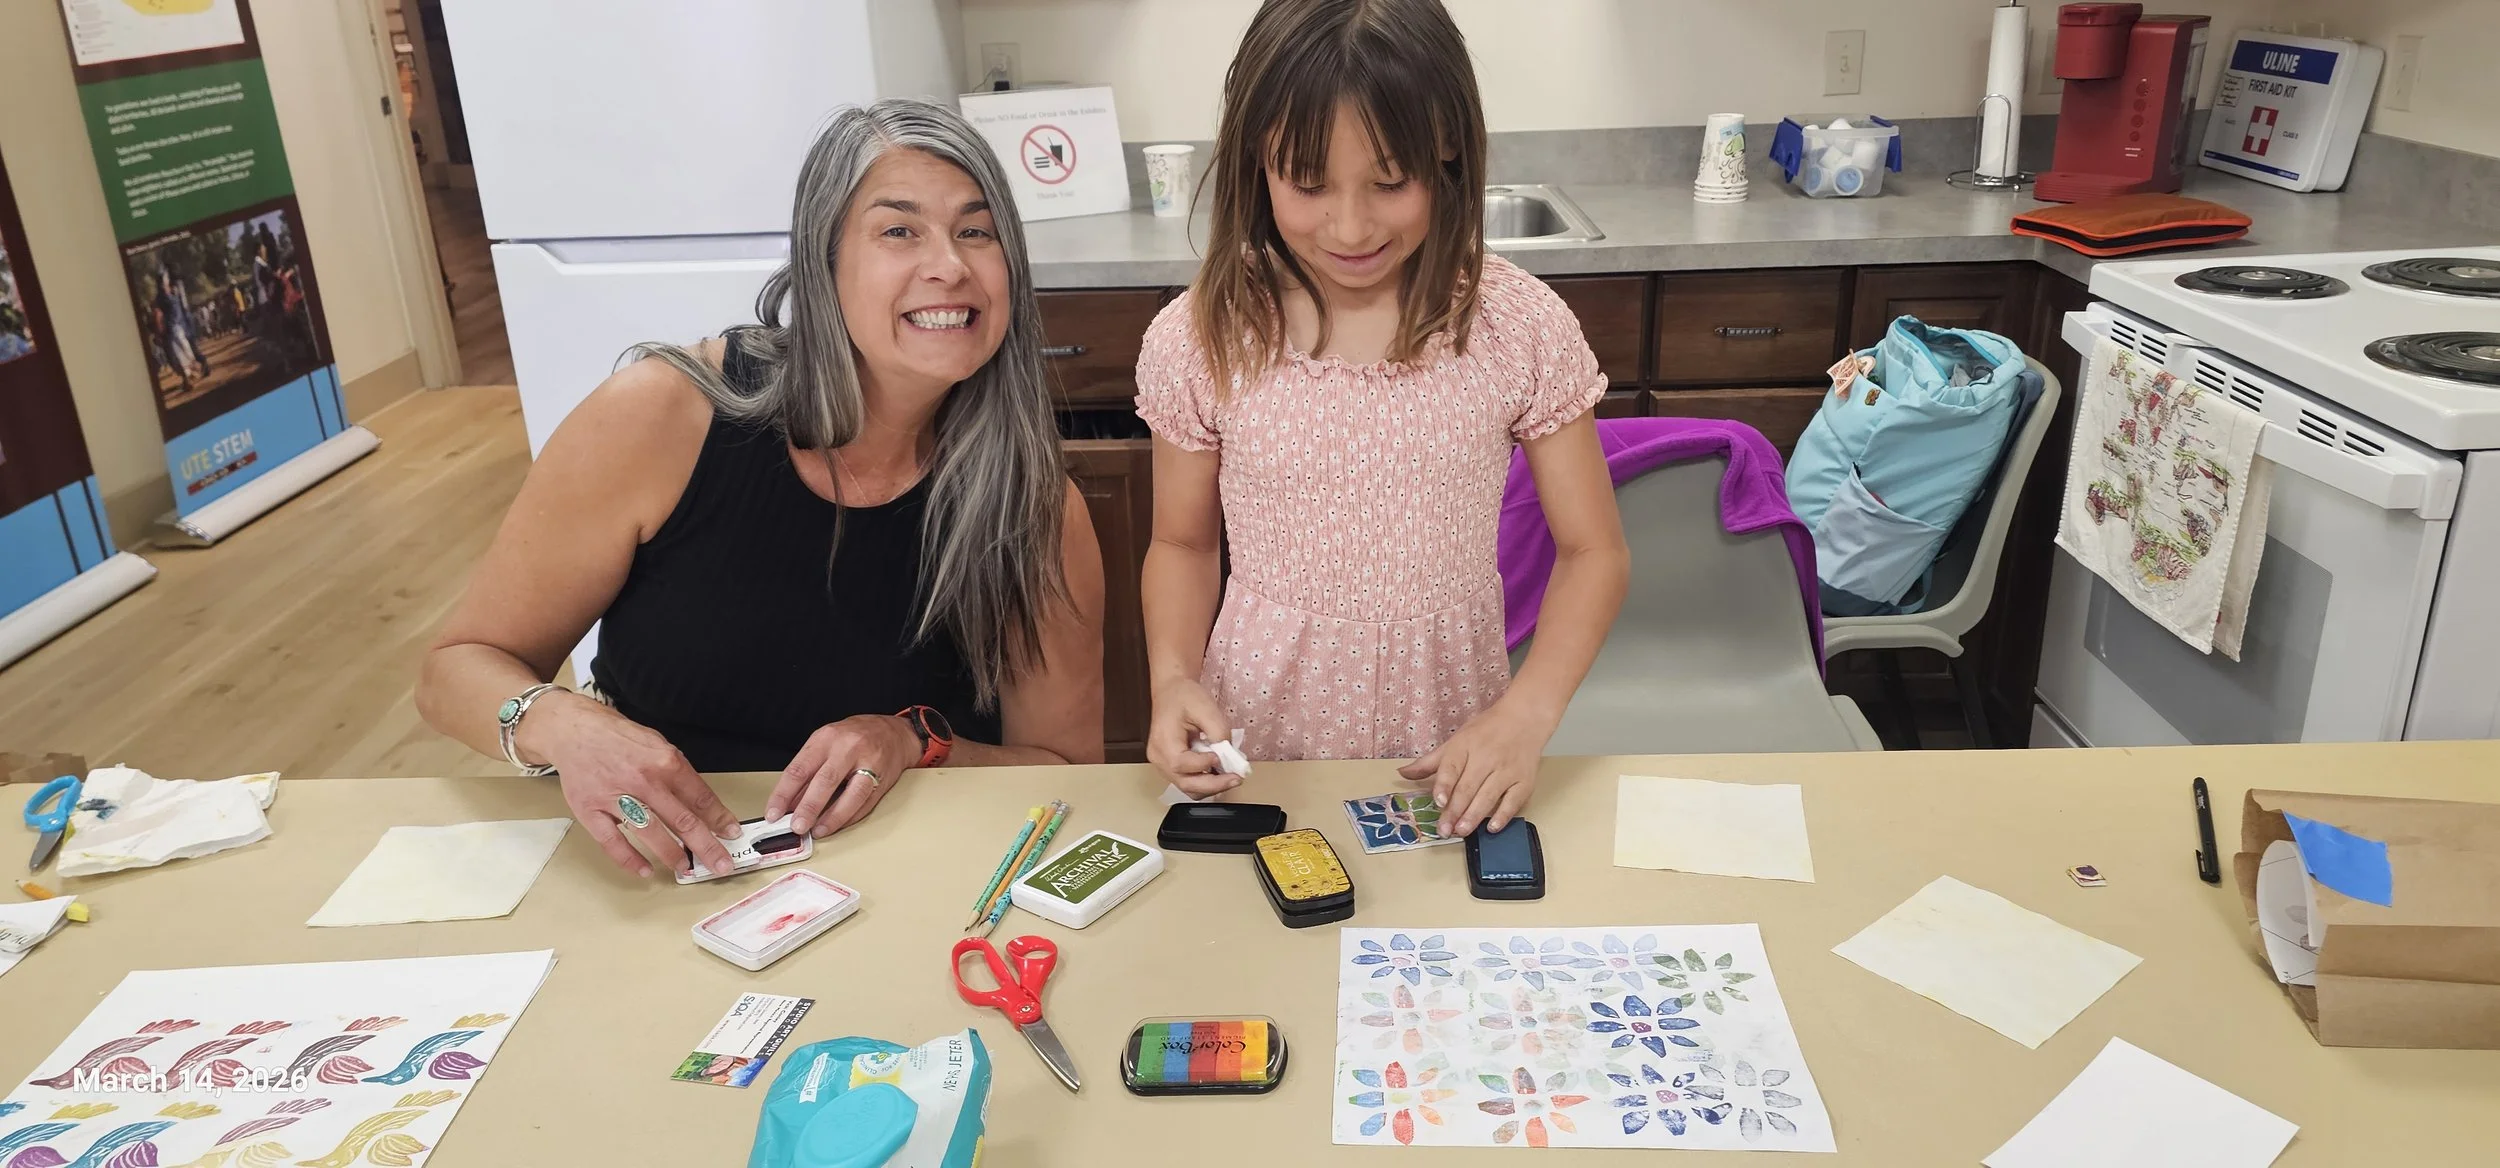
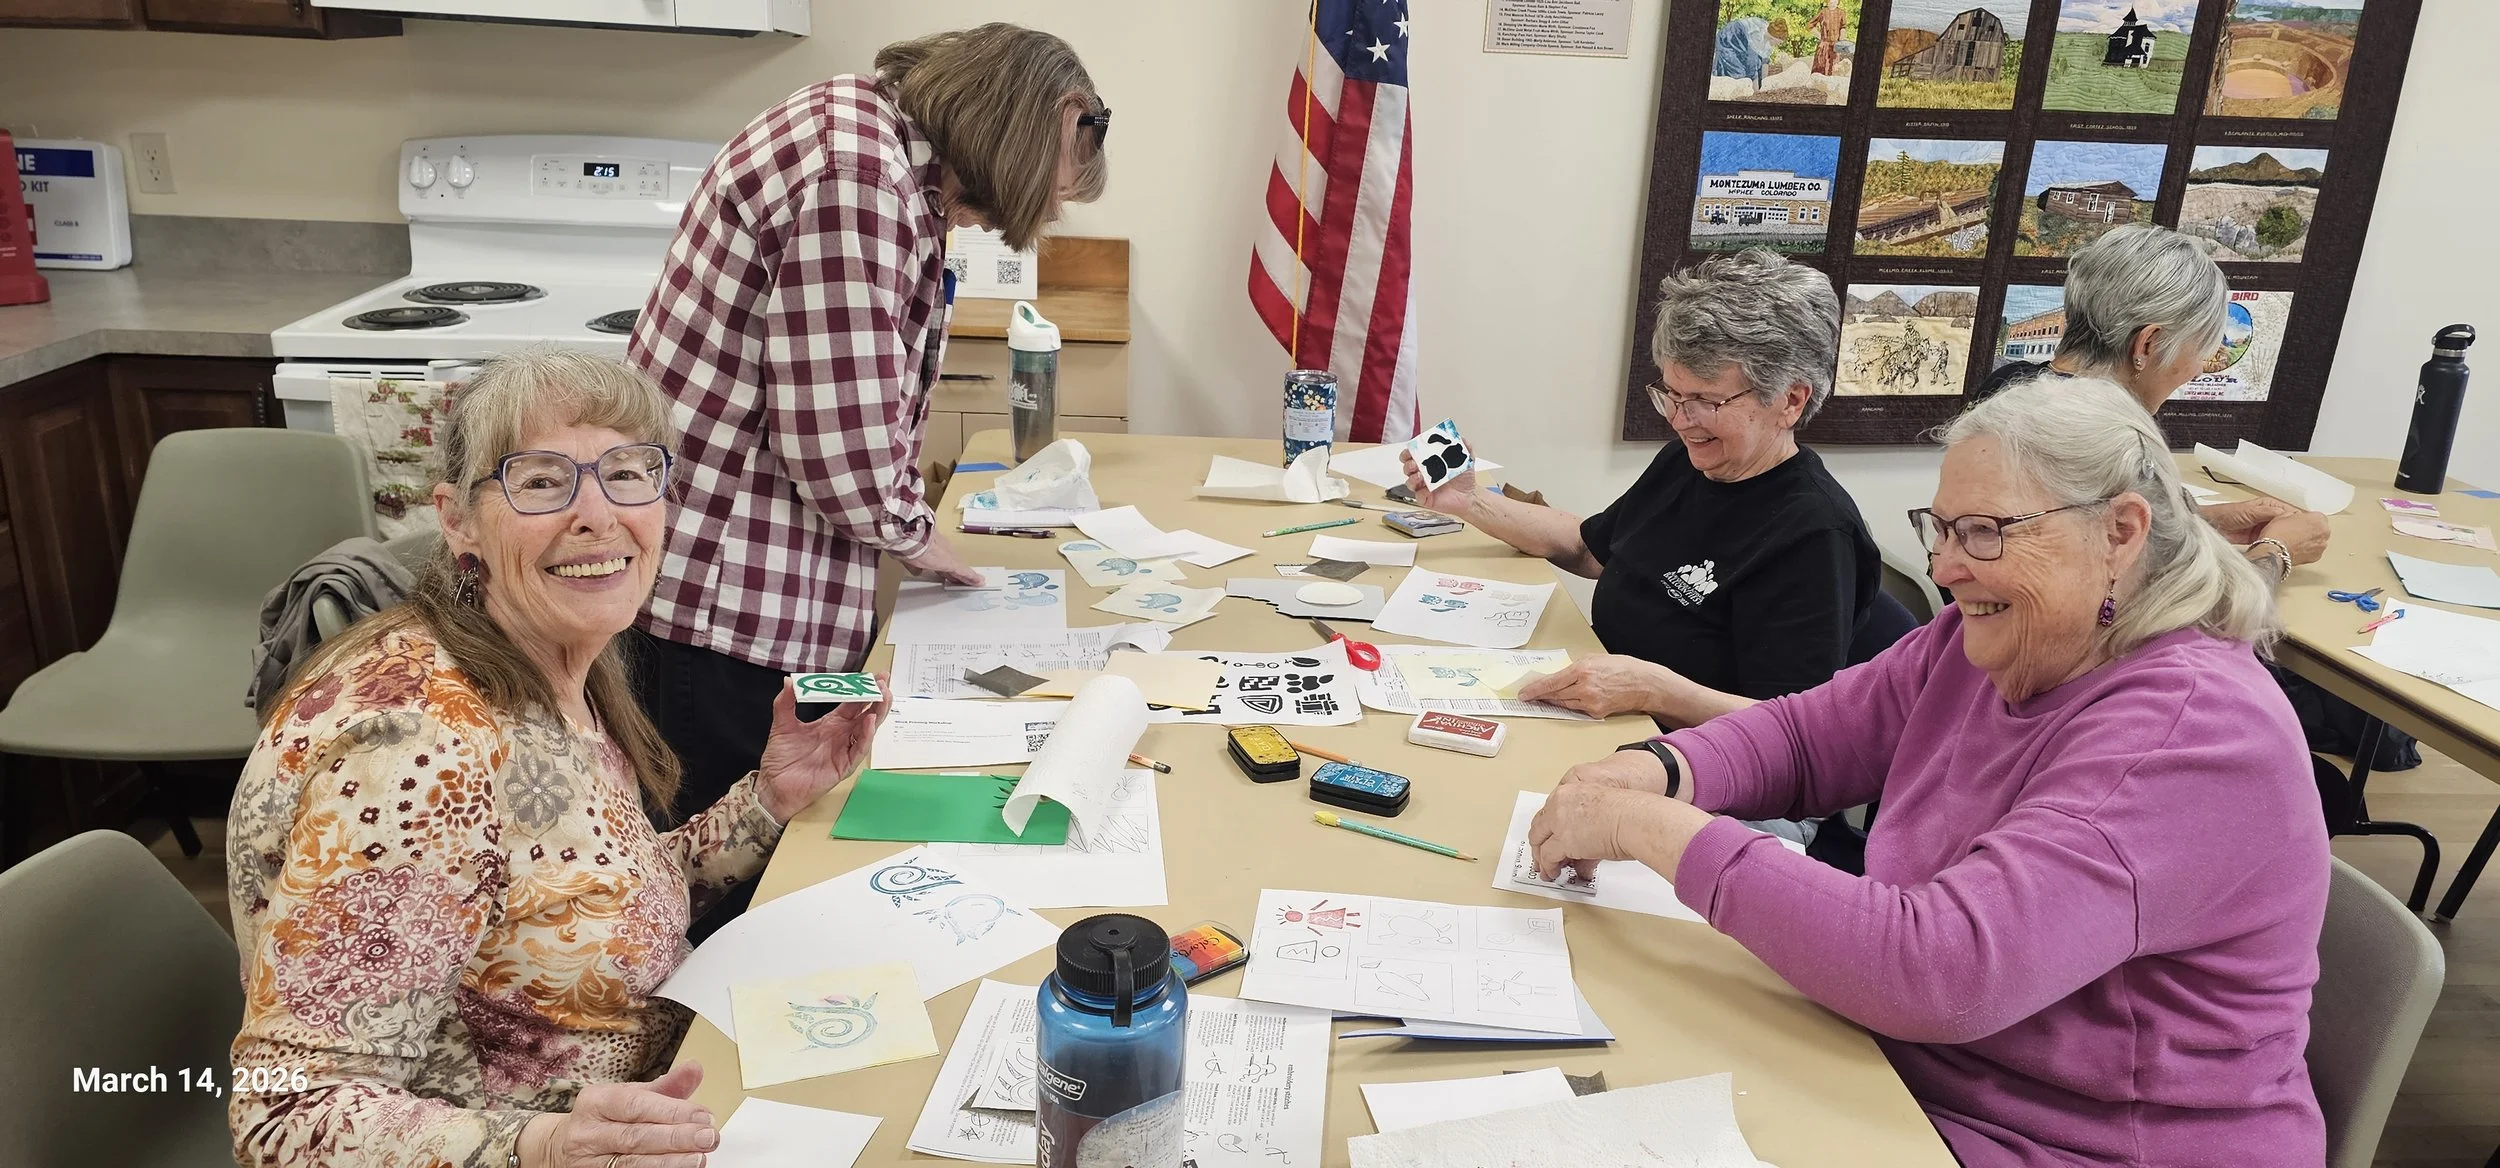
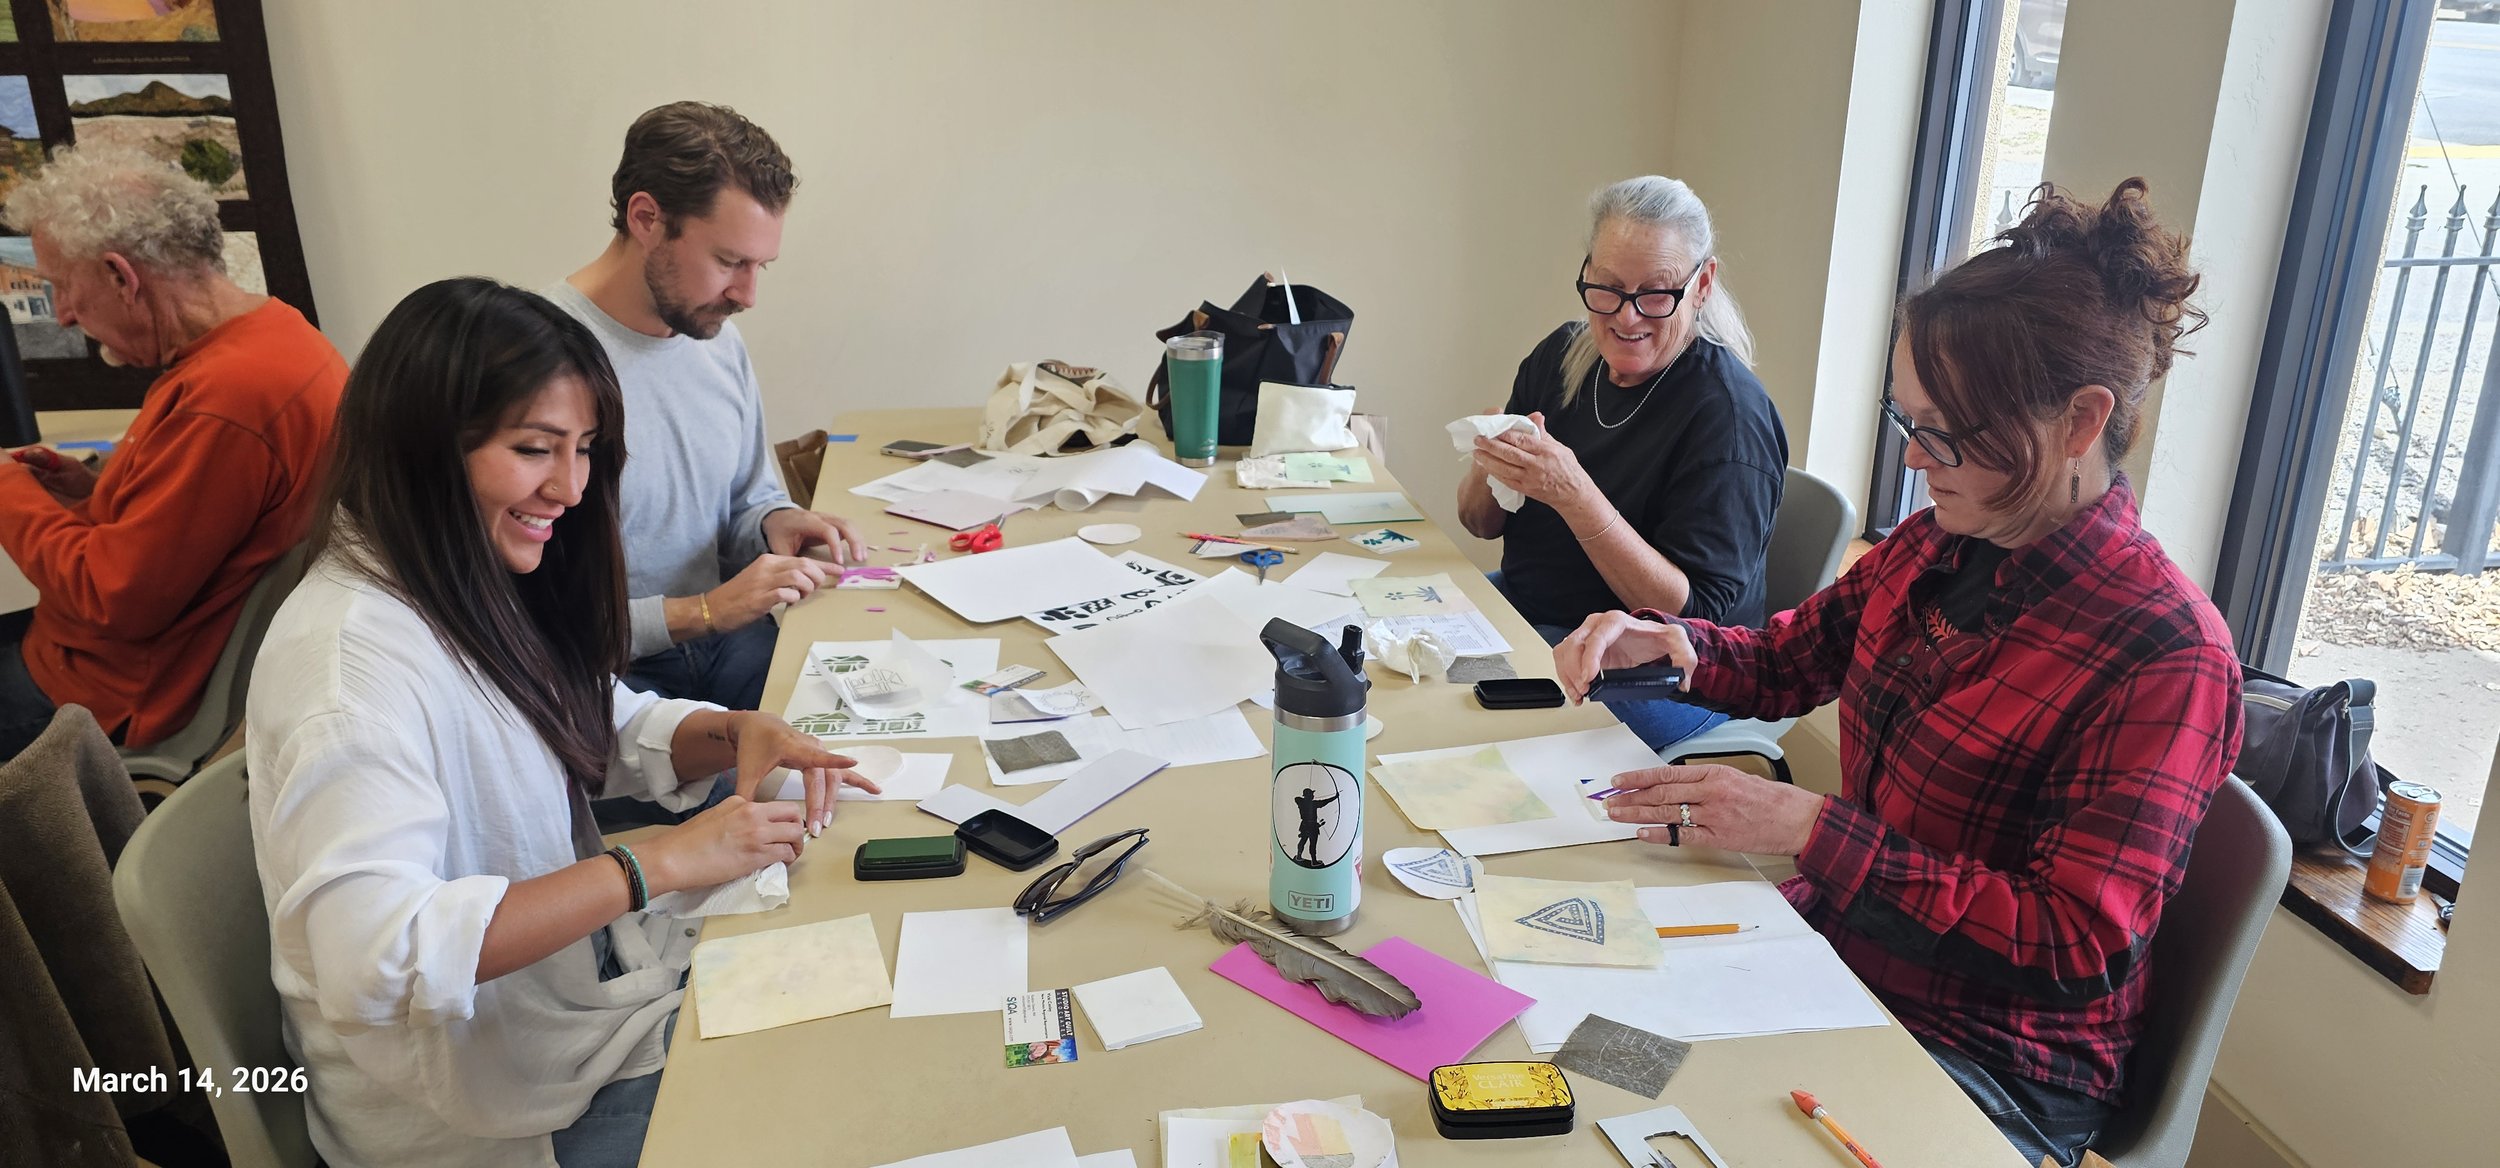
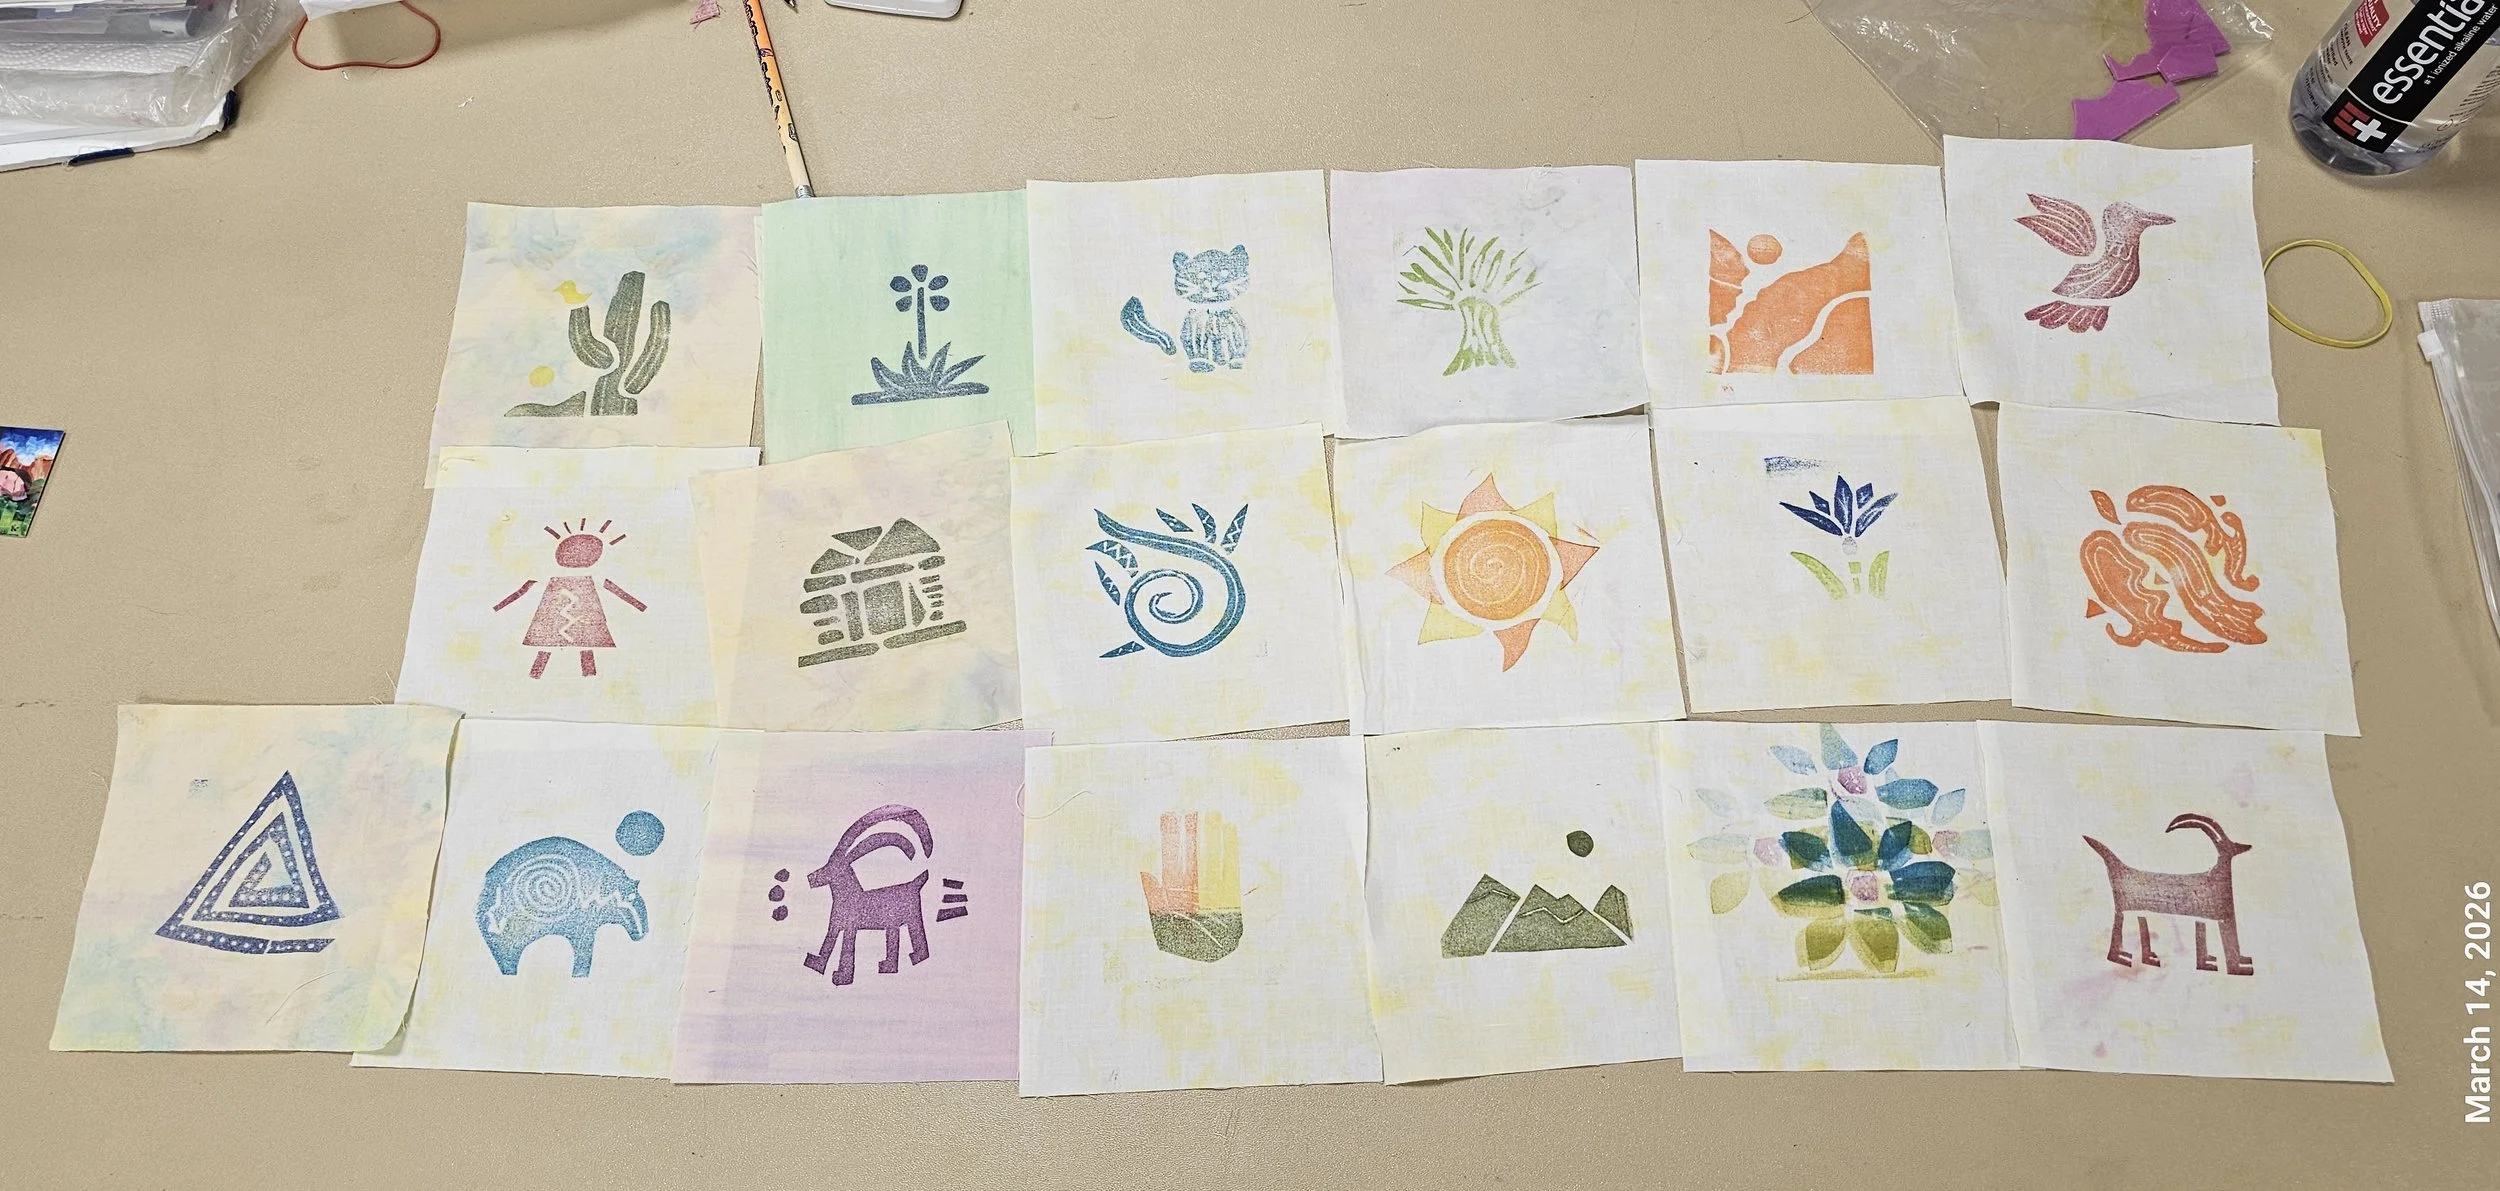
I will sew these little fabric blocks together and donate the little quilt back to the Canyons of the Ancients National Monument.
Sand Canyon from the Top Down
Today I hiked Sand Canyon down from the top (starts by Sand Canyon Pueblo) with Amala. Jeff, another ranger, dropped us off. There is a very steep section, and they advised going down instead of up. It was a beautiful hike and we saw many cultural sites I had not been to yet.
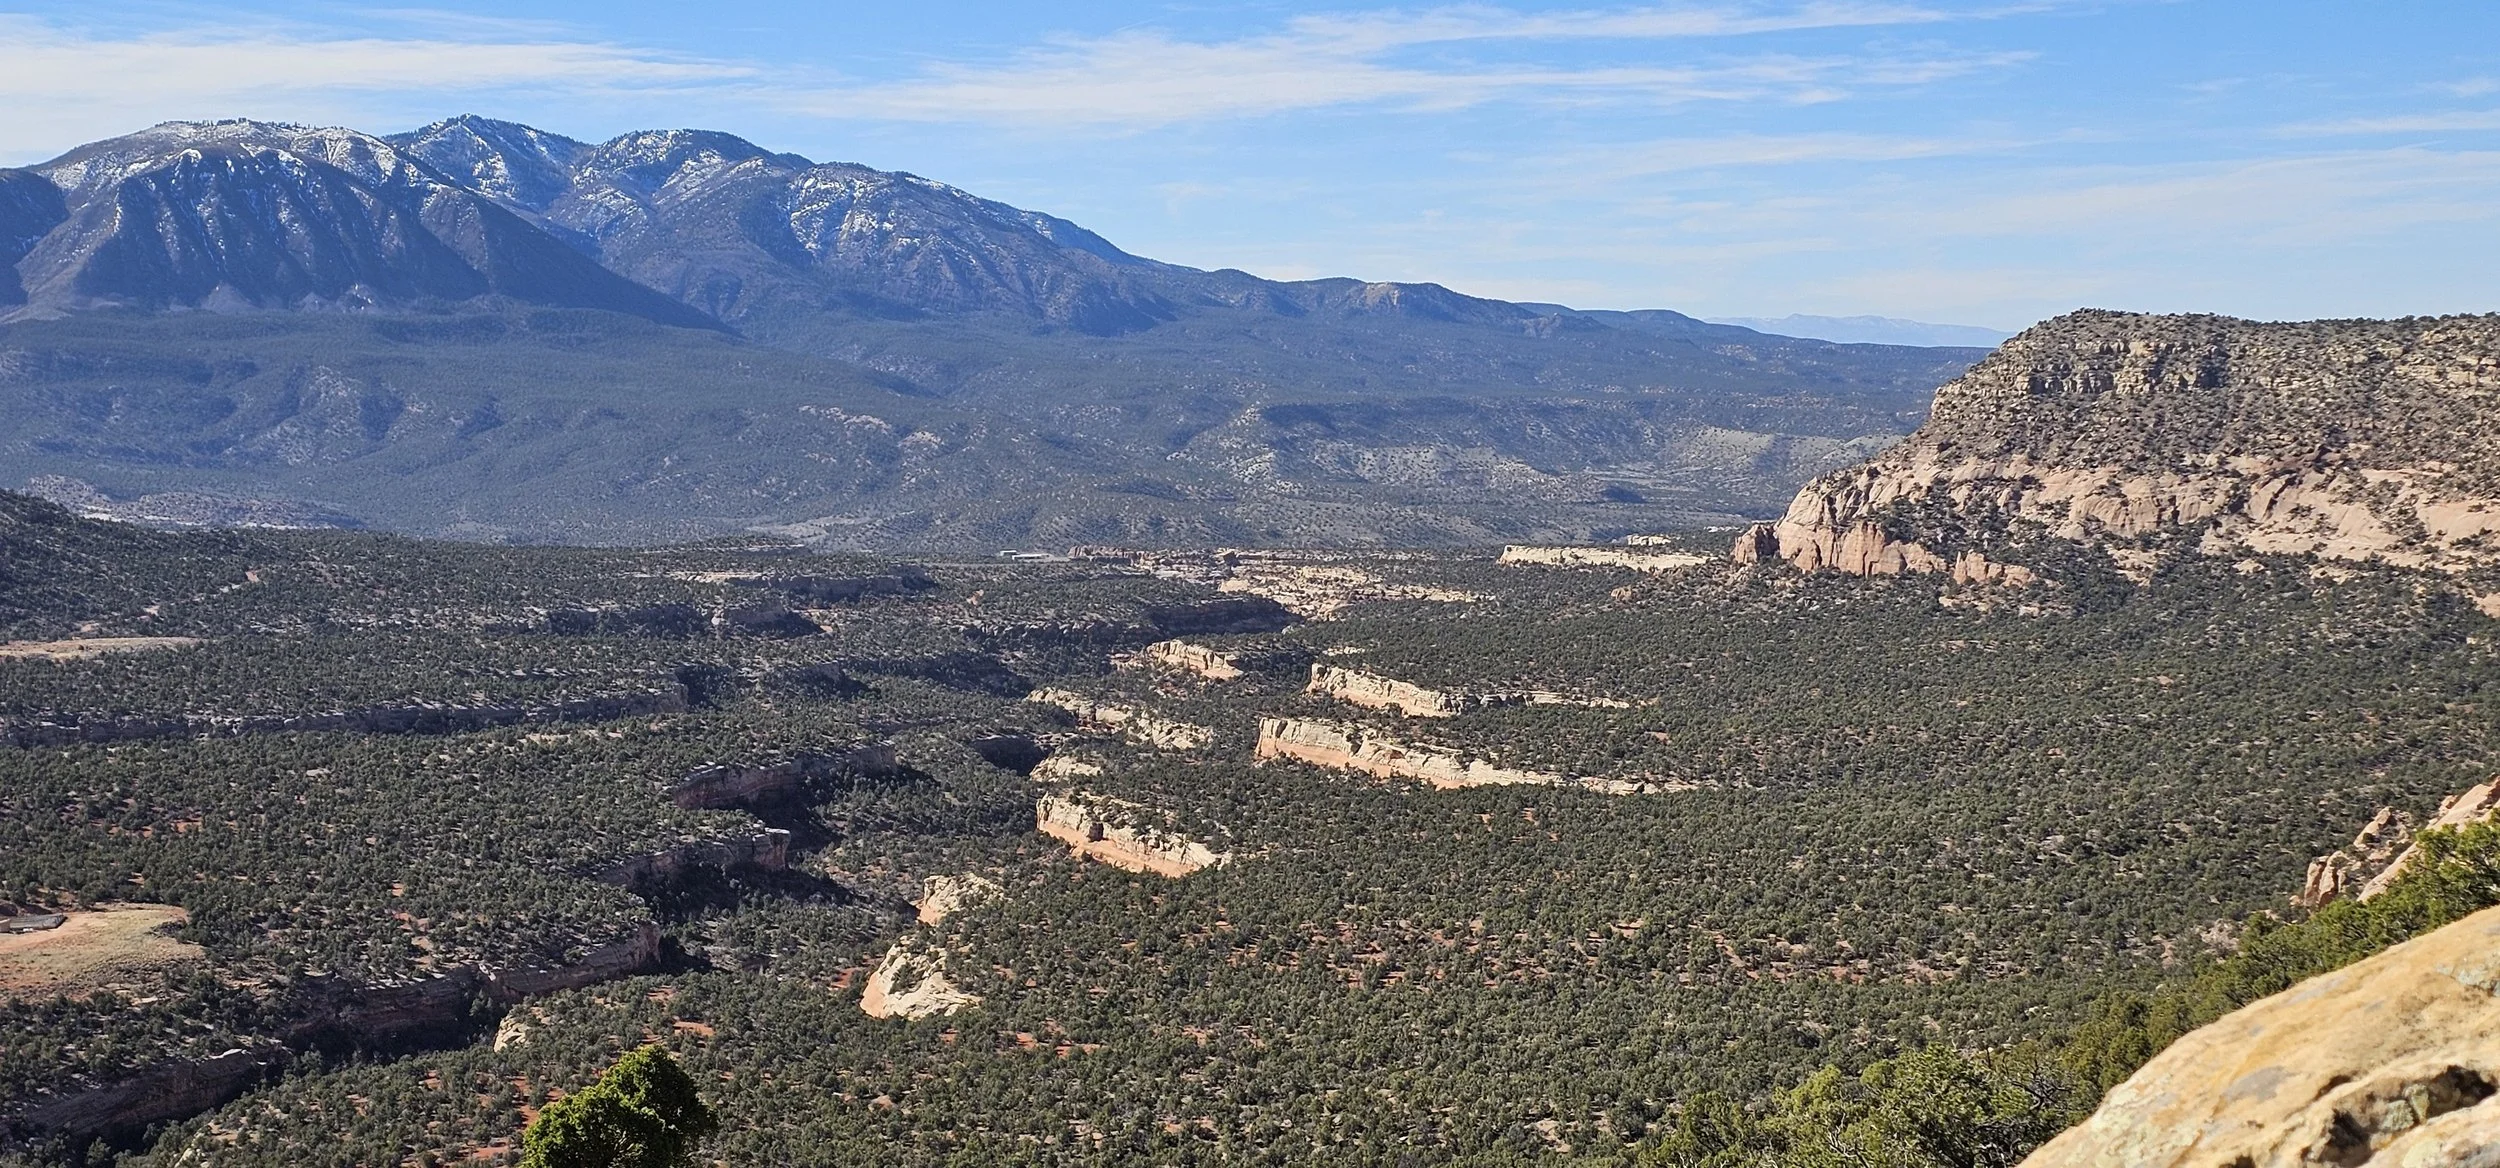
View of the canyon from the top.
The hike skirts the sandstone you see on the cliff to the right and after a couple of miles drops into the canyon via a set of steep switchbacks.
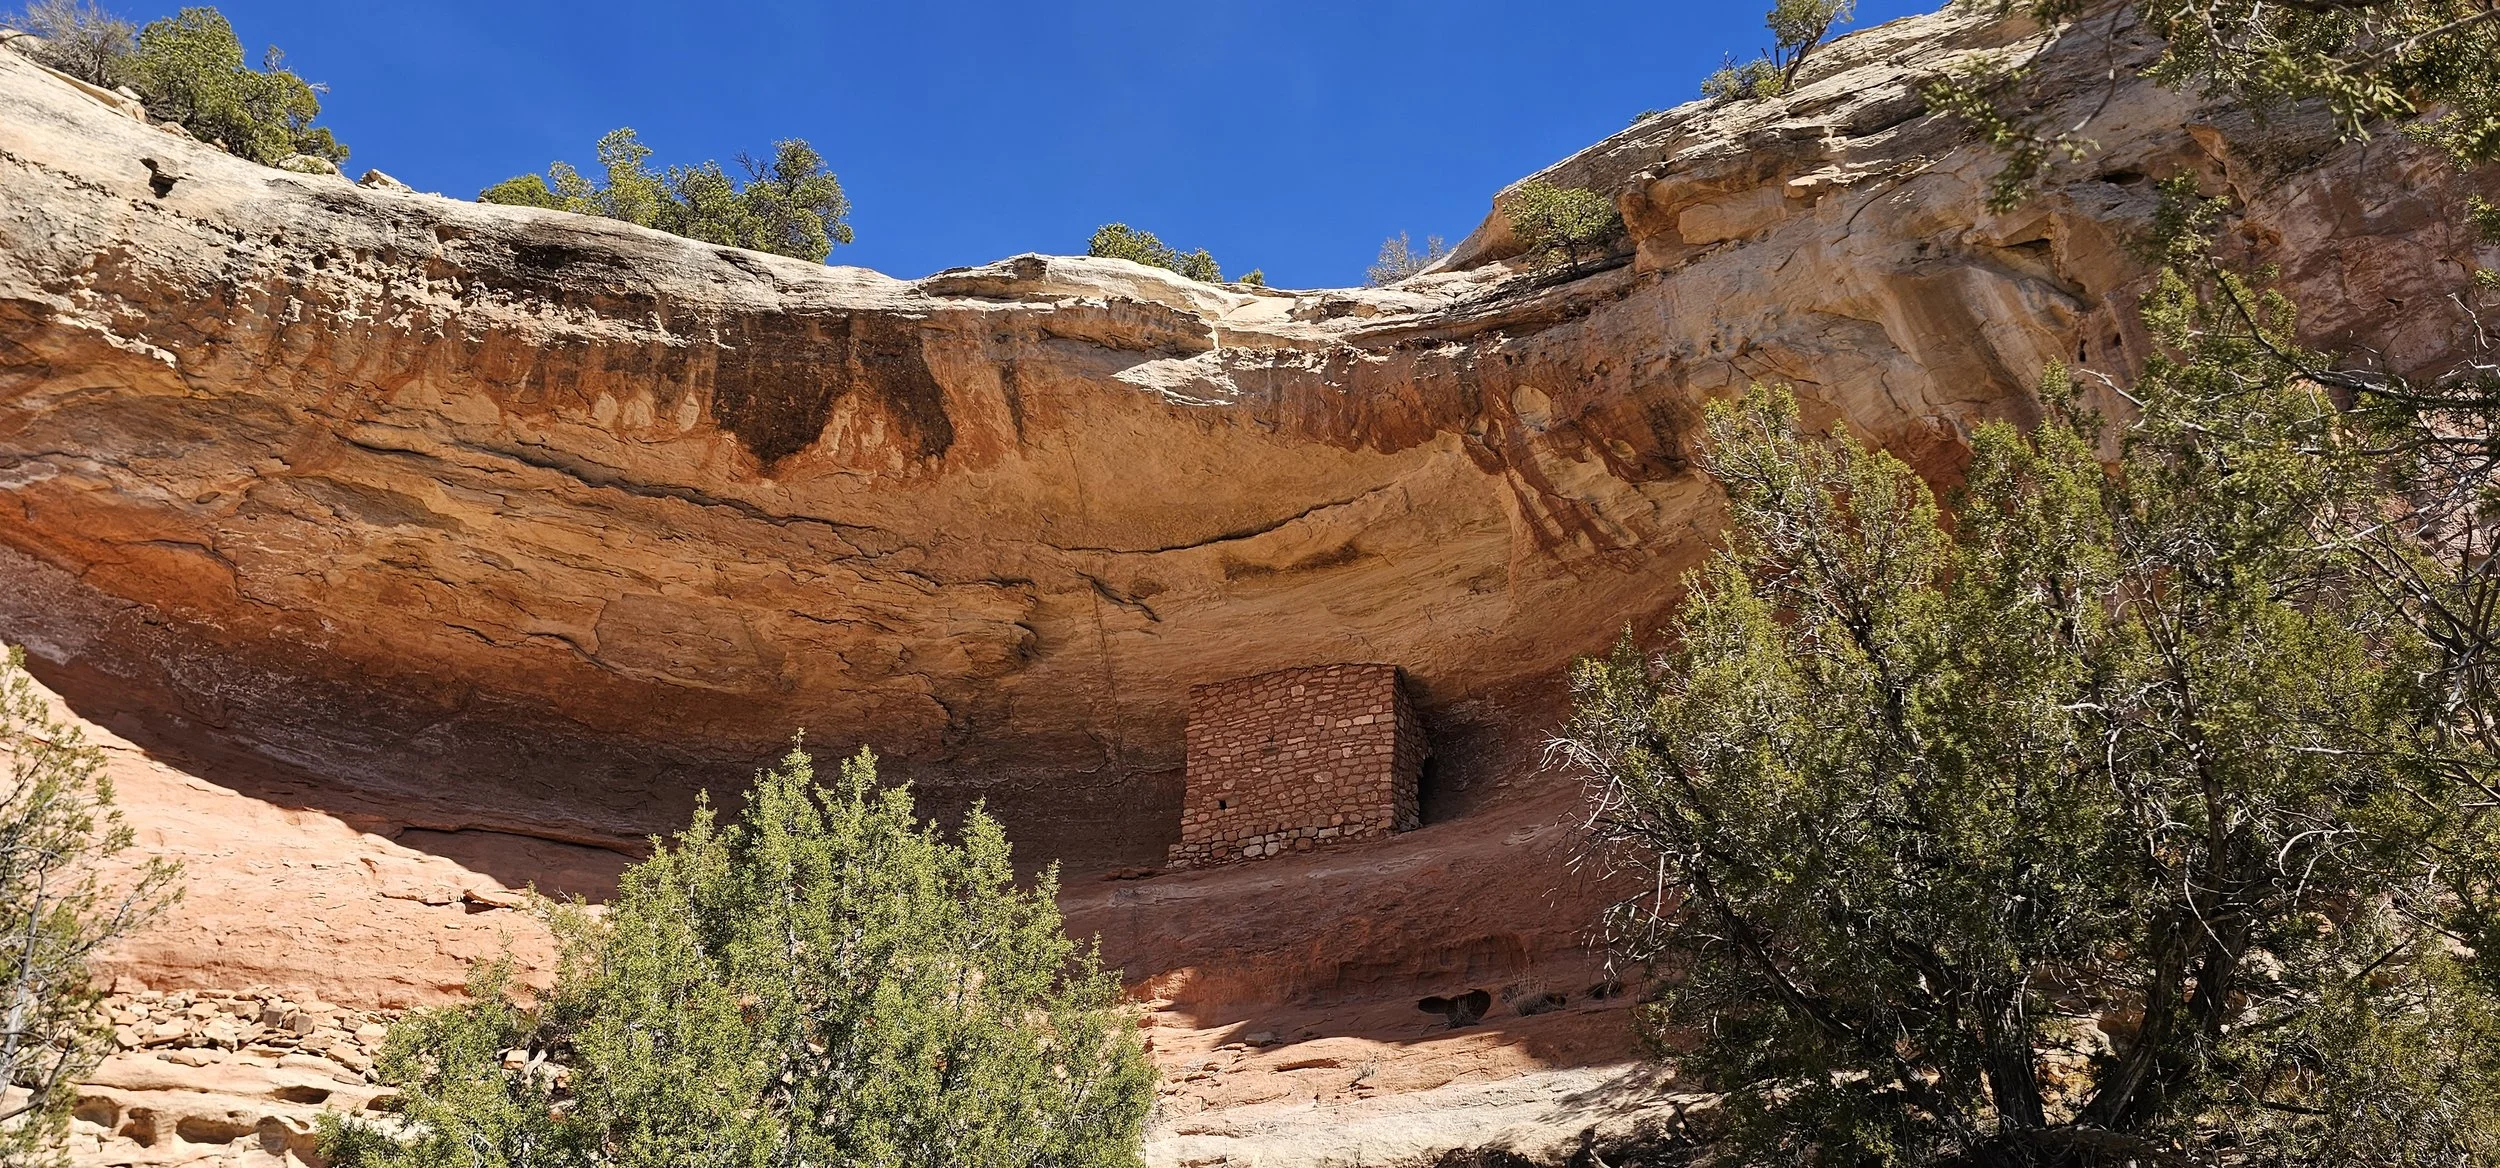
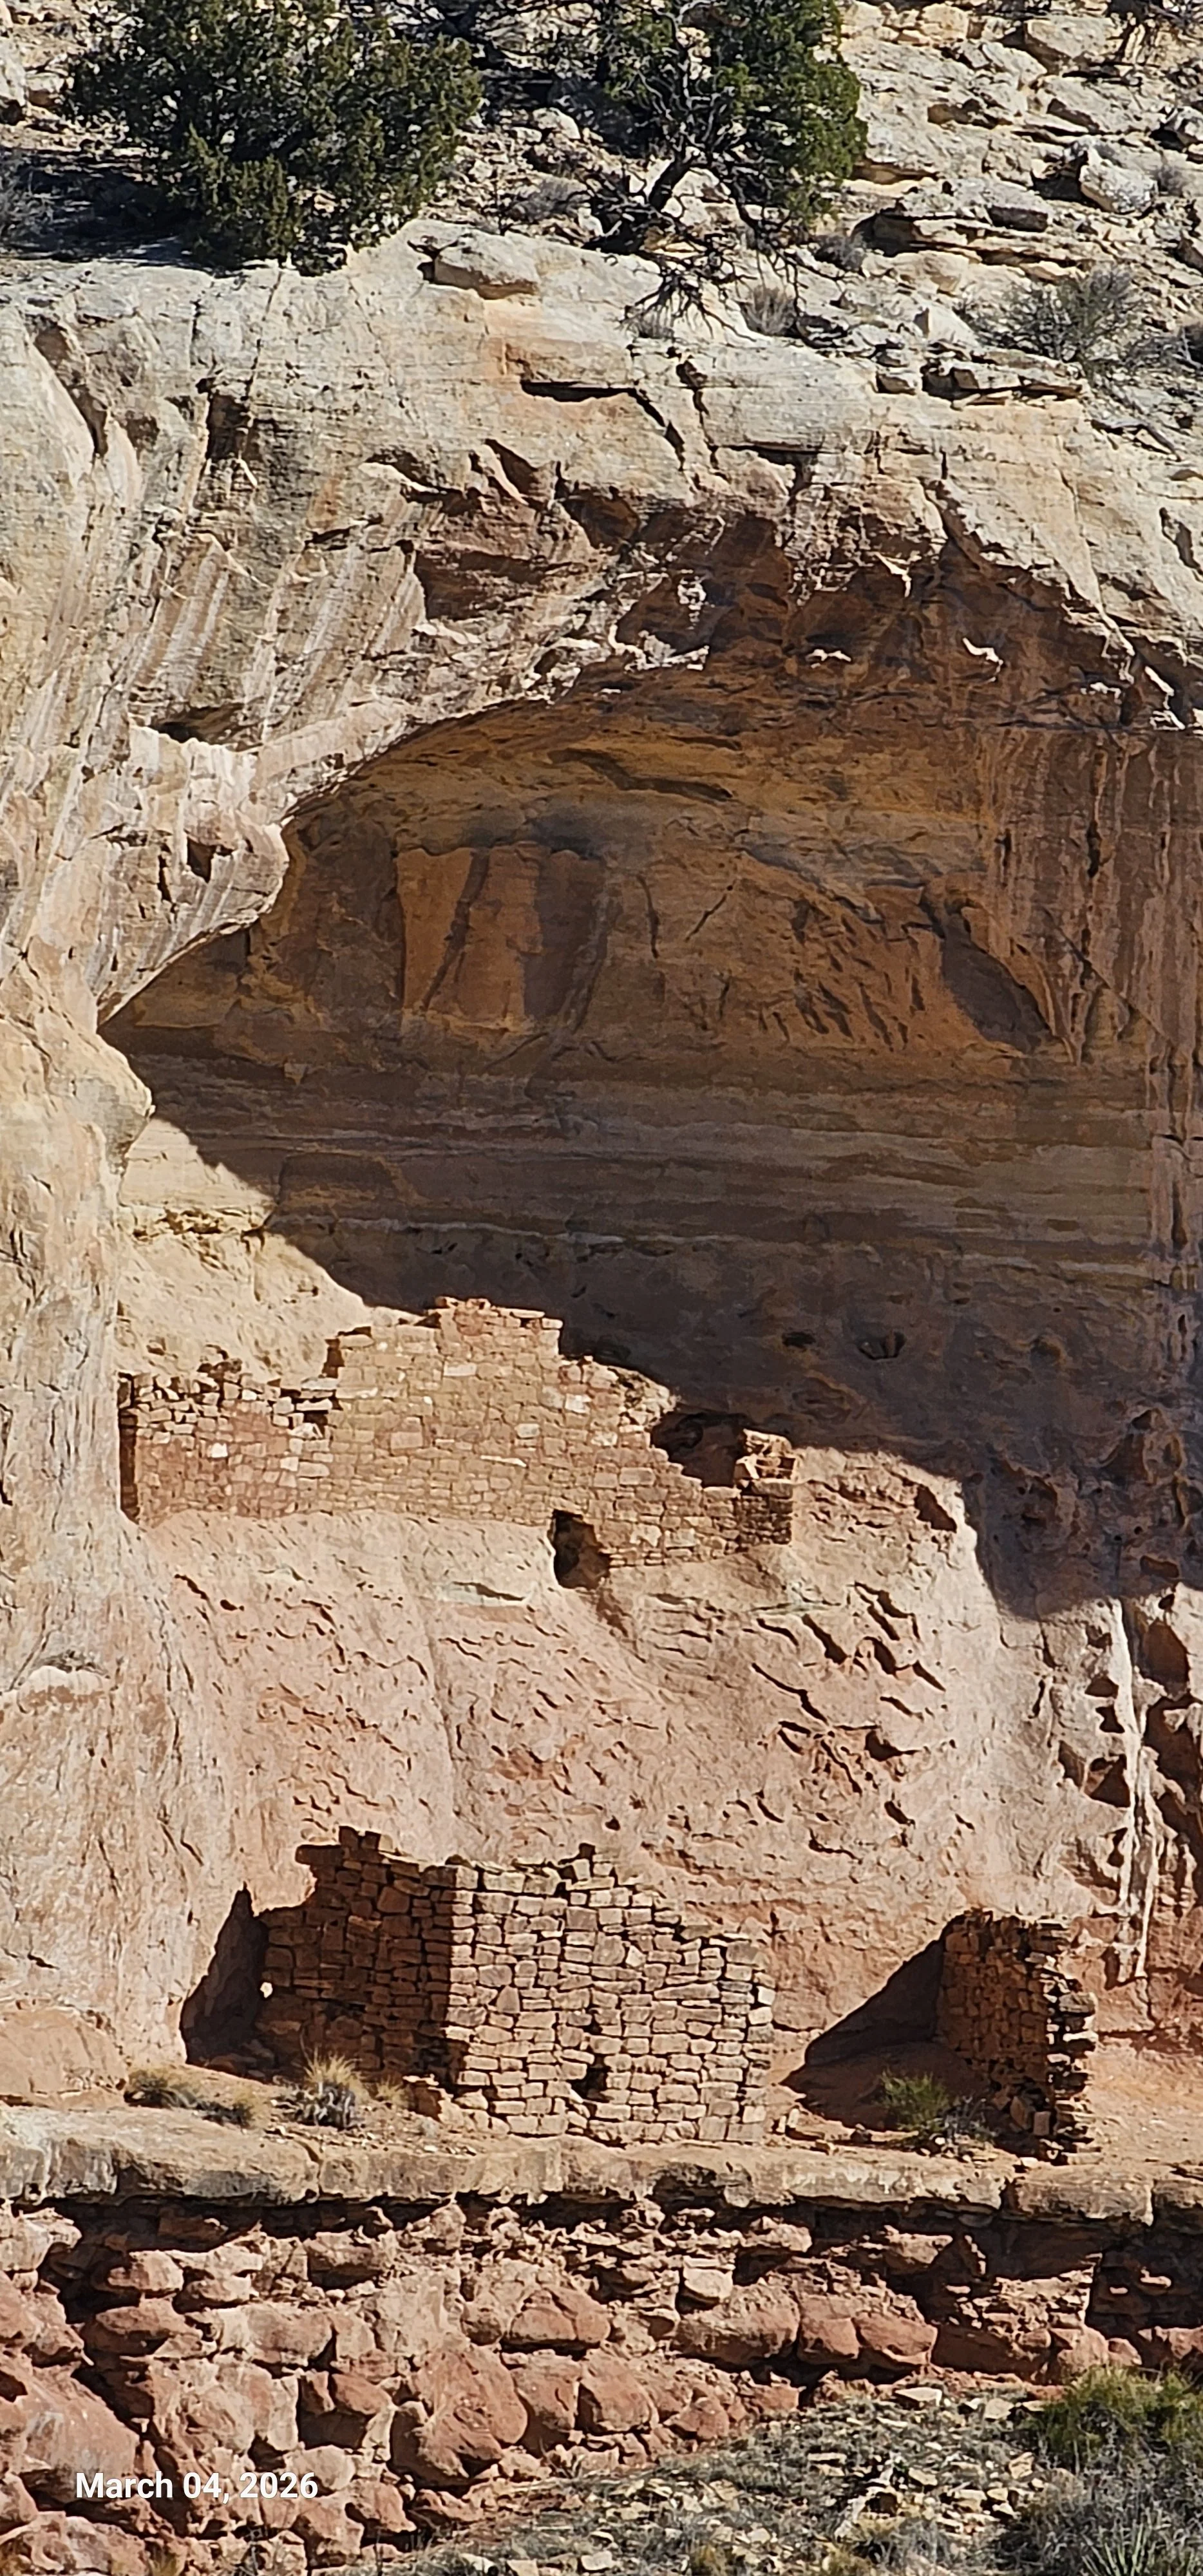
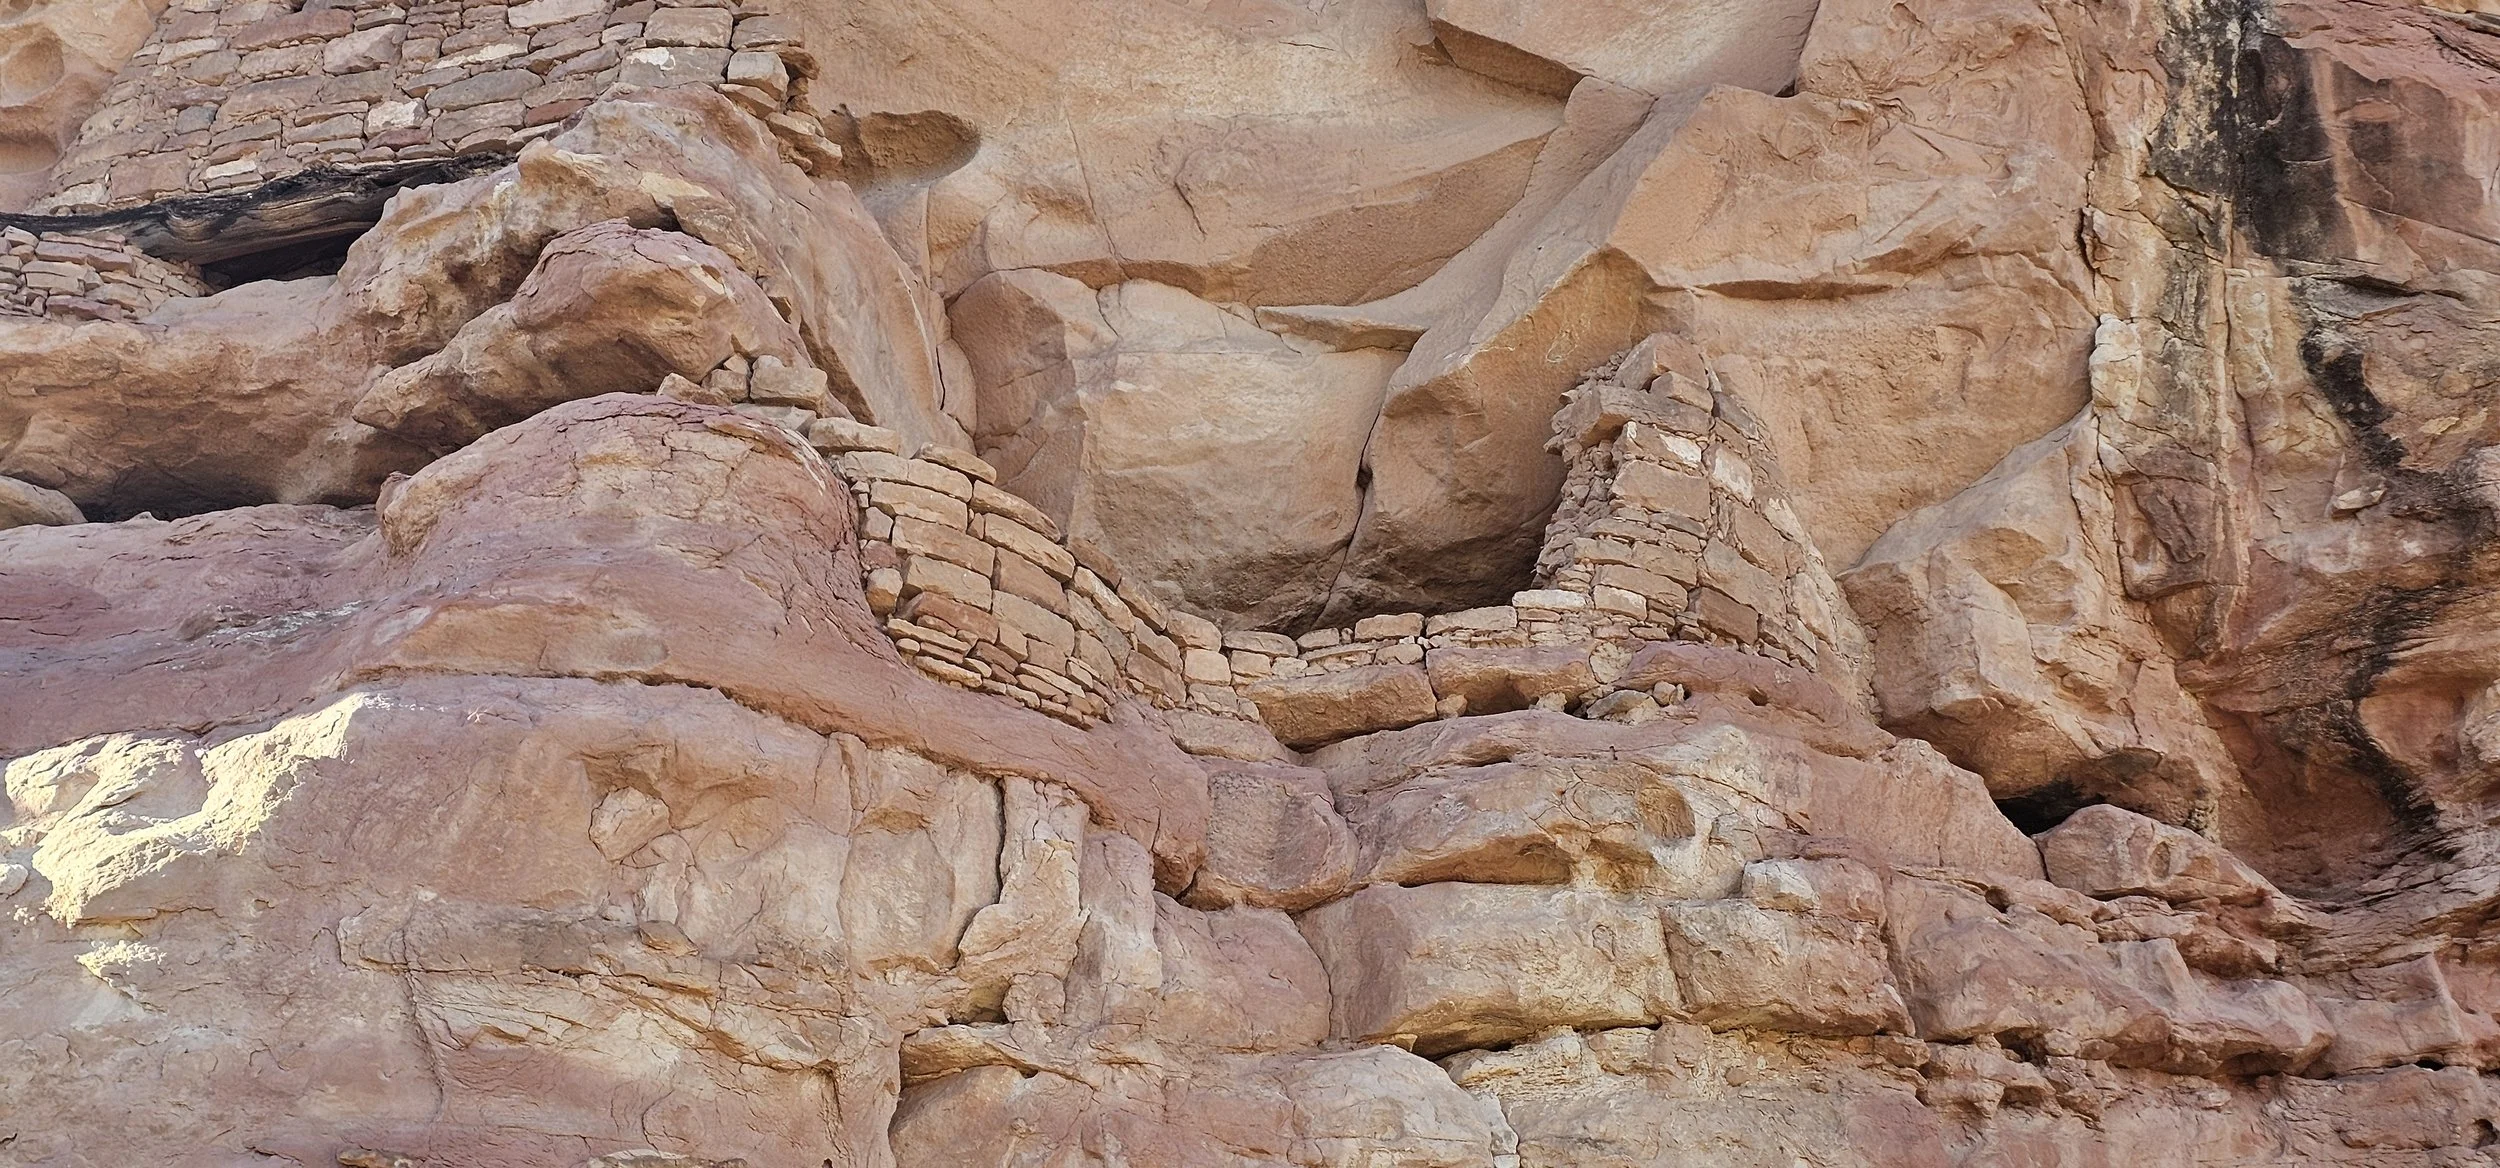
The cliffs protect so many beautiful structures.
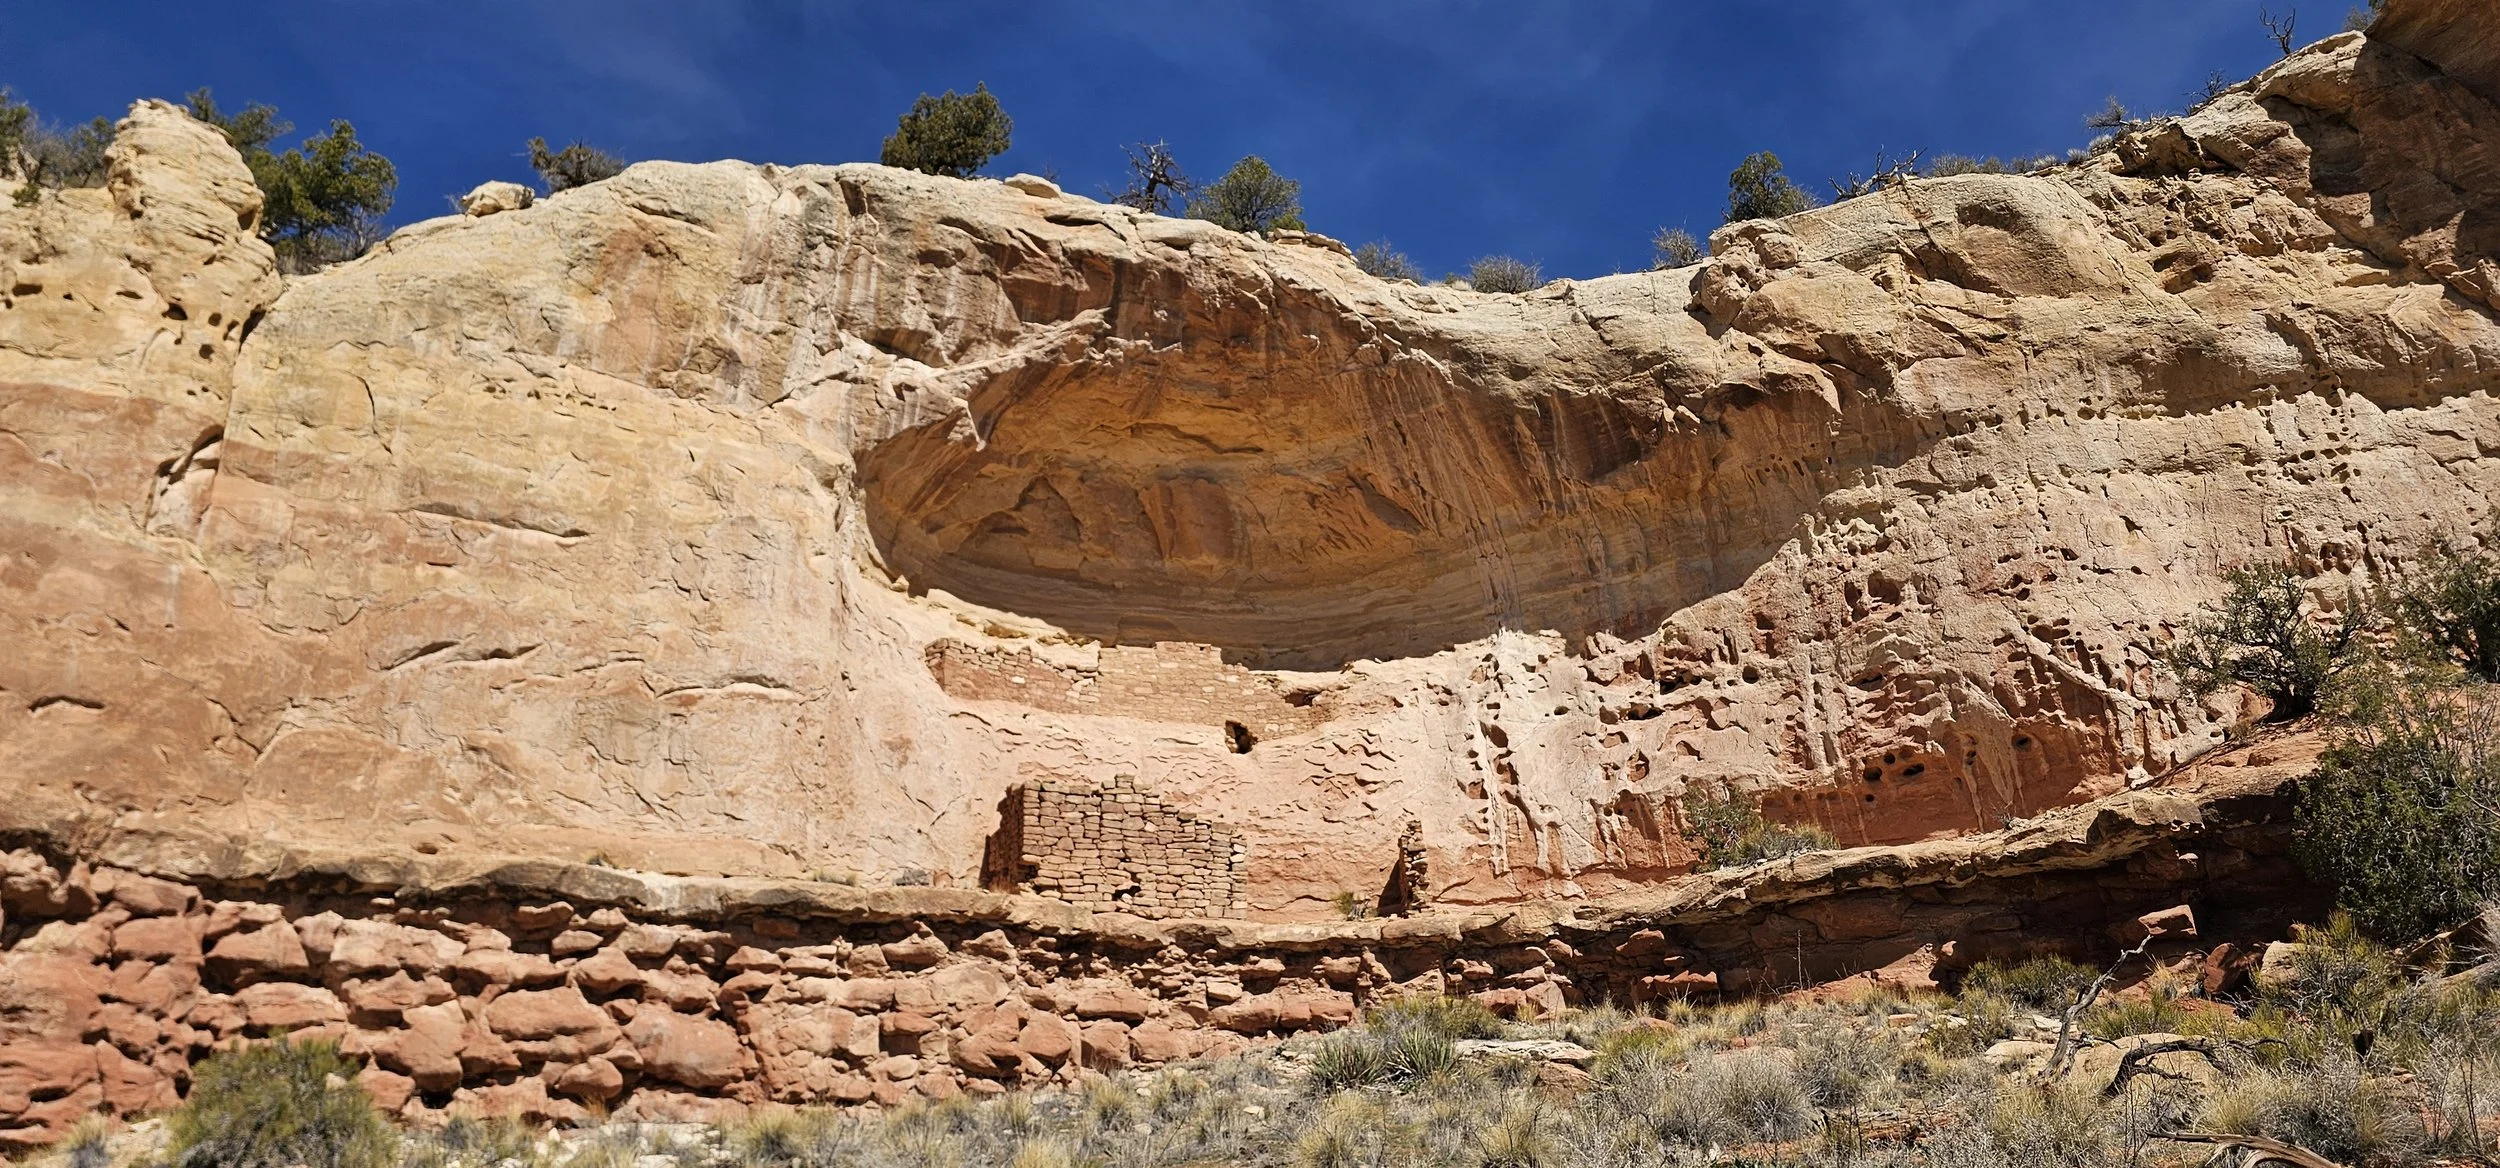
Double Cliff House
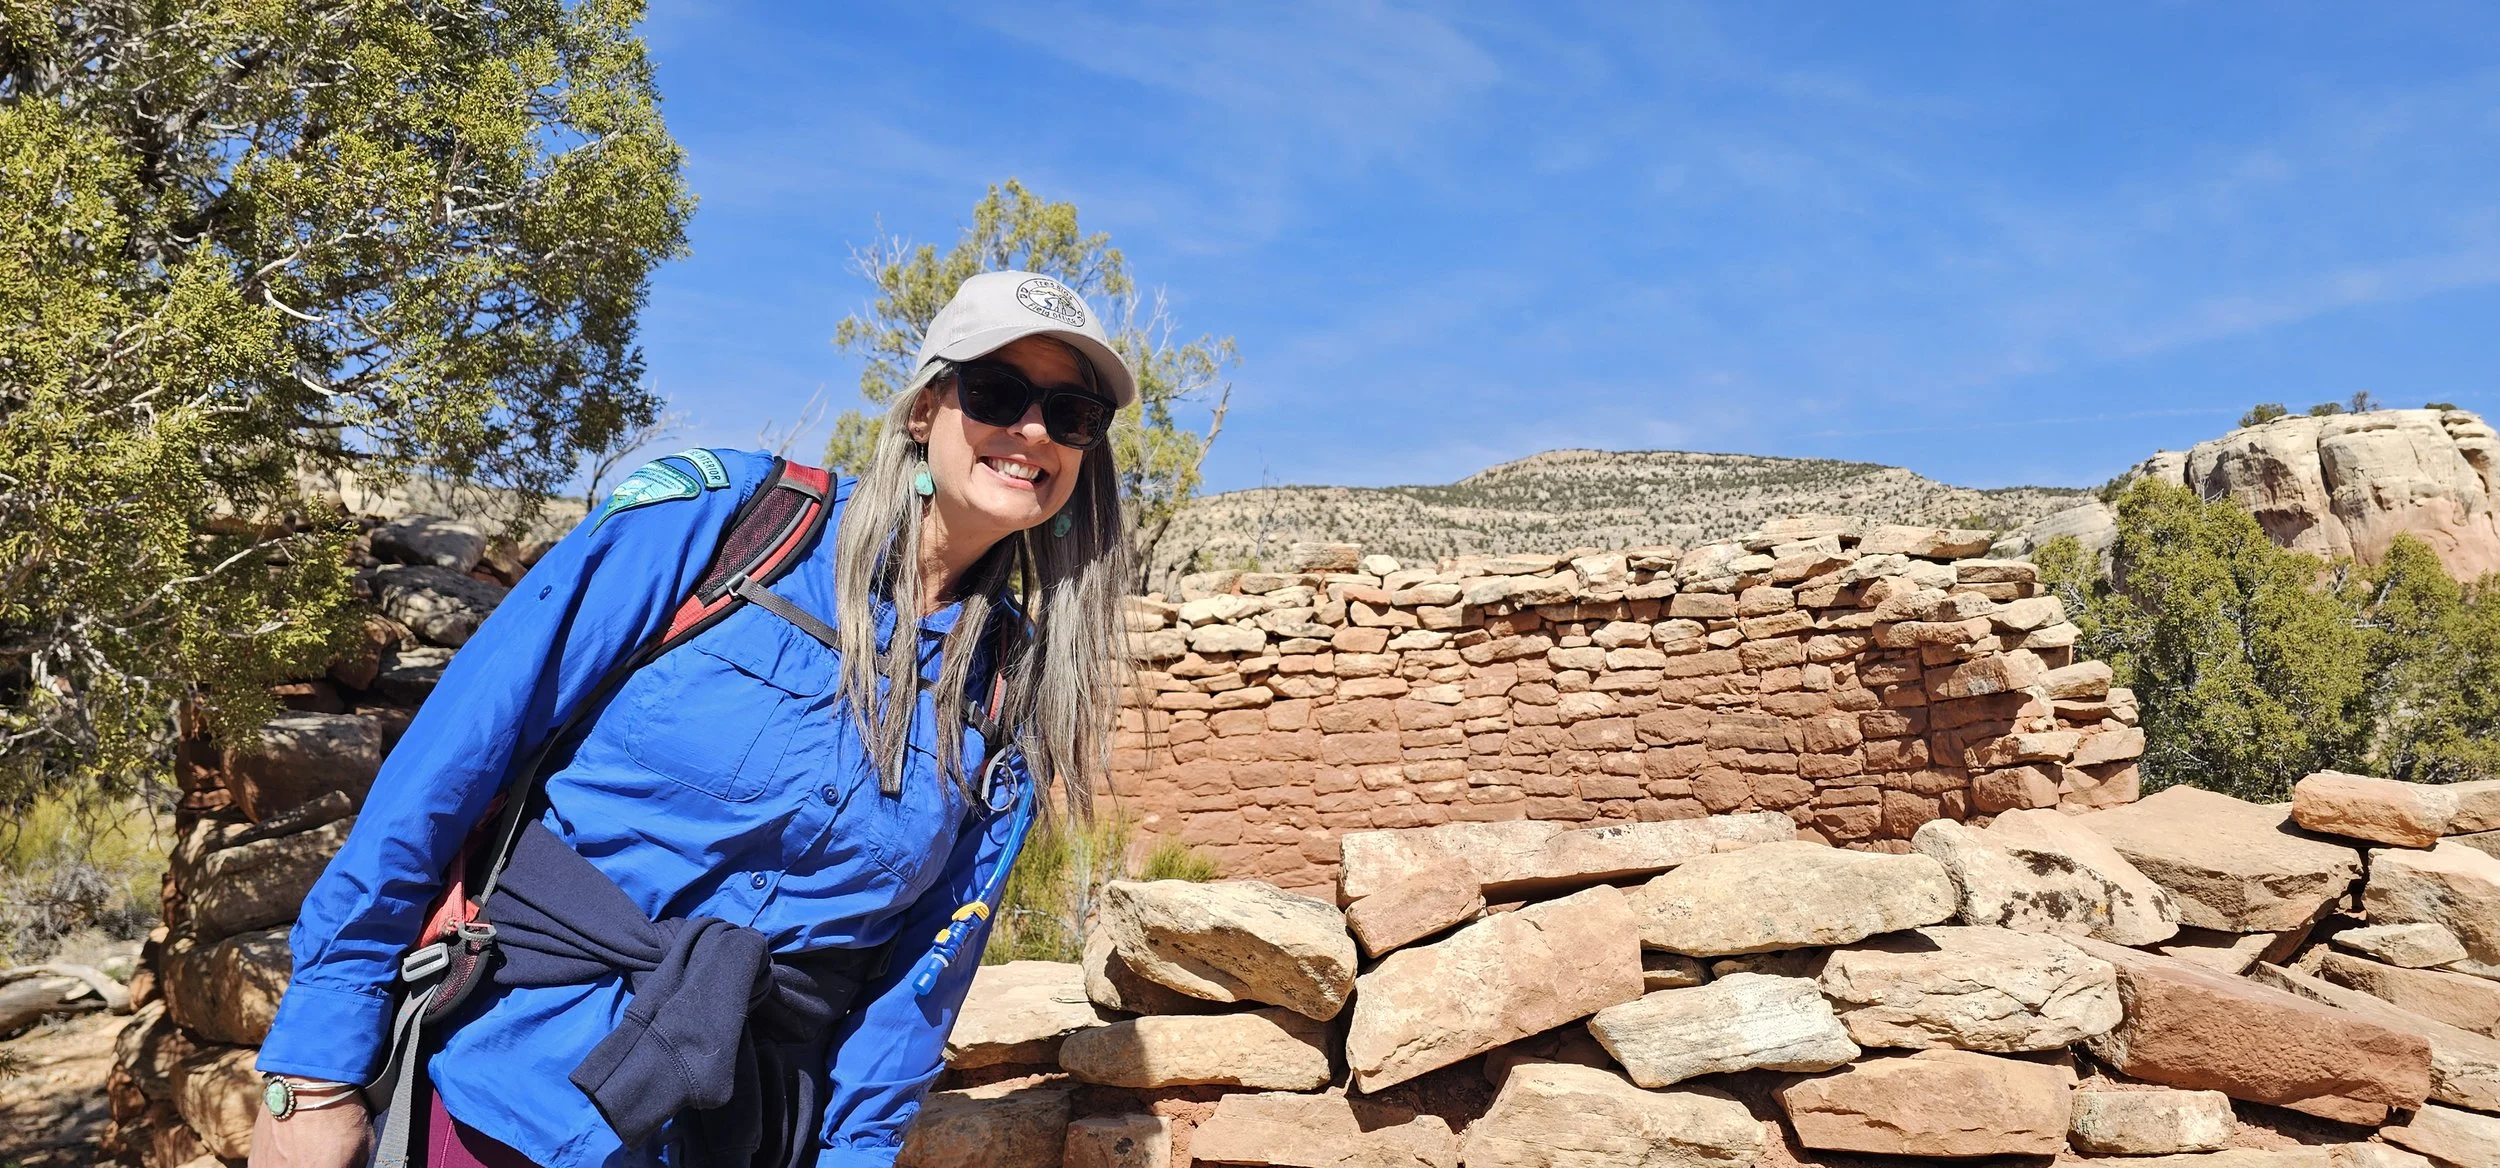
Ranger Amala Posey-Monk Supervisory Park Ranger
Visitor Services and Recreation Program Manager
It was a glorious day, and it was so nice to have company on this hike.
Printing in the Casita
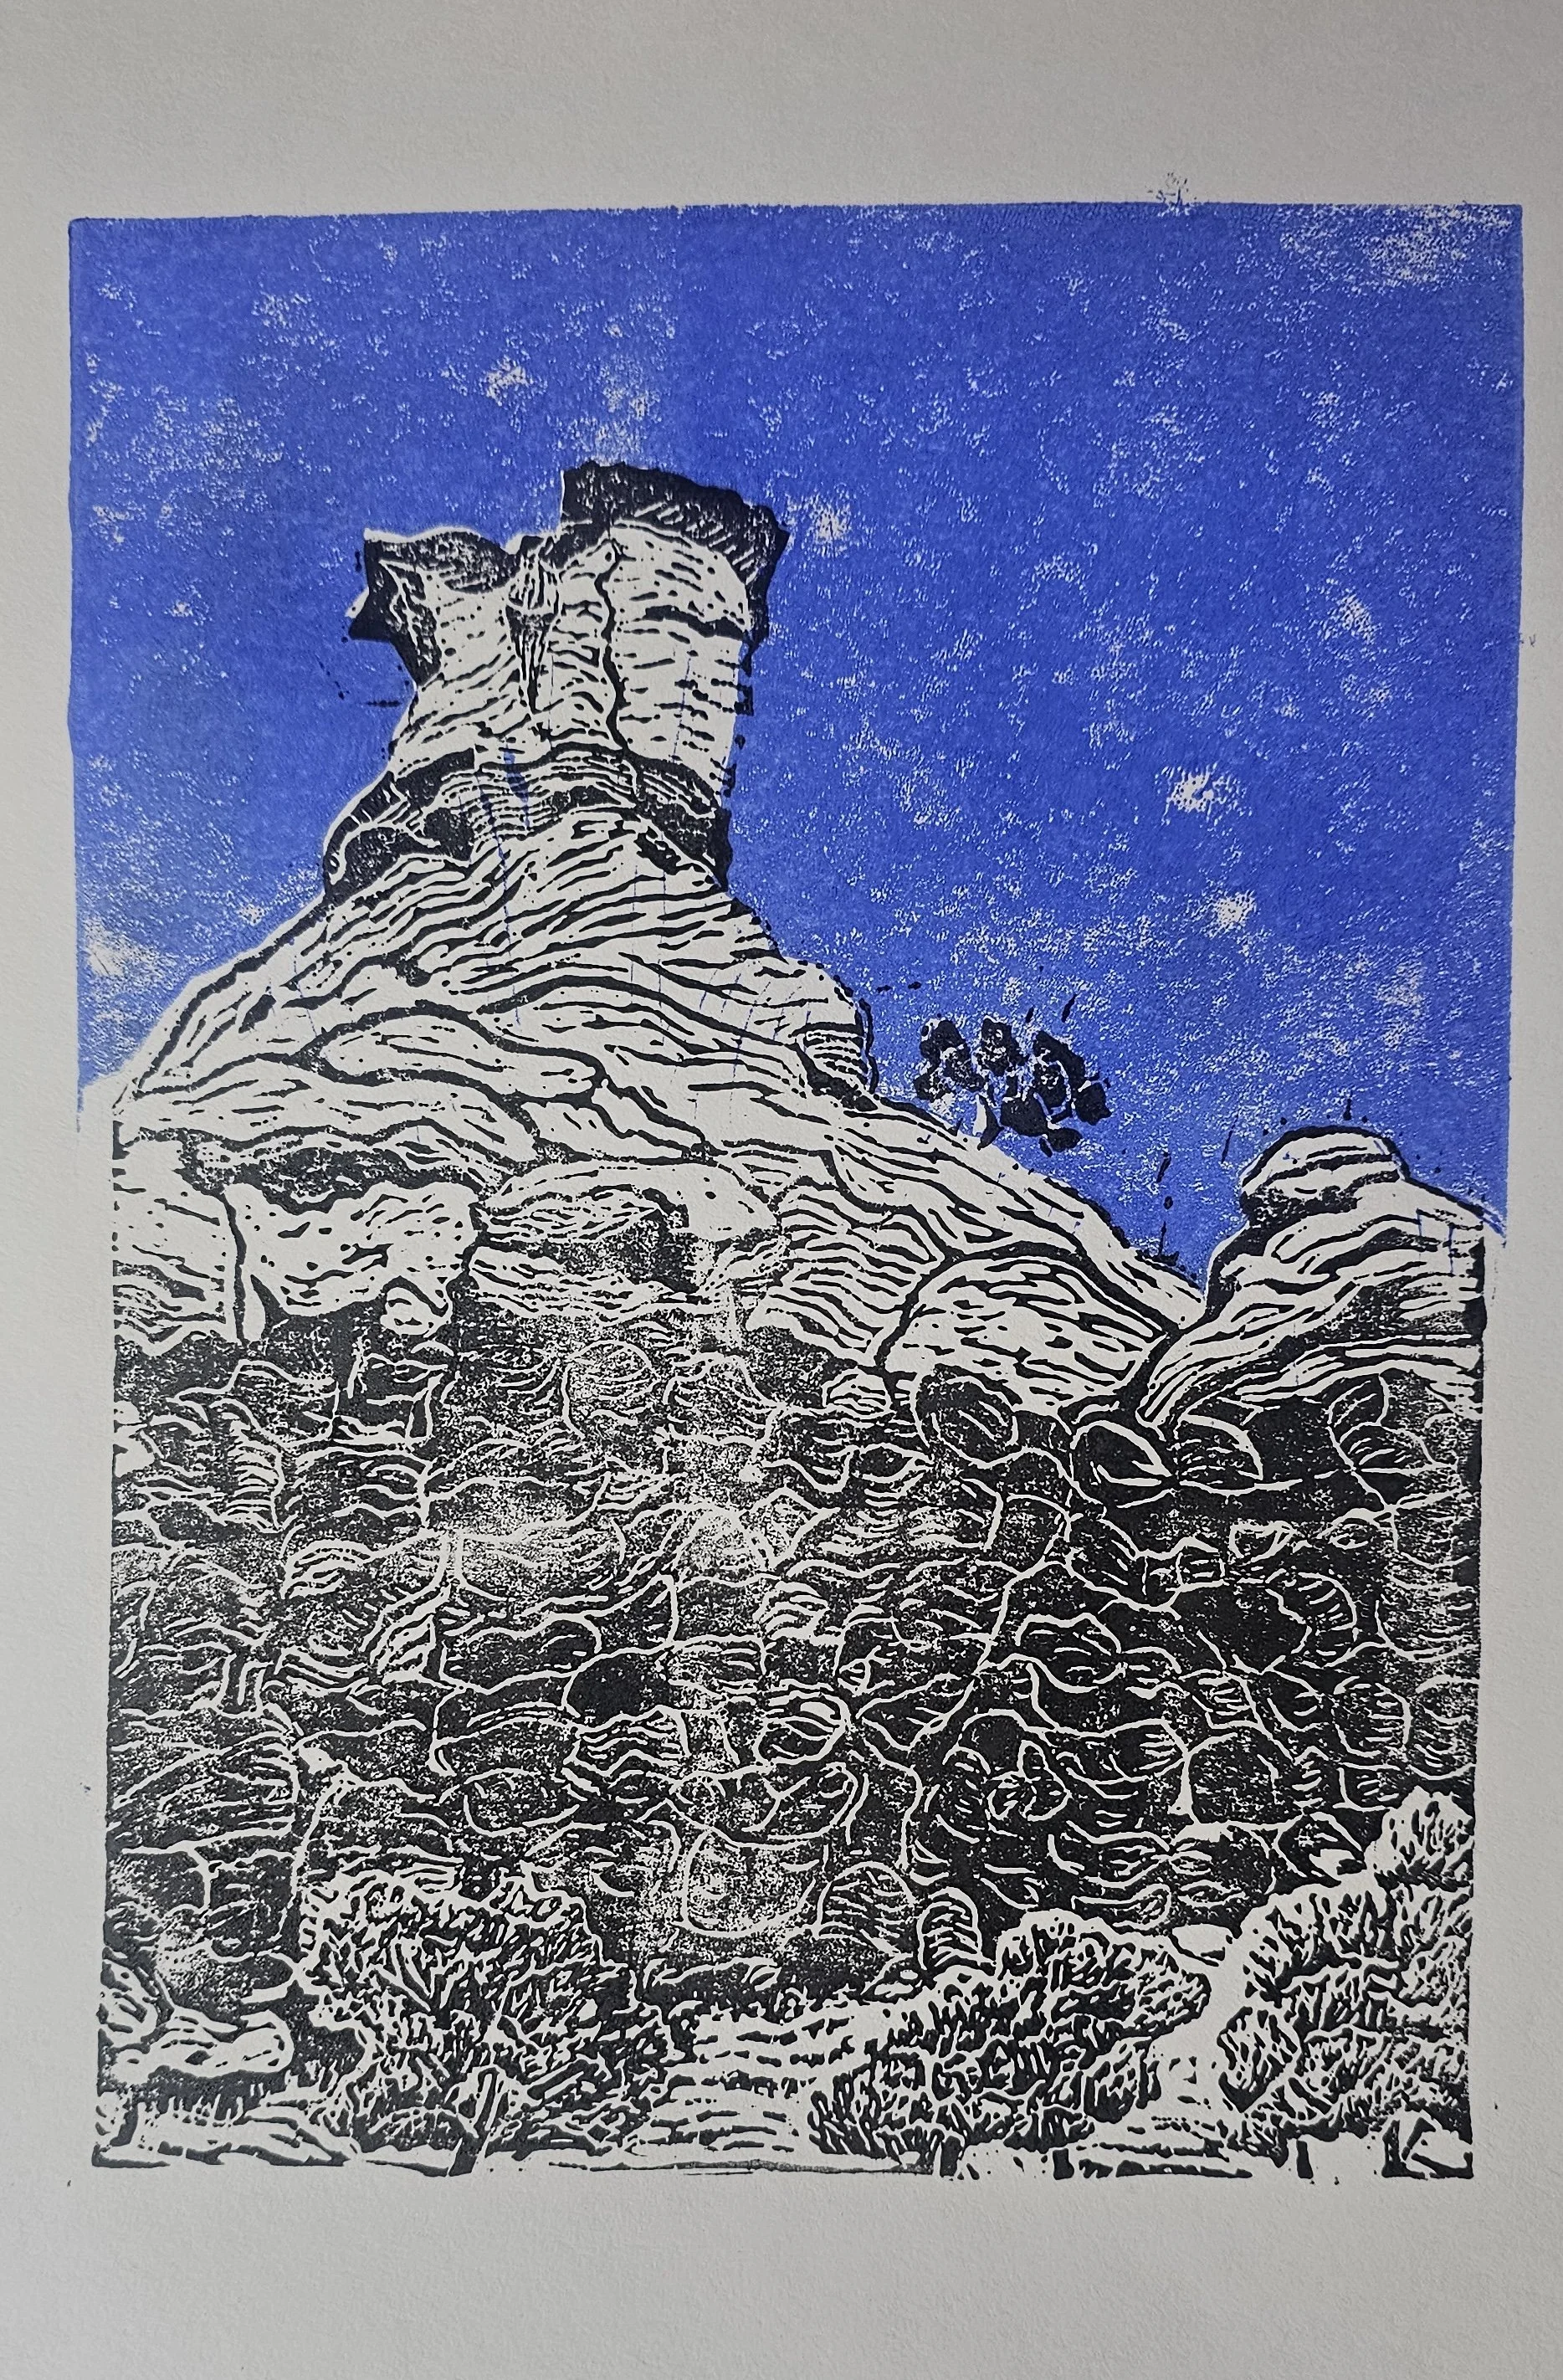
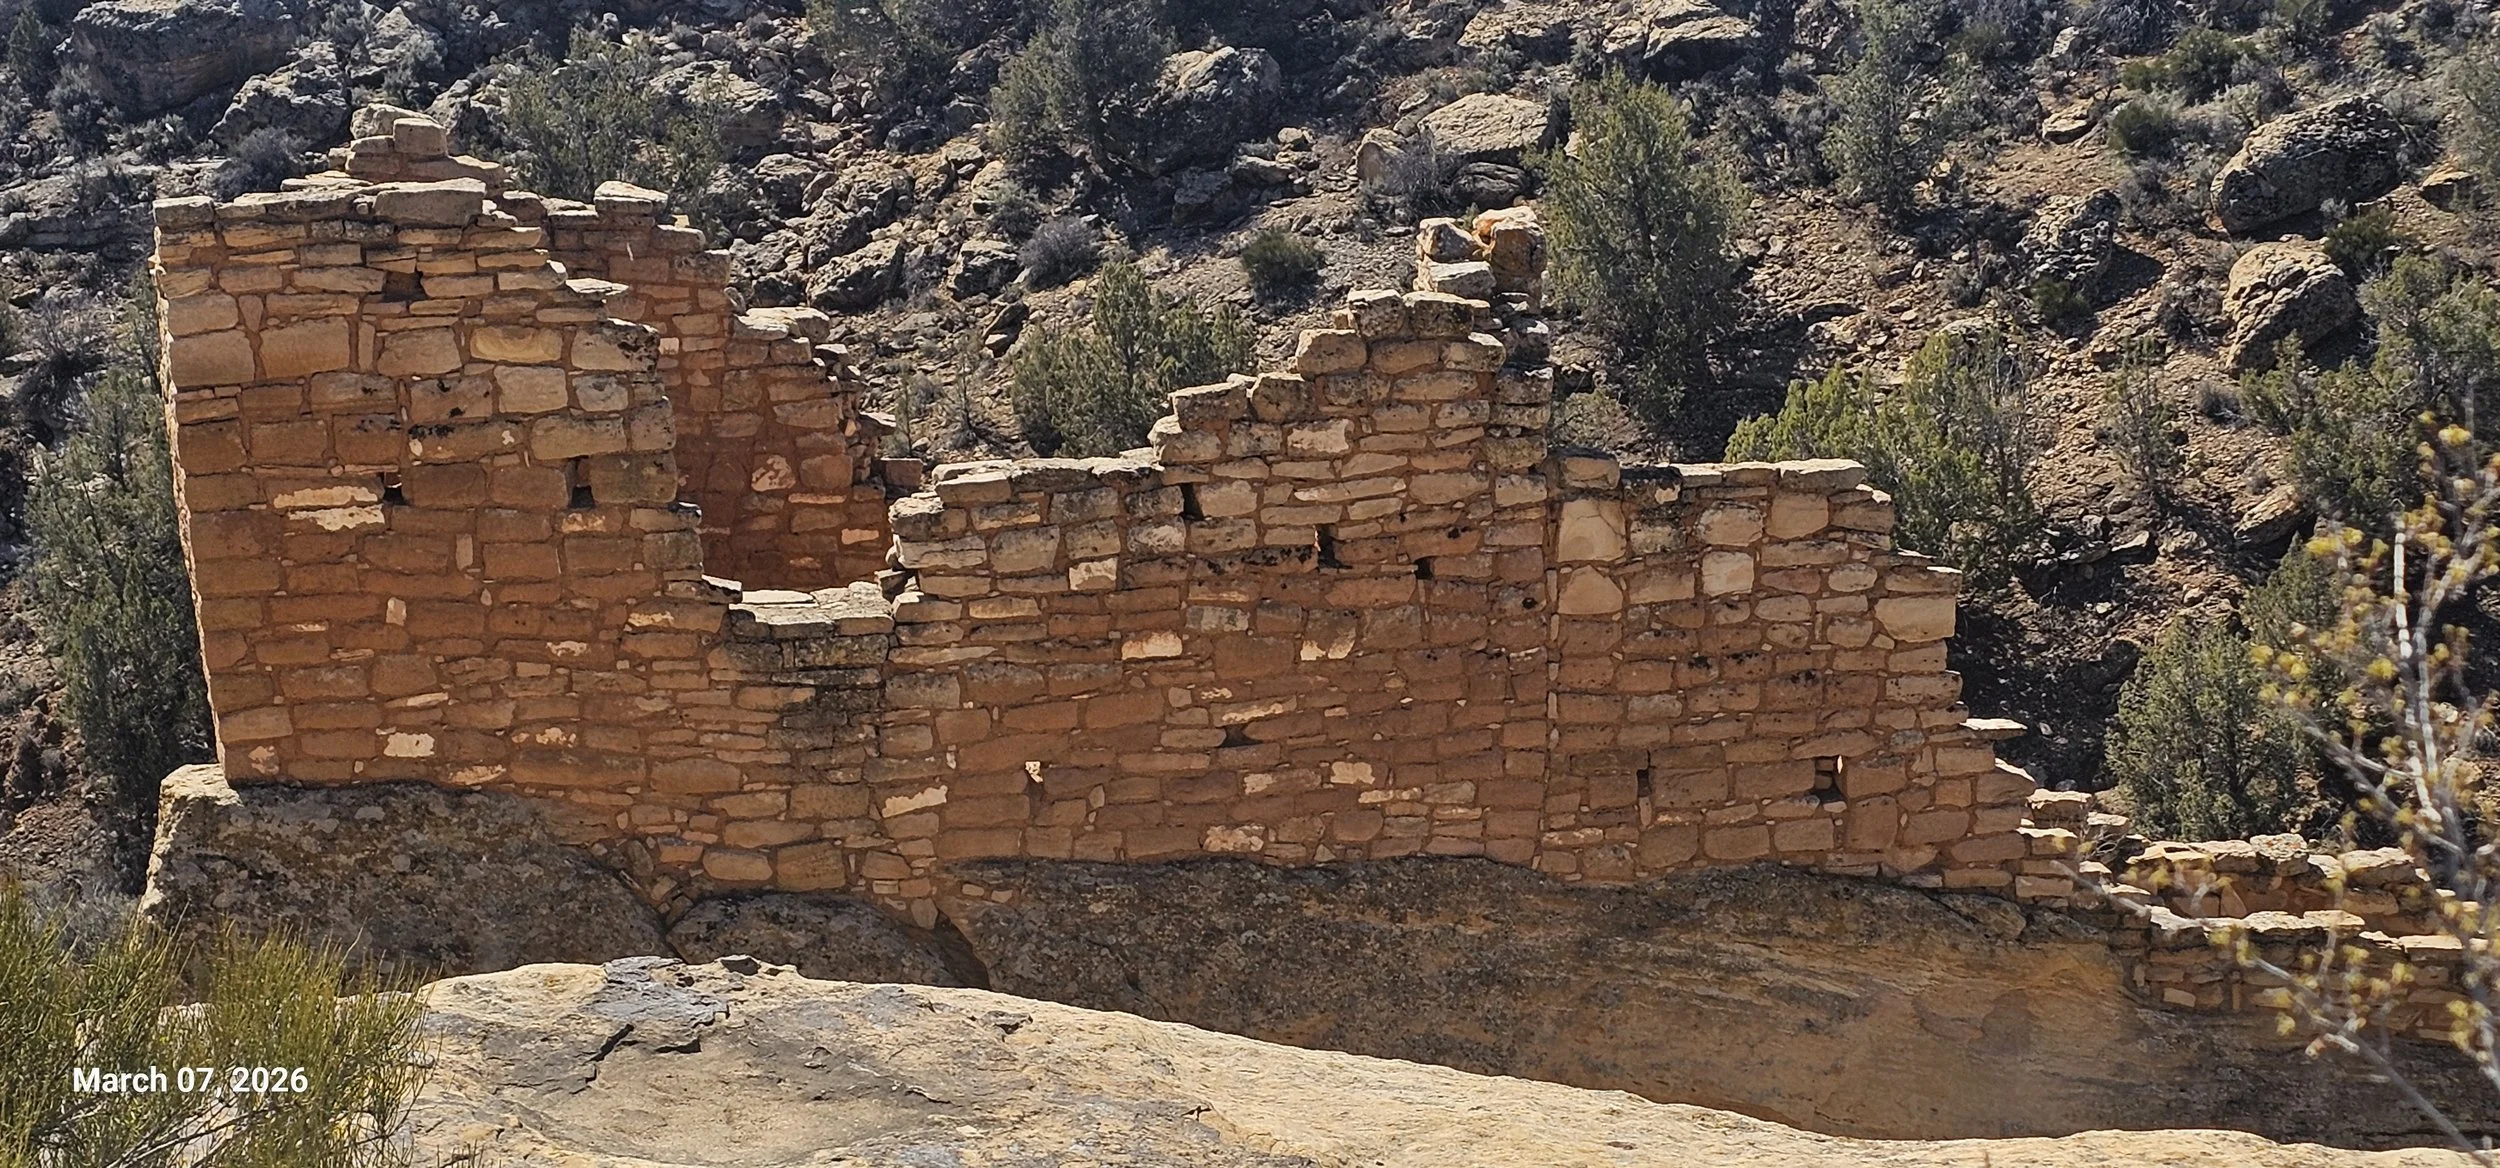
I just finished a series of test prints based on one of the beautiful rock formations seen in Sand Canyon. This was quite challenging in a small space without proper supplies.
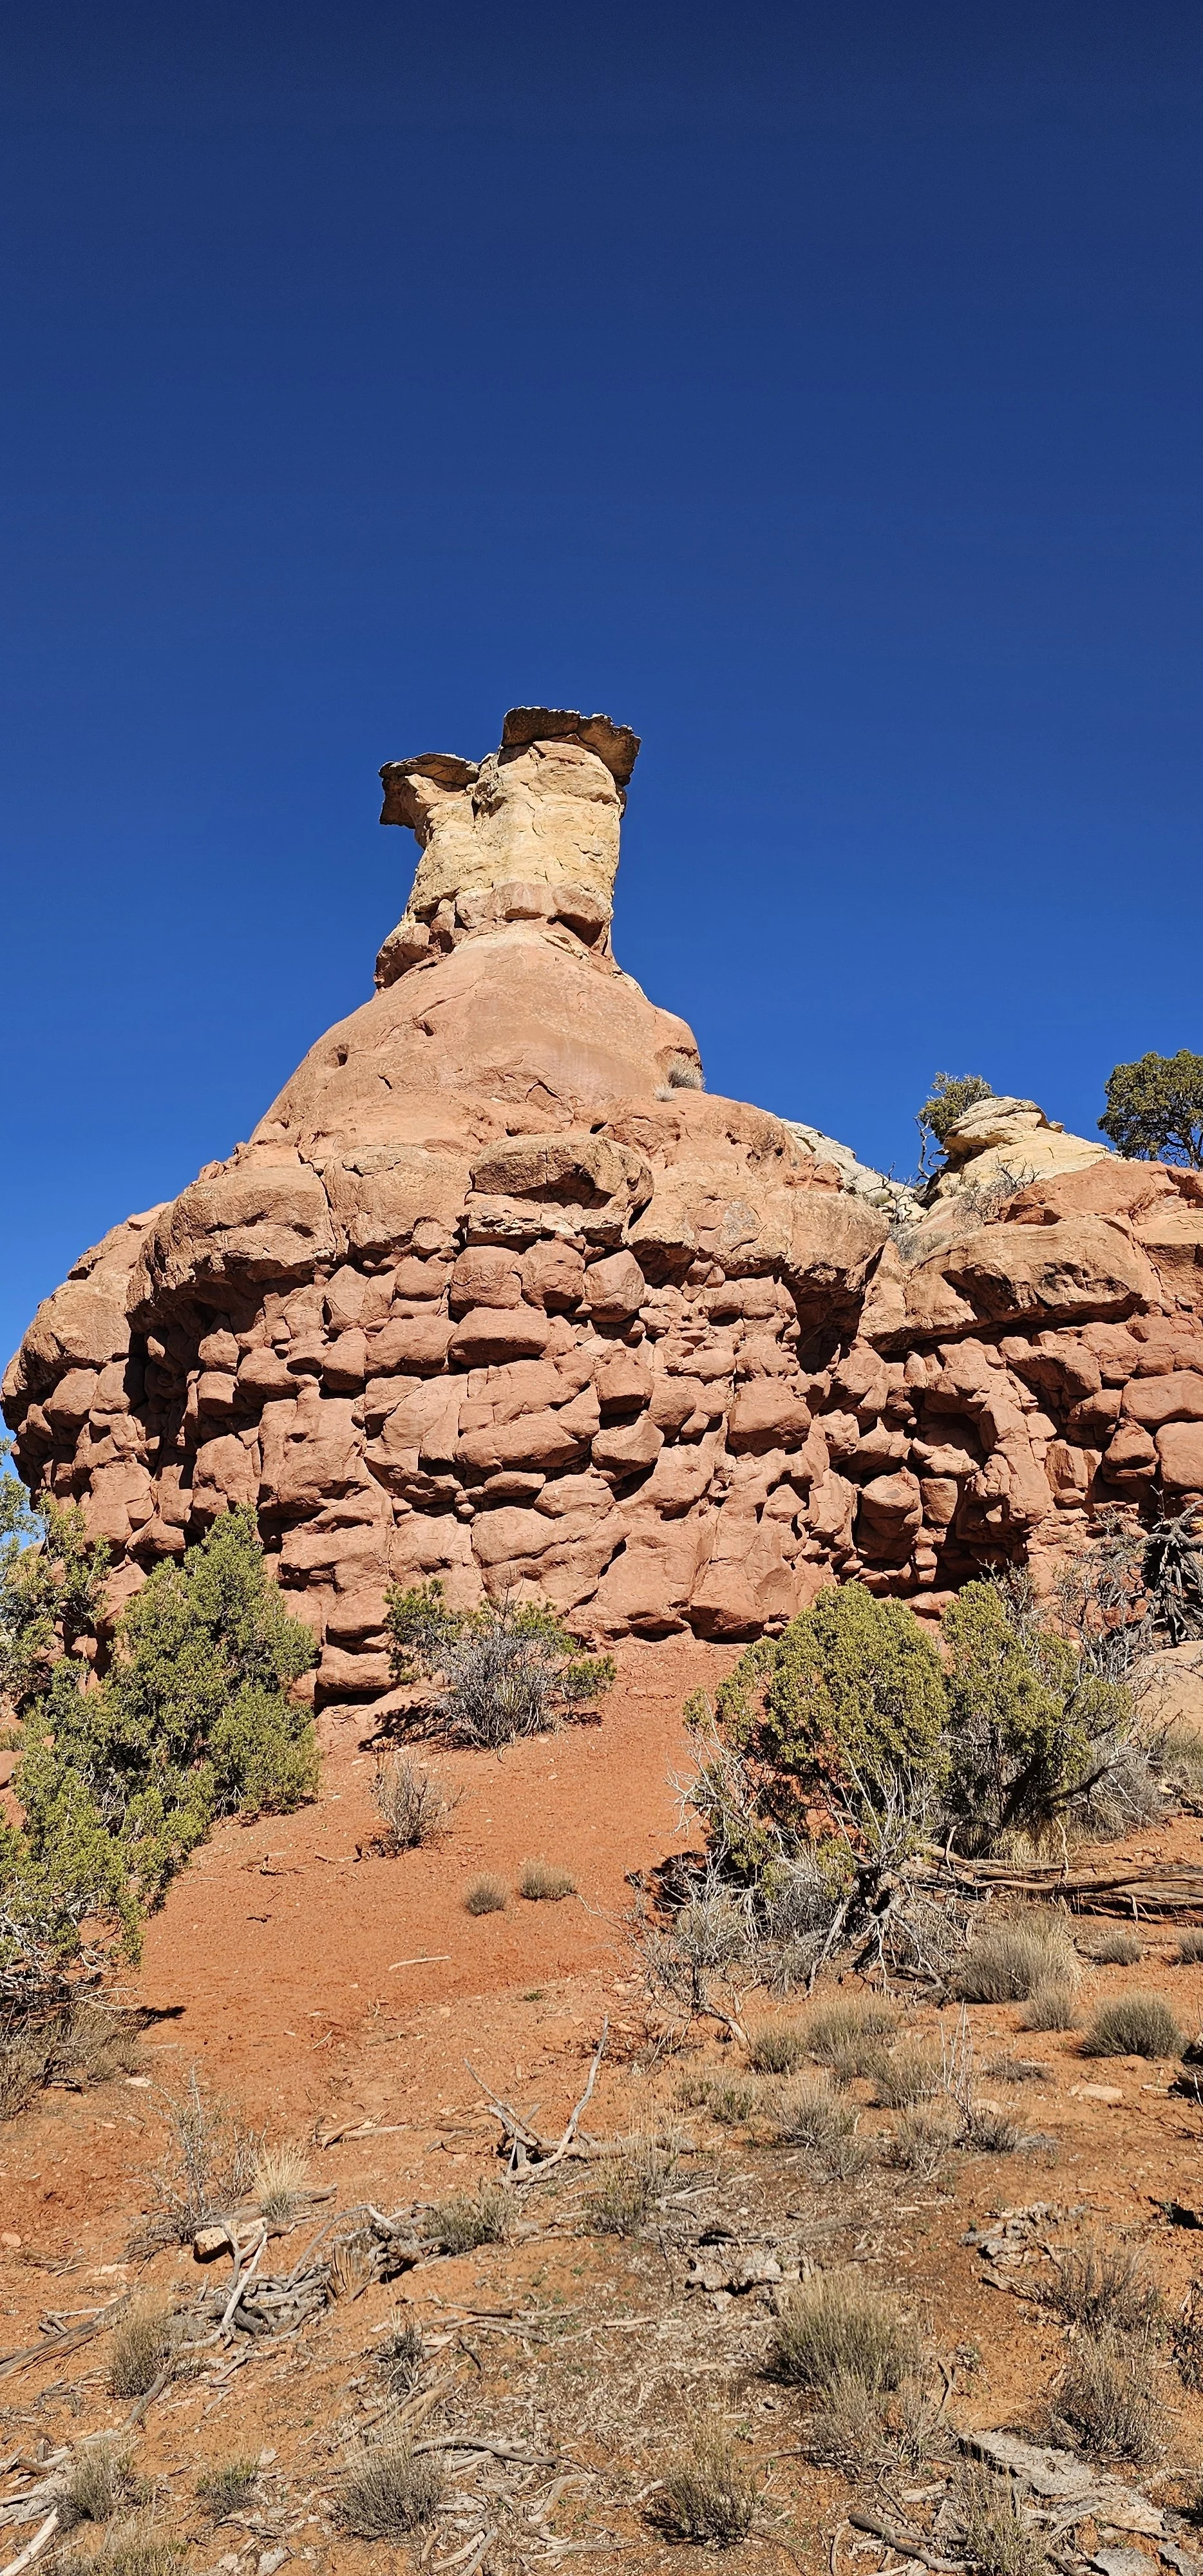
Original photo that I then cropped down to use for the inspiration for the Lino carvings.
I carved two different blocks one to just print the blue sky and one to print the rock formation.
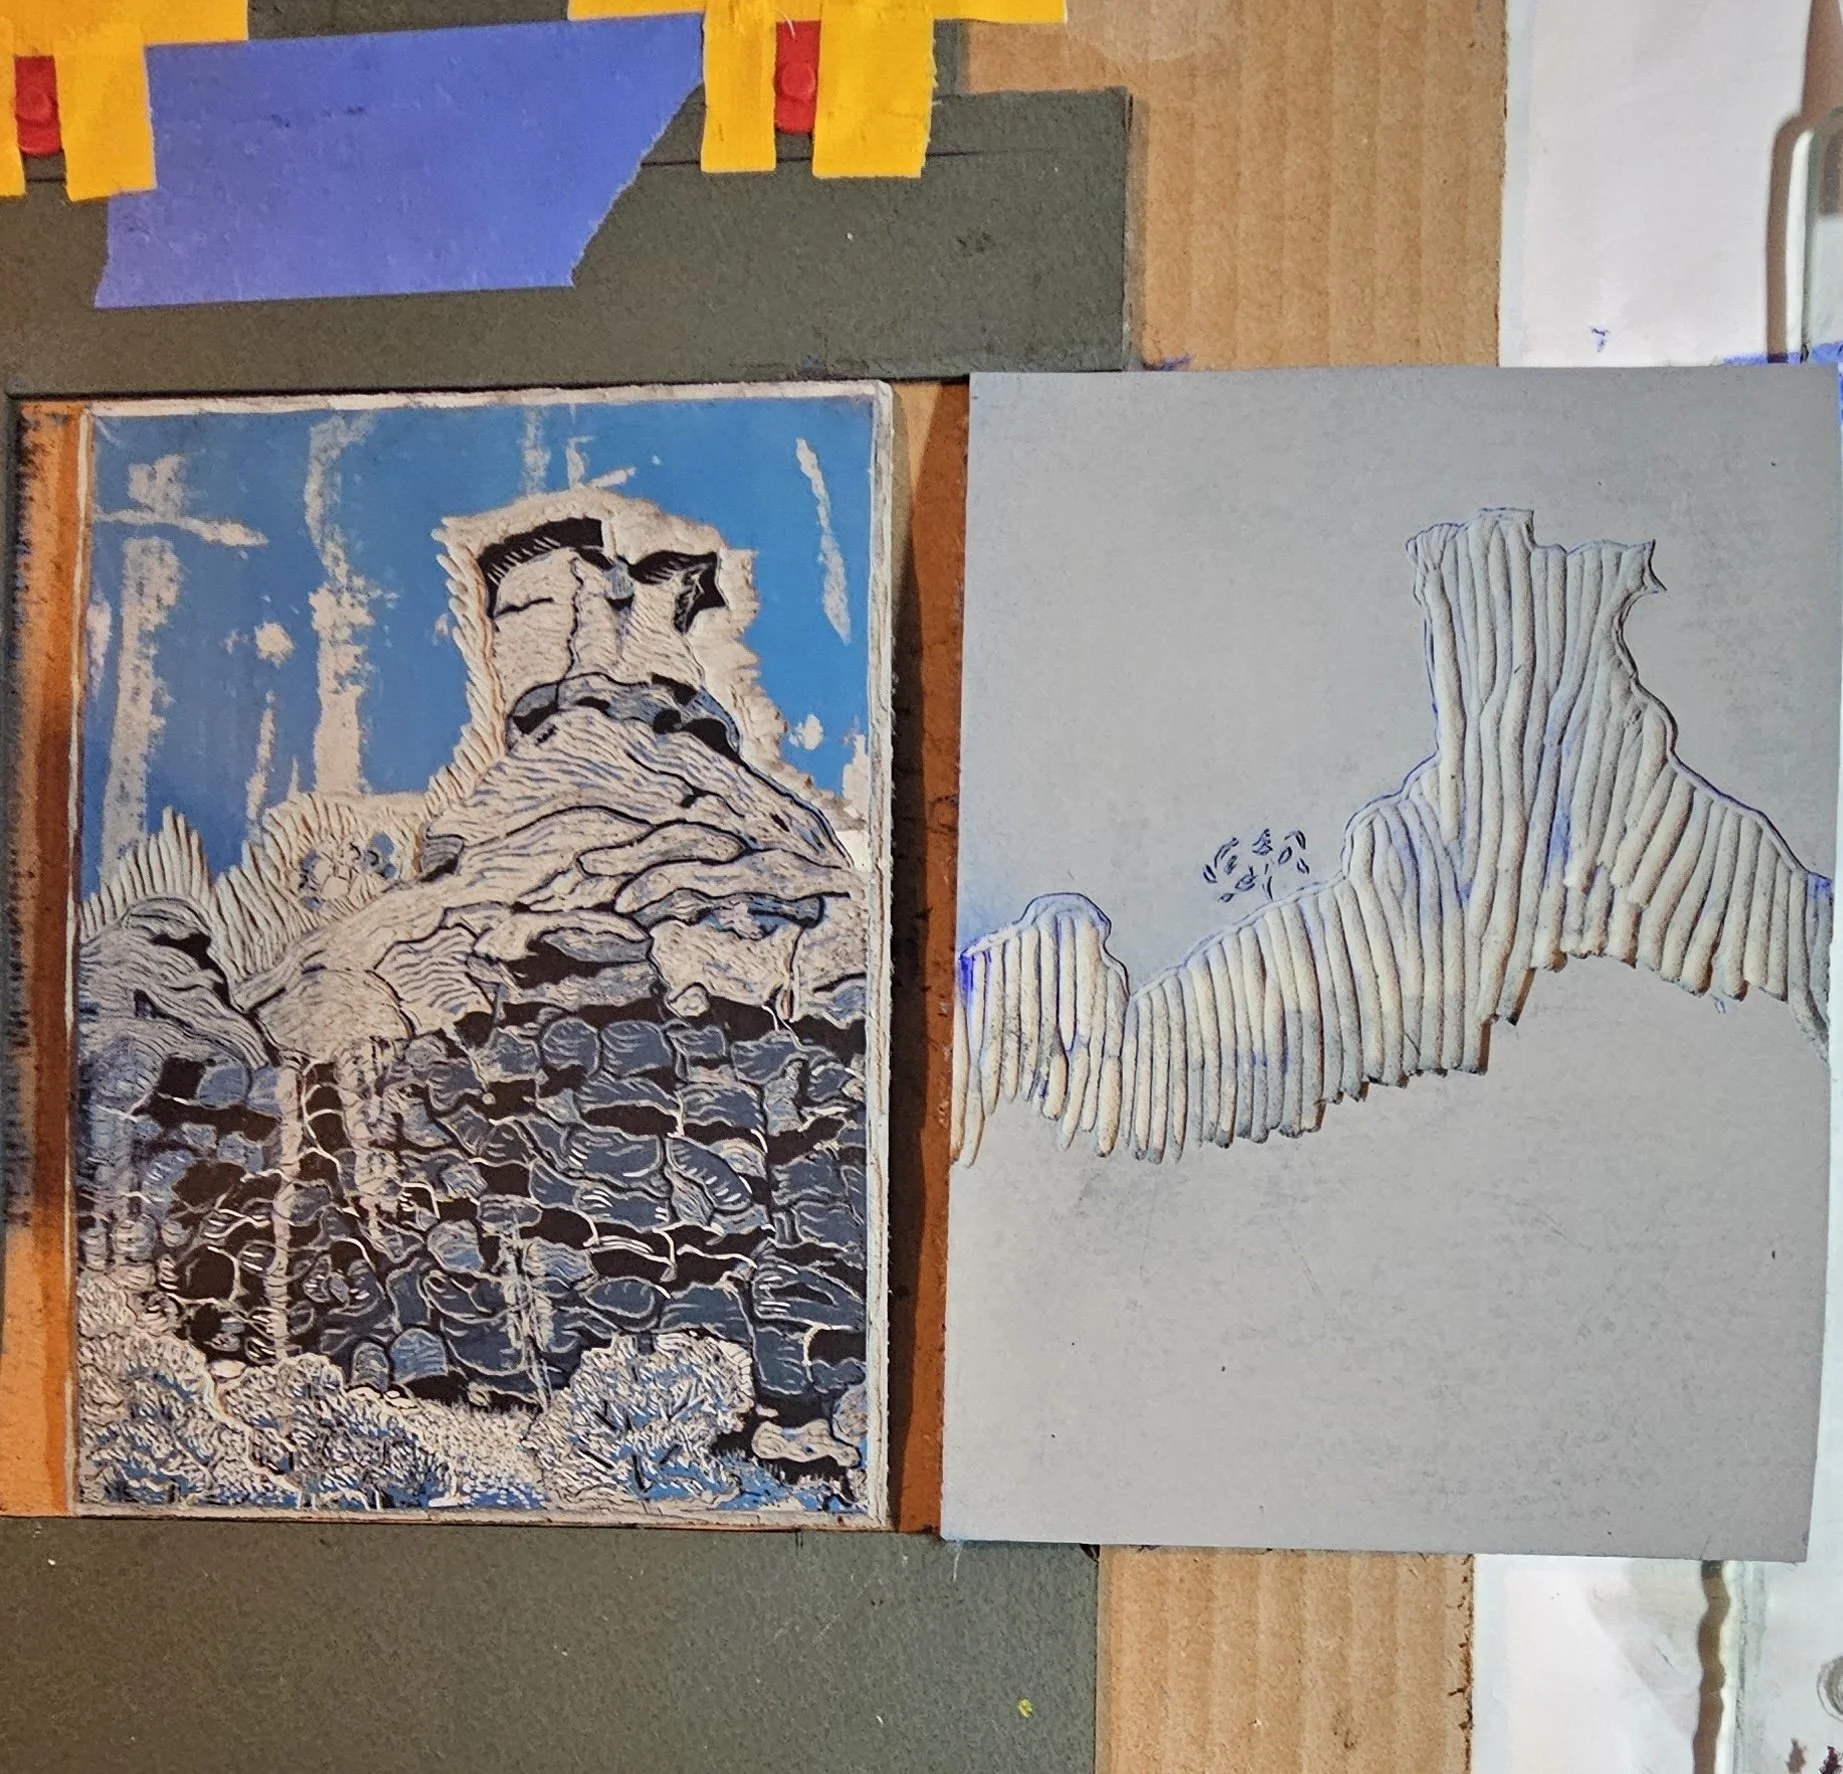
I have no good quality ink with me, but did have some blue acrylic paint. You can see it didn’t make a very good print, but will give the idea of what the principal look like when I can print them at home..

I let those sky prints dry overnight, and then printed the rock image in the morning . I made a few adjustments to the rock image as I printed and will probably do some more when I get home. The prints aren’t very good as I really don’t like this water-based ink. When I get home I will use Cranfield Safe Wash Ink. It is oil based and it takes a long time to dry so it’s not a good thing to use for traveling. The water-based ink at least gives me an idea of what the print will look like.
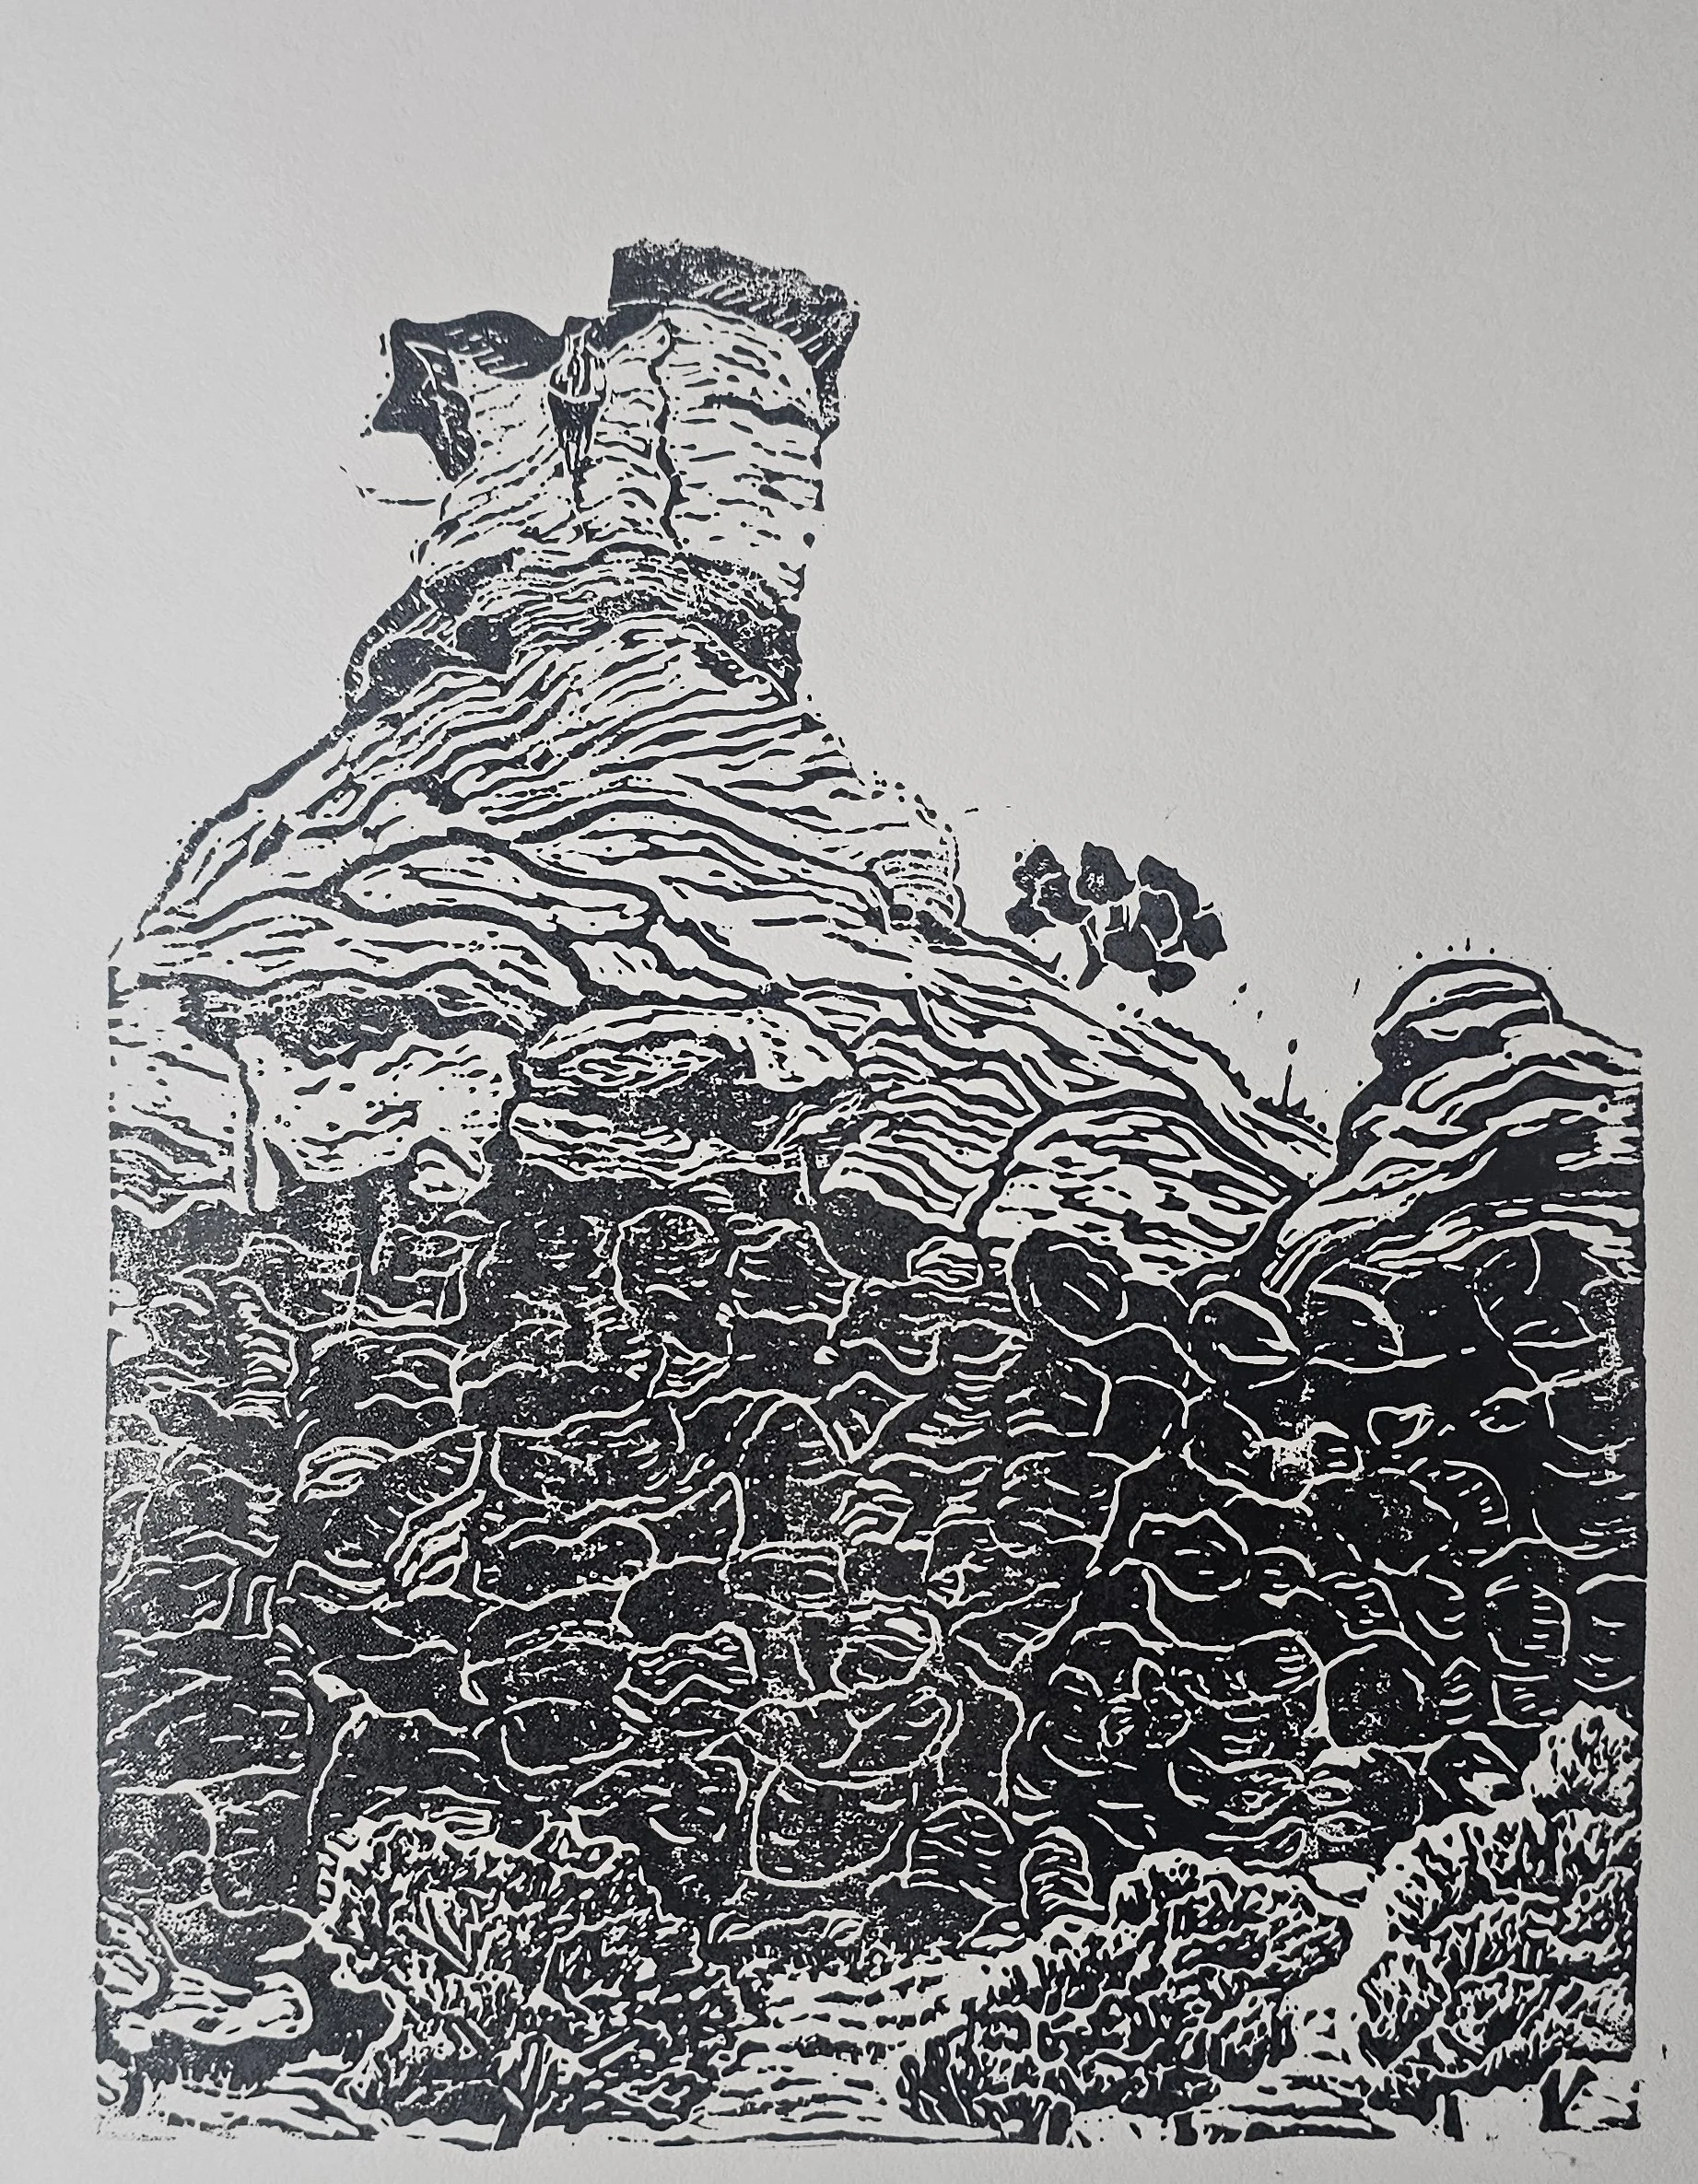
I never like to waste ink so I printed a few plain white ones and the black-and-white image looks pretty good.
Hovenweep National Monument
Hovenweep National Monument is just across the Colorado Utah border. It is also along the 85 mile drive that loops the entire Canyons of the Ancient National Monument.. There are numerous ancestral sites that ring a small canyon, including many towers and large buildings.
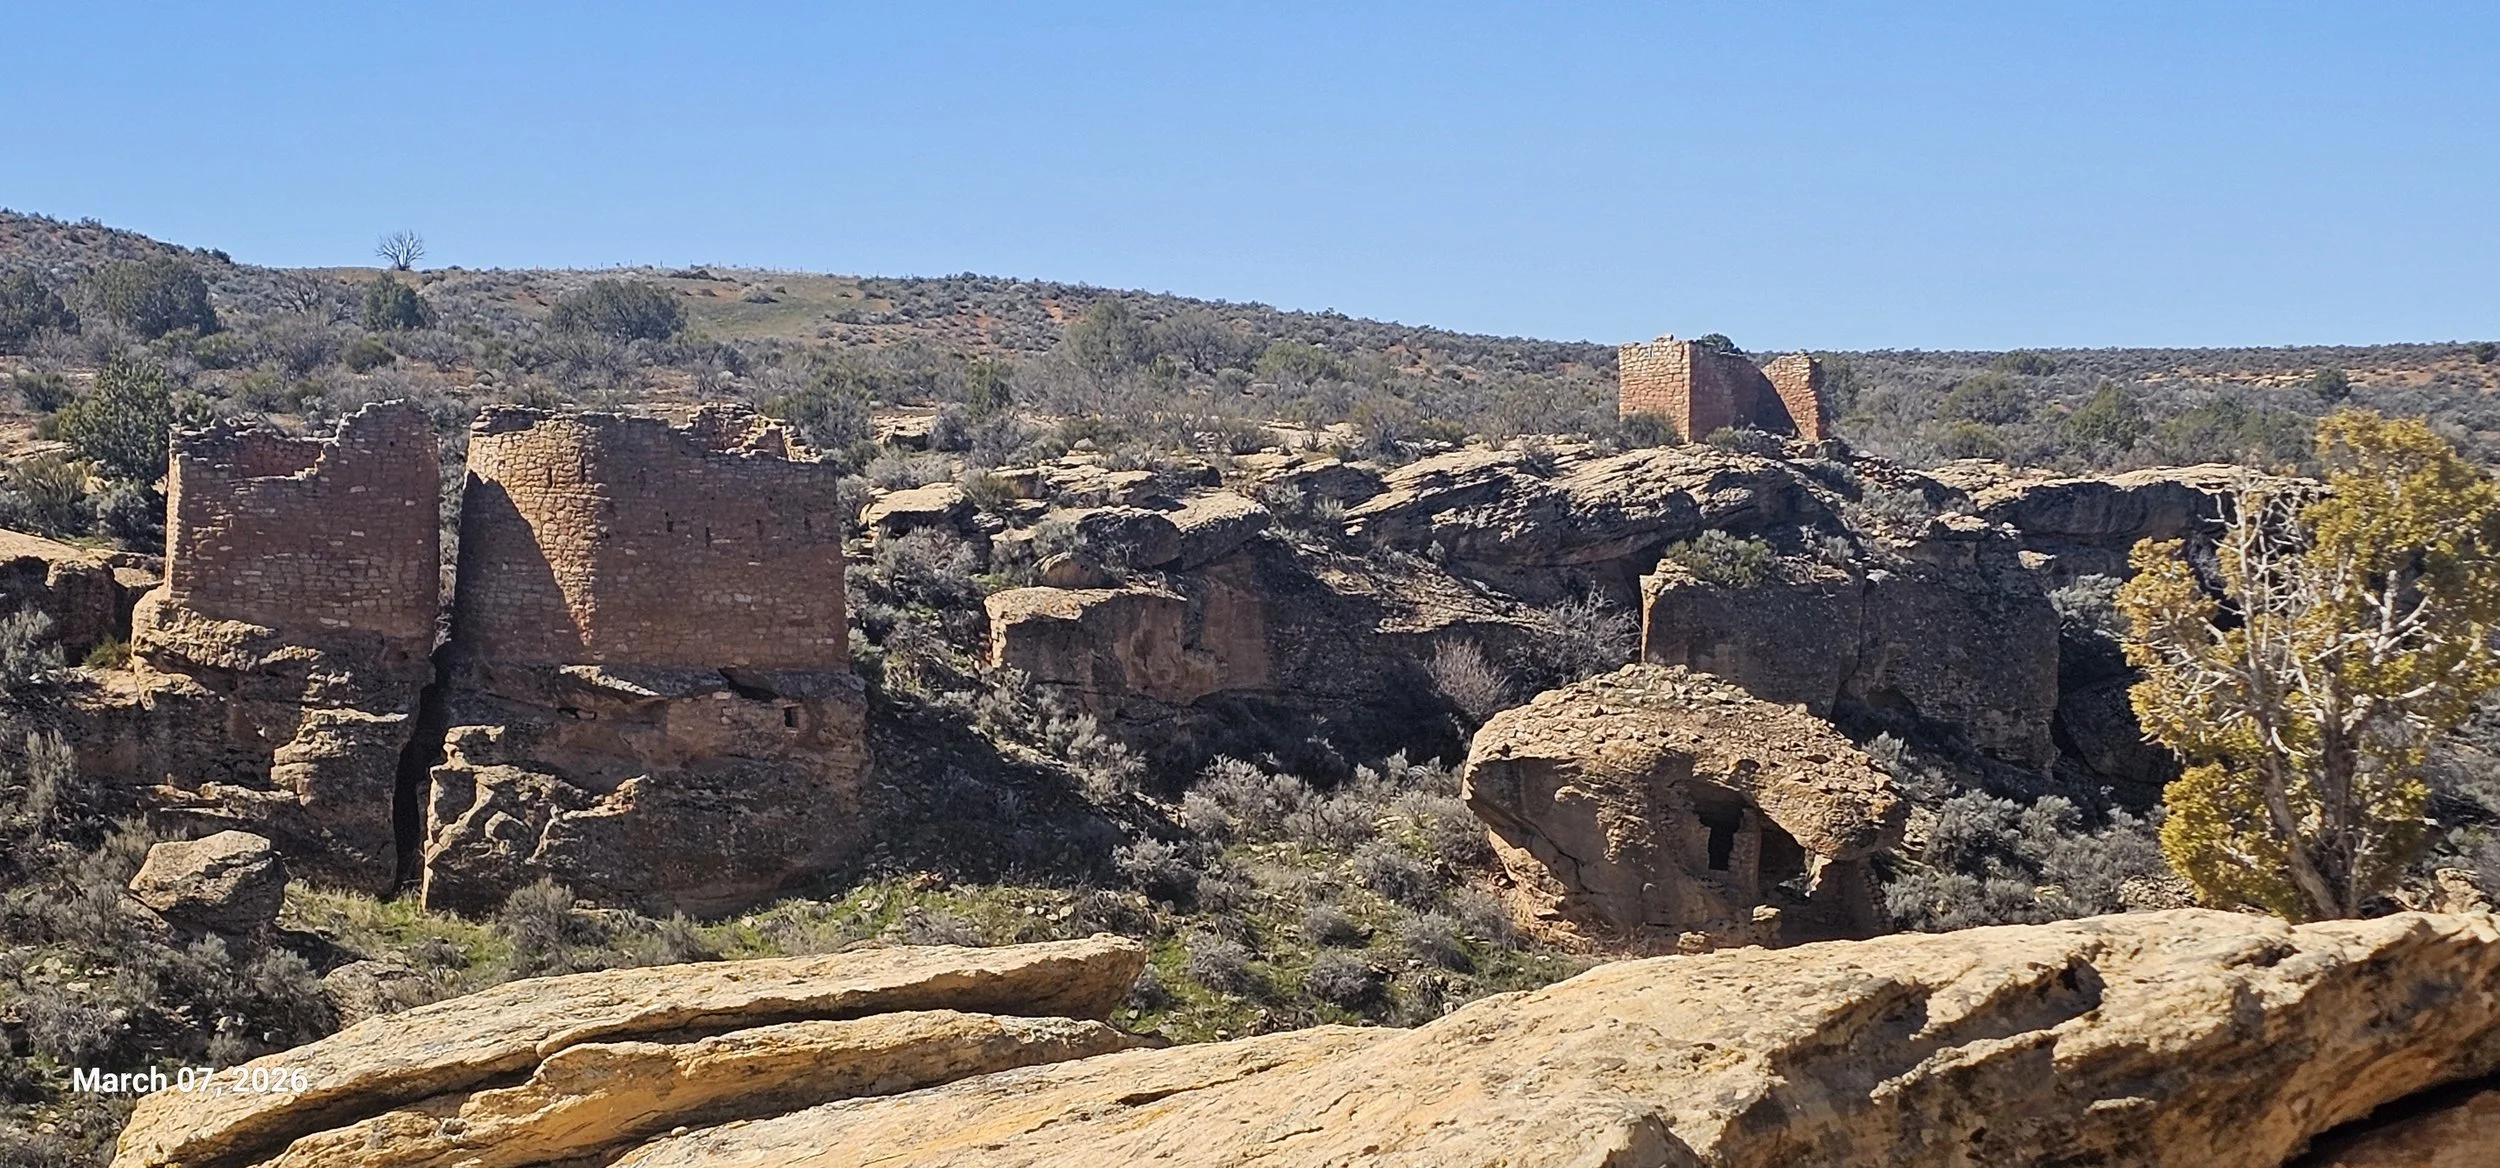
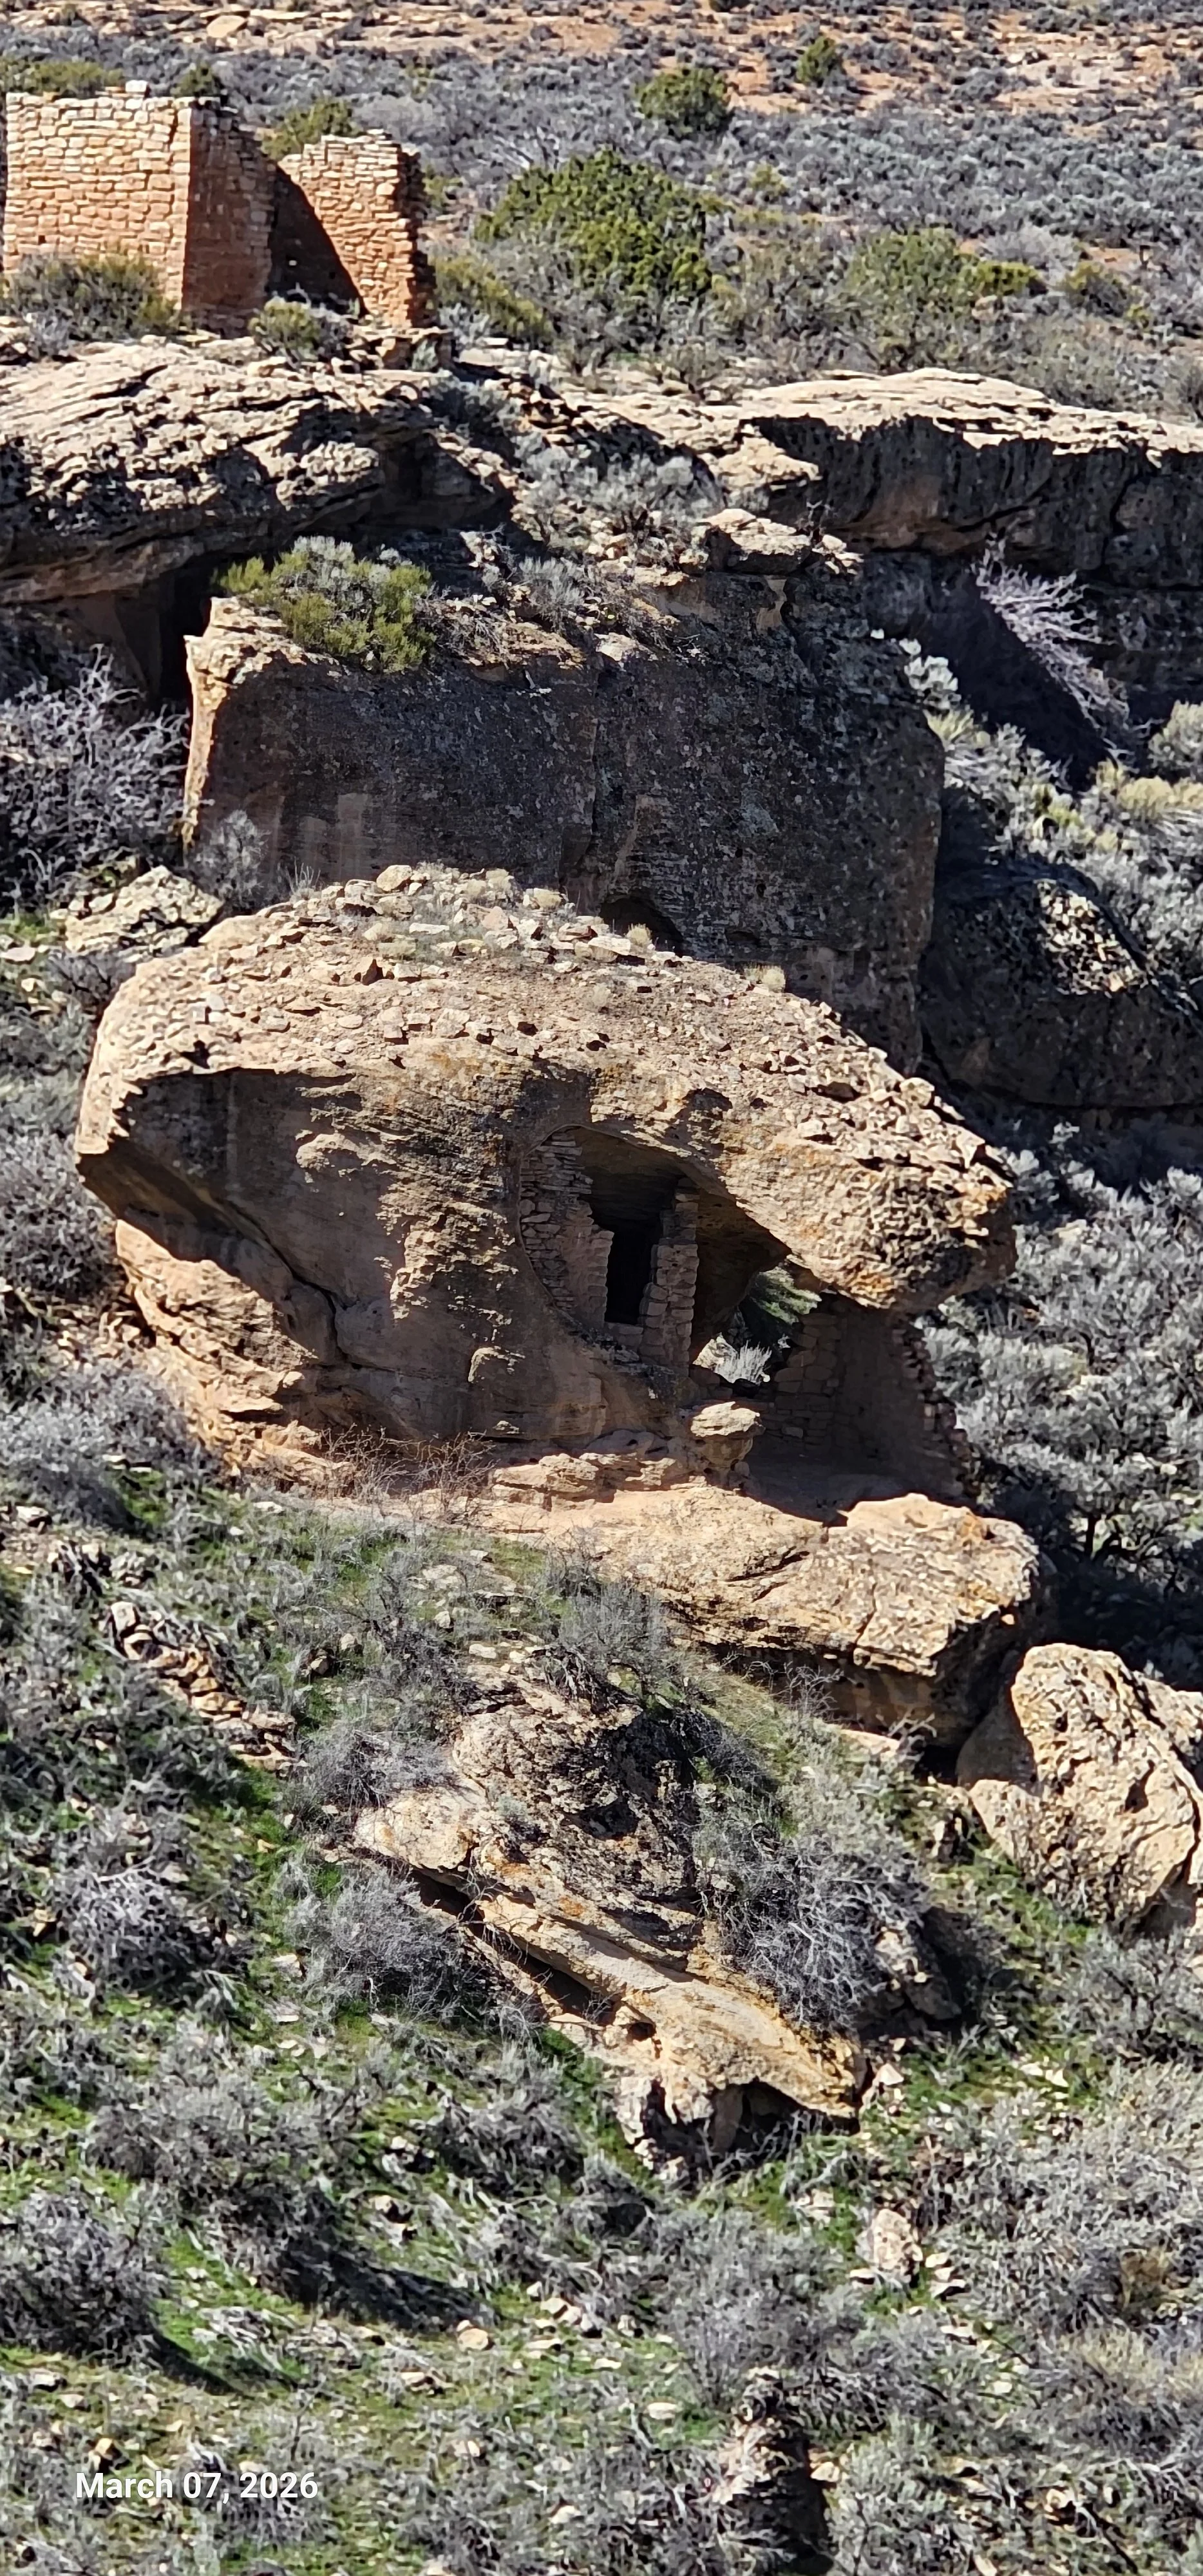
This one built underneath, and inside this large rock was very unique.
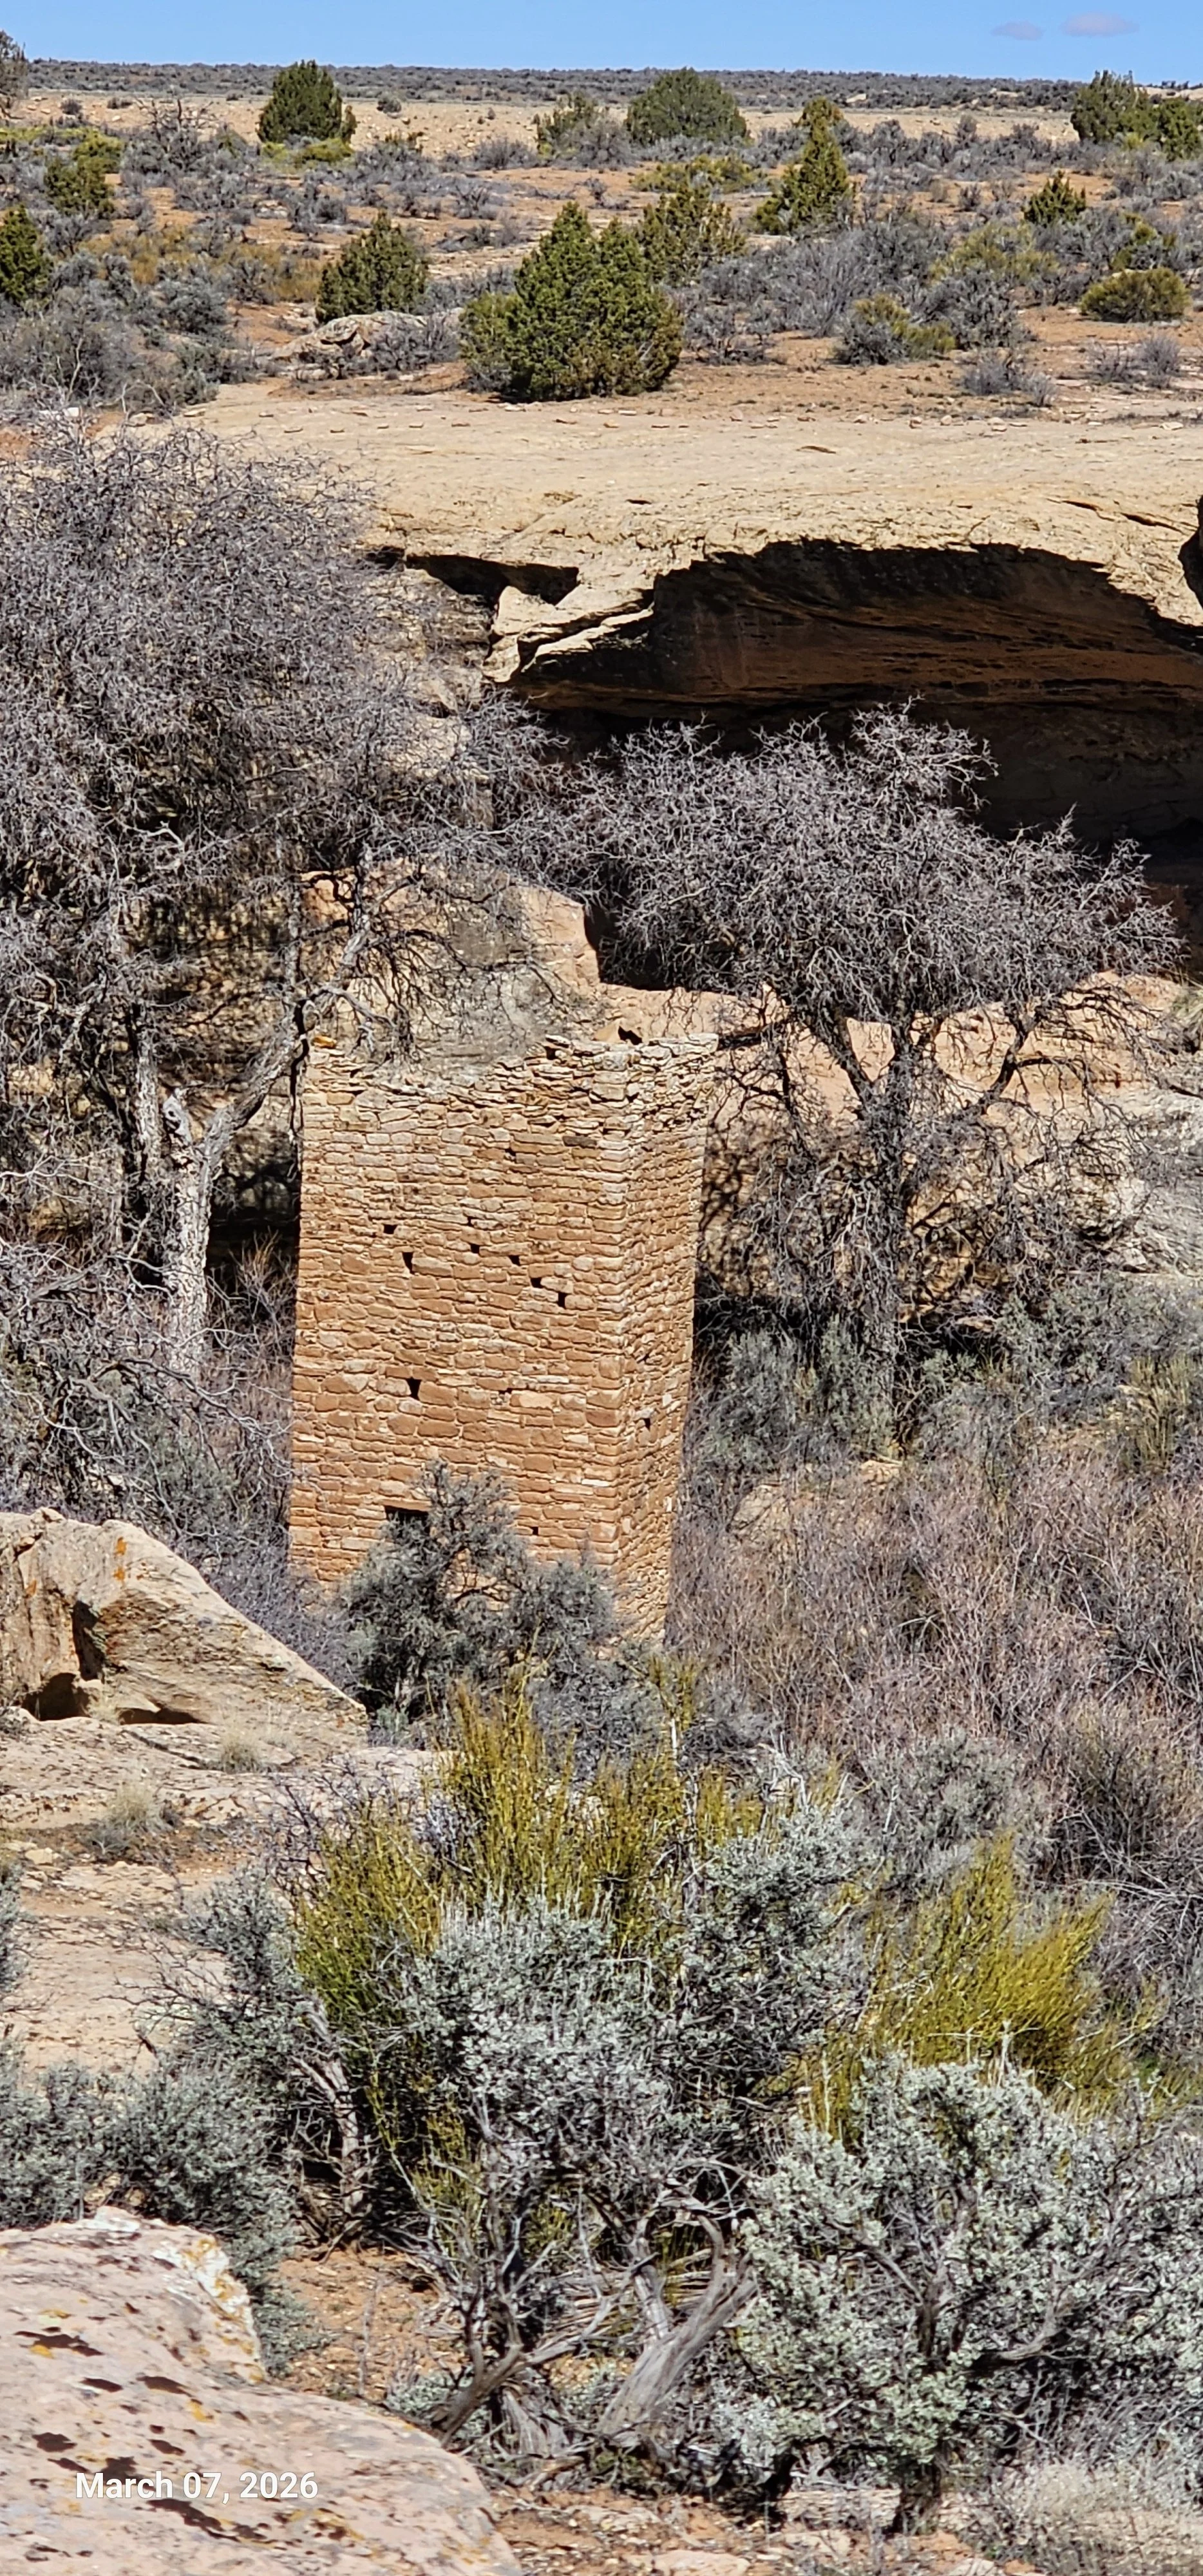
The Square Tower is built down in the bottom of the canyon.
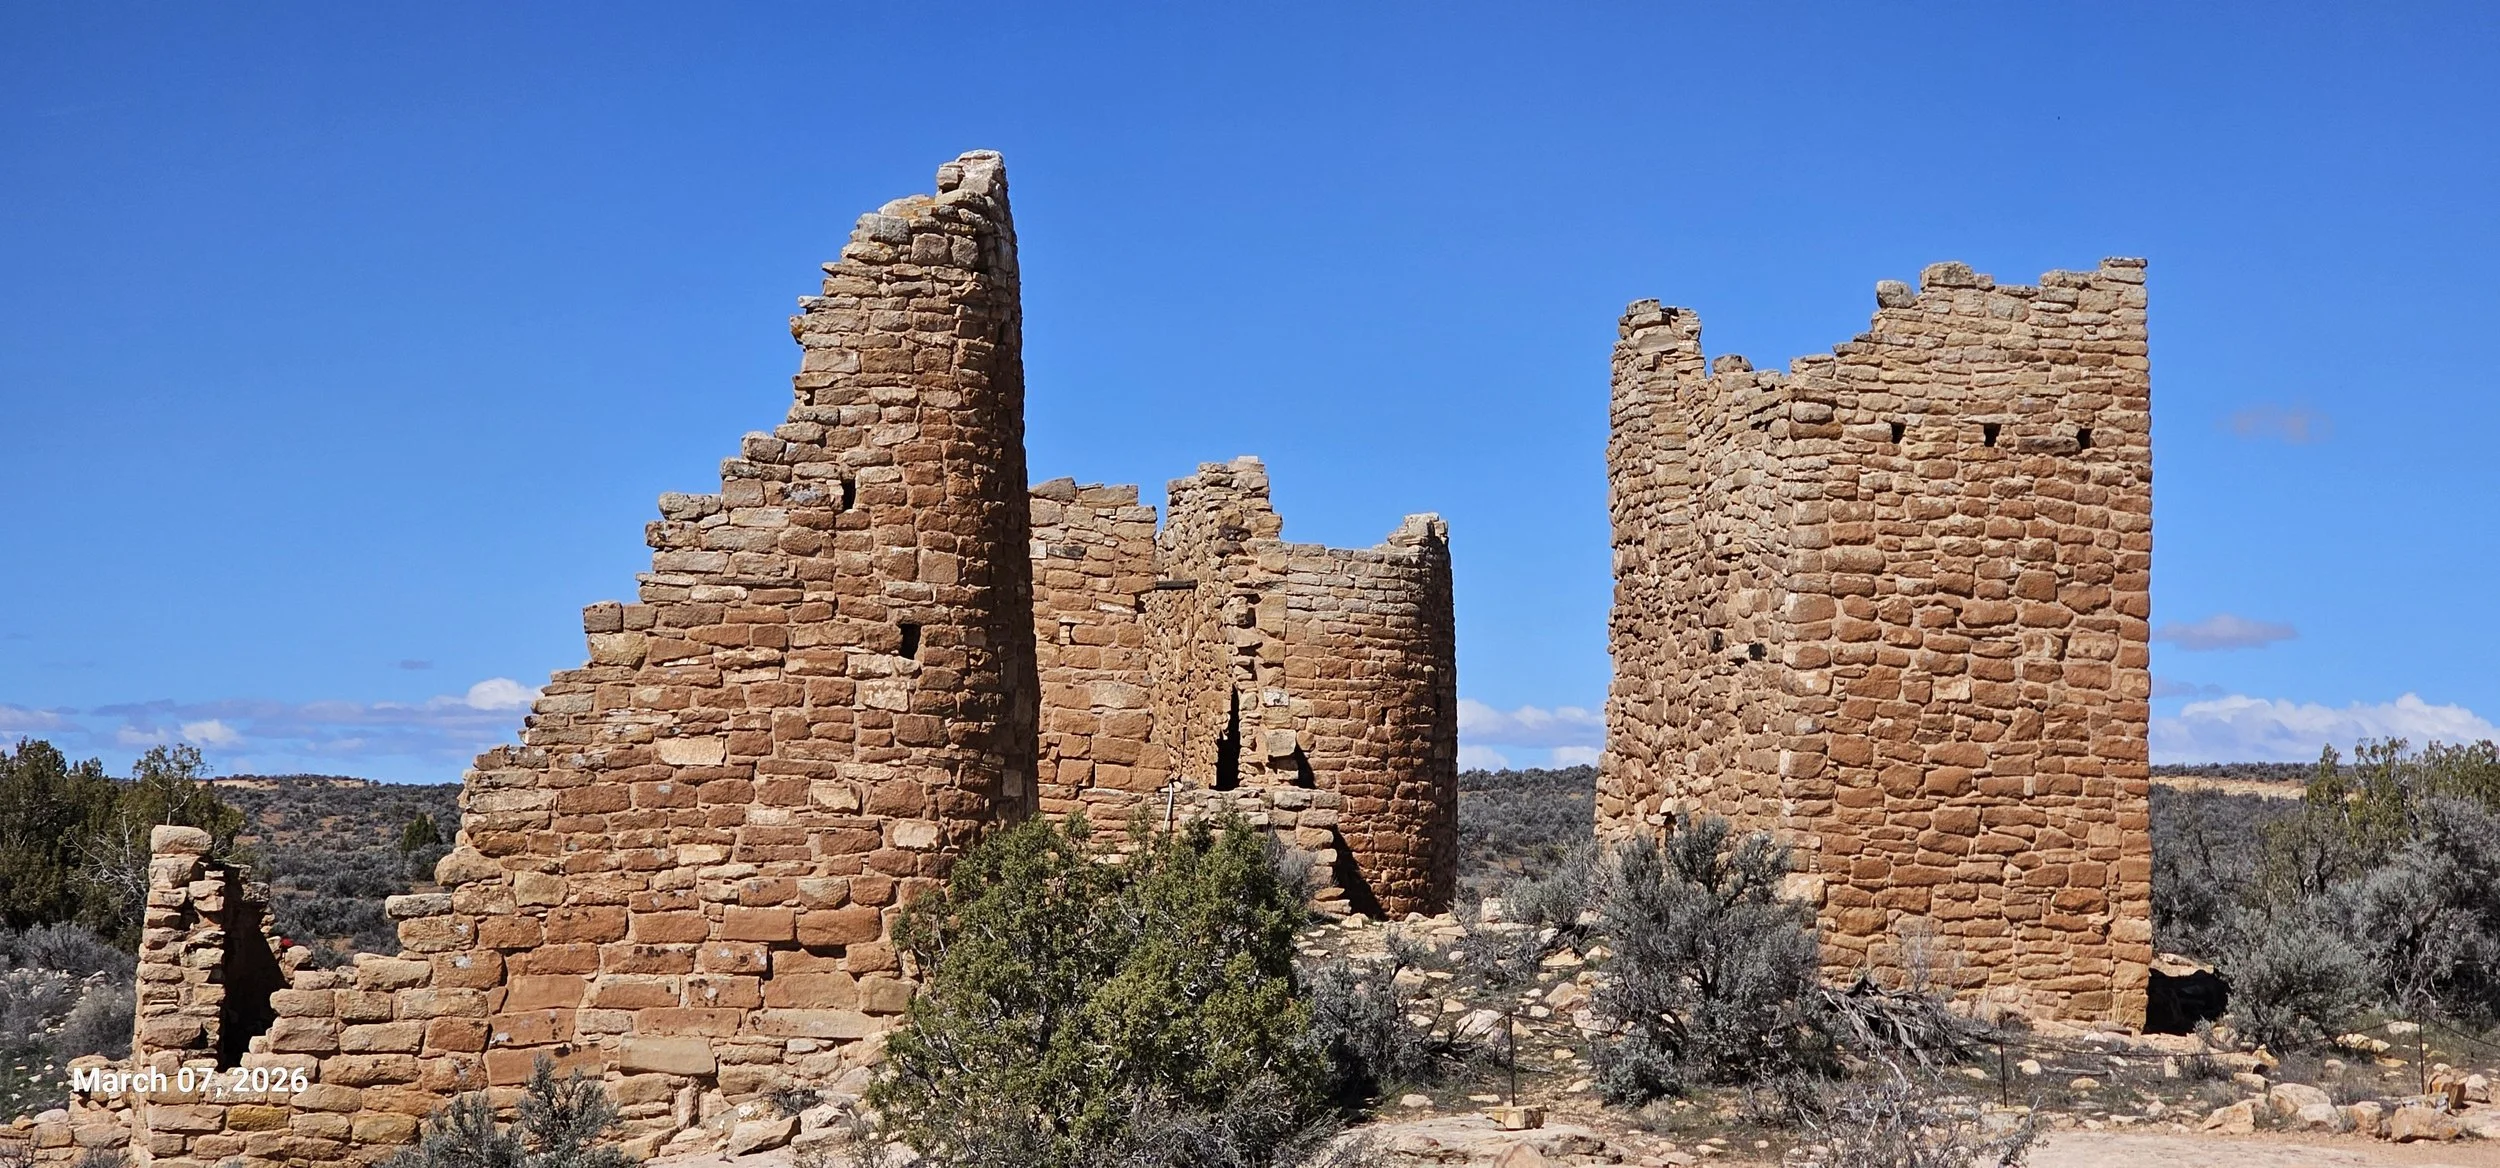
There are so many towers in this settlement area.
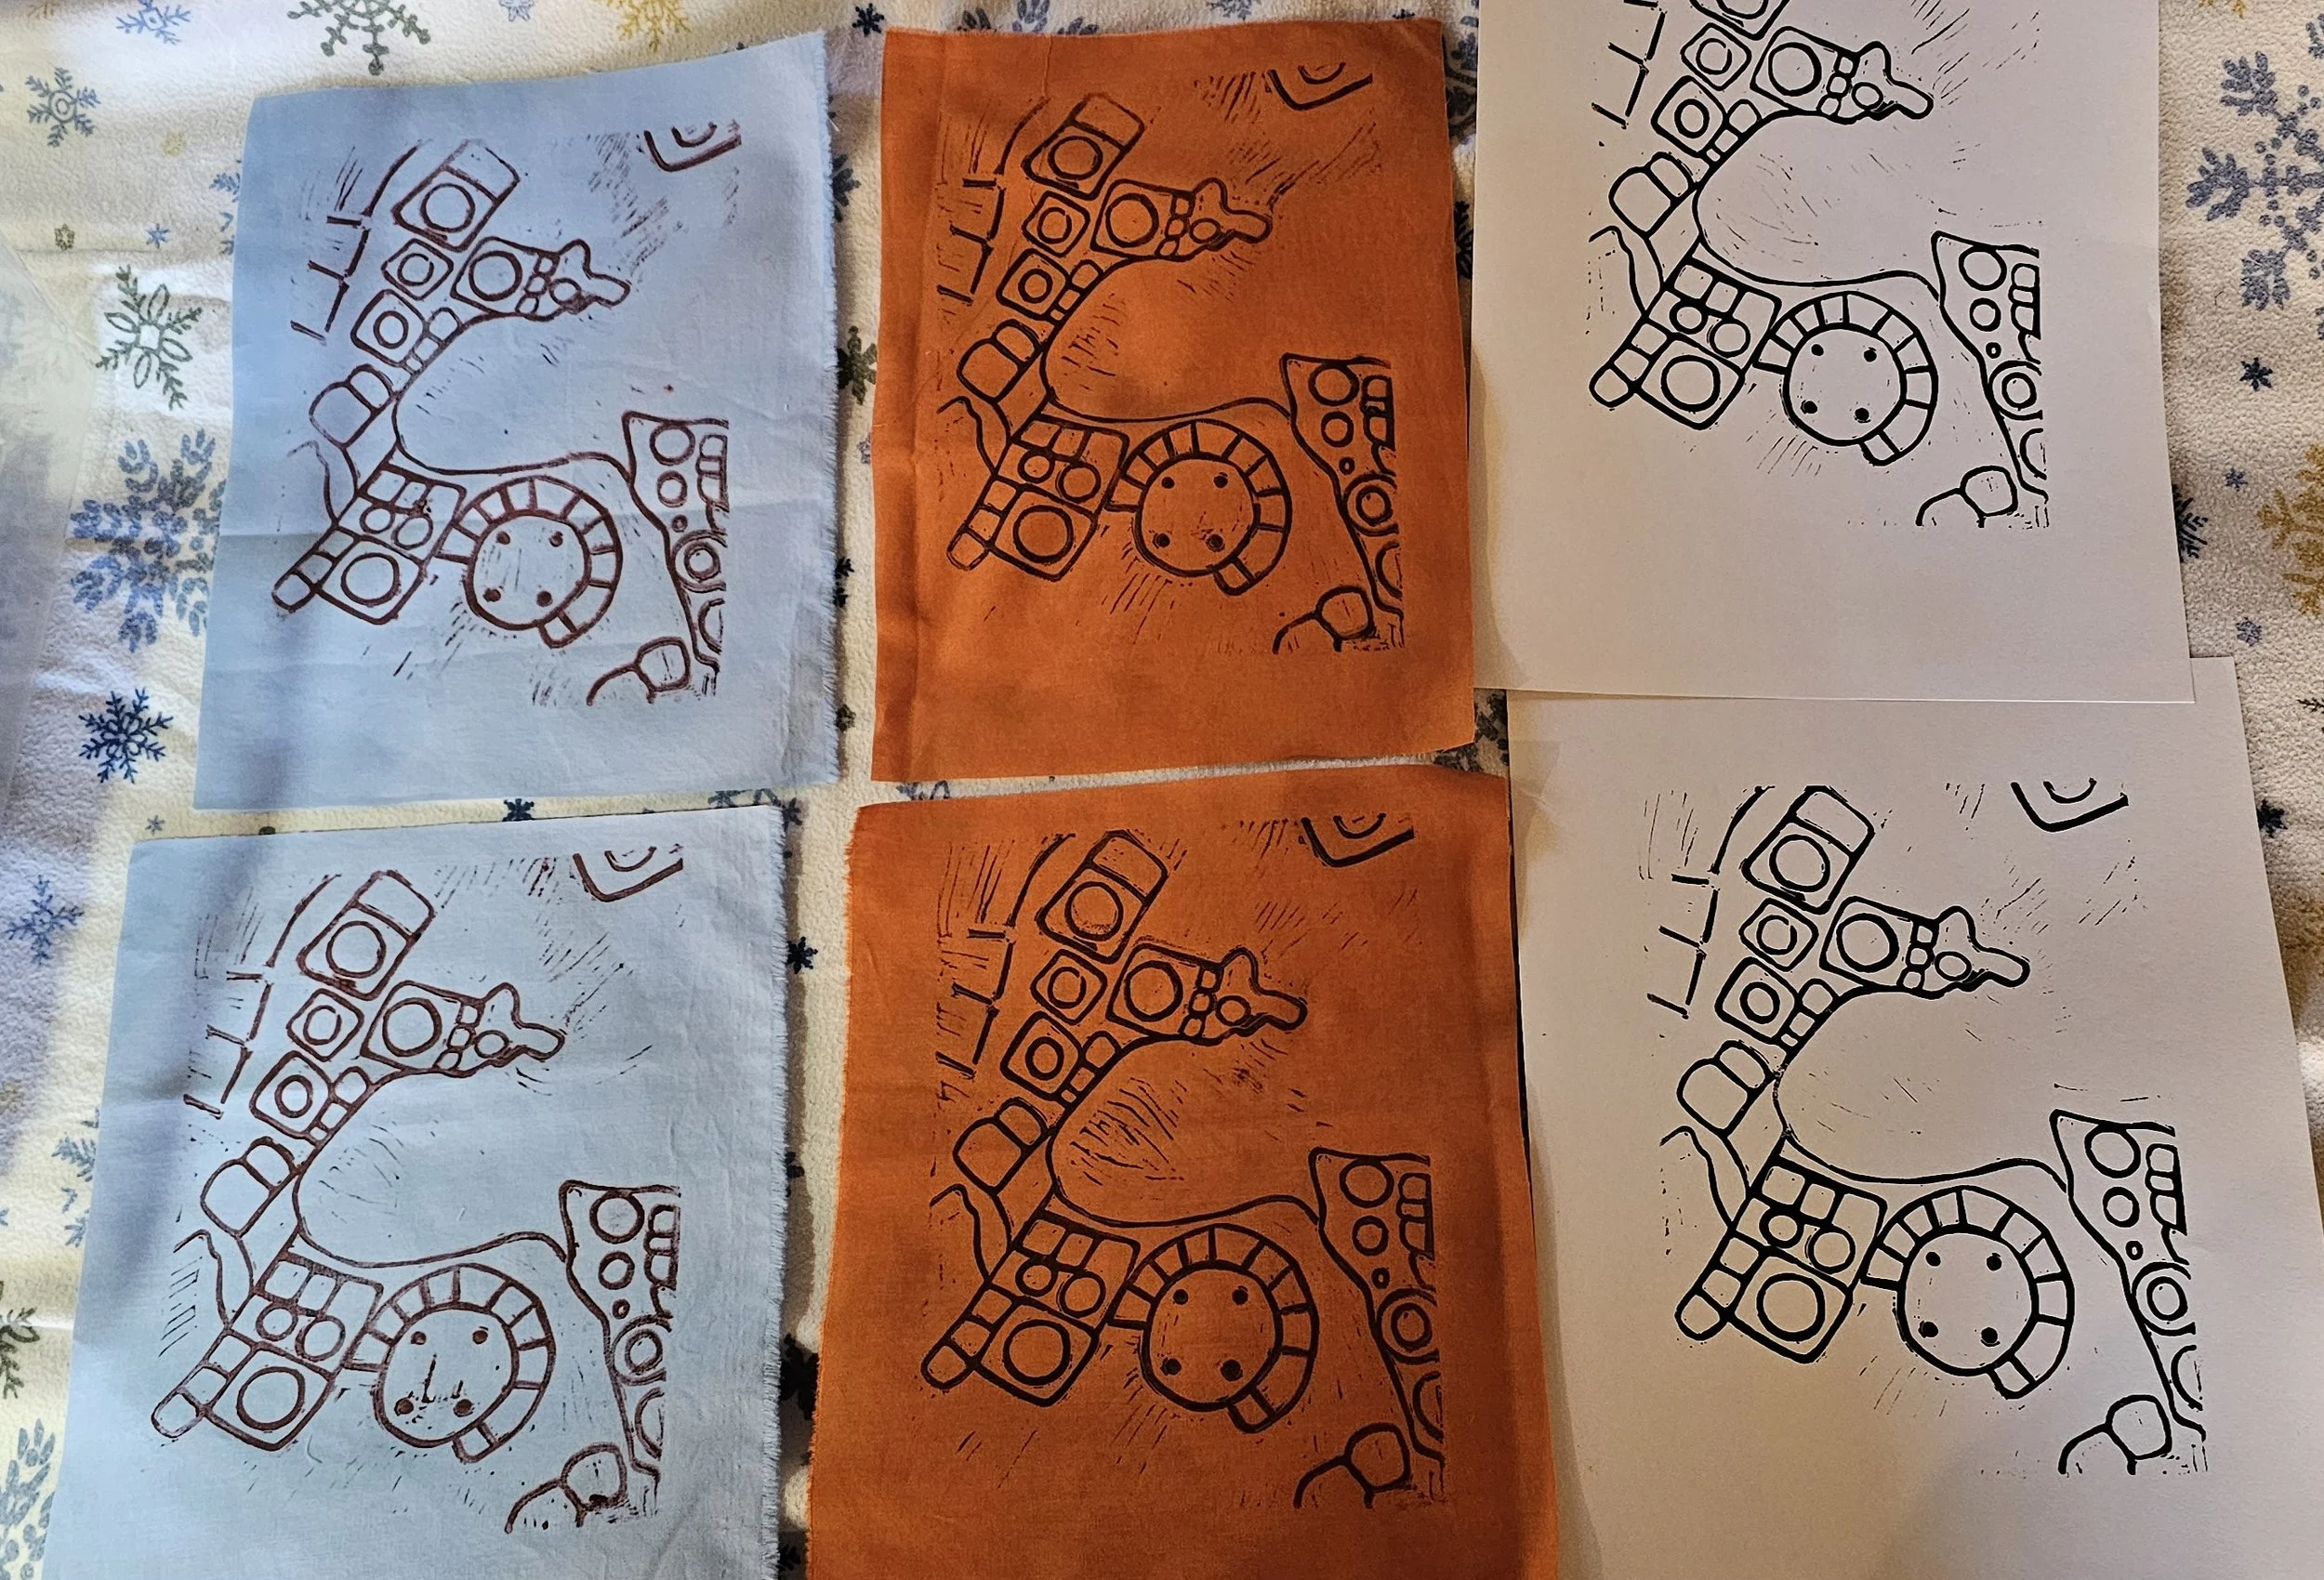
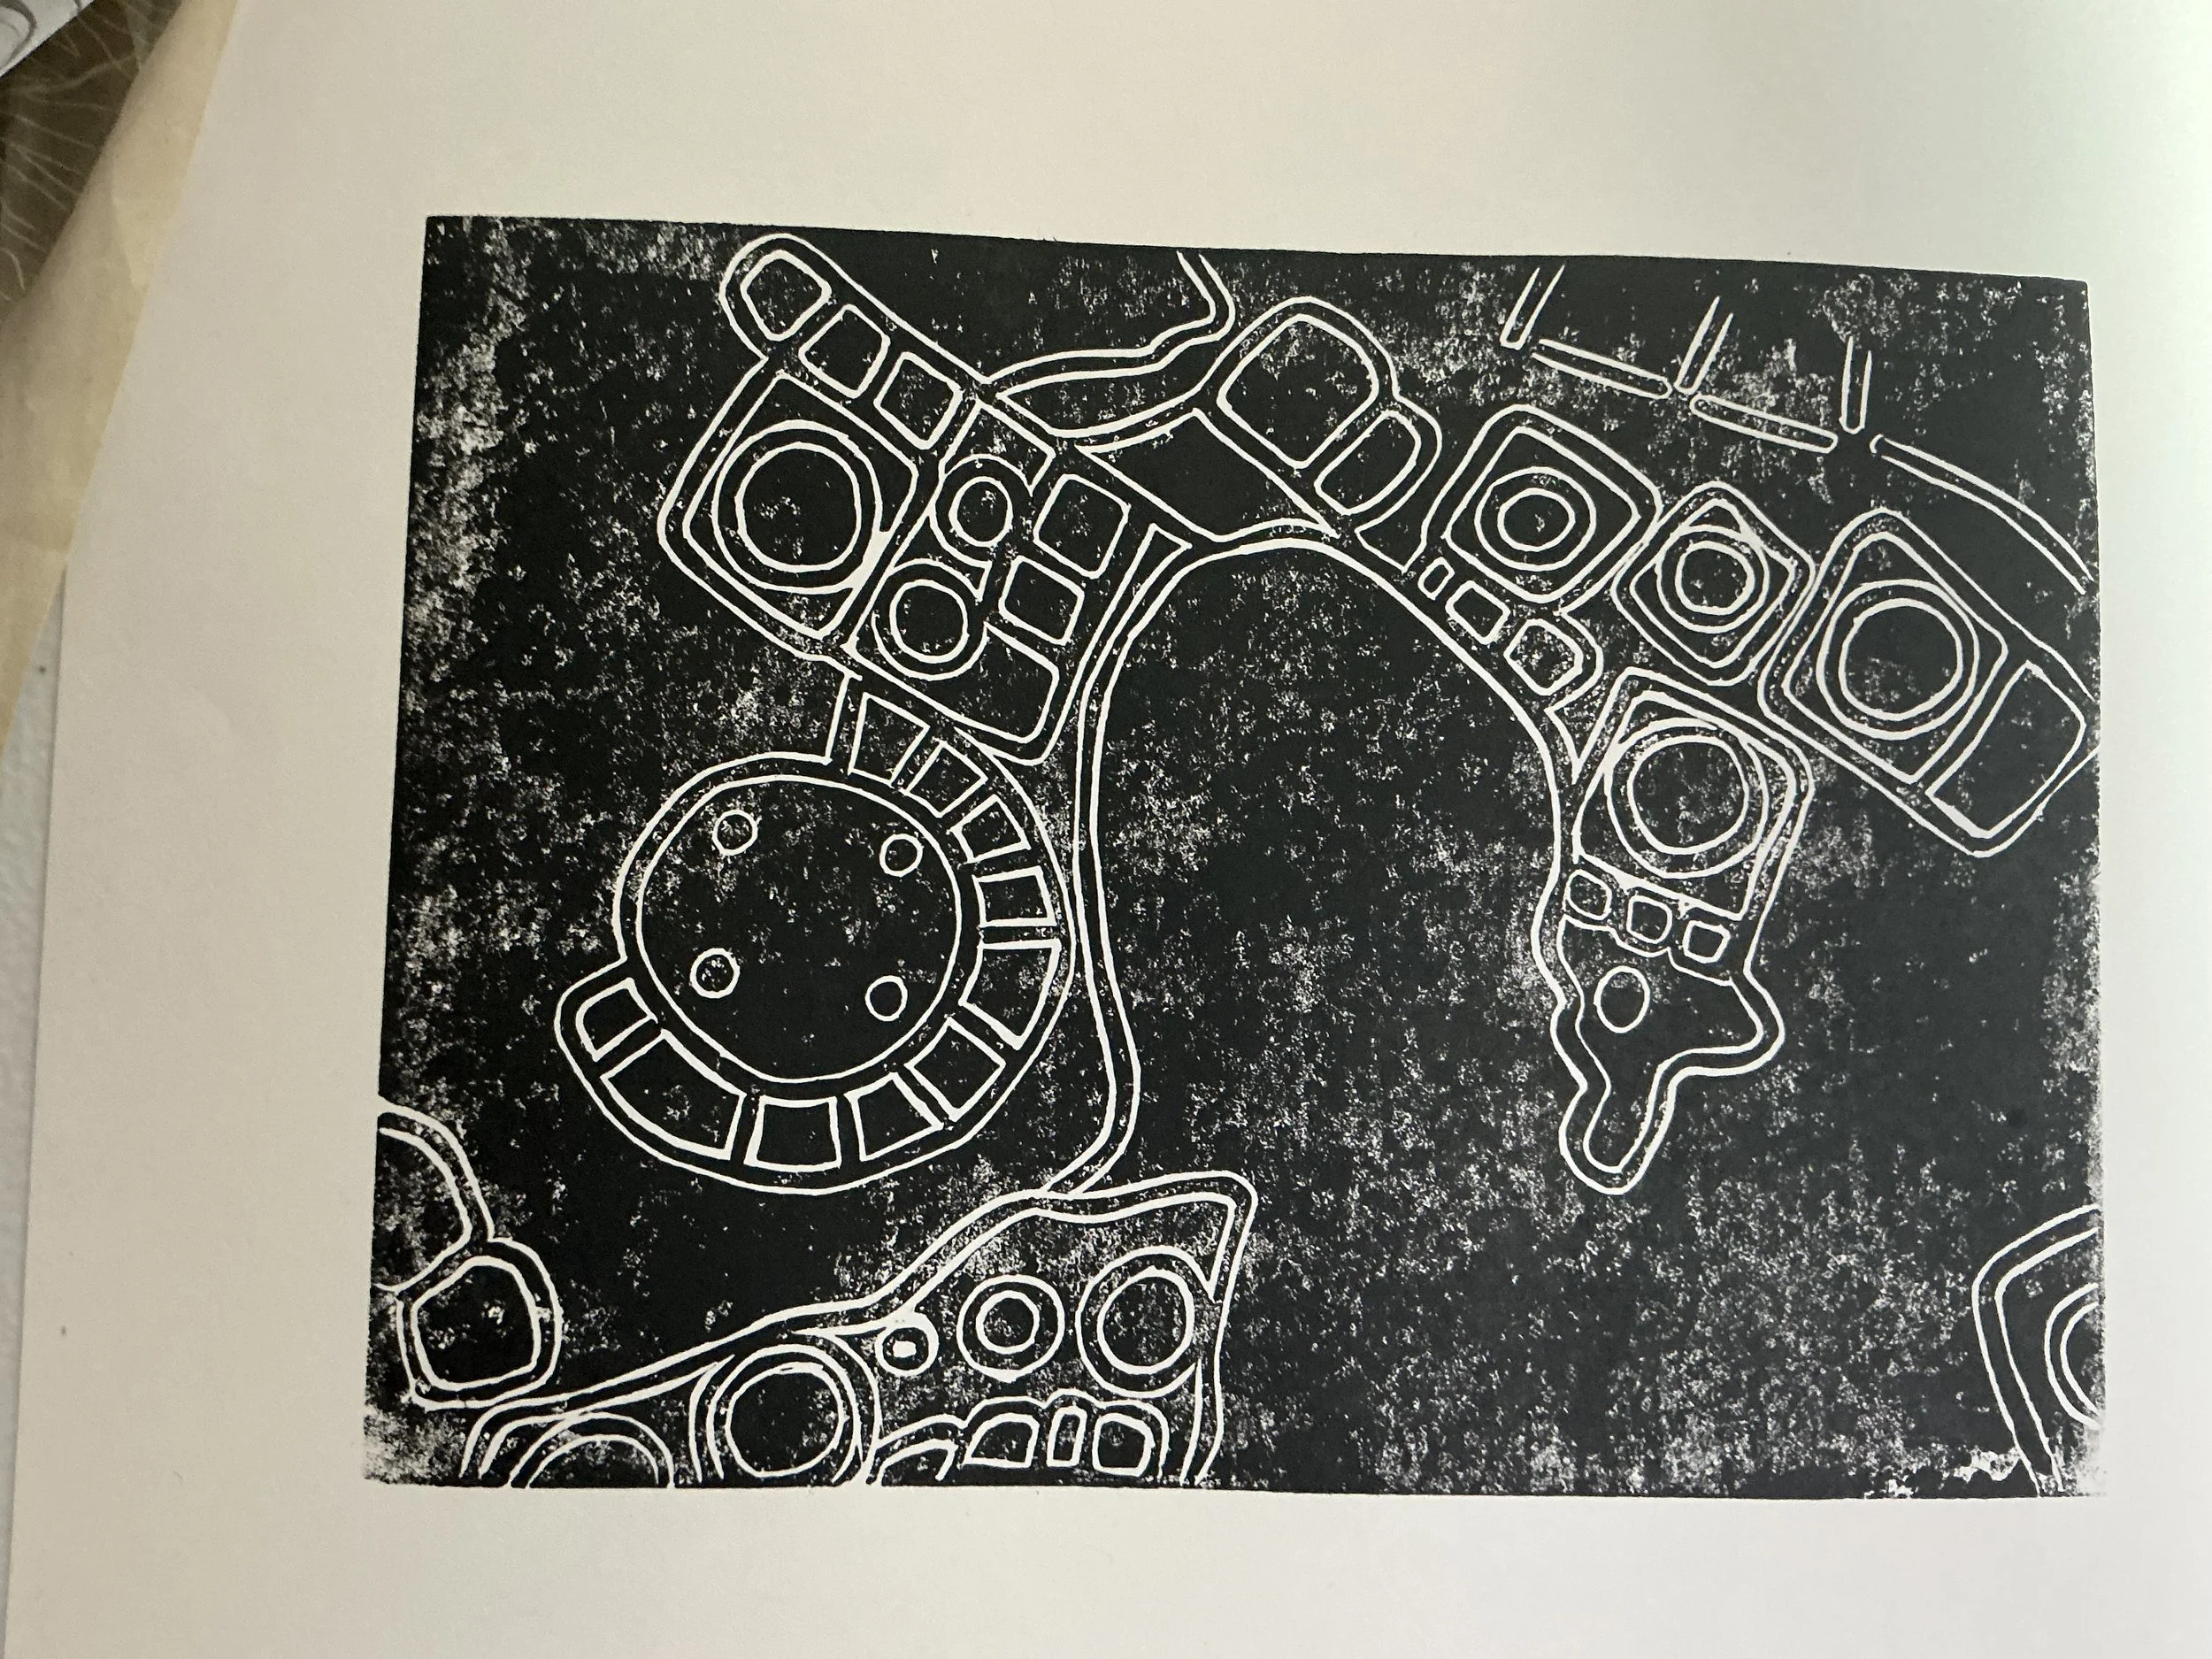
Here are some prints on both fabric and paper of the partial footprint of the Sand Canyon Pueblo. I thought it made an interesting design.. not sure what I’m going to do with them yet.
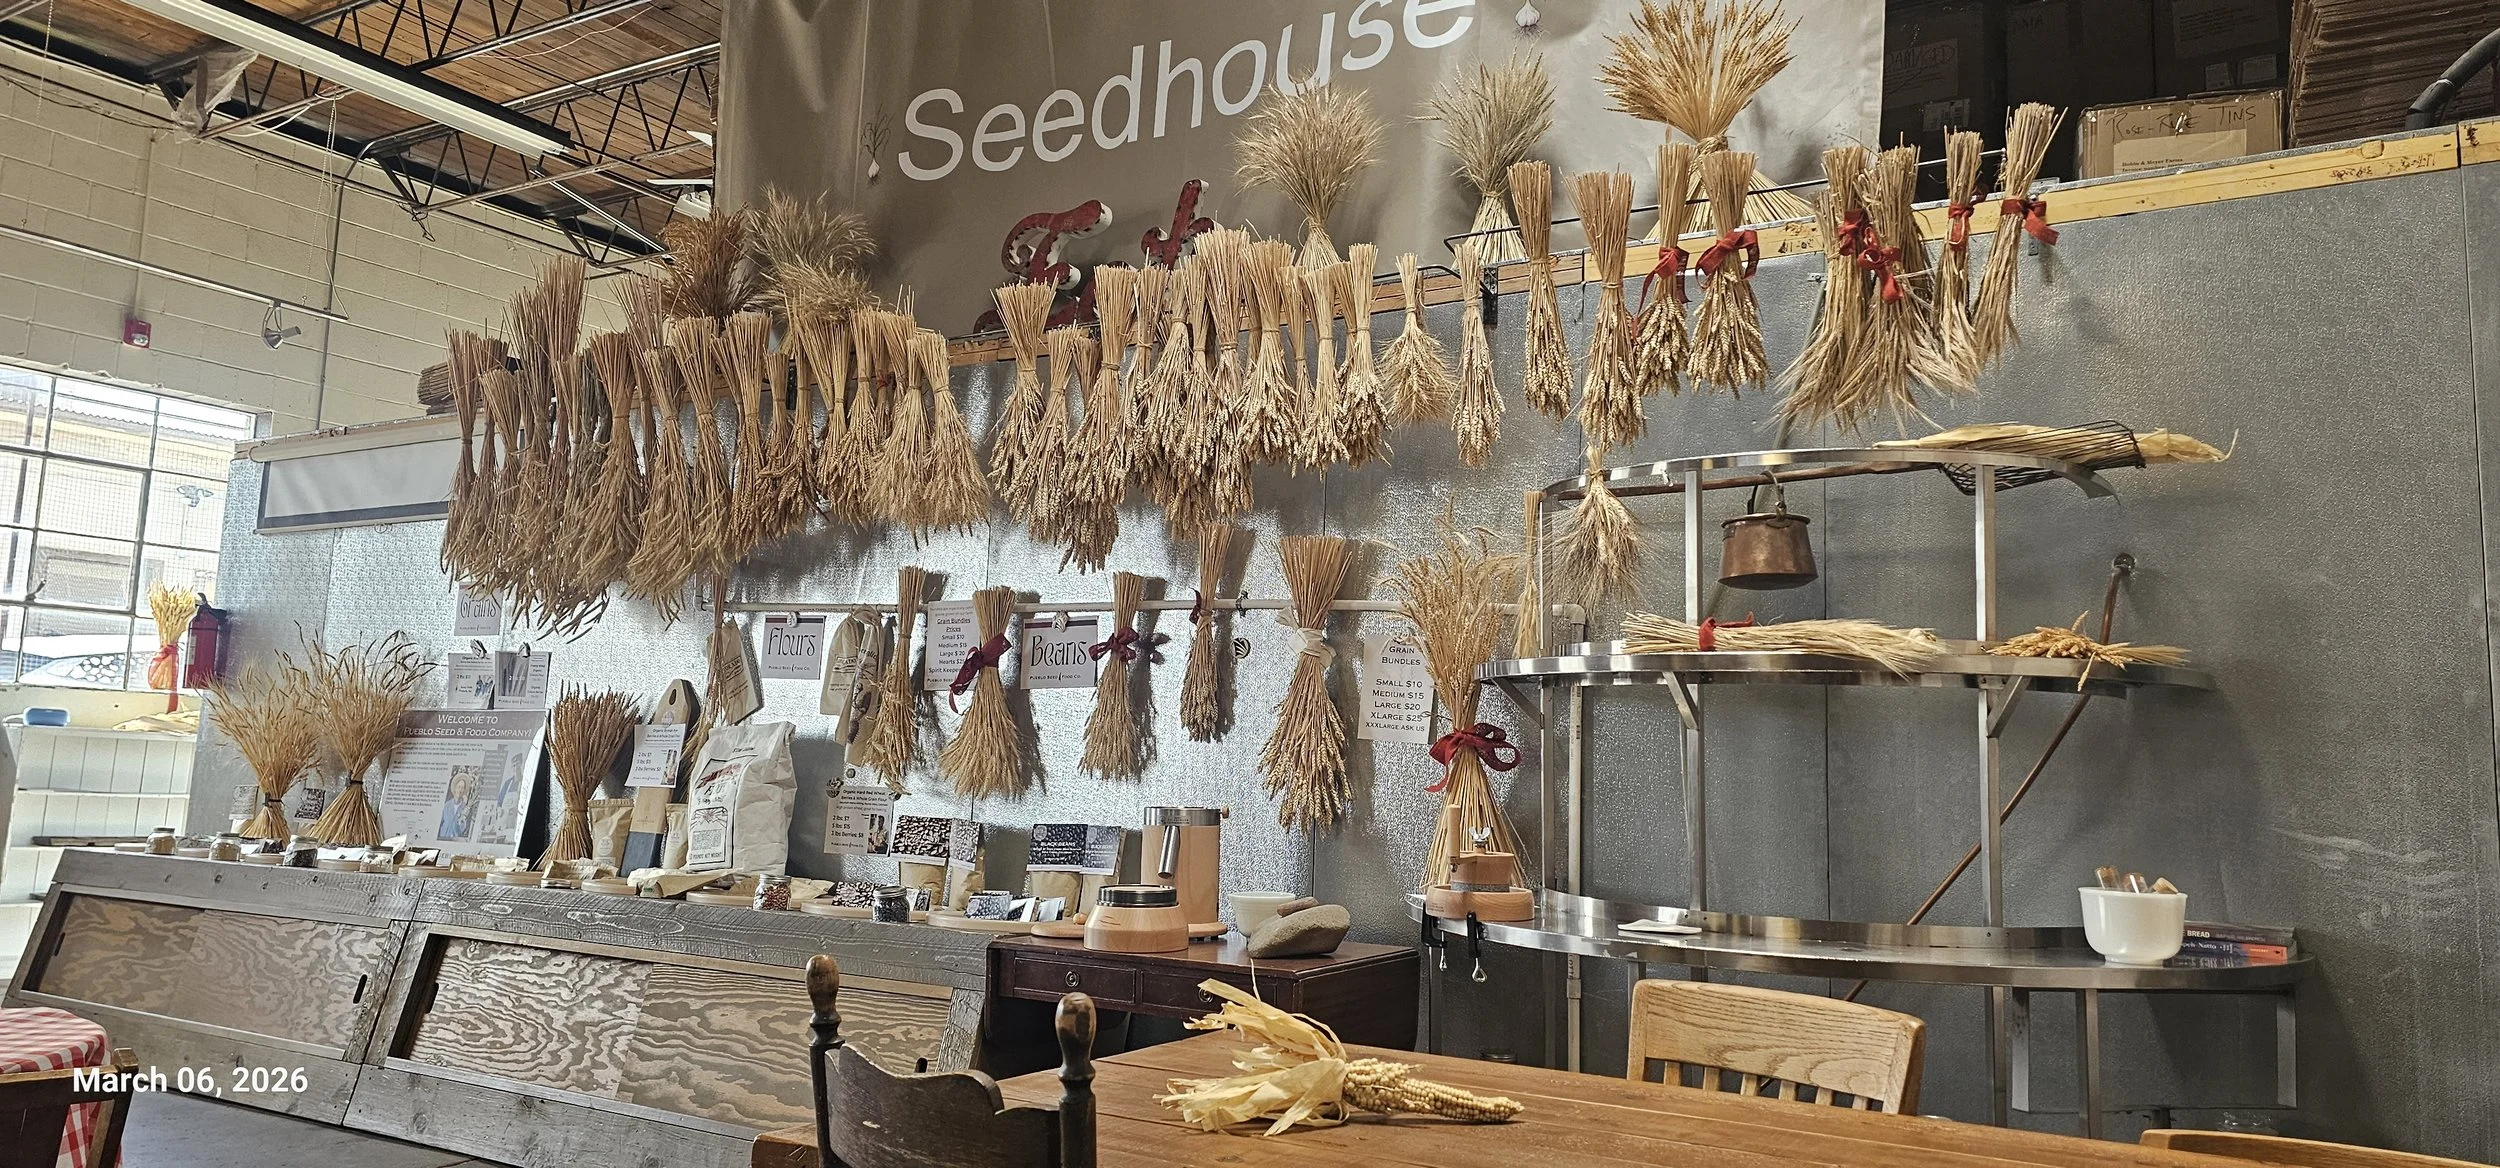
Good Eats
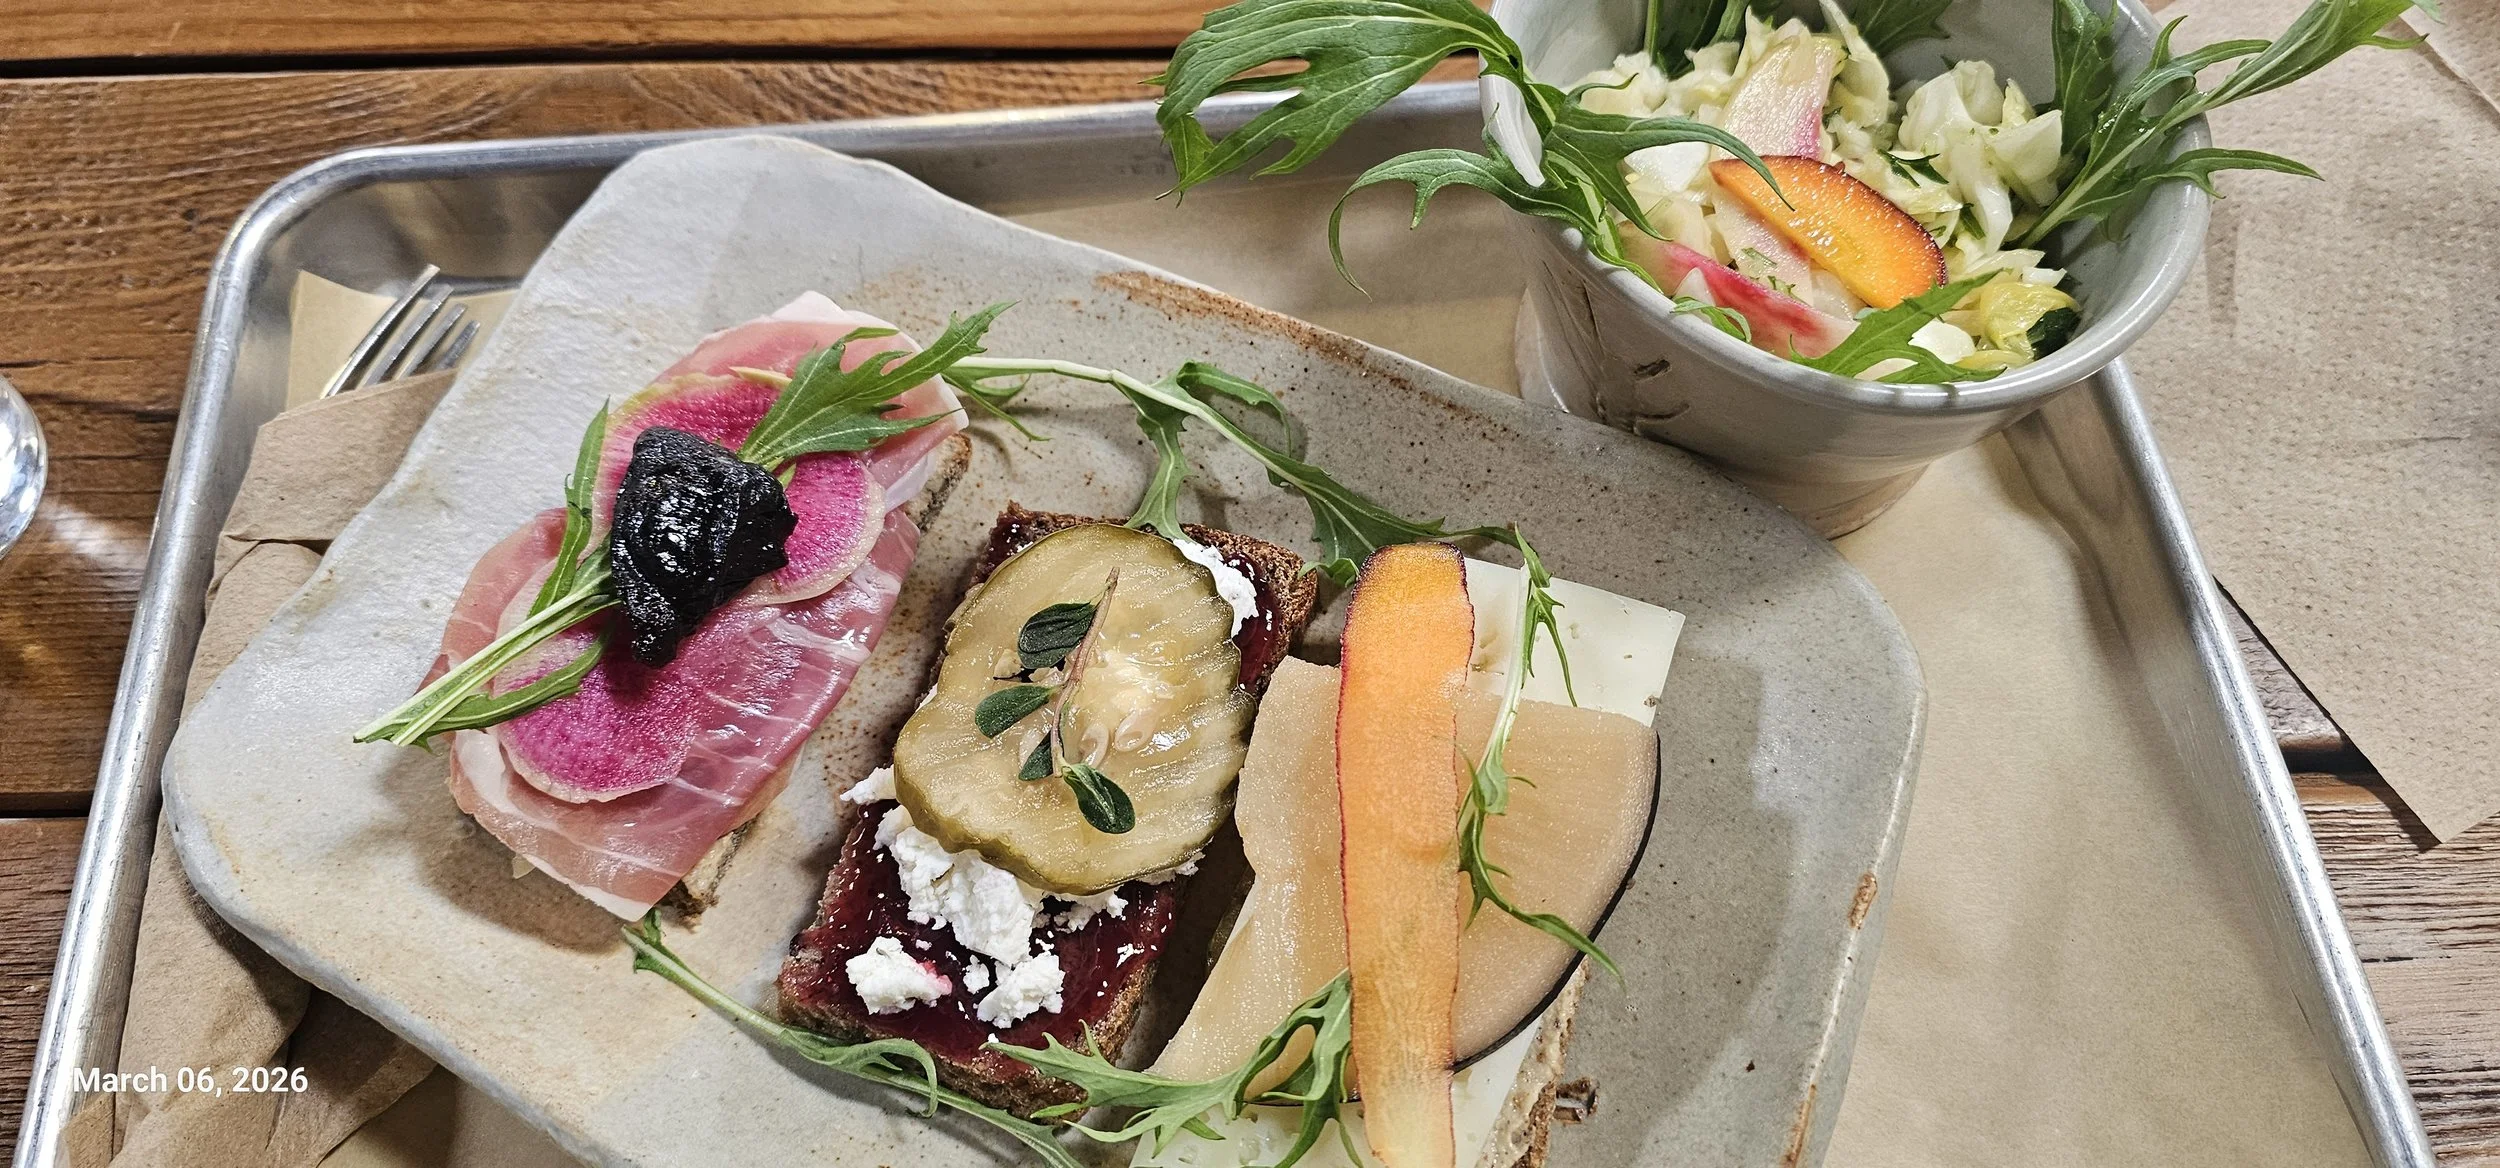
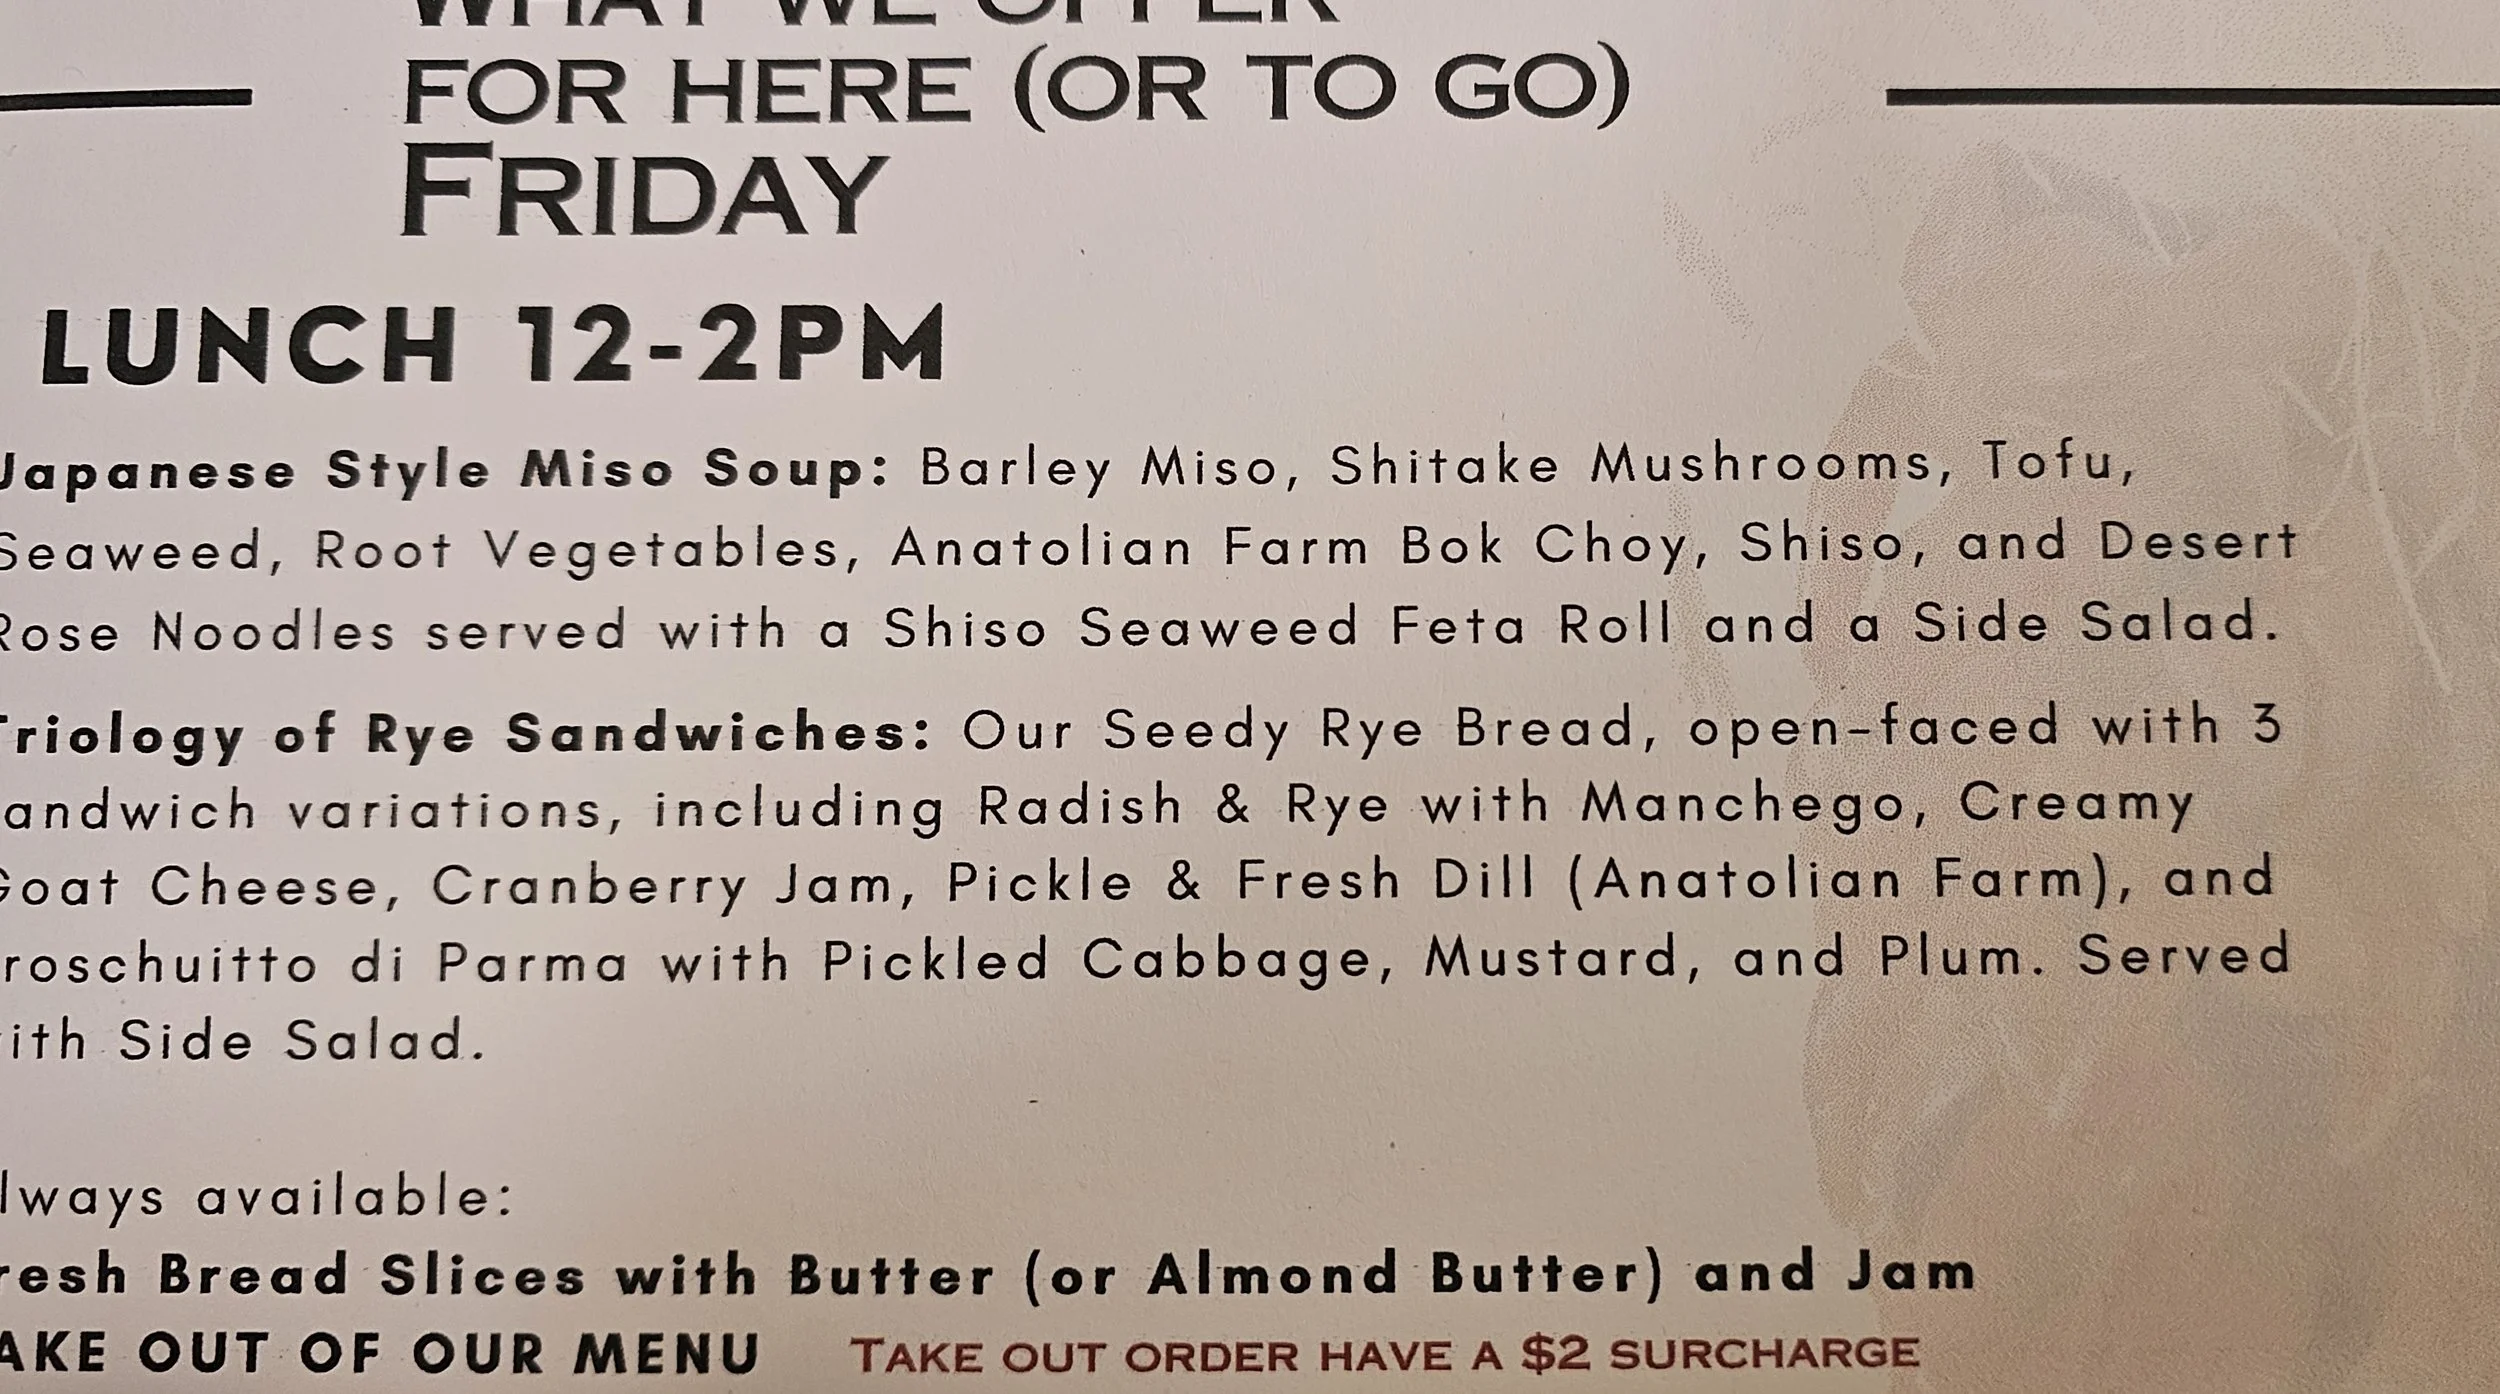
A few people had told me about the Pueblo Seed and Food Company. They grow a variety of organic foods, including grains here in this area of McElmo Canyon.. They have a little store in Cortez open Fridays and Saturdays, where they serve lunch or breakfast and have wonderful breads, cookies, muesli, and other great things..
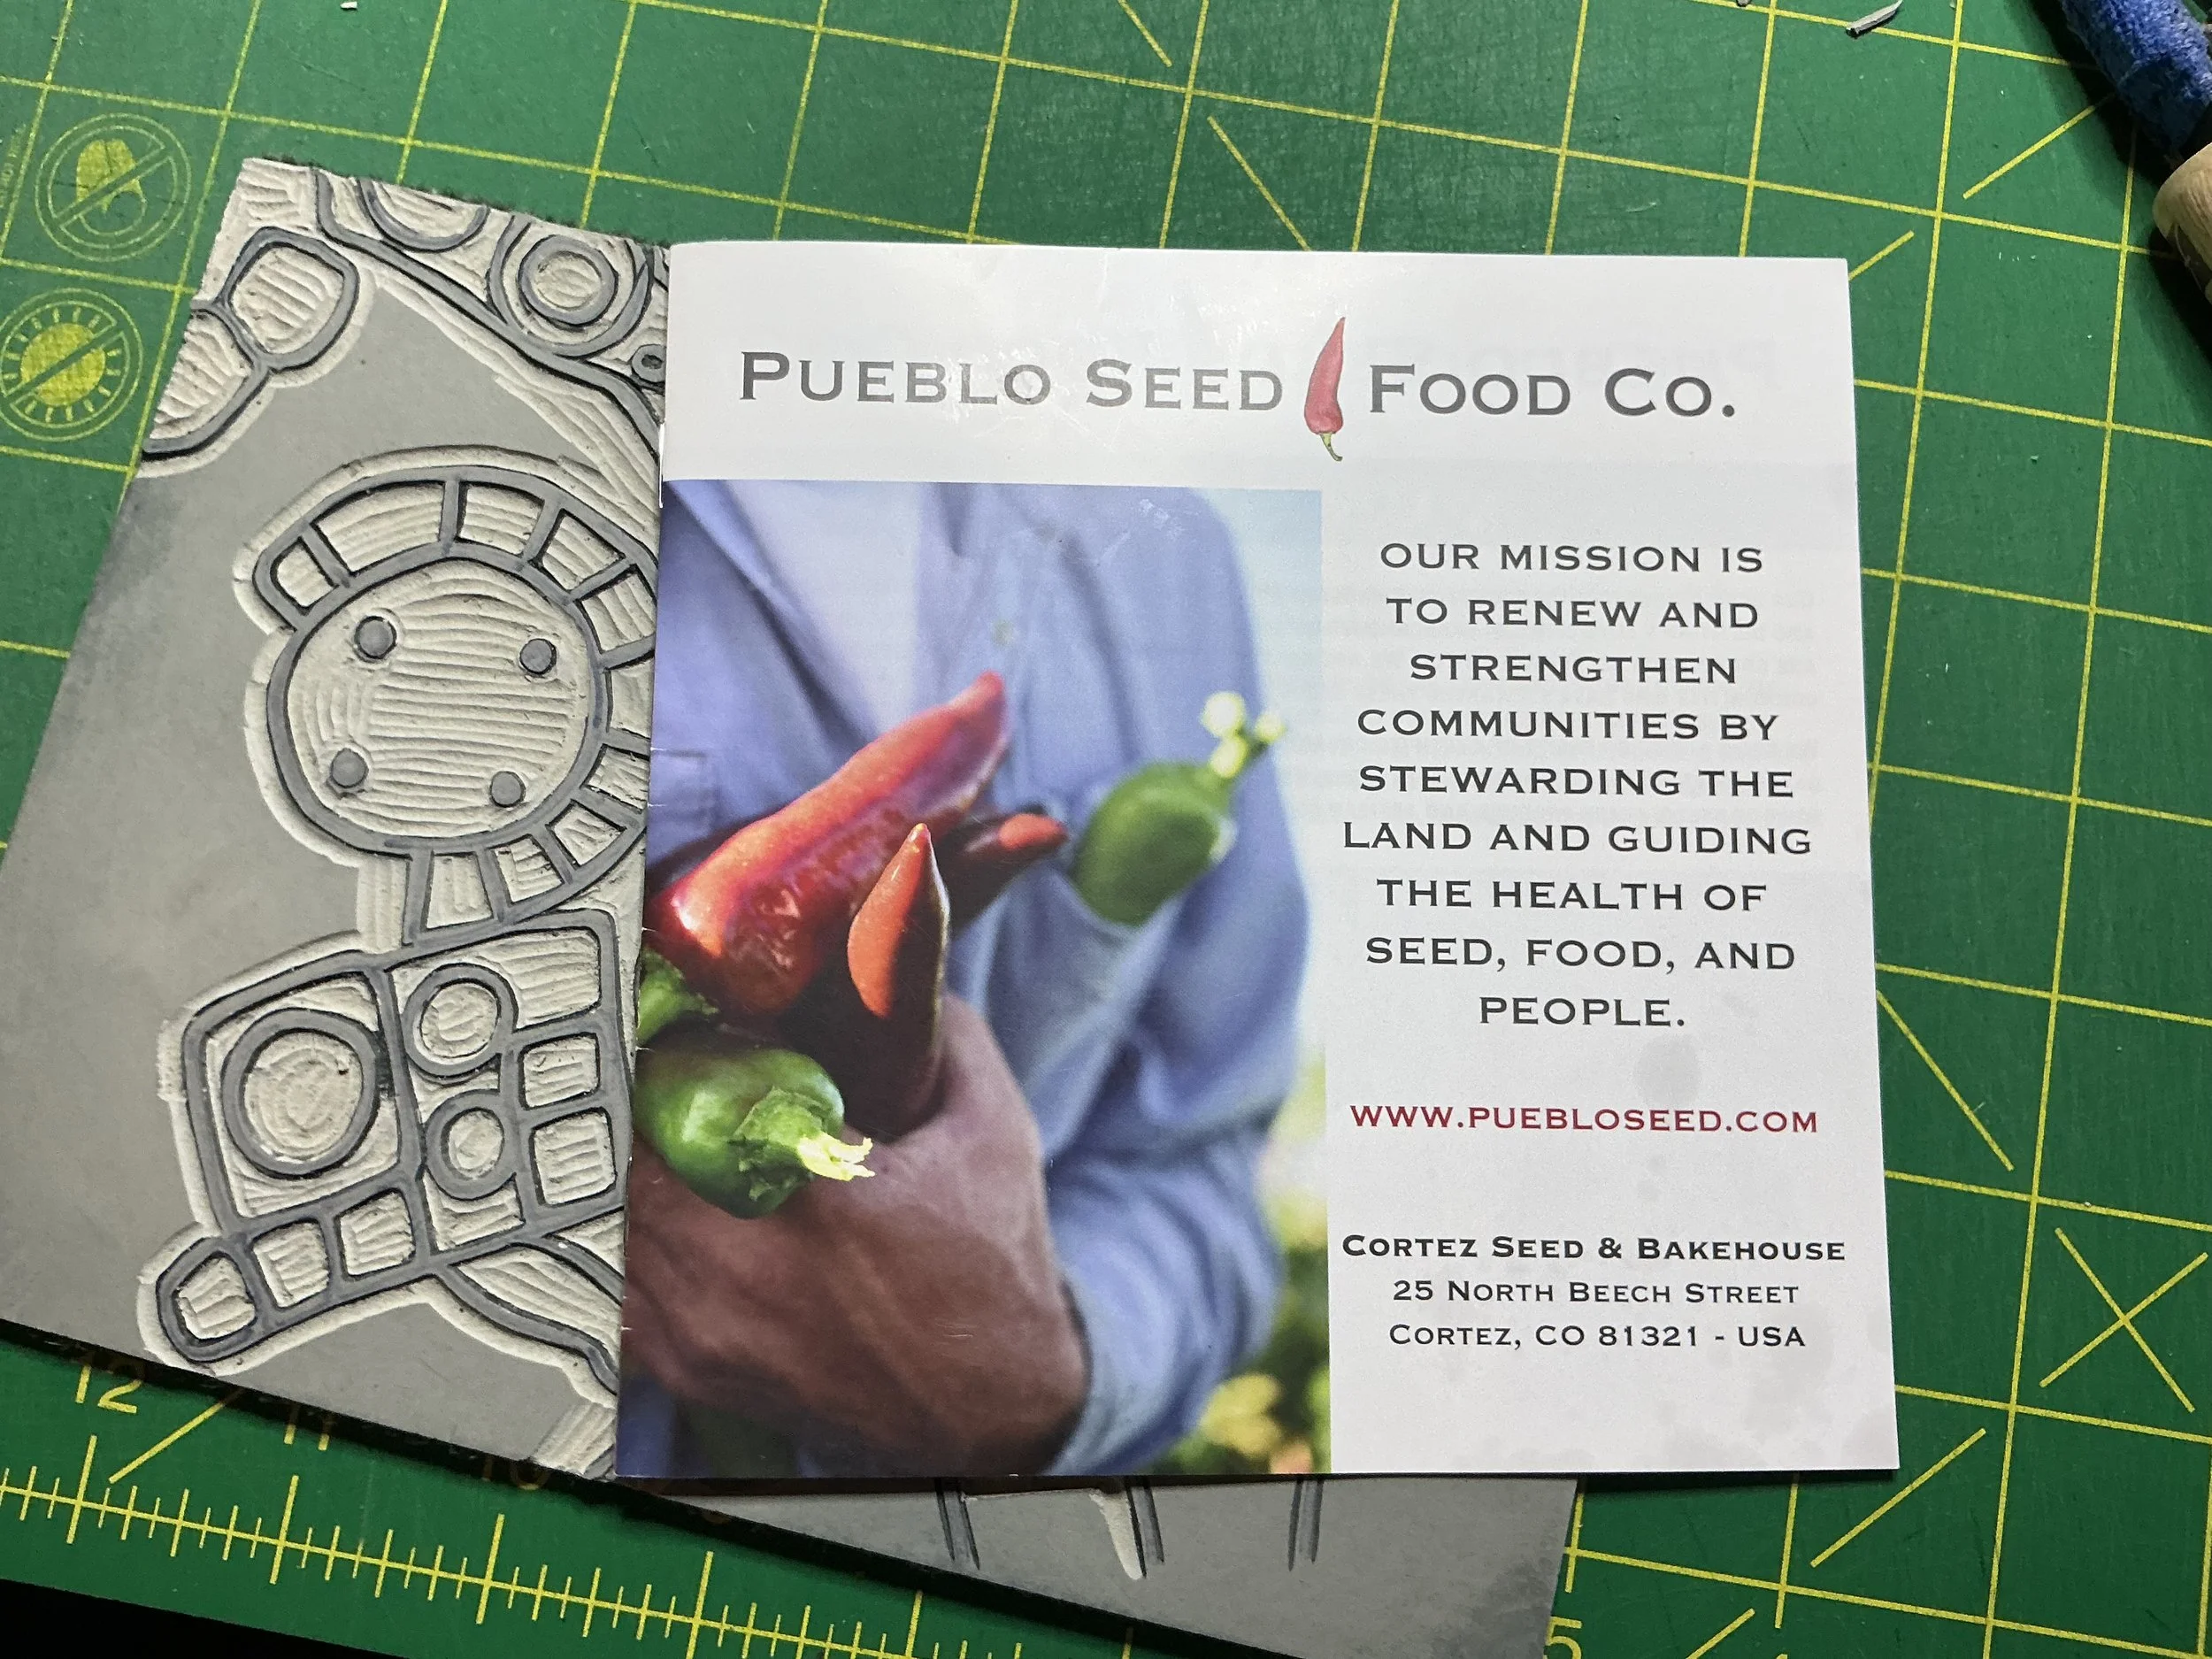
I really enjoyed my lunch here and spent way too much on a variety of cookies, porridge, muesli and breads.
You can see by the first image that I’ve been carving a lino block. This is a small section of the footprint of the Sand Canyon Pueblo, which included 400 rooms at the time of inhabitation. I’m planning to carve away all the negative space and just leave the lines so I can print it on fabric, but here’s a little test print of just the line drawing before the background has been carved away.
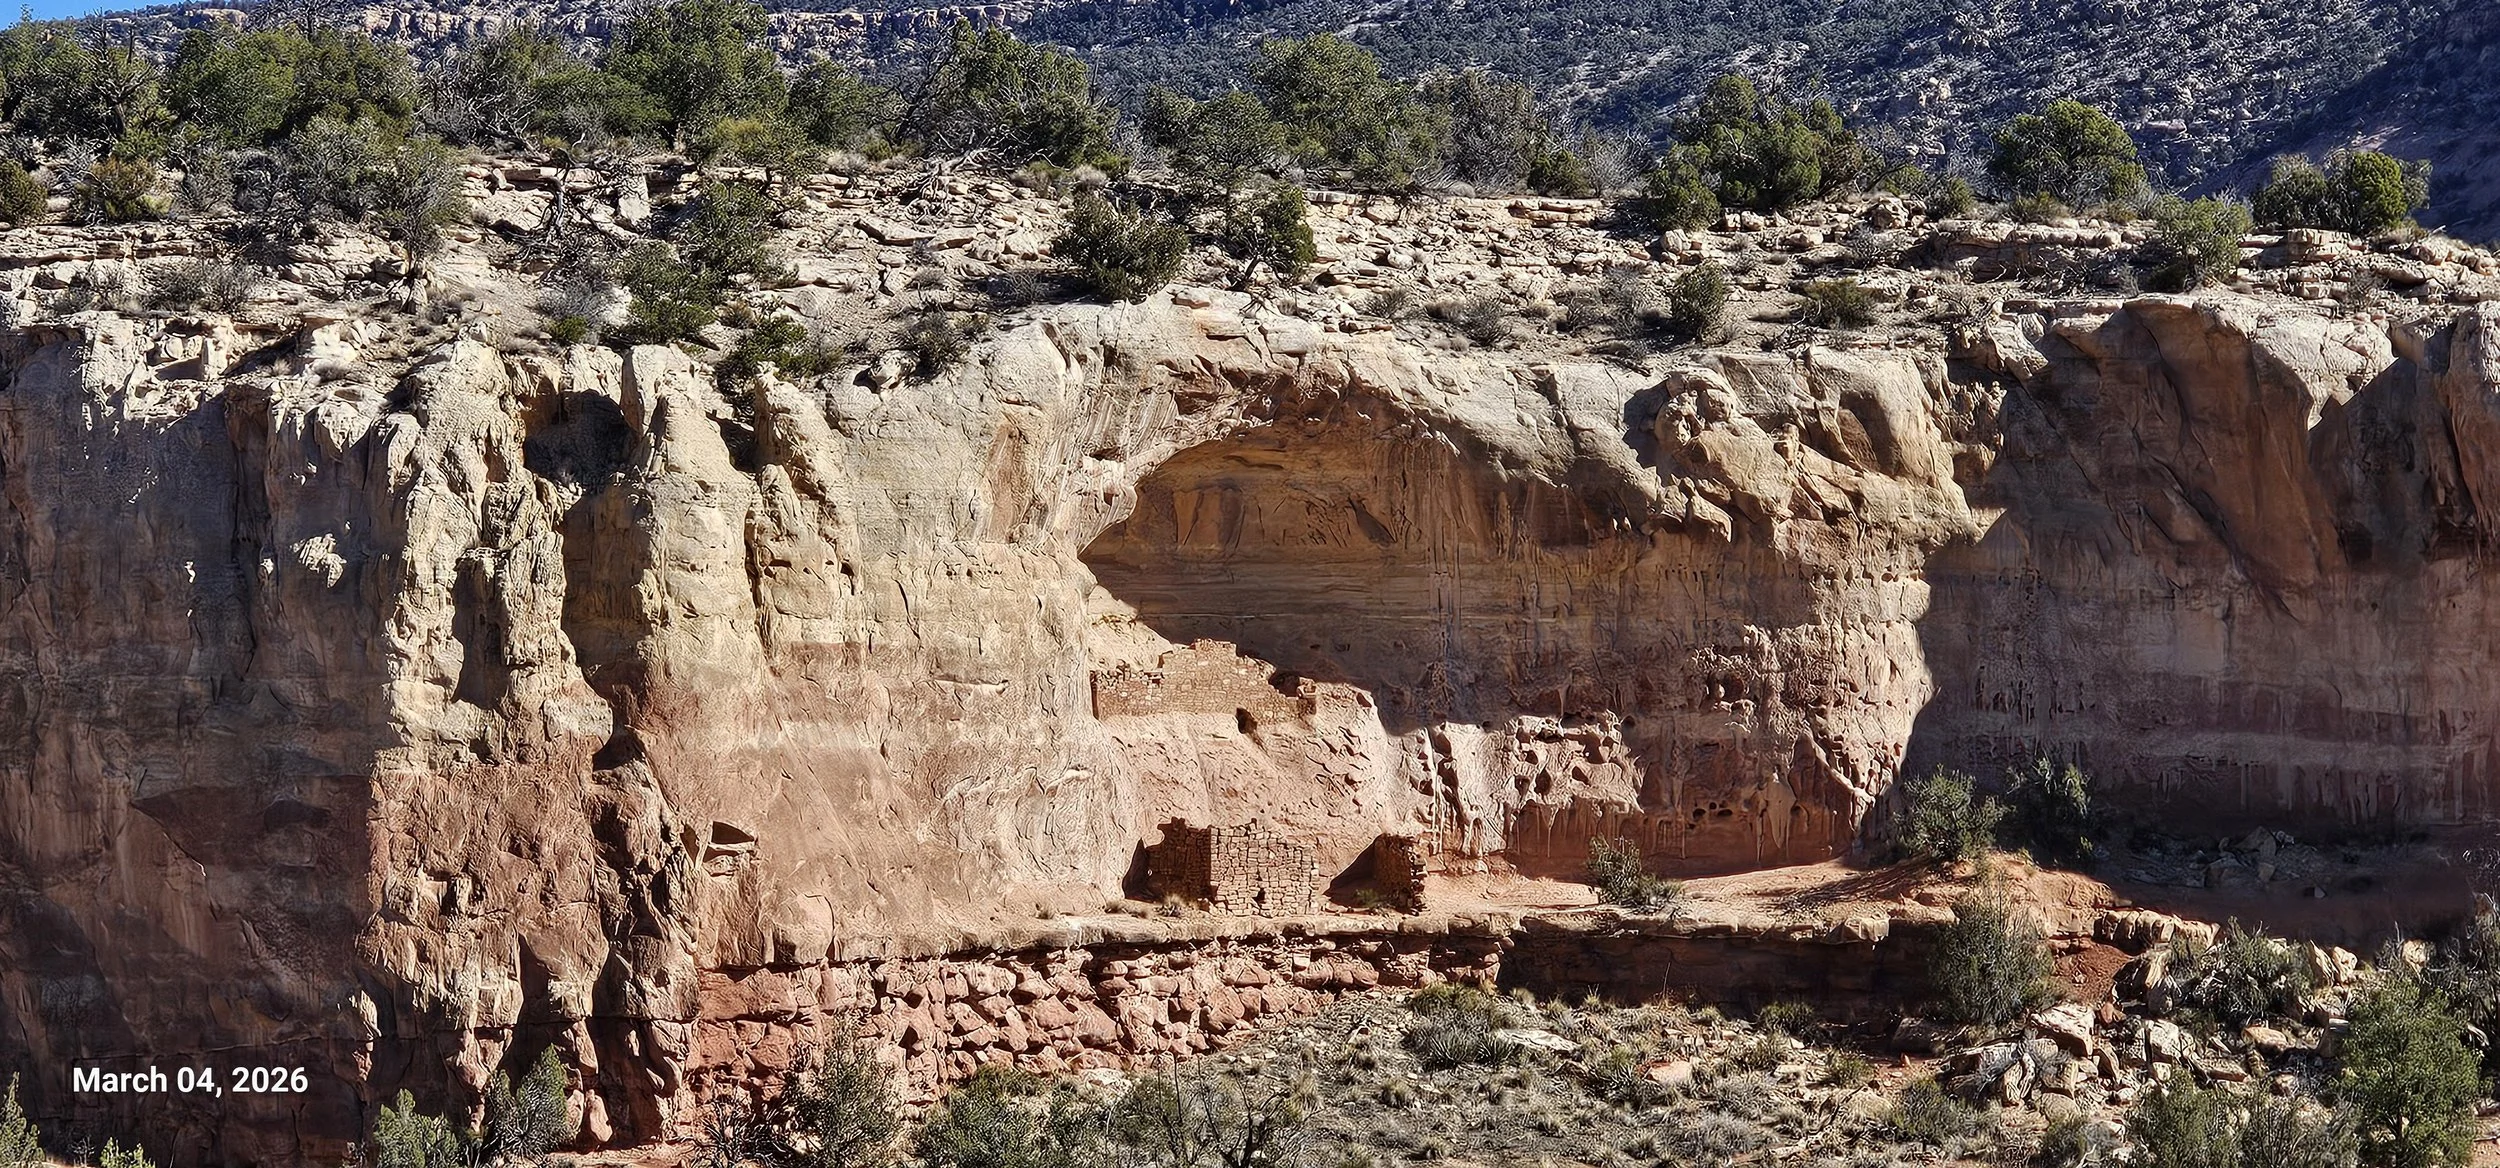
Hiking the Monument
What a beautiful morning for a hike I did about the first 2 miles of Sand Canyon in perfect sunny, warm weather. The views of the cultural sites were spectacular. It is amazing to think about the people that lived here and why they chose to build their homes in the alcoves of the sandstone.
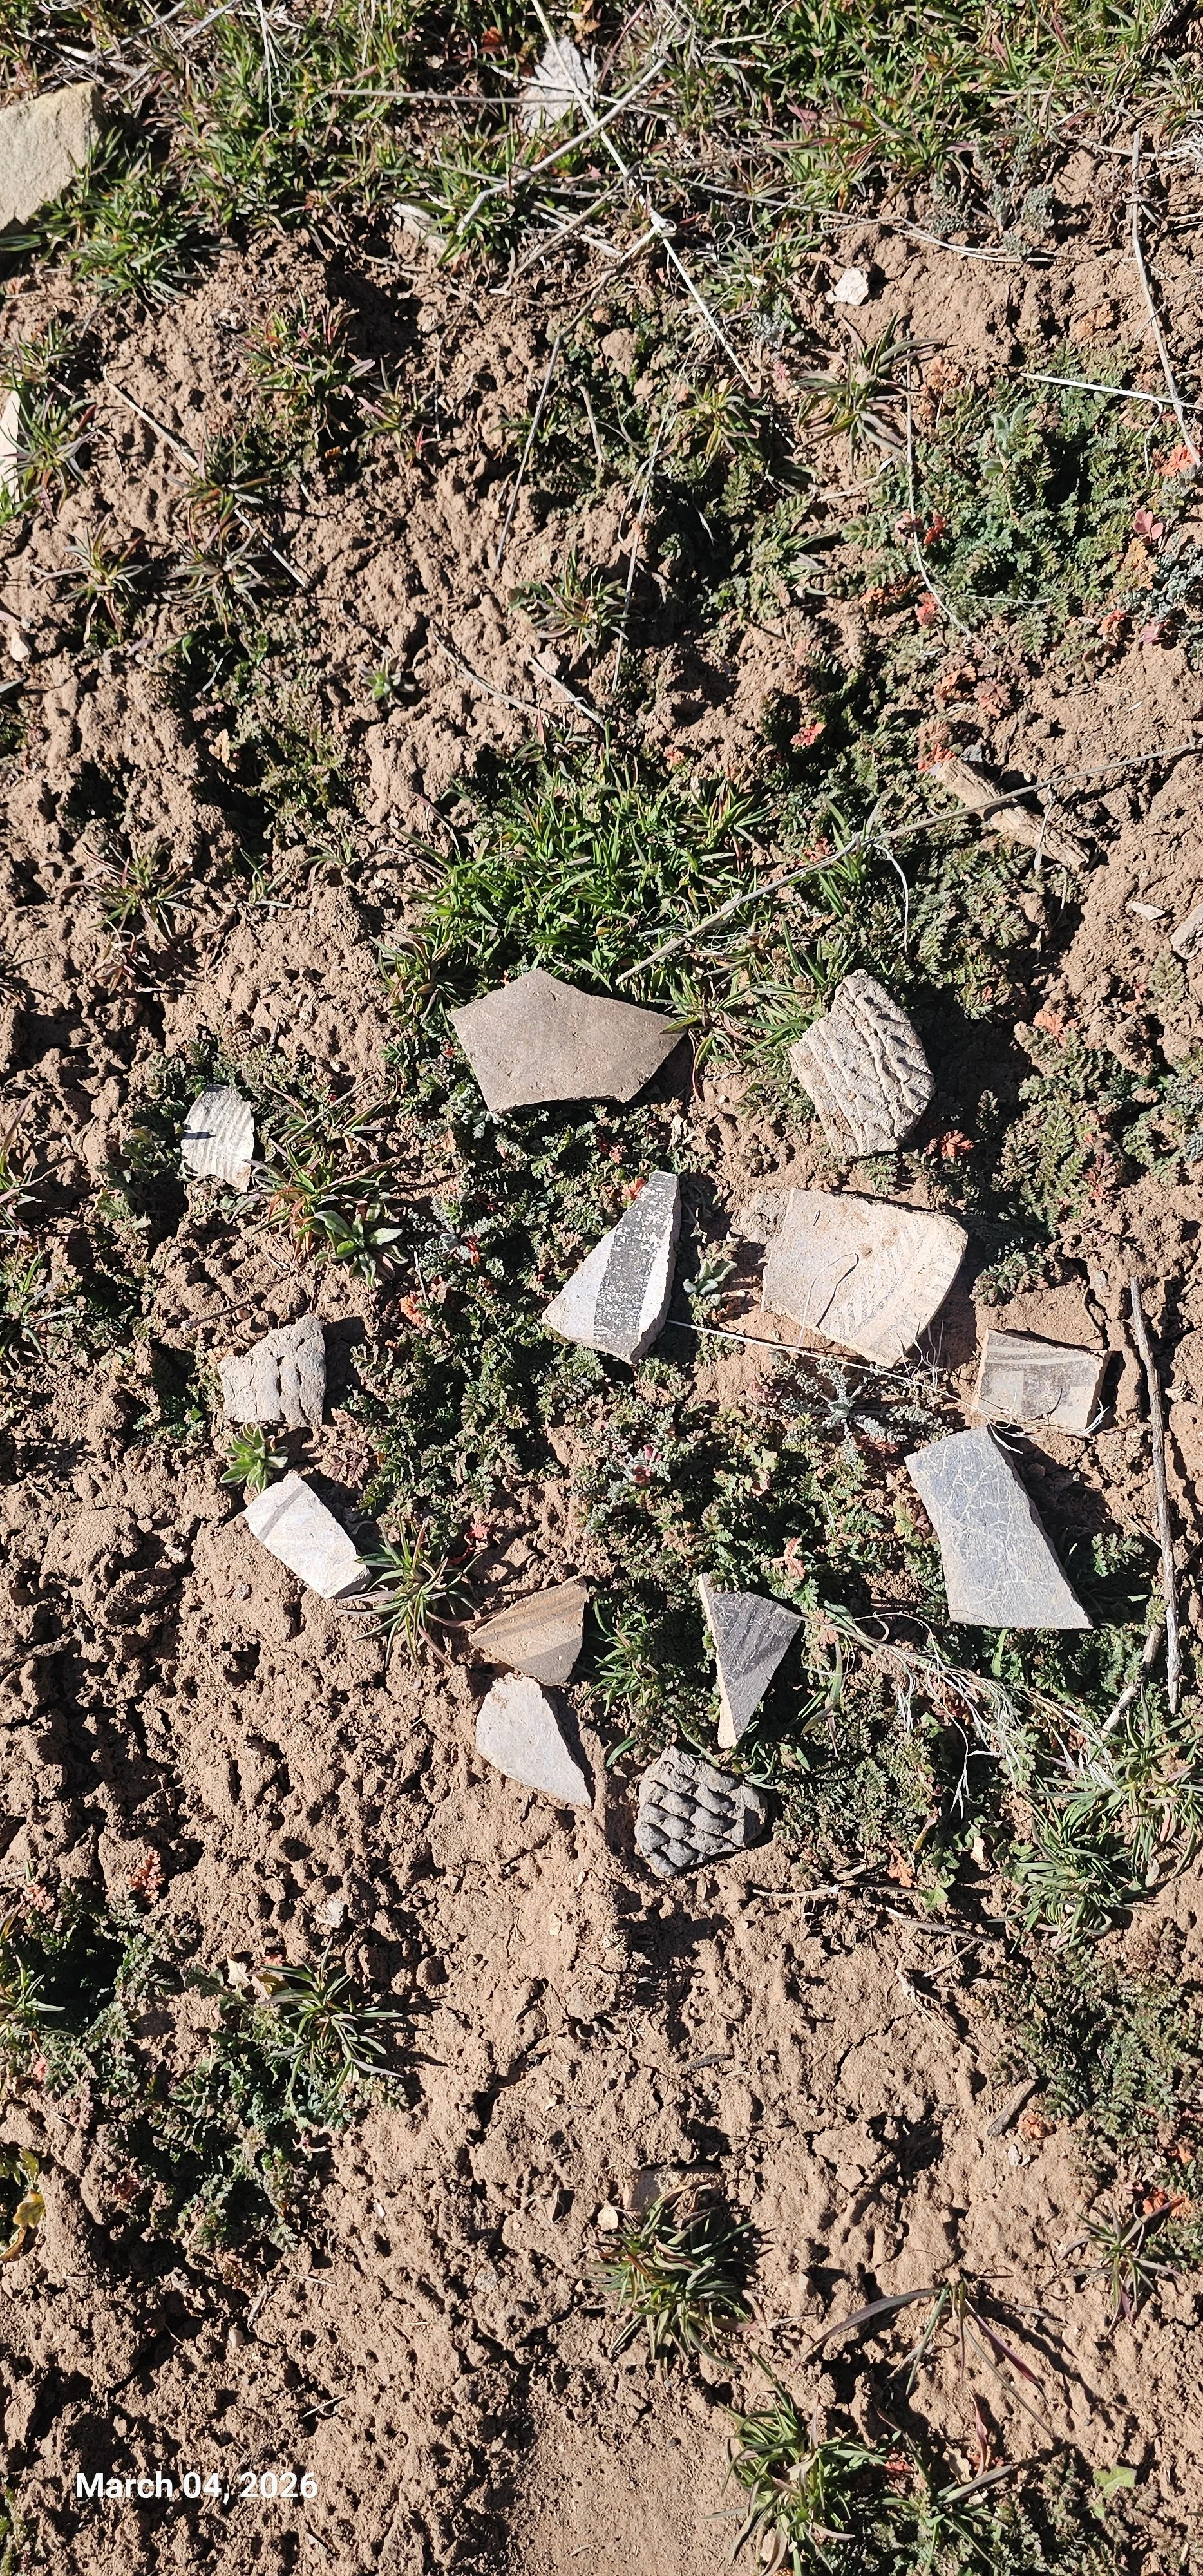
In the afternoon, Pamela took me on a field trip to Lowry Pueblo, and then to Painted Hand Pueblo. These sites have been excavated and stabilized as public sites, but she pointed out all of the area around. These developed sites where many other cultural sites are under the earth and how to spot them. We discovered evidence of people going off trail and collecting pot chards and worked pieces of stone and collecting them into little piles. Upon finding these we scattered them. When you hike in these landscapes of the ancient people and find artifacts, please take a look at them and then leave them where you found them..
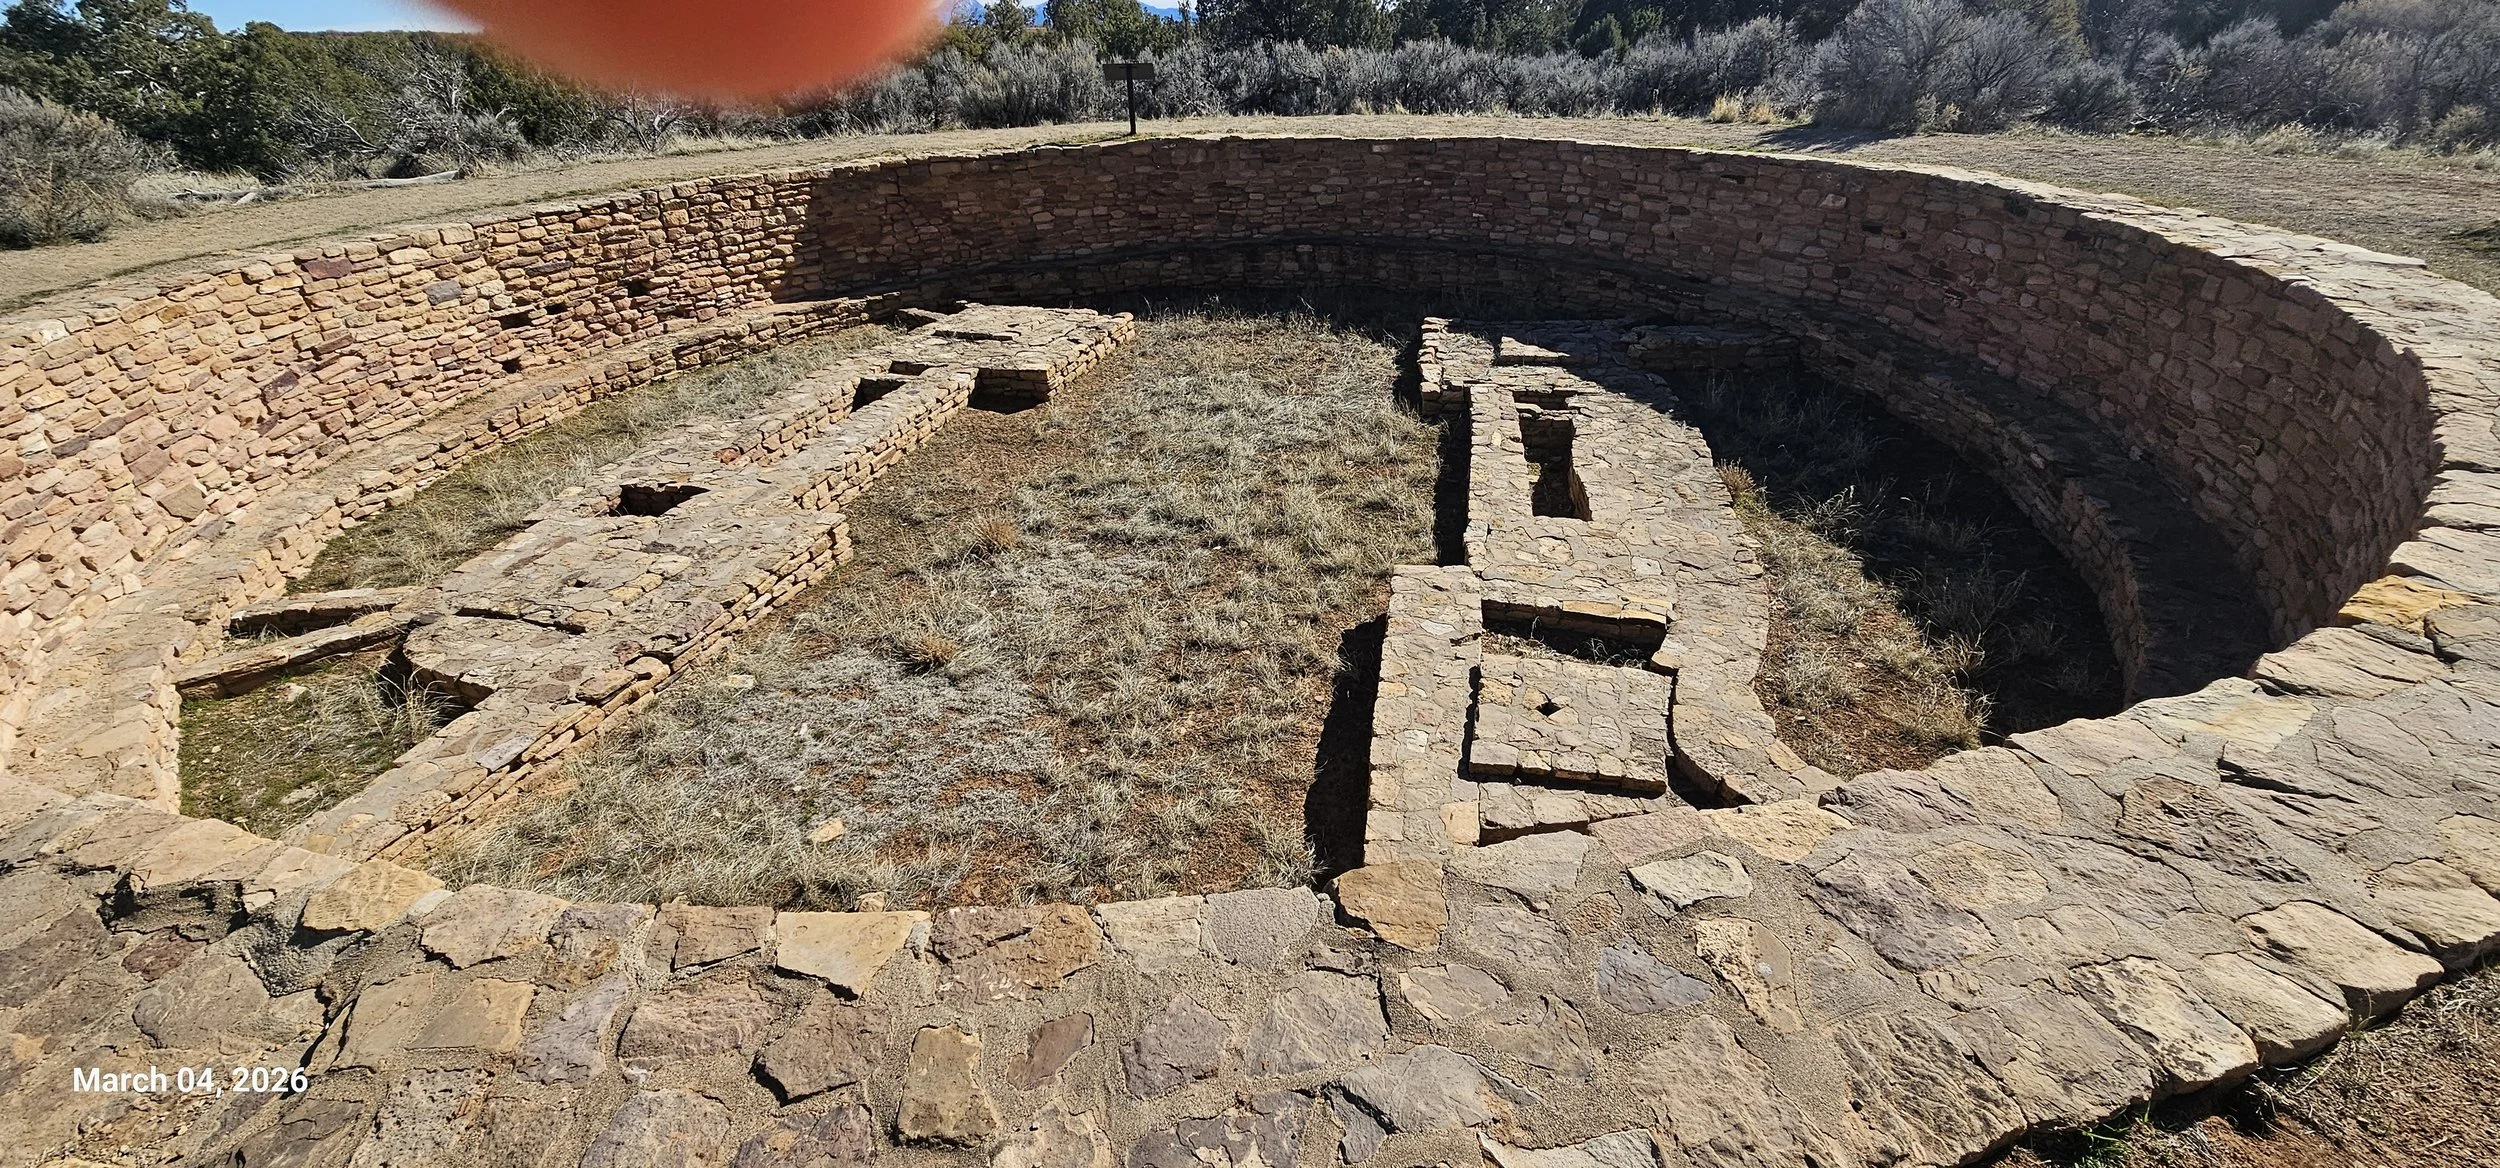
The figures at the bottom of the Great Kiva at Lowry Pueblo are really interesting. I’ve never seen anything like them before. .A native from Santa Clara Pueblo interpreted these figures as representing winter people and summer people.
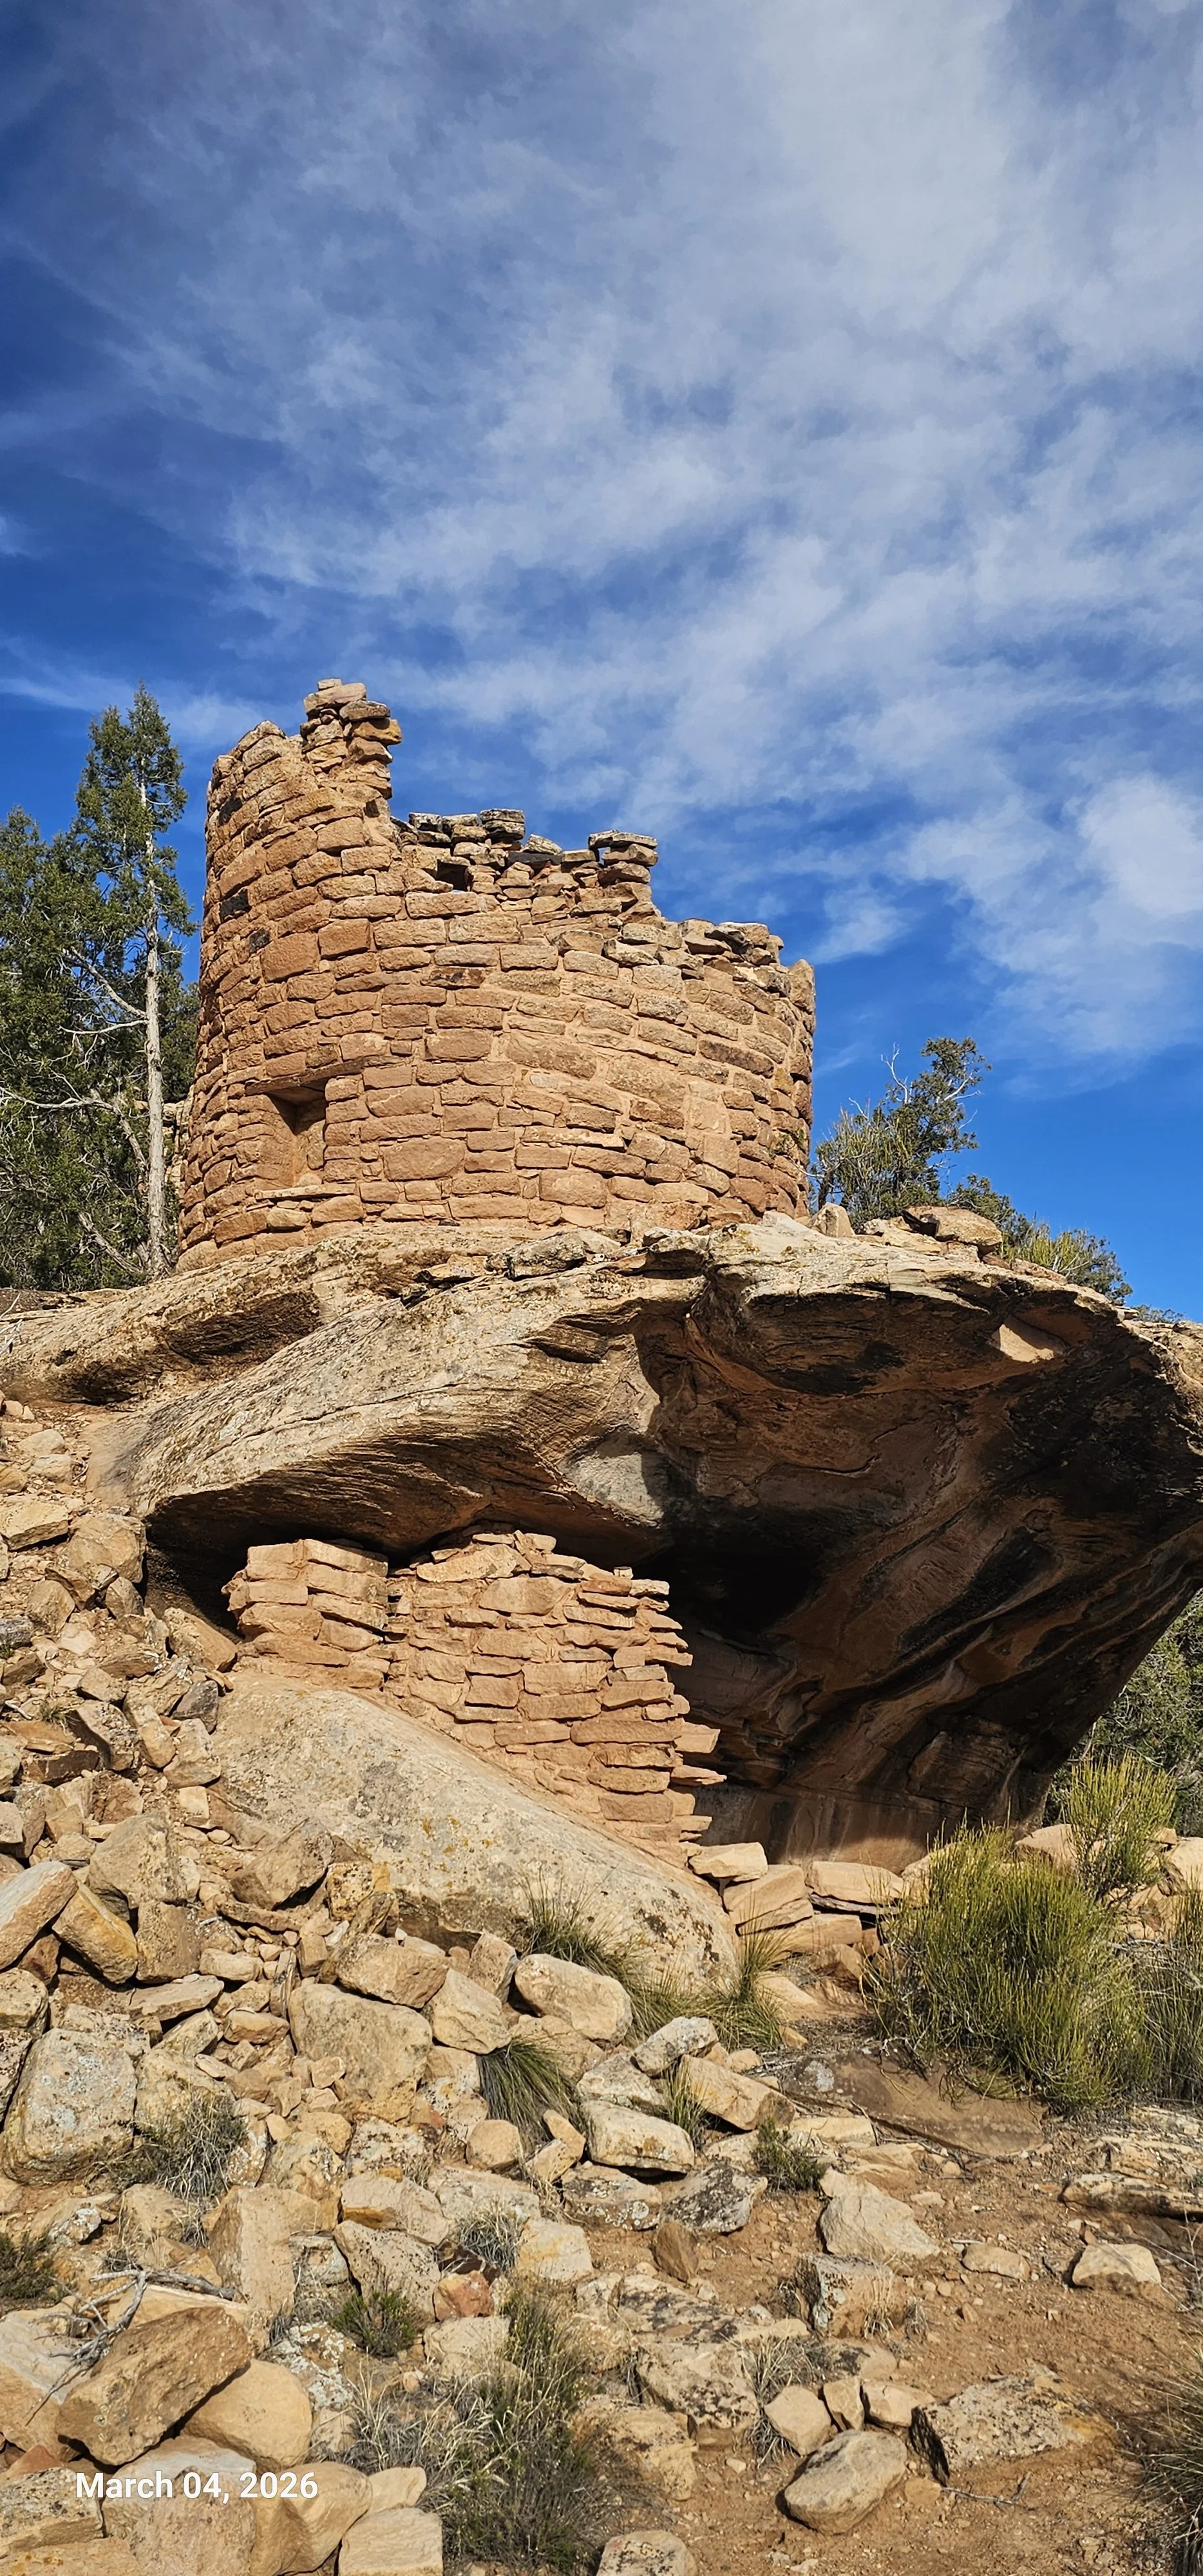
After Lowry, we visited Painted Hand Pueblo and walked down to see the tower that had been built over Kiva inside the Kiva We spotted one of the white handprints left by the early people..
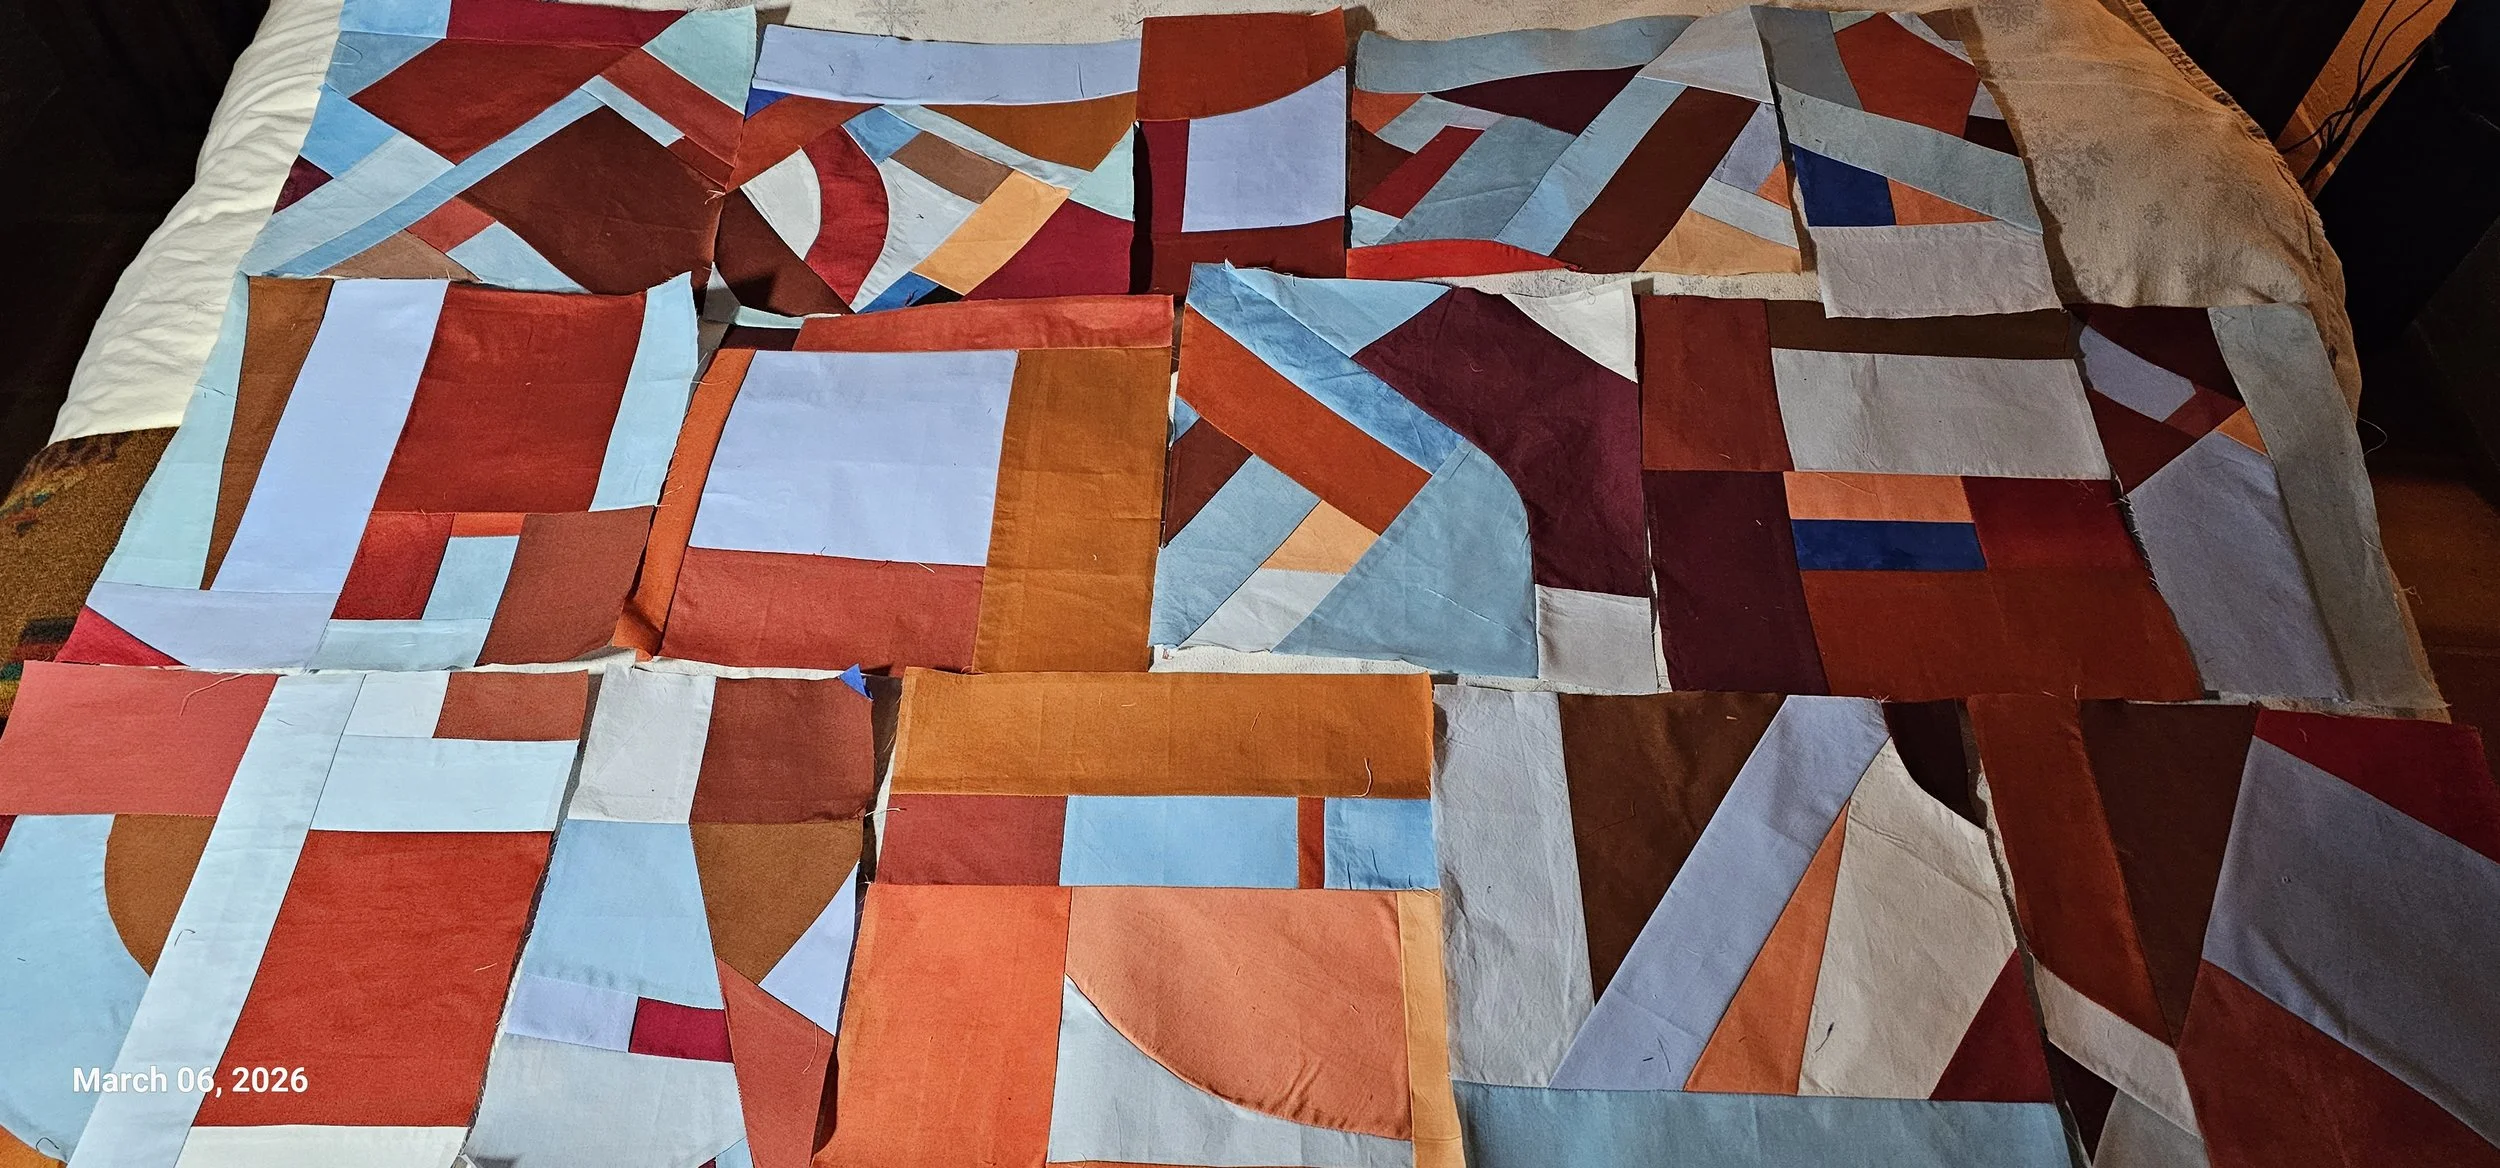
Today was a snowy day, so I stayed in for most of it and worked on sewing blocks inspired by the beautiful colors of the surrounding canyons. I’m hoping to eventually display these blocks on a larger background piece by hanging them on hooks so they can be arranged and rearranged. In a gallery setting, viewers would be able to touch the pieces and create their own compositions.
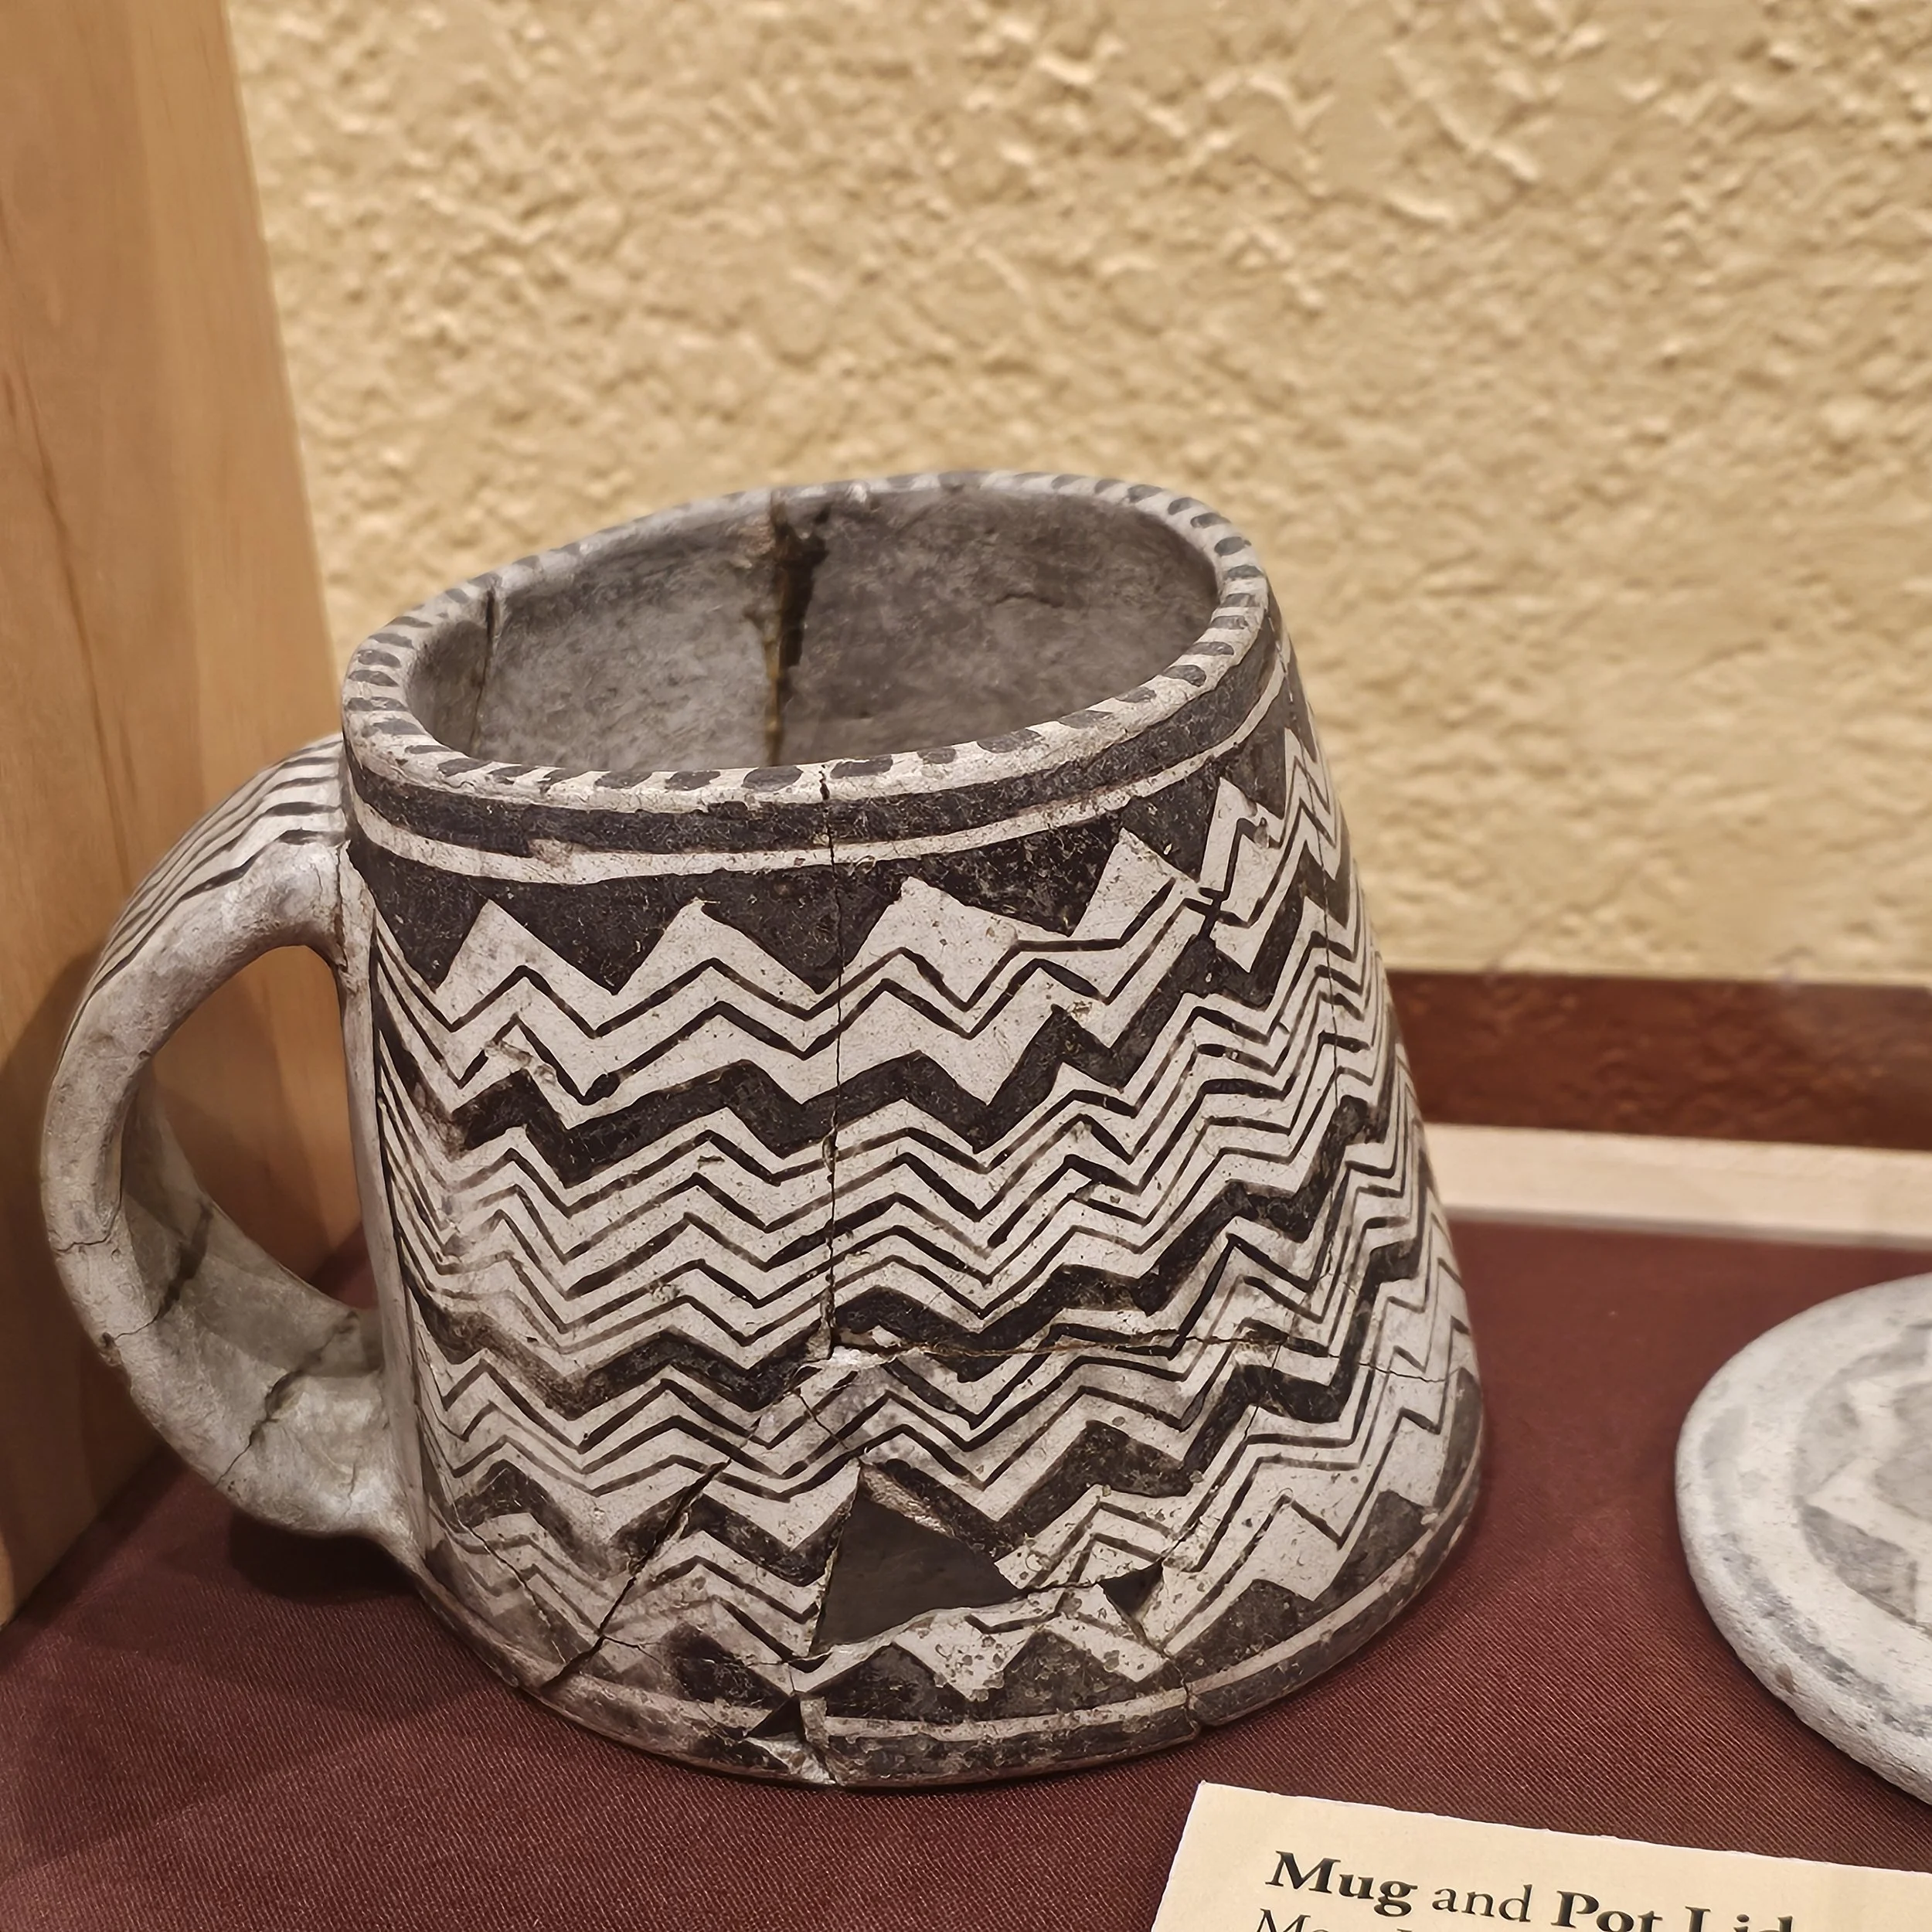
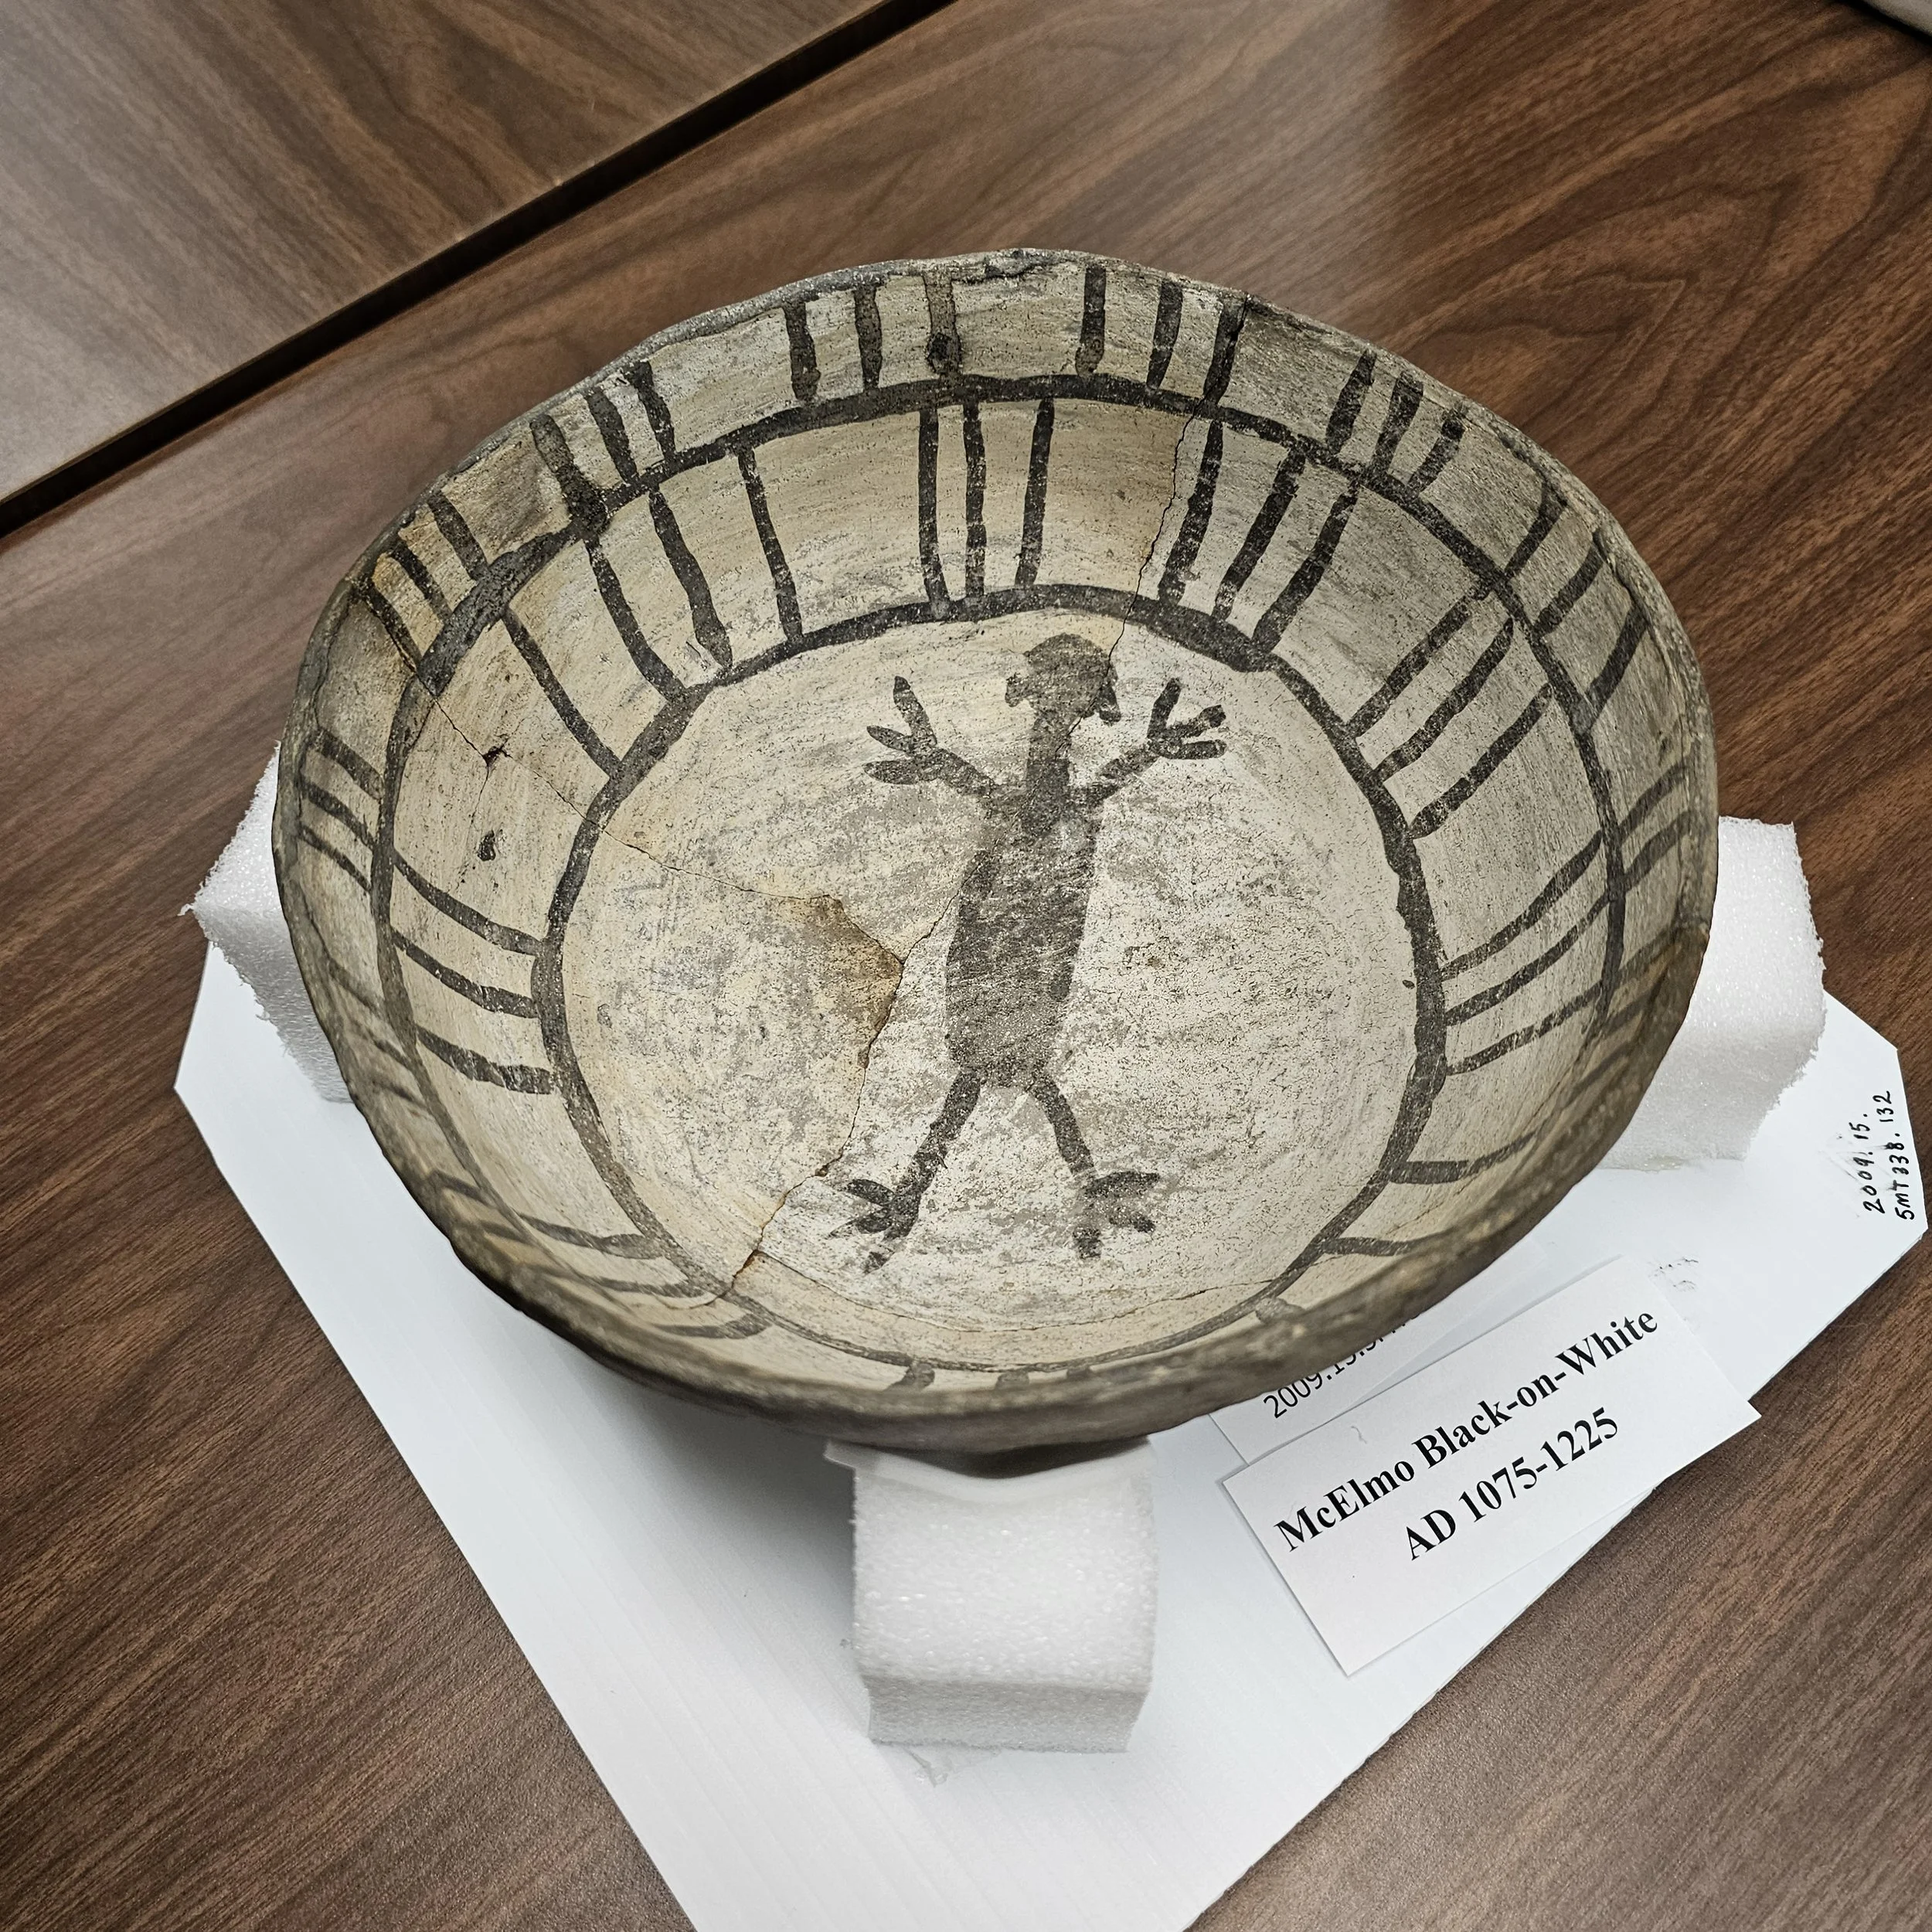
Each block will be finished with quilting designs inspired by patterns I’ve seen on pottery in the Canyons of the Ancients Visitor Center.

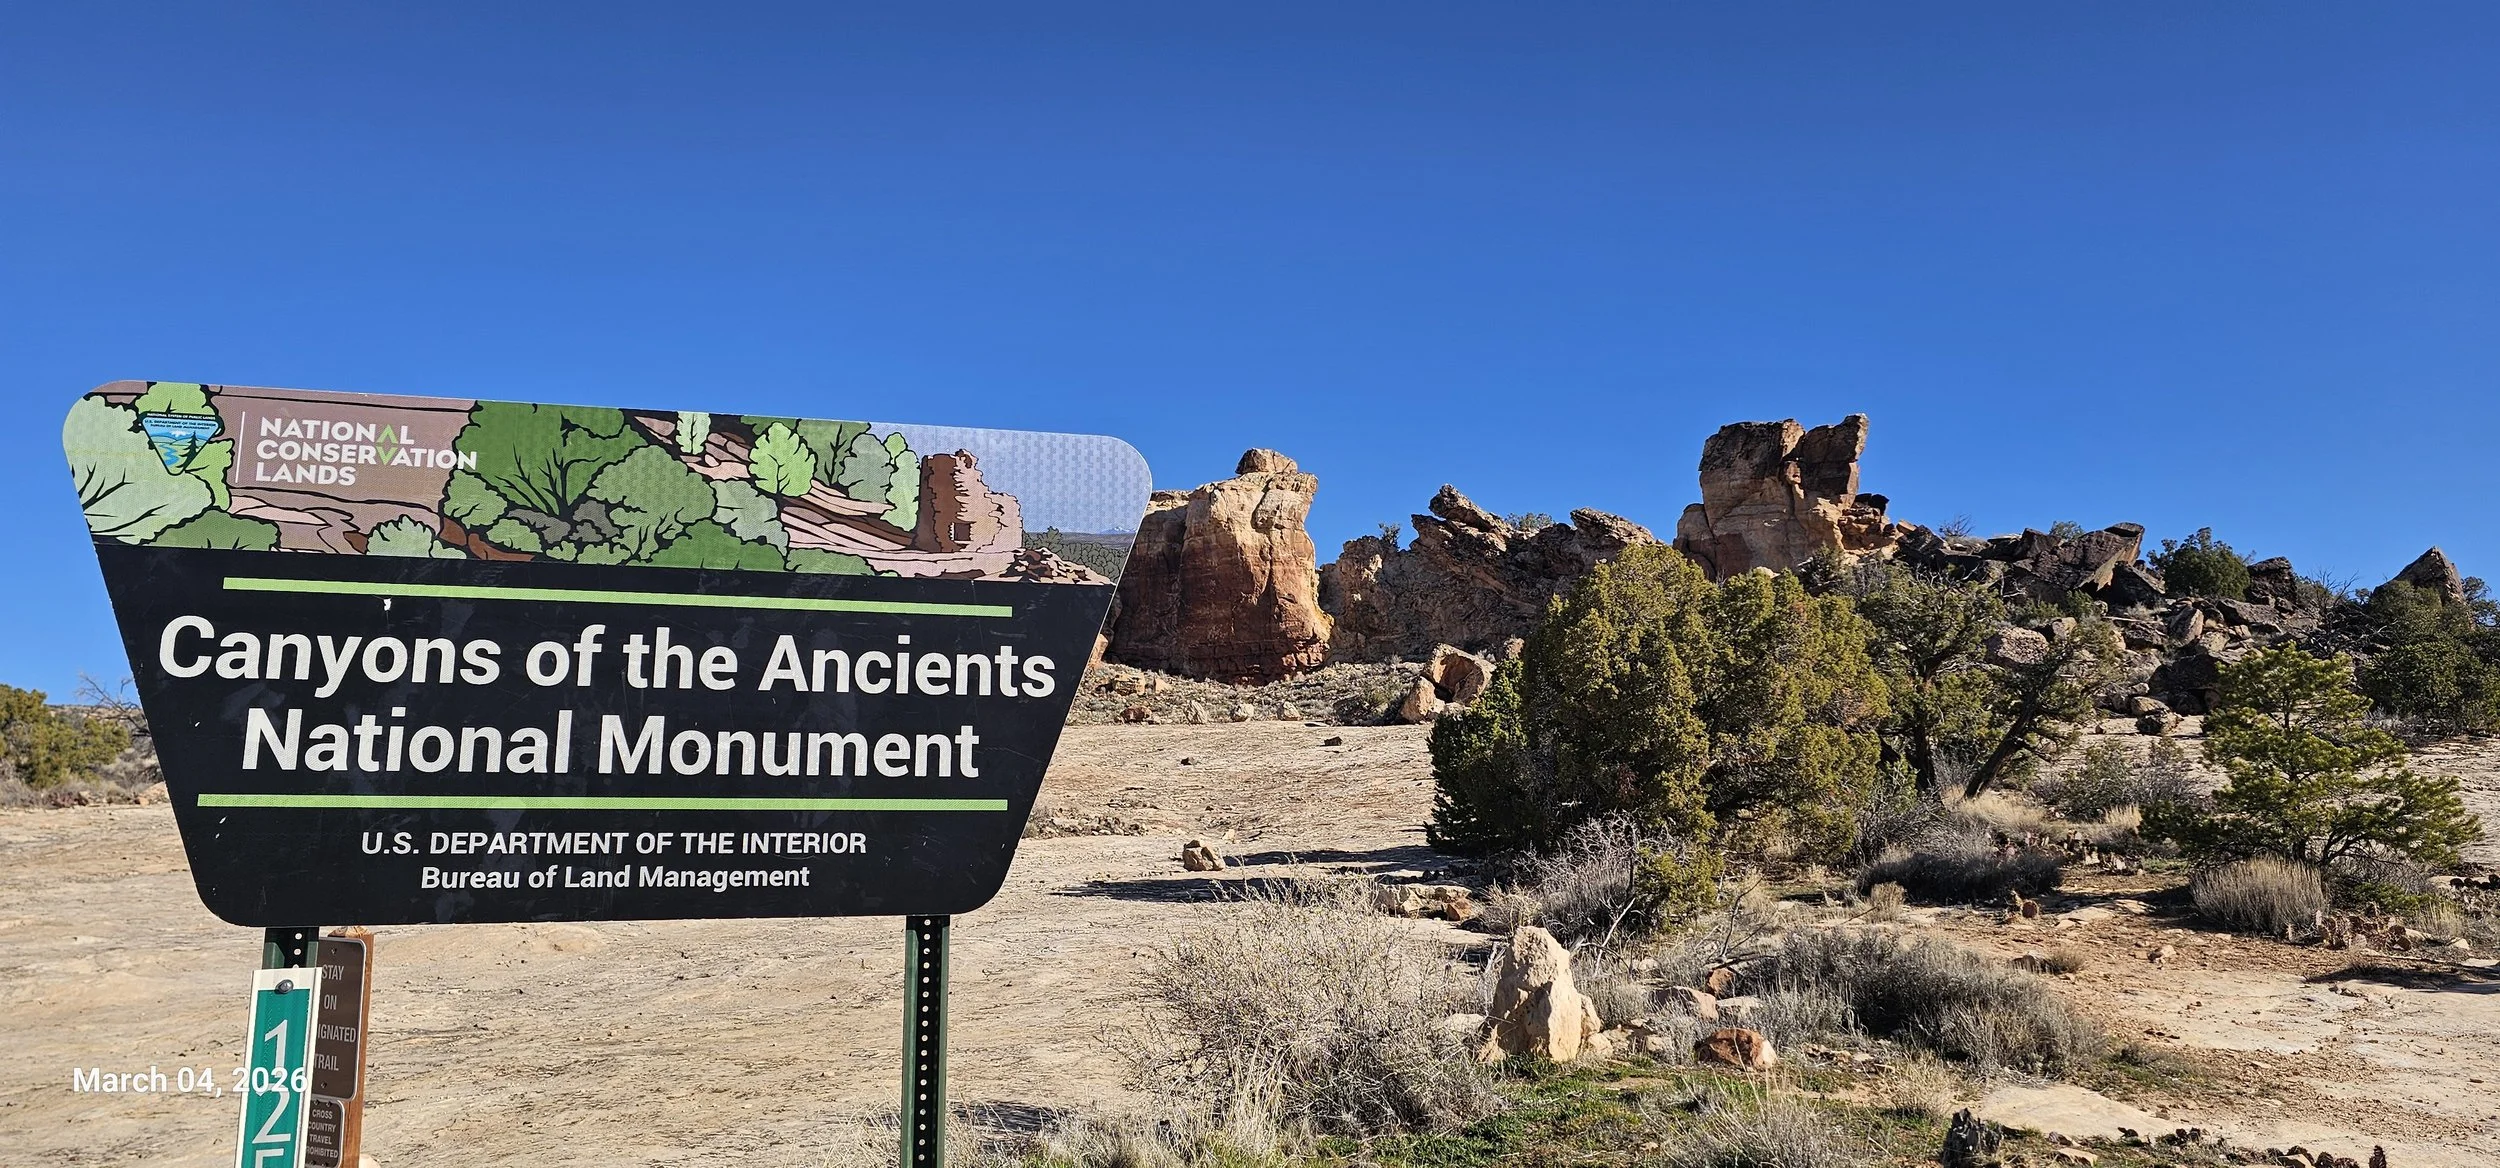
Artist in Residence
A dream come true for me to have been selected as the artist in residence at Canyons of the Ancients National Monument in southwestern Colorado.
During my first day, I had a wonderful orientation with Amala Posey-Monk, who also gave me a tour of the beautiful visitor center museum. I was fortunate to go on a short behind-the-scenes tour with the curator as well.
Years ago, during the Dolores River Project, a dam was constructed to create the McPhee Reservoir. Before the area was flooded, archaeologists conducted a massive excavation and built this museum to house the nearly three million artifacts that were recovered.
This part of Colorado is rich with cultural sites. Thirteen of these sites are carefully preserved and open to the public, while the rest of the land has been allowed to return to its natural state in accordance with the wishes of the Pueblo tribes.
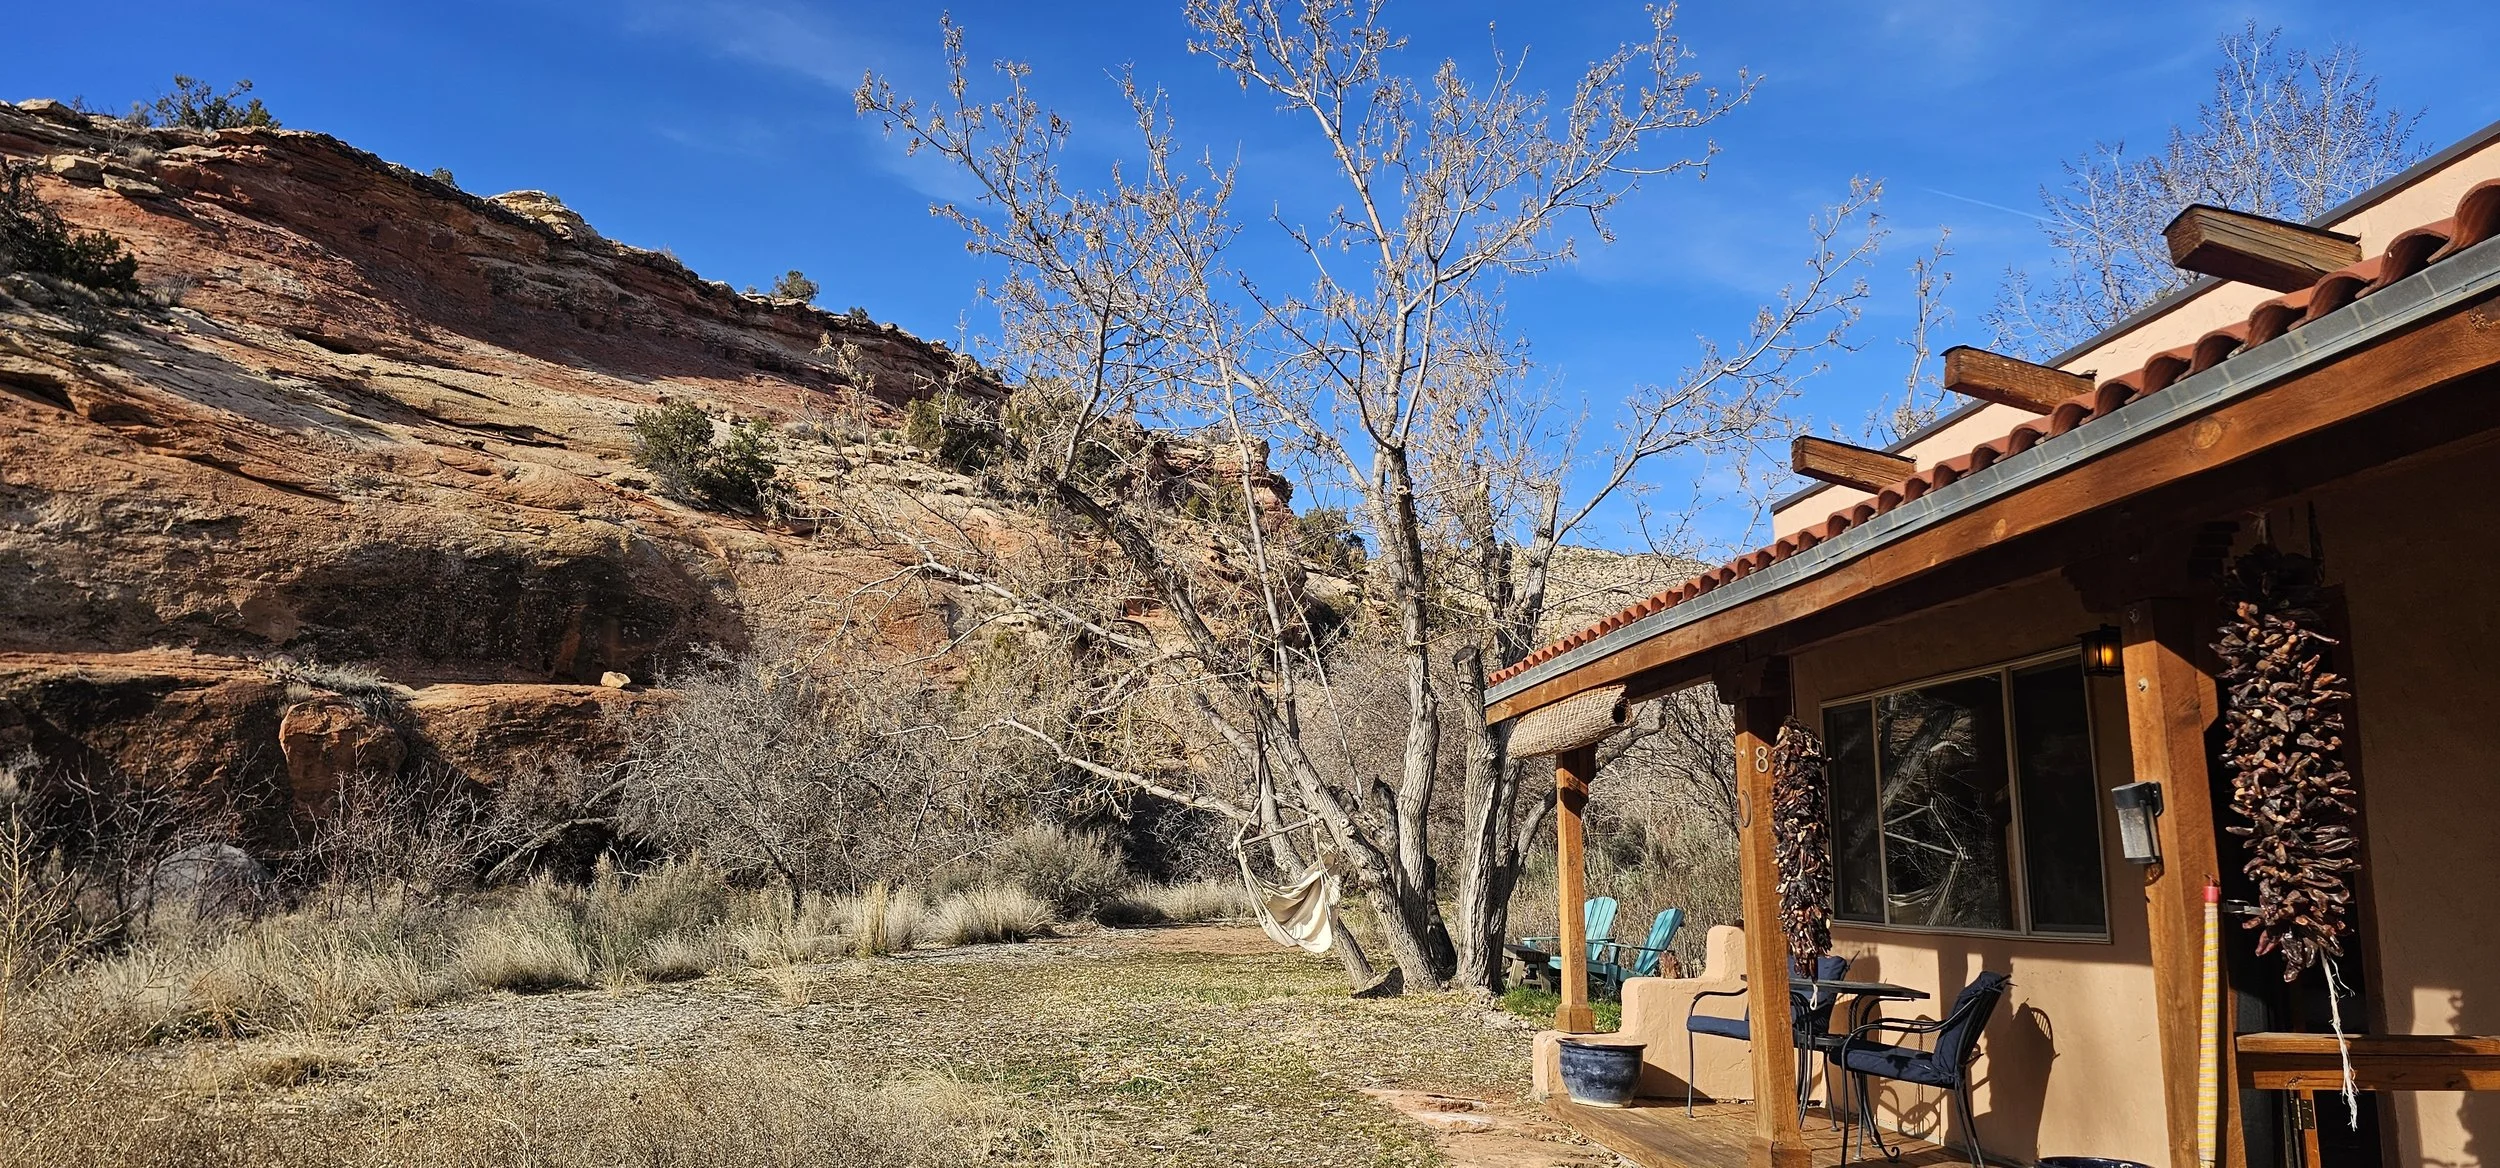
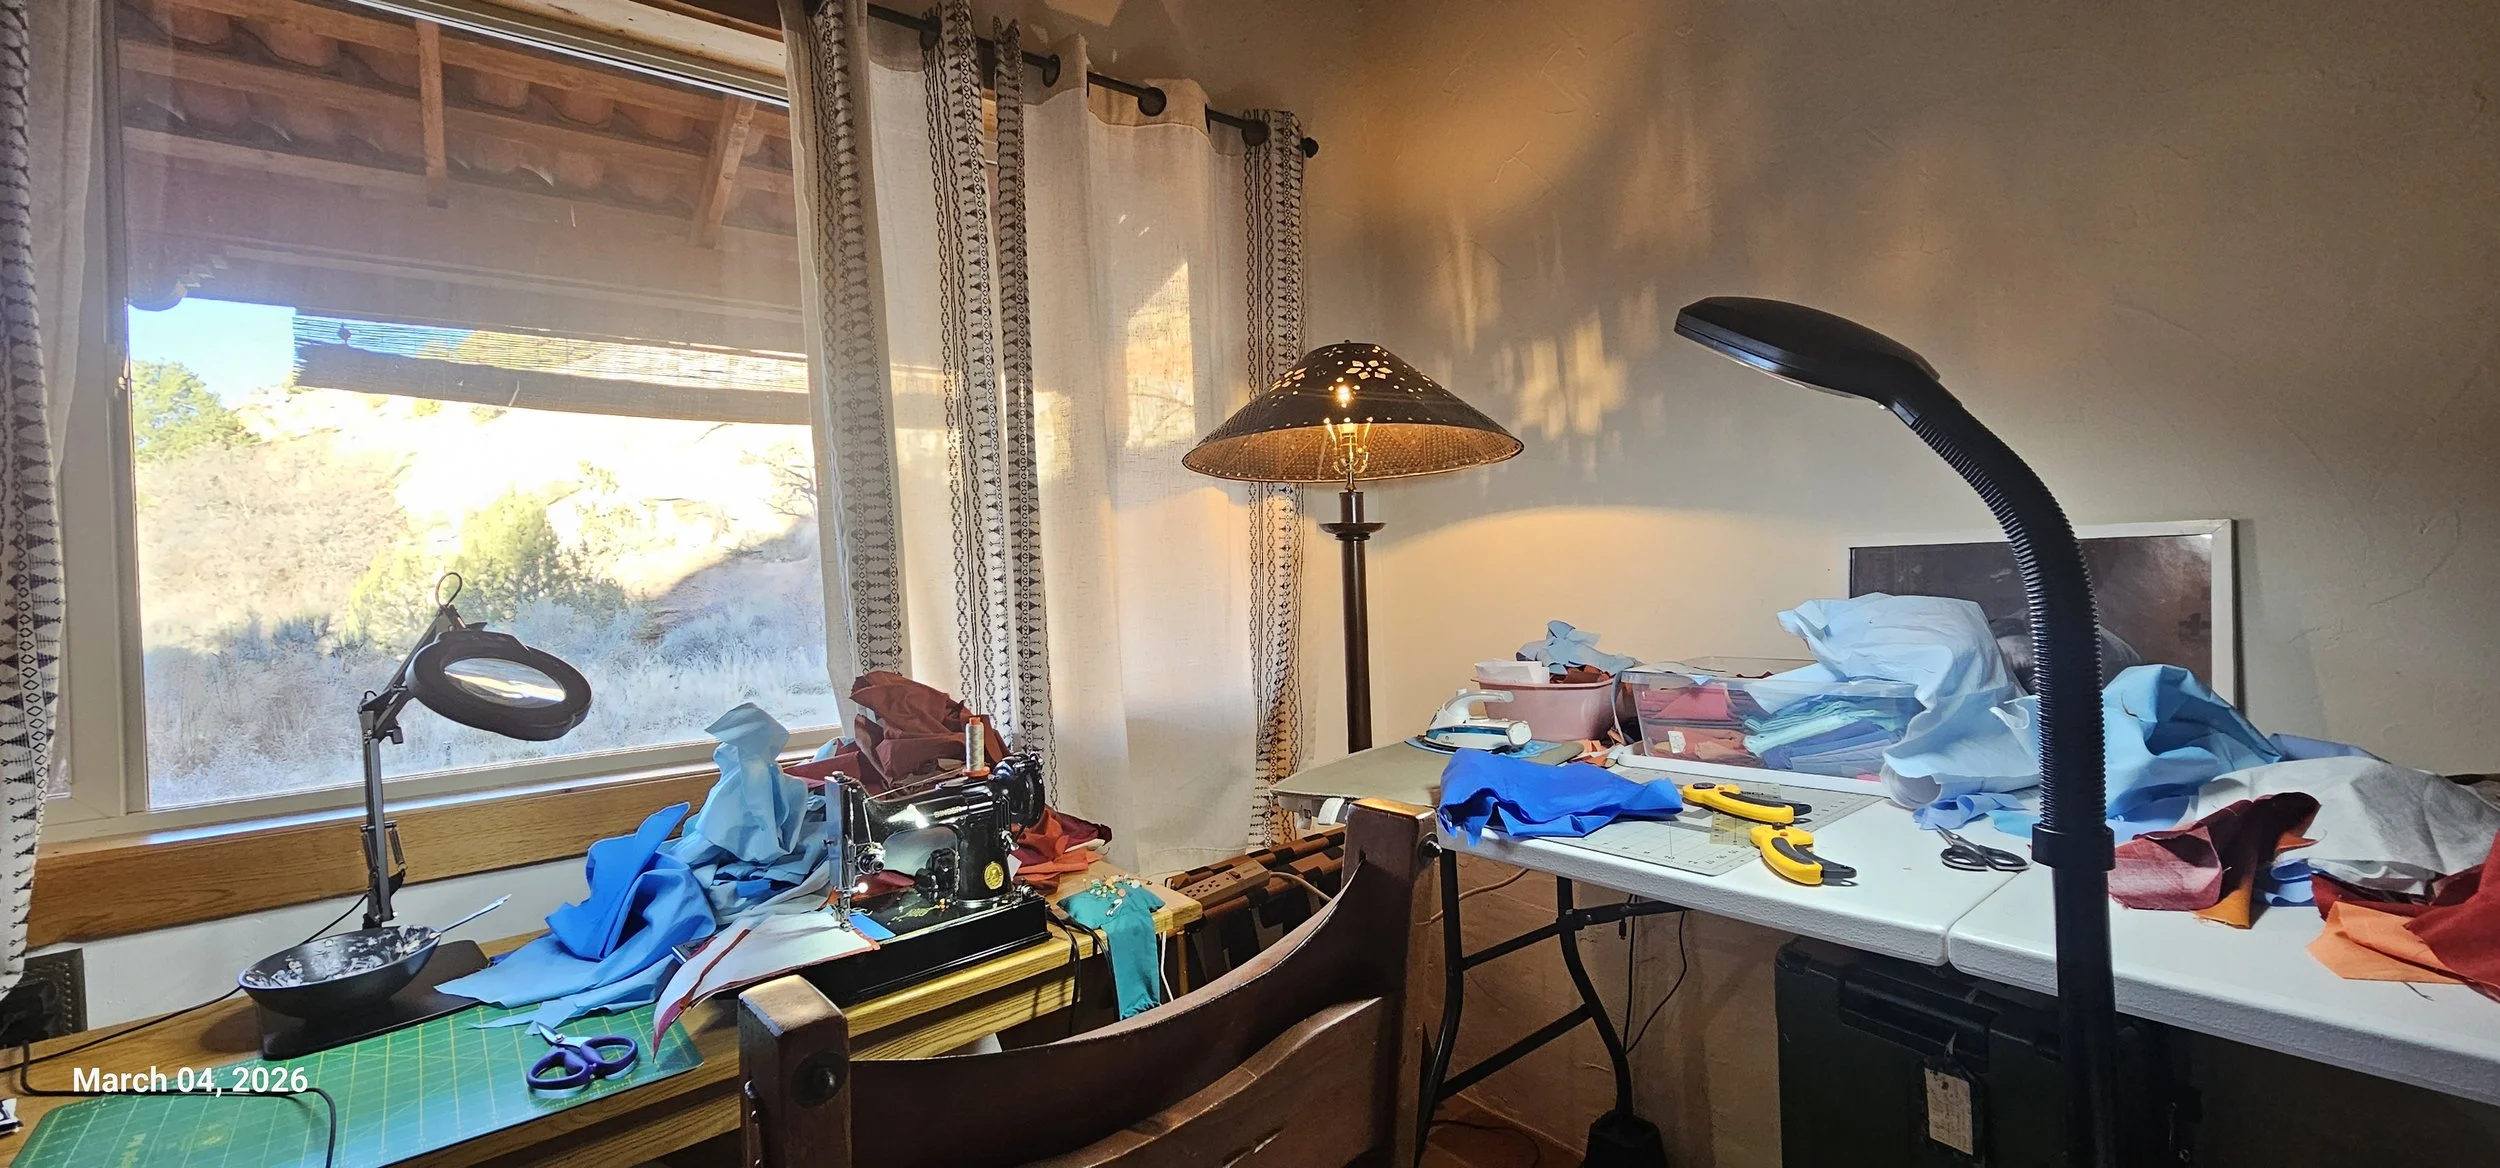
This residency is sponsored by the Southwest Colorado Canyons Alliance, who are housing me at the beautiful Ancient Echoes at Kelly’s Place on the southern edge of Canyons of the Ancients National Monument. My lovely casita looks out onto colorful cliffs, and there are many cultural sites located right here on the property.
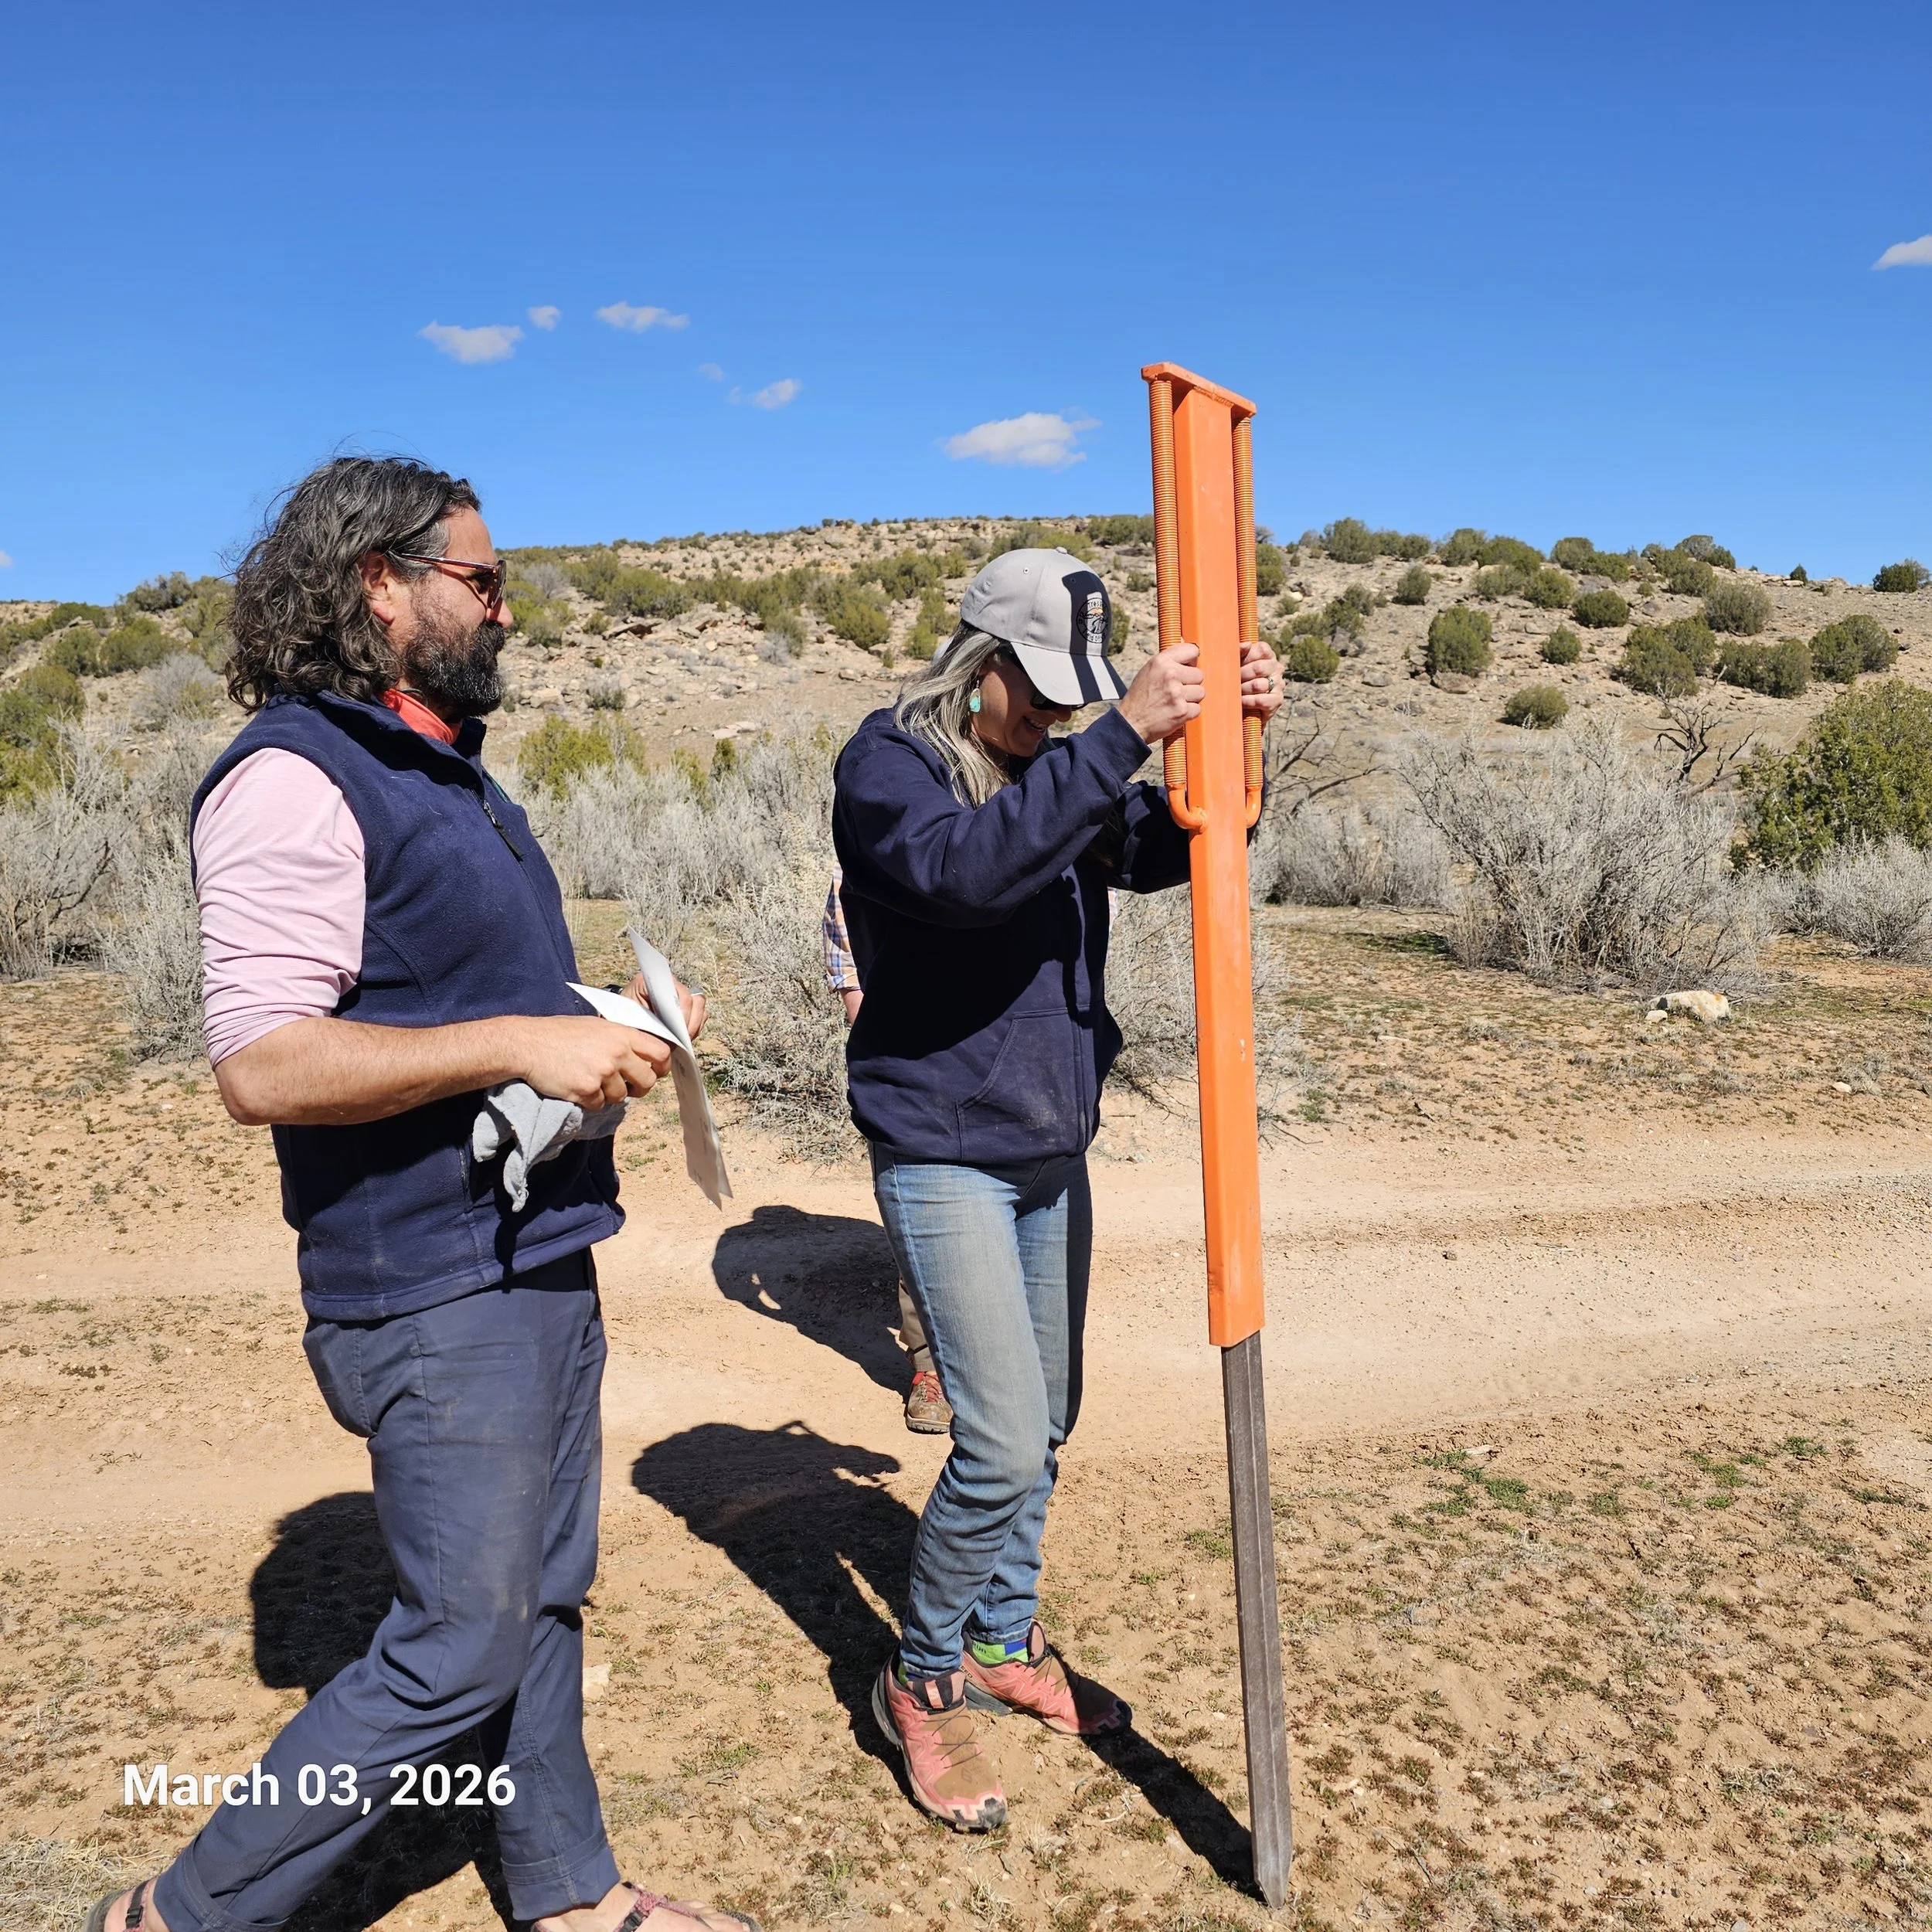
On the second day, I toured the monument with the monument manager, Ray, along with Jeff and Amala. We traveled deep into the backcountry, looking for areas where people had been driving off-road where they weren’t supposed to and putting up signs to indicate that off-road vehicle travel is not allowed.
The monument covers an enormous landscape, and it was a wonderful opportunity to see so much of it while riding along with the park staff. Having a tour of the area with the rangers gave me a much better sense of the scale and character of this remarkable place.
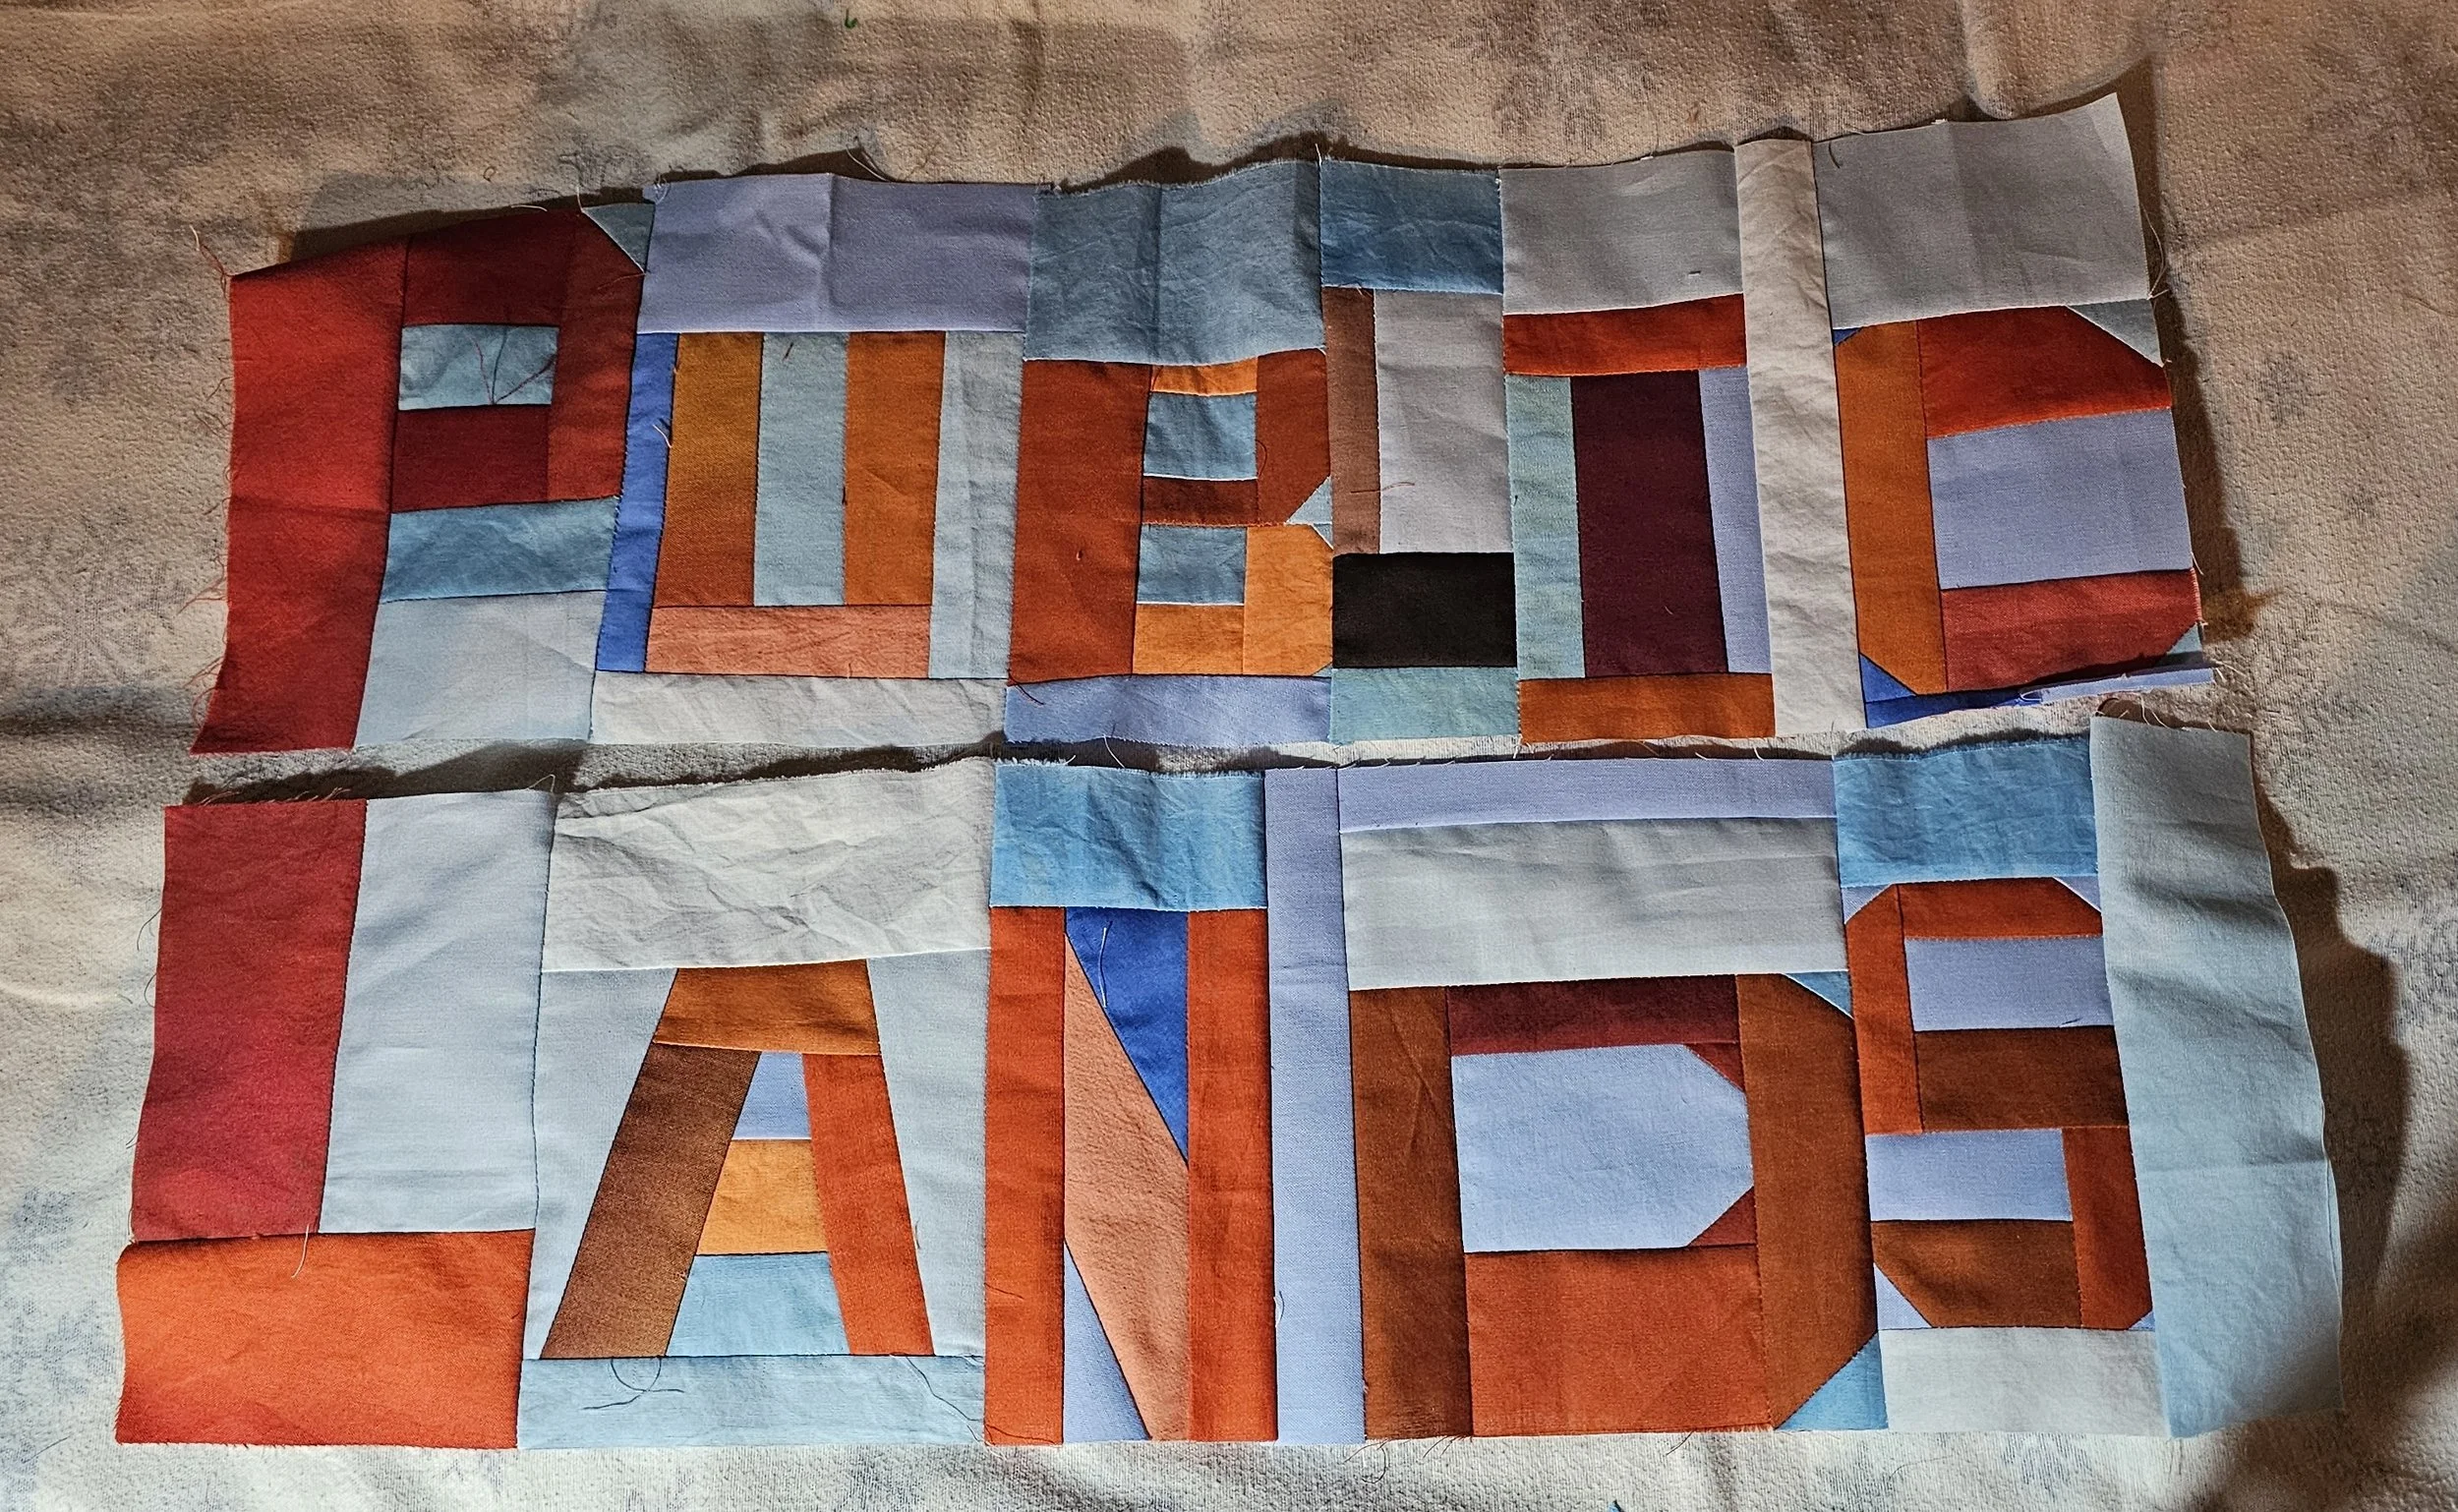
I’ve set up a small sewing area in my casita and have been working on a couple of projects inspired by the colors of the surrounding landscape. This piece features some improv lettering. I’m planning to create a series of phrases about protecting public lands in this style and combine them into a larger art quilt.
Join me in the next post to see some spectacular pictures of the landscape.
Credit Card Machine Printing Press
I recently watched a video of Sarah Whorf making a printing press from a credit card knuckle buster. I was immediately drawn to this as I used one for years in my pottery business. Back in the day I imprinted the cards on the paper/carbon receipts and took them to the bank. As time passed the banks would no longer take the slips and I had to telephone them in one at a time when I got home from a show. Next, when I finally got an electric machine on the landline in the gallery, I would bring the imprinted slips back from arts and craft shows and manually enter them into the machine. Of course, eventually I got a portable card reader to take credit card payments when on the road.
I had that knuckle buster for years but finally threw it away.
Wow, when I saw this simple conversion to a printing press I was intrigued. So, I bought one on EBay and tried it out.
It worked great. I used different amounts of card shims depending on the thickness of the block. It worked with my rubber carved blocks, the cut our foam blocks and the lino blocks. I used Versafine Clair stamp pads on the first tests which worked fine for the rubber and foam but was not good enough for the lino. The next day I used the Caligo Safewash ink on the lino block and that worked much better.
If you want to make one of these watch Sarah’s video.Printing on Modified Credit Card Imprinters - Sarah Whorf

Puzzle Block Print
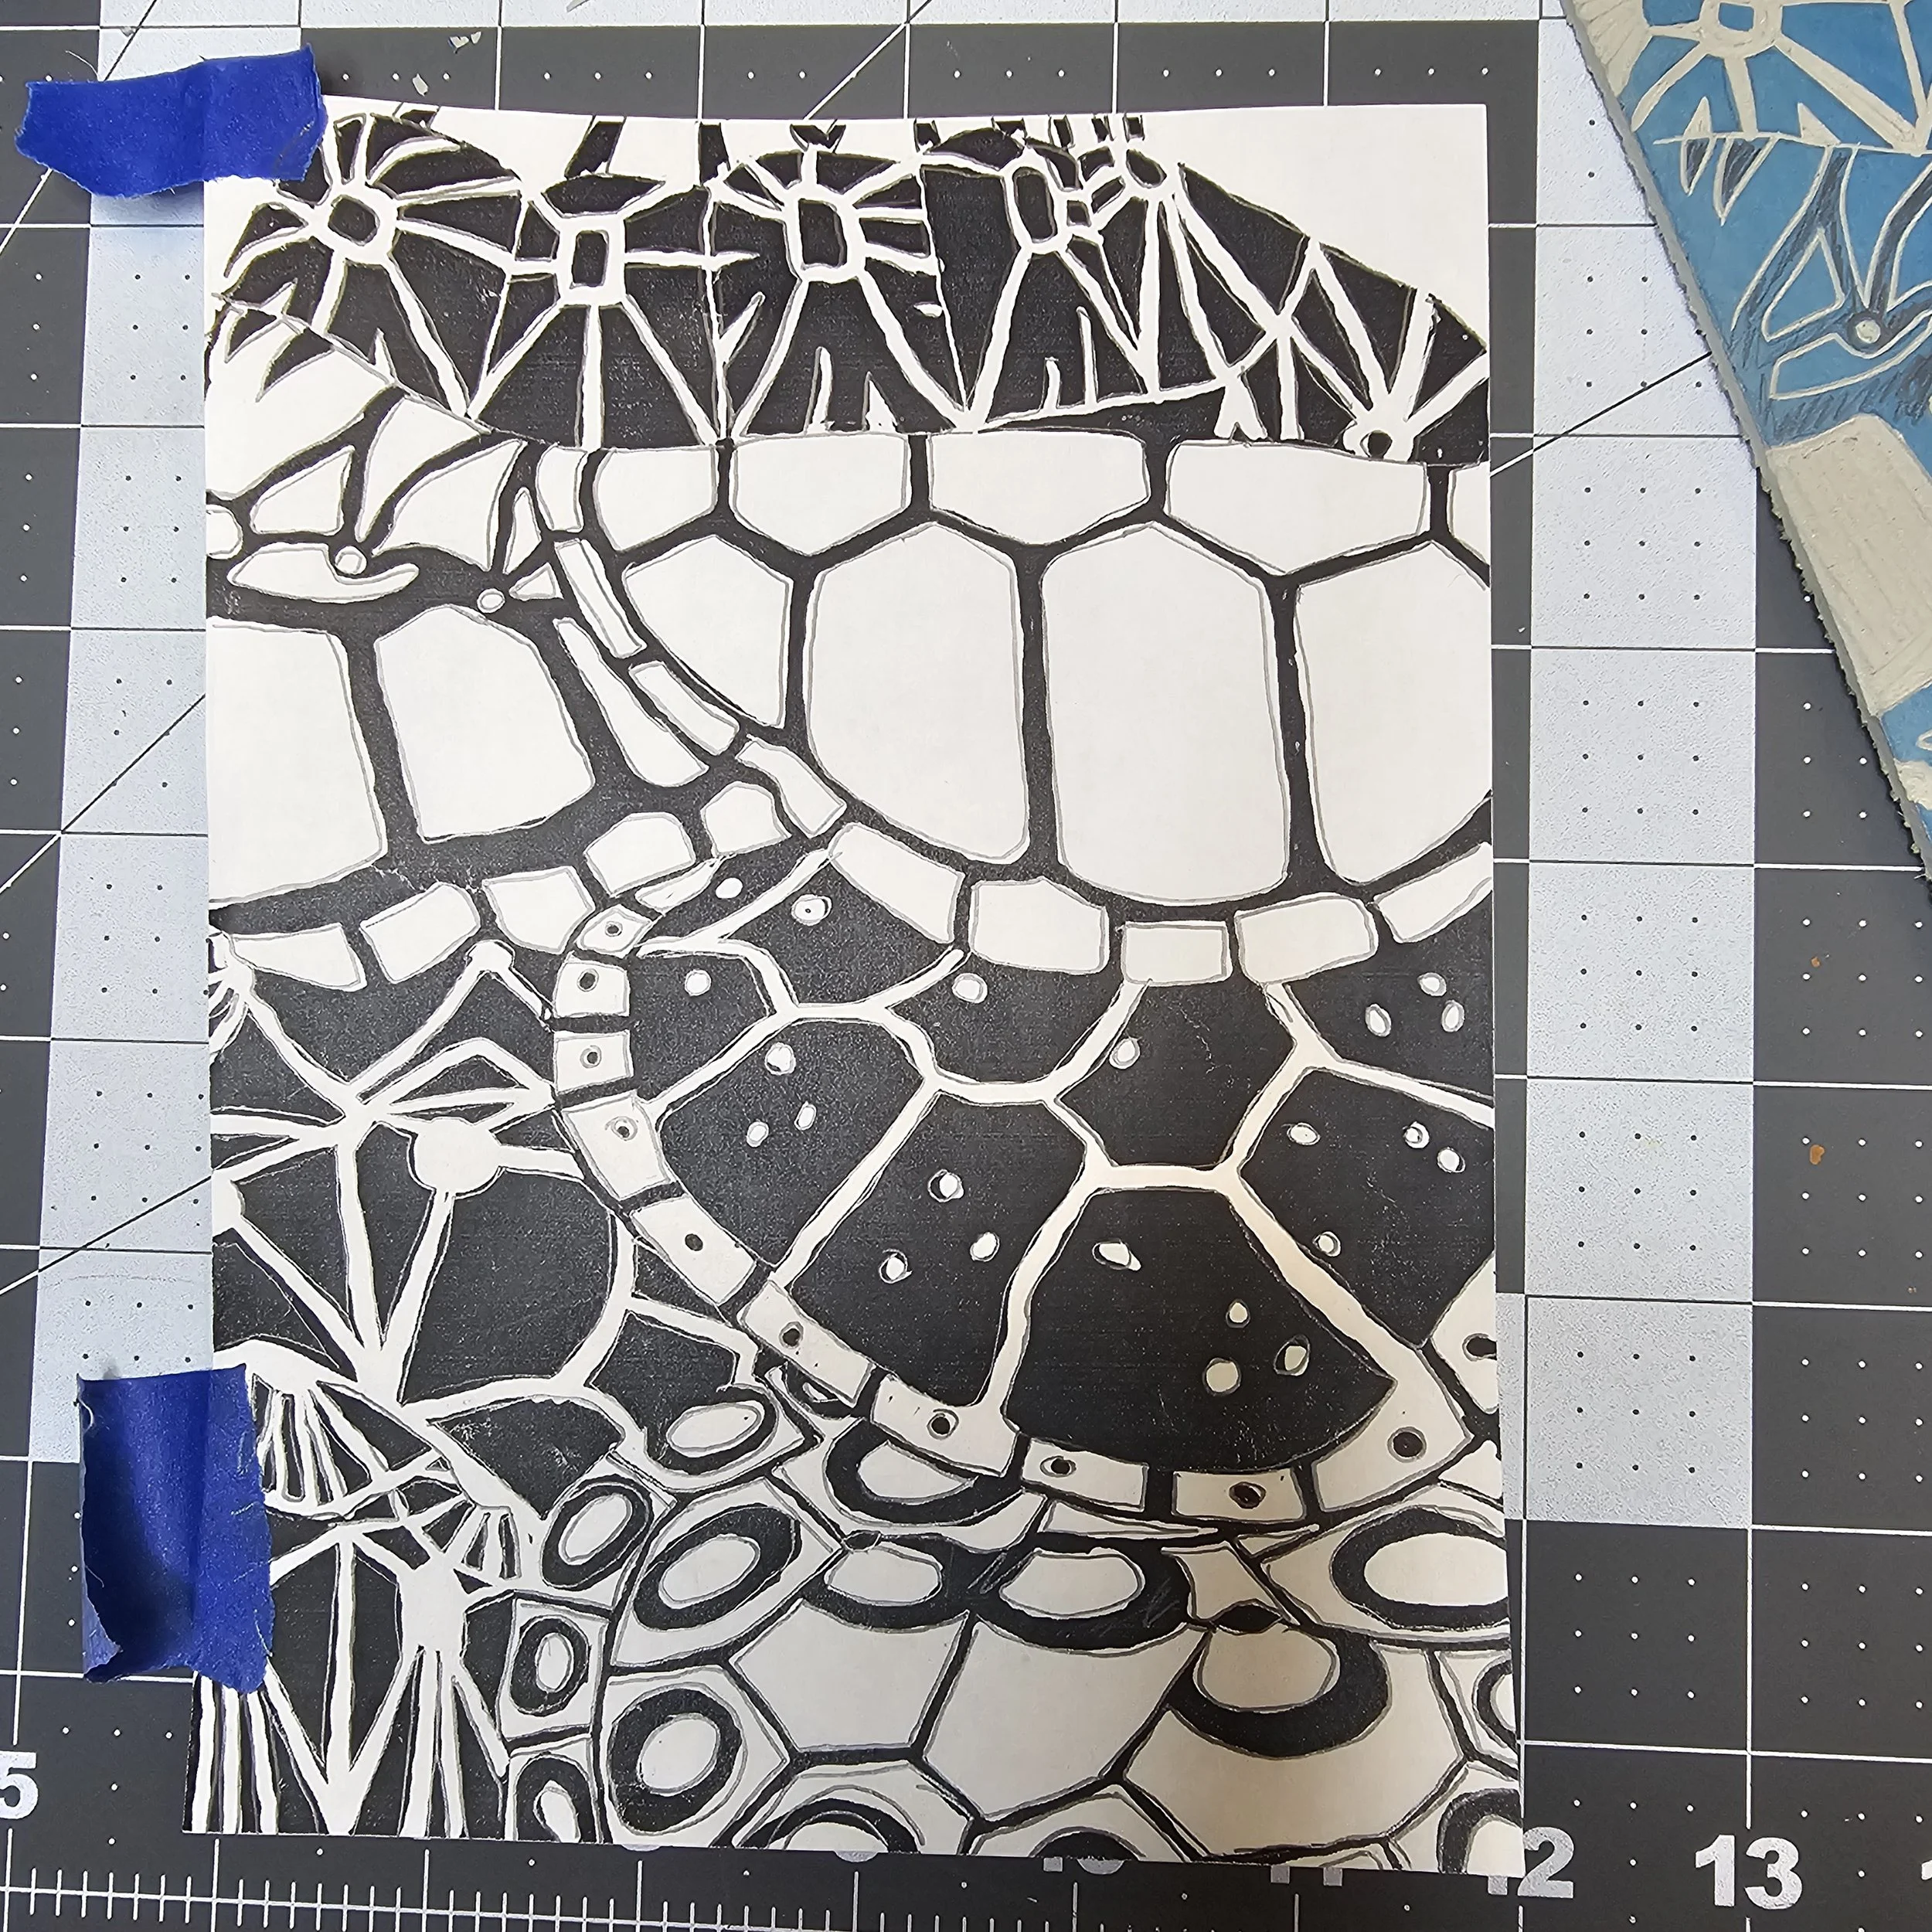
This block from one of my images from Joshua Tree National Park was carved in the RV on a trip in January 2026. I stained the block blue to see the carving details as I carved. In the southwest we are known for clear intense blue sky and the carved block shows just what I wanted.
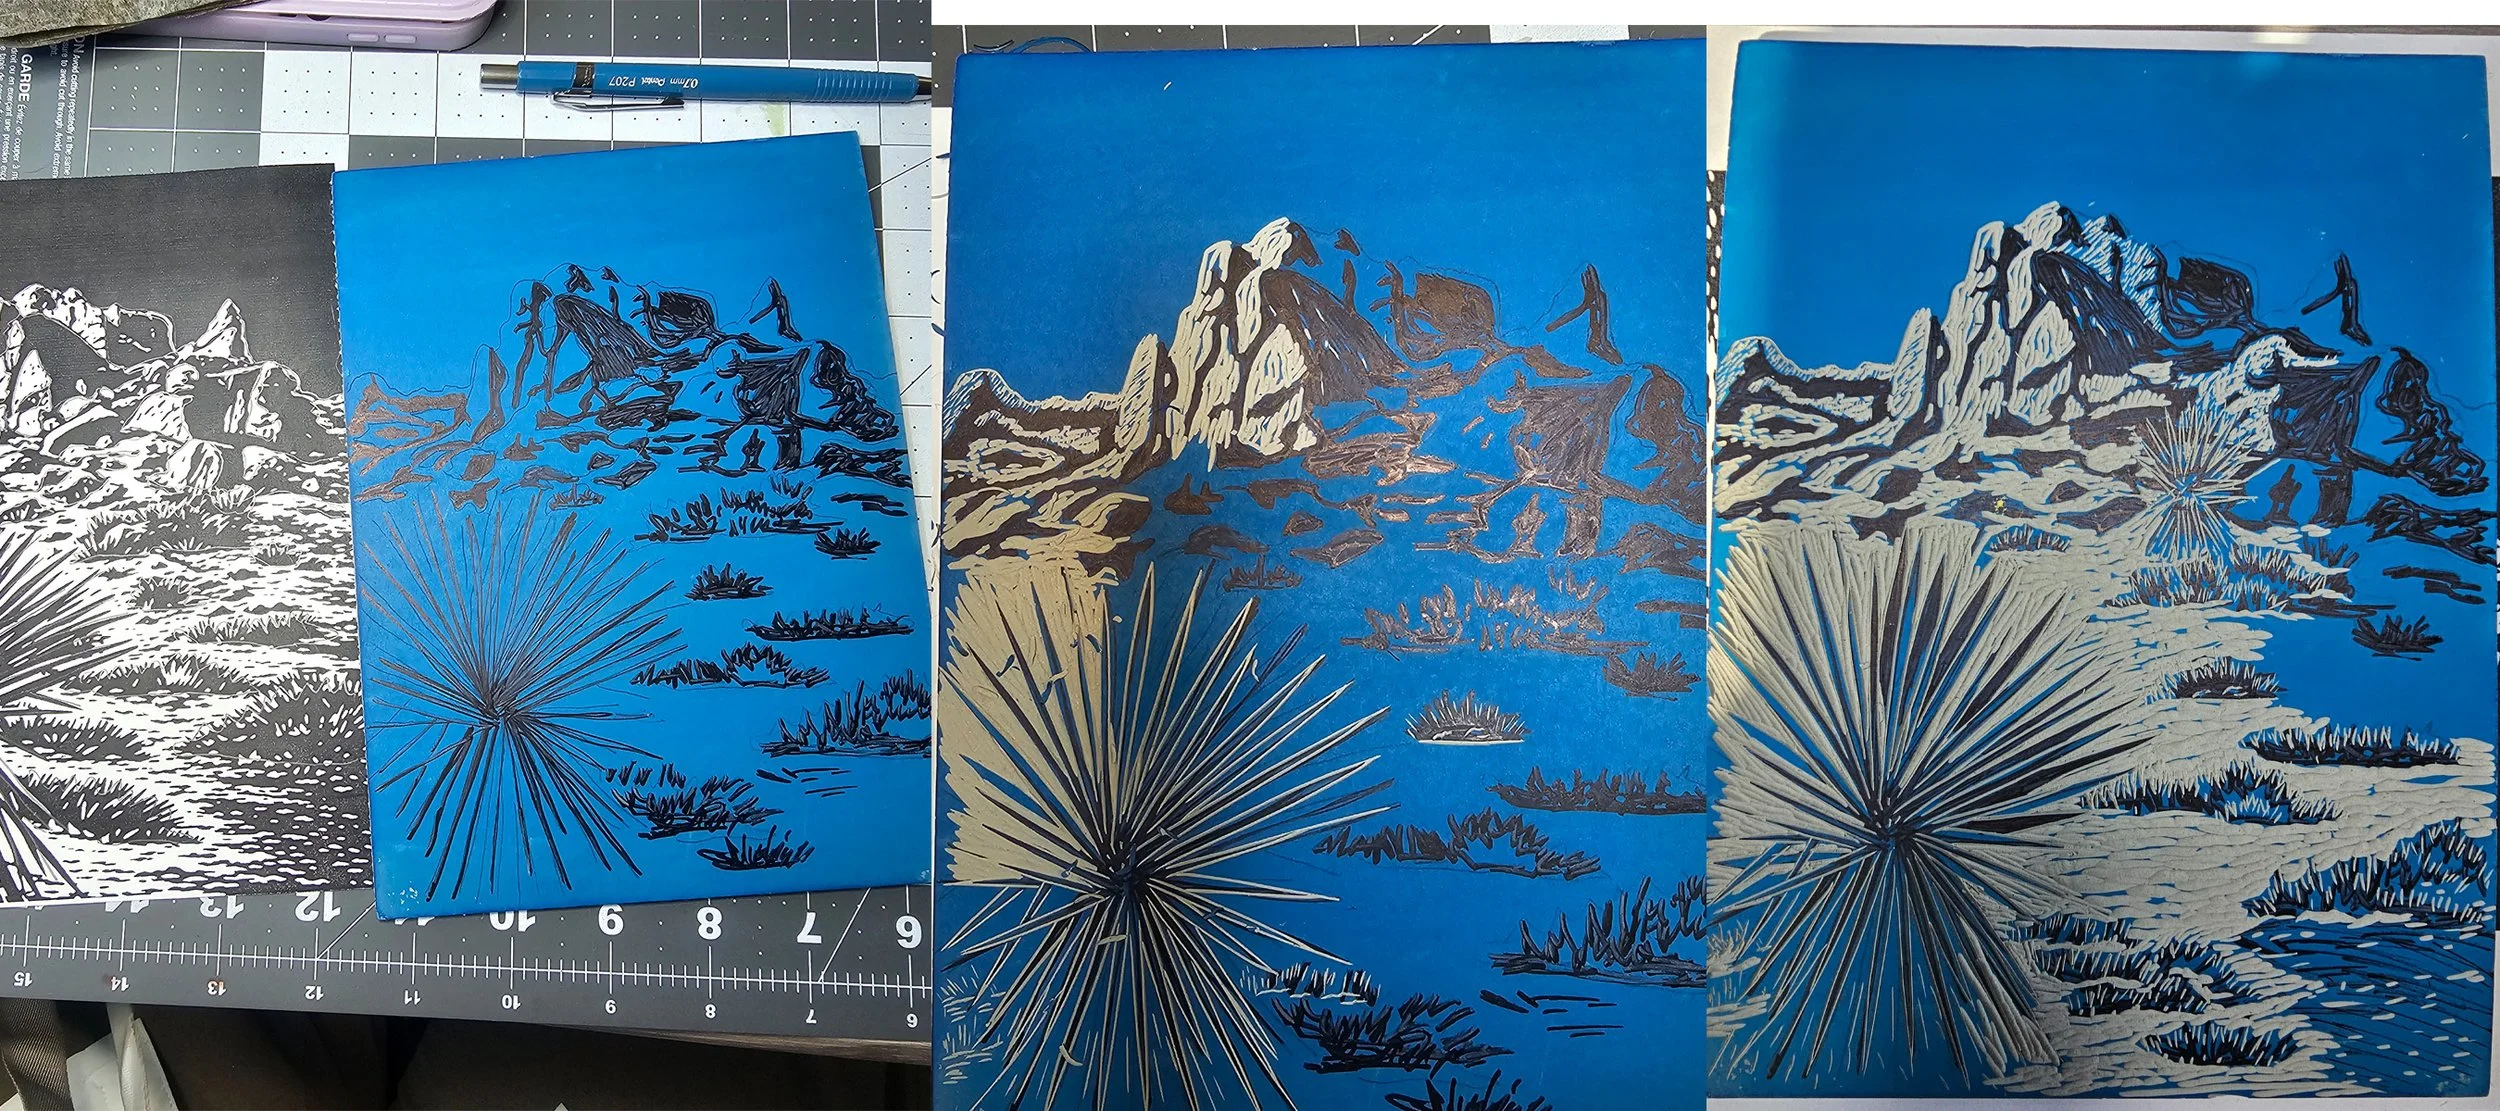
Someone online suggested to achieve this effect that I cut the block into two parts and ink each separately. Then only one print needs to be pulled..
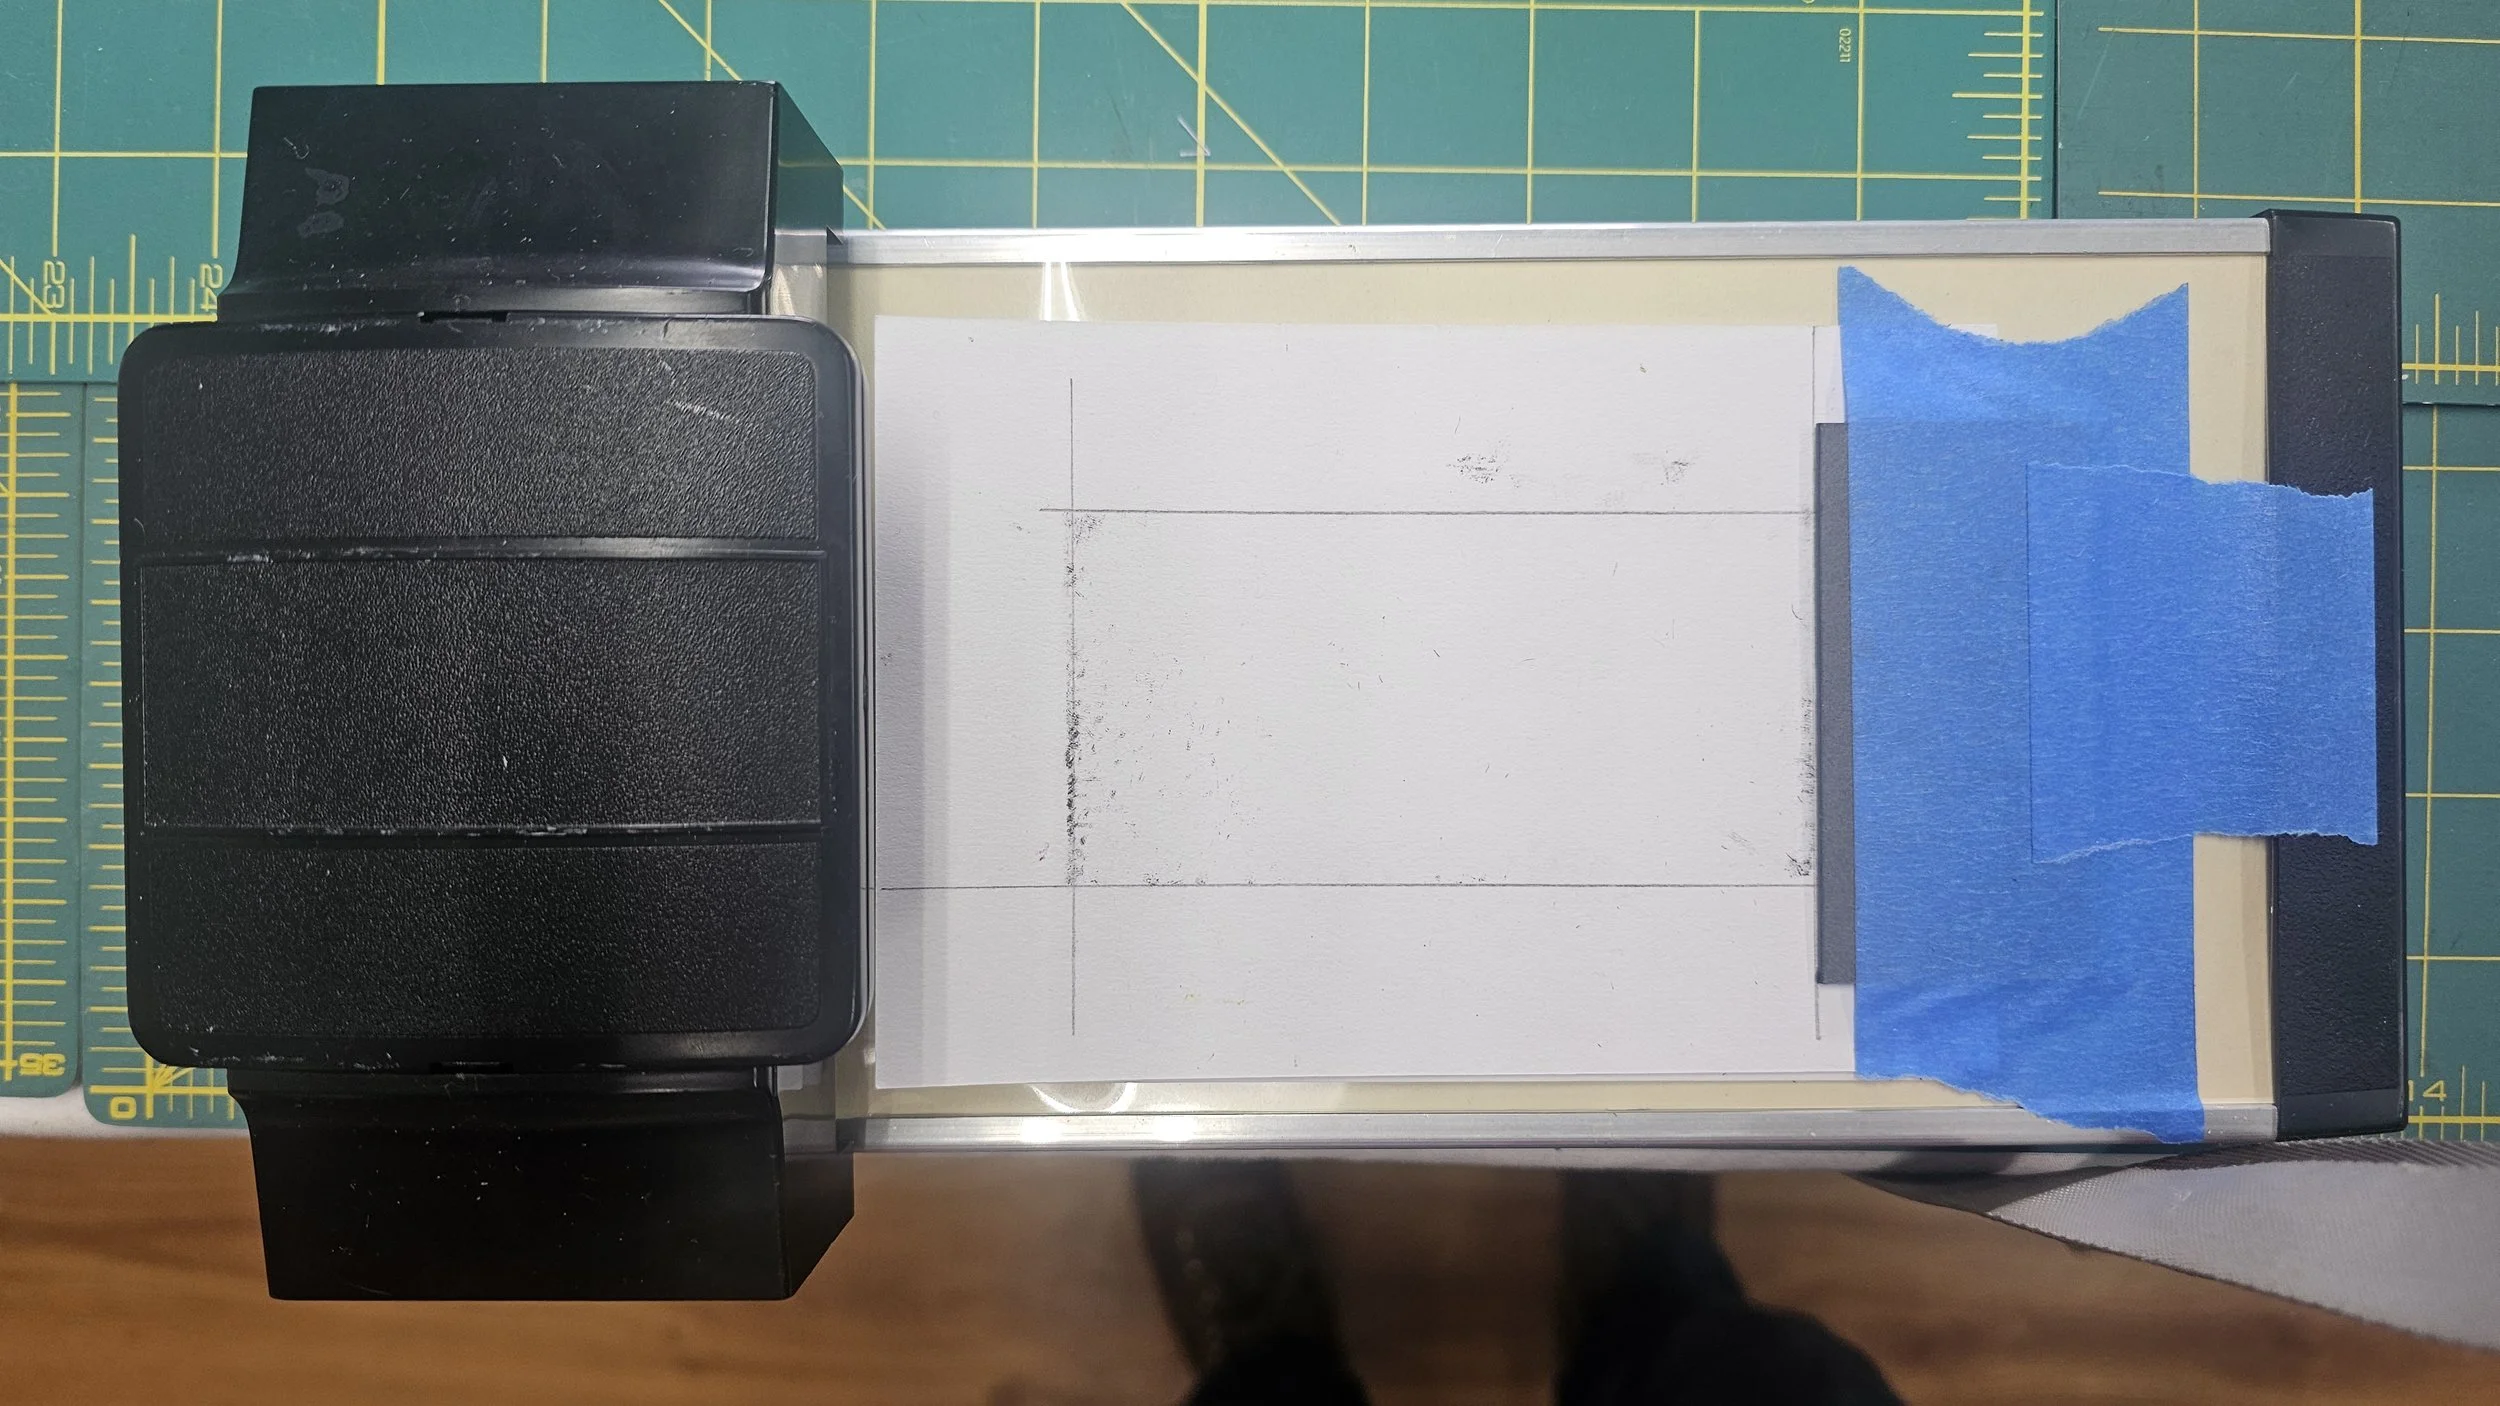
Block cut apart and block inked up with Caligo Safe Wash Ink in the registration board.
I was pretty happy with the results after I figured out how to not move the paper so I didn’t get a weird edge.
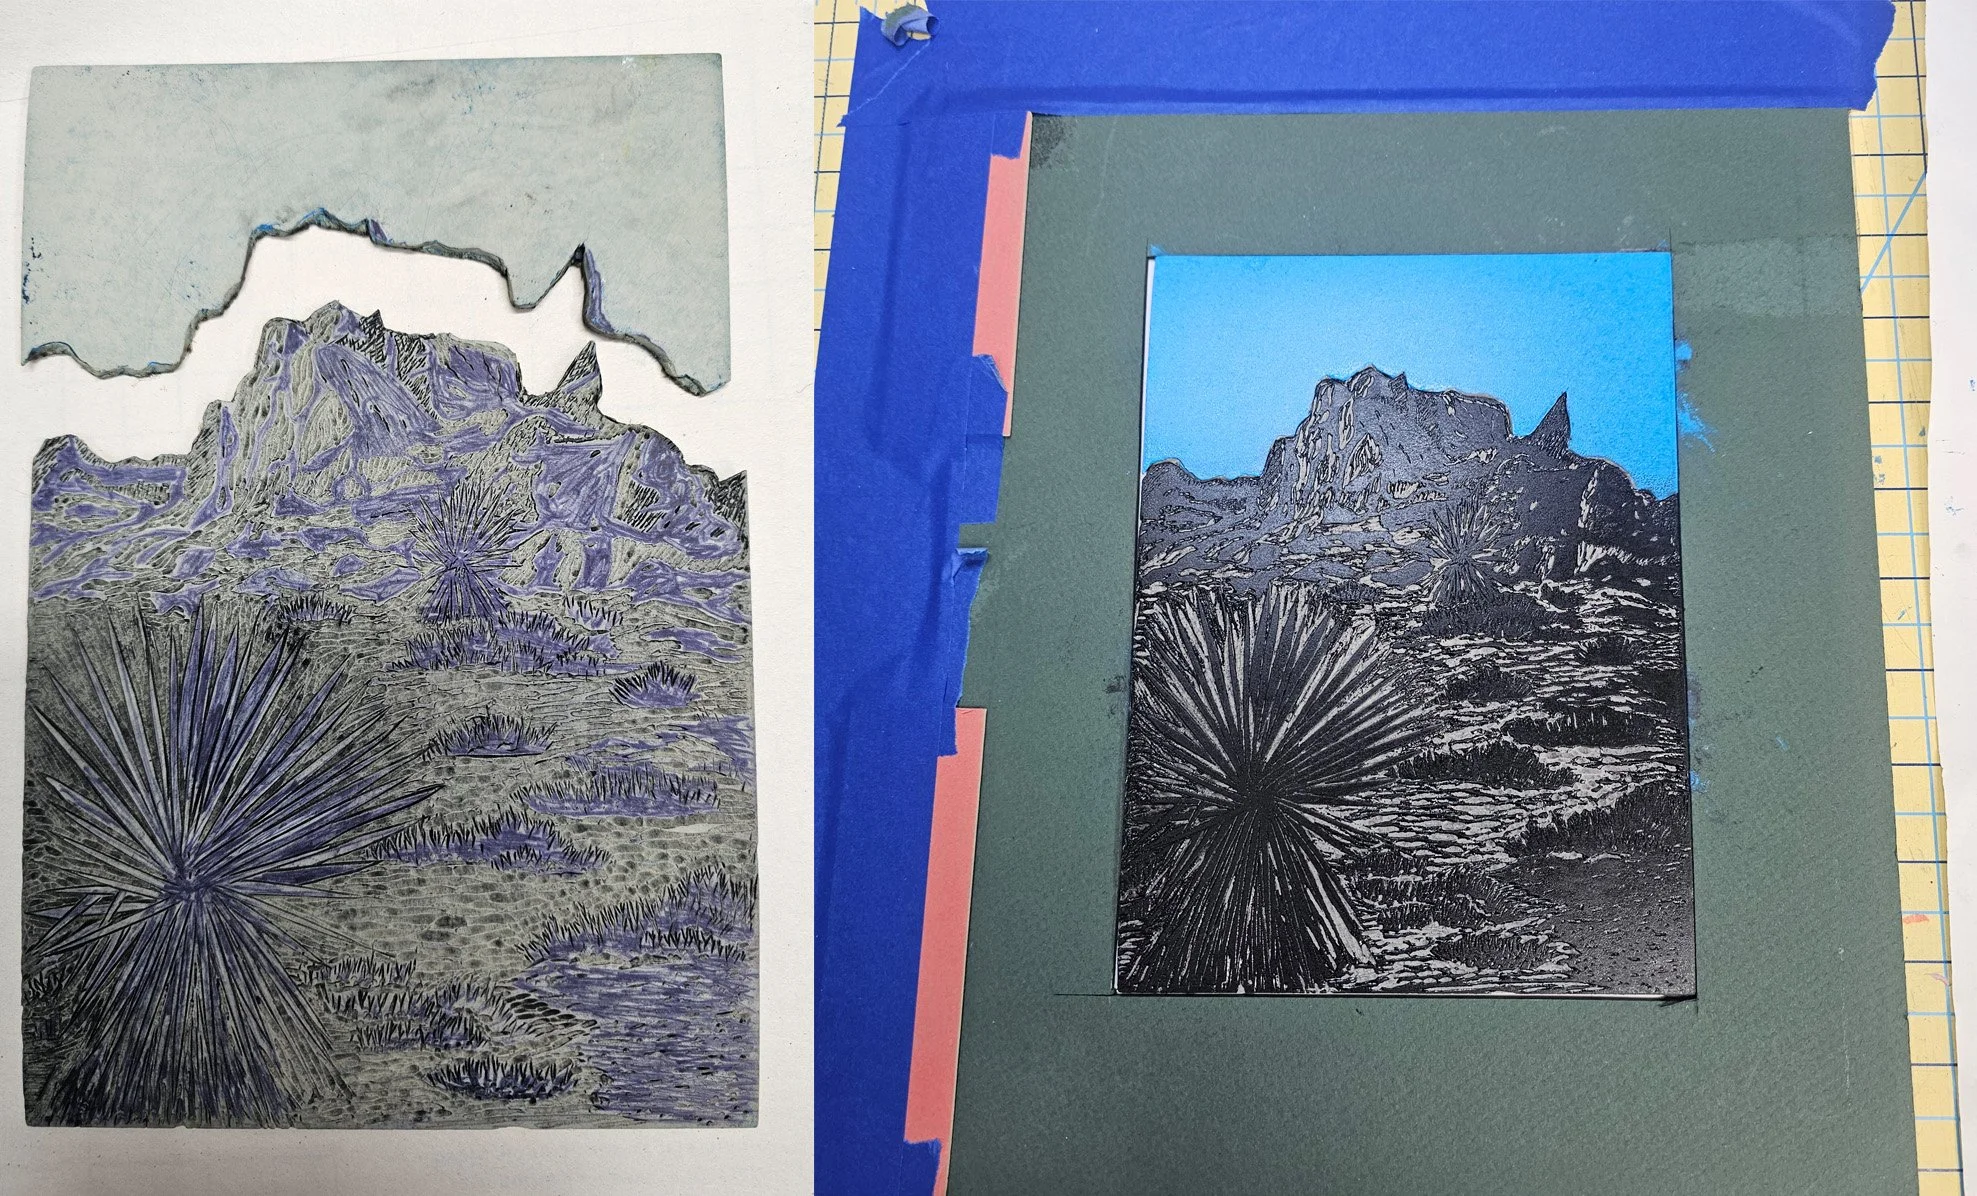
It was very difficult to cut the linoleum apart and I would not recommend this for anything very detailed.
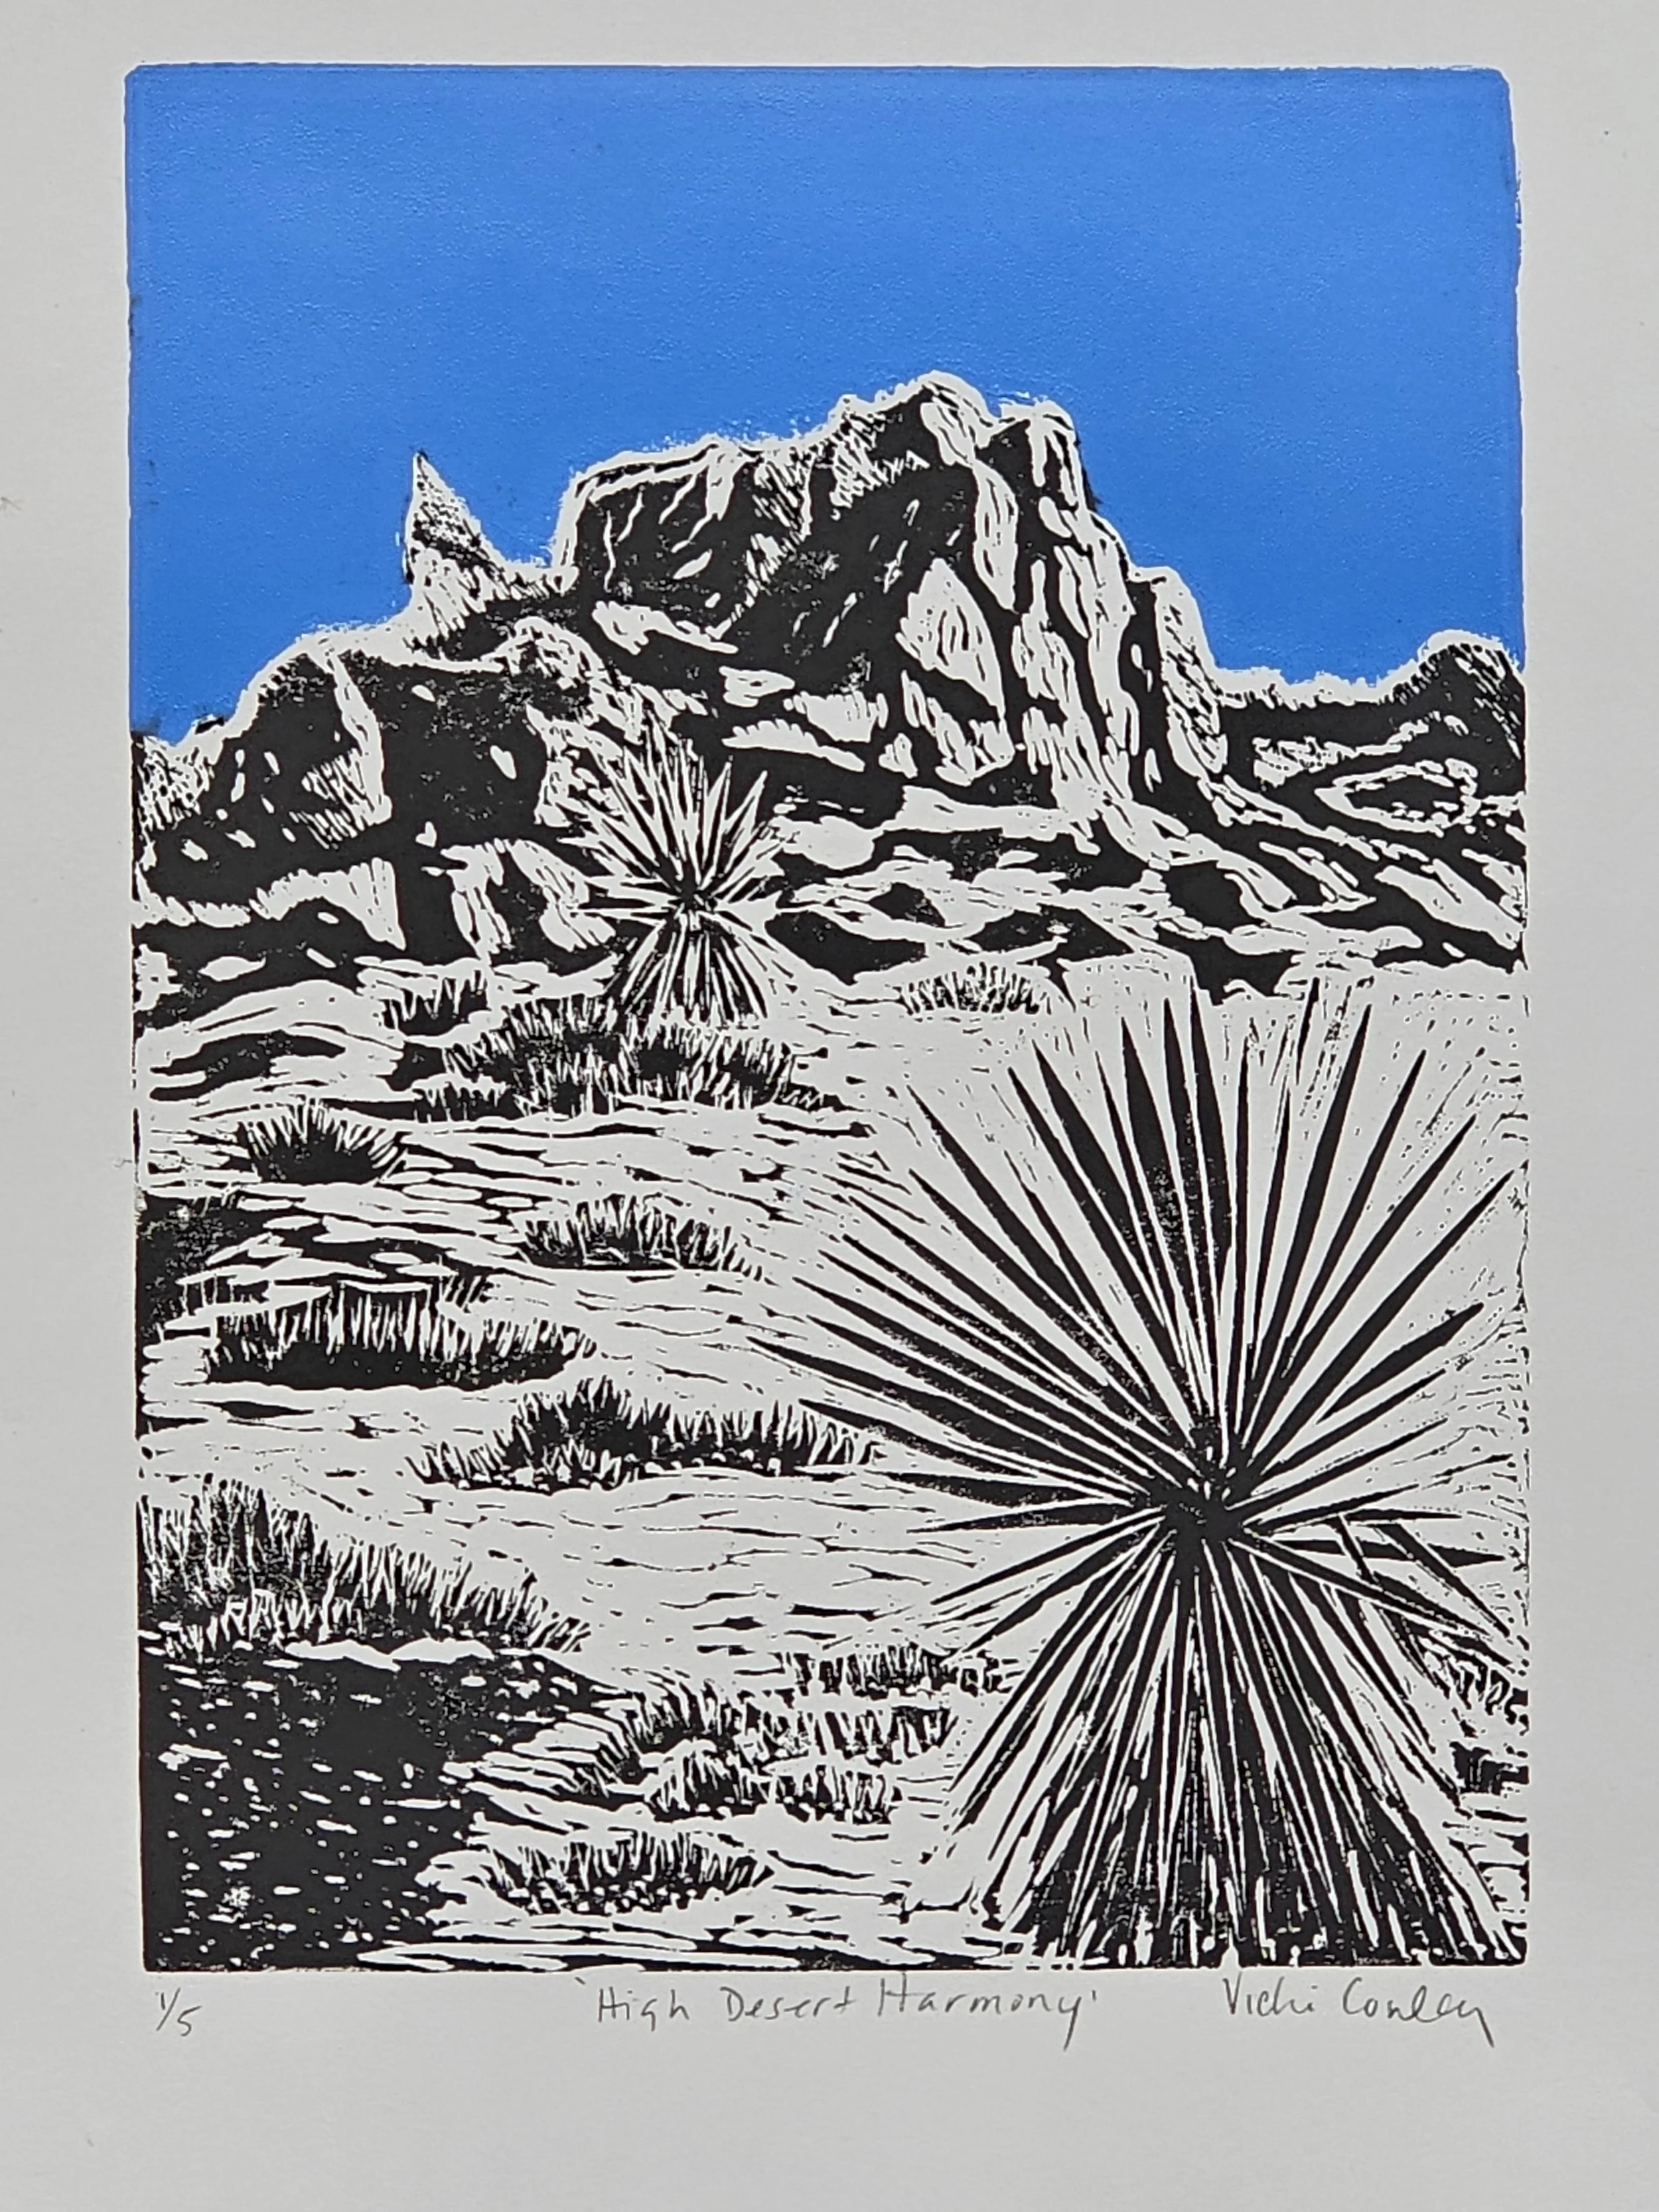
High Desert Harmony, edition of 5, image 8 x 6 inches, paper 12 x 9 inches, Speedball paper, Caligo Safe Wash ink.
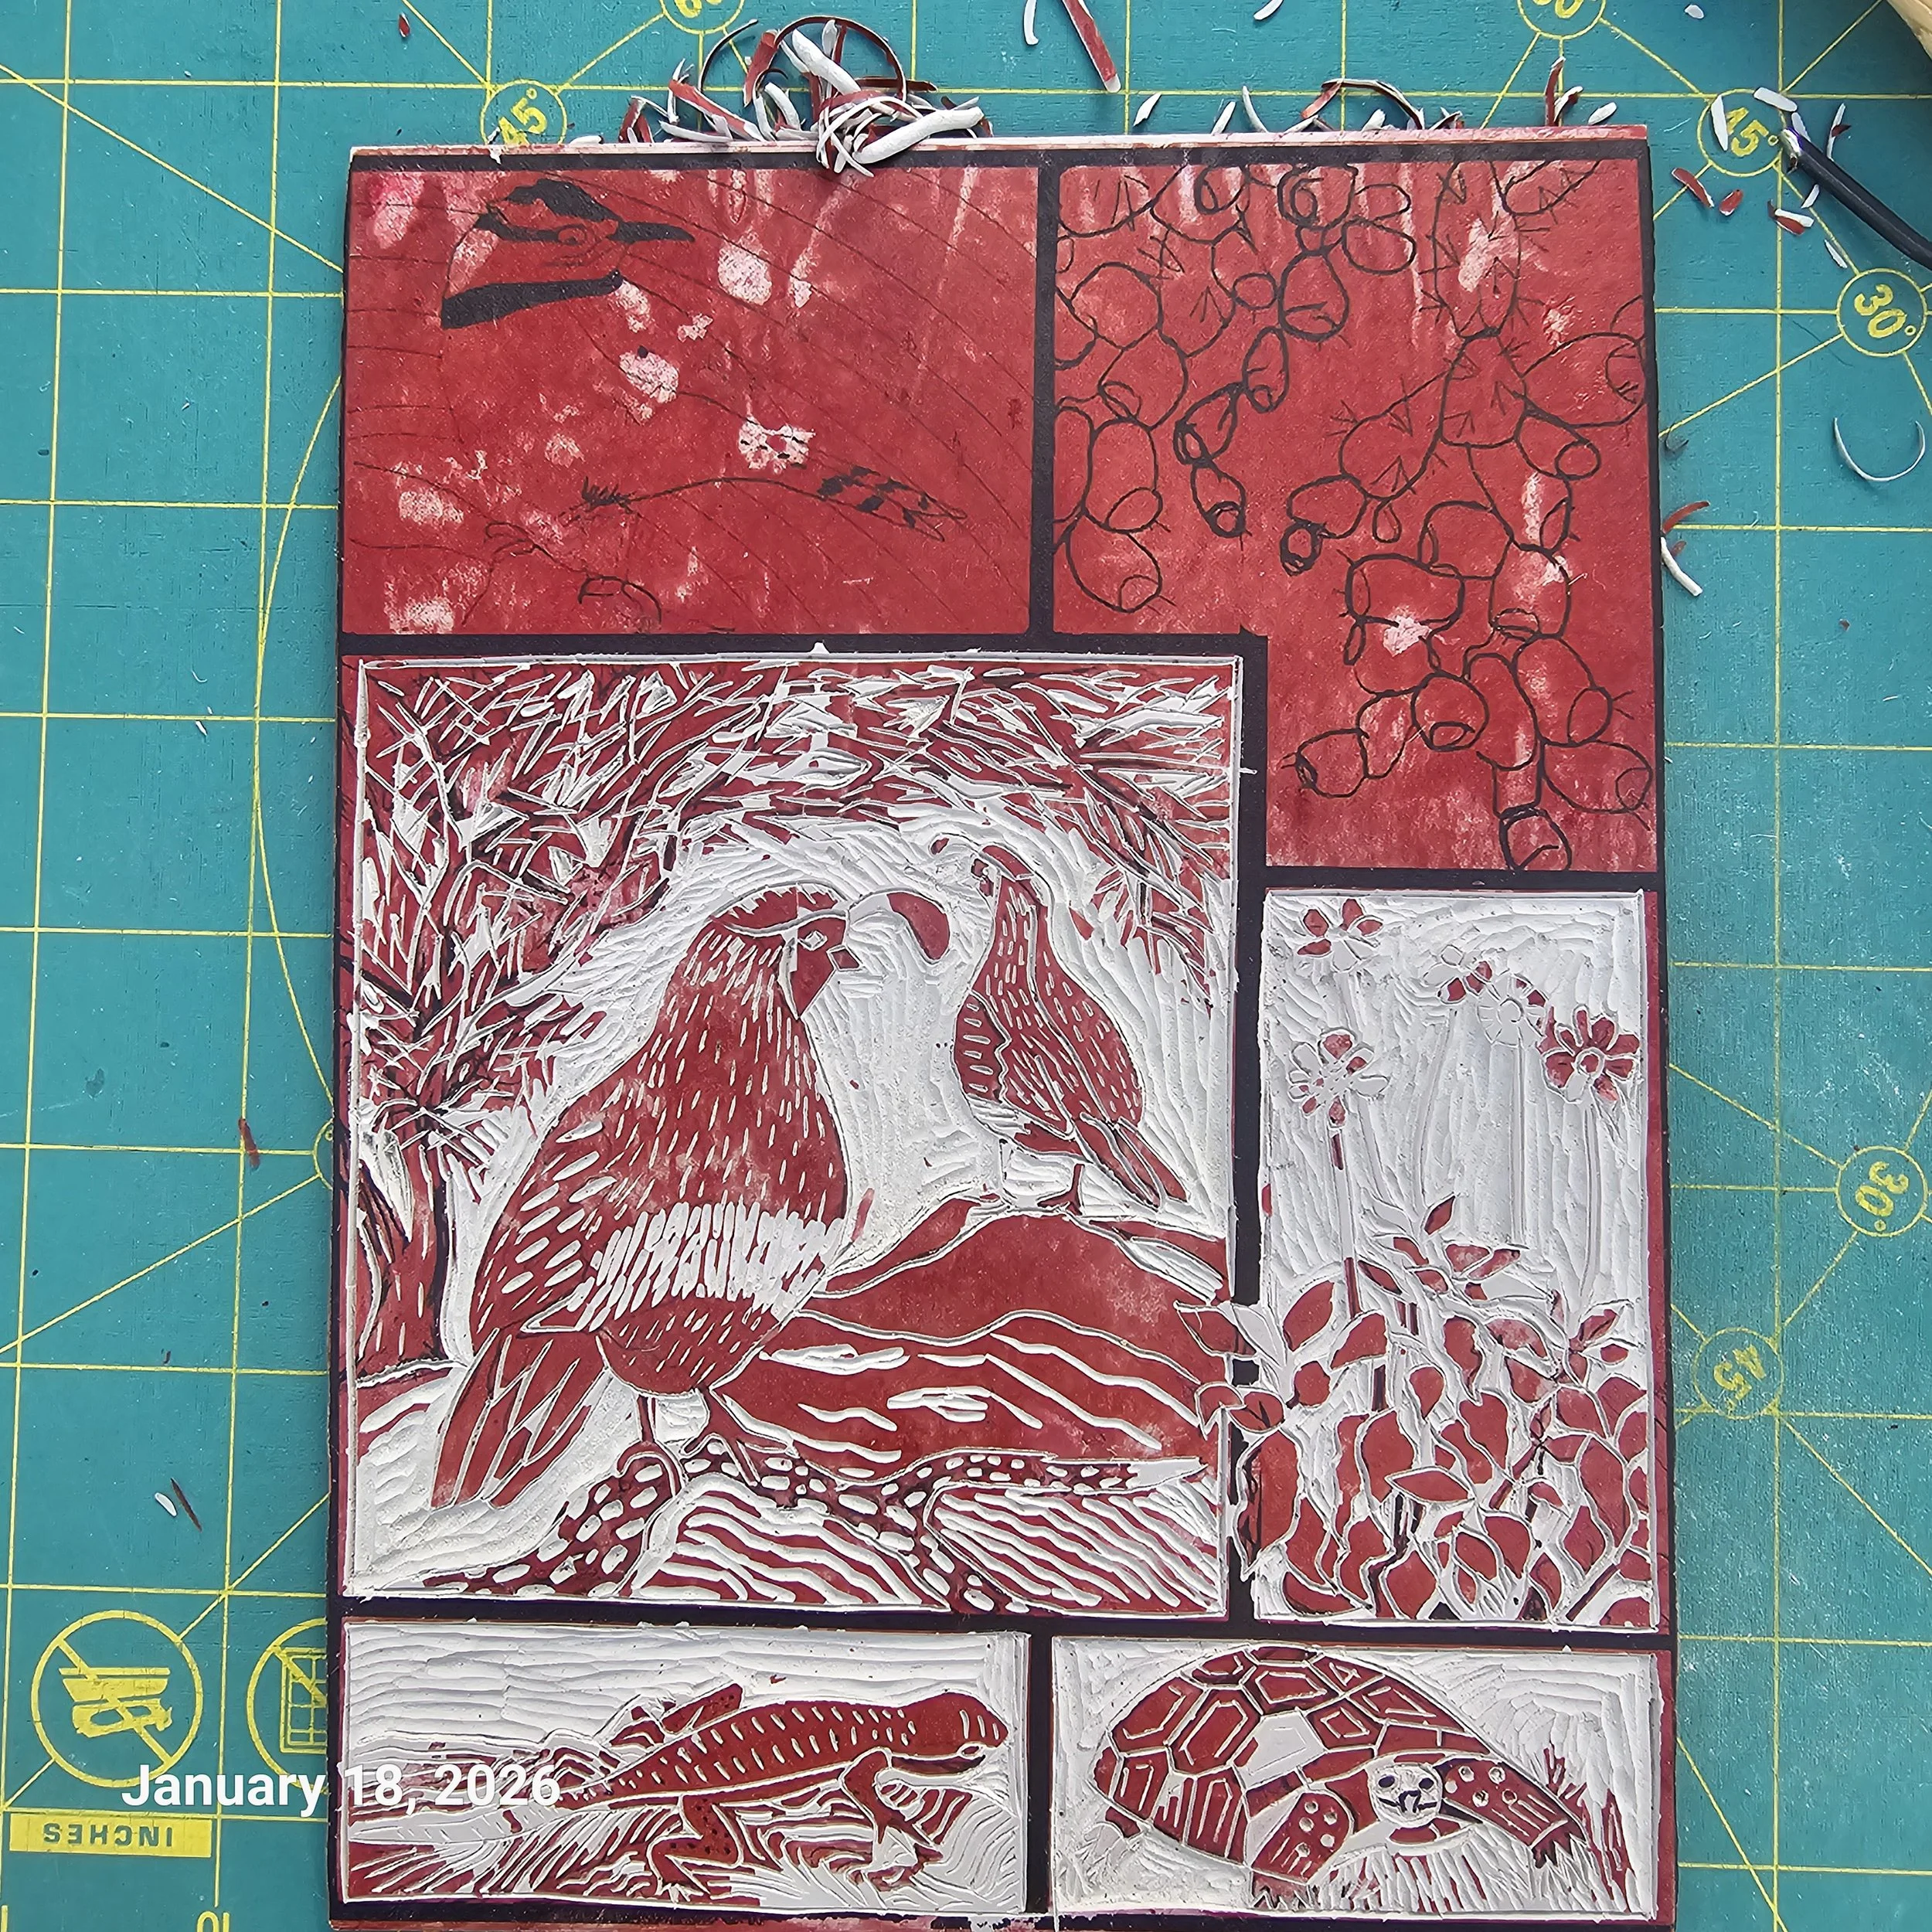
I also reprinted the Desert Neighbors block and had much more success. The inking and printing, especially by hand, really takes practice. Maybe someday I will get press.
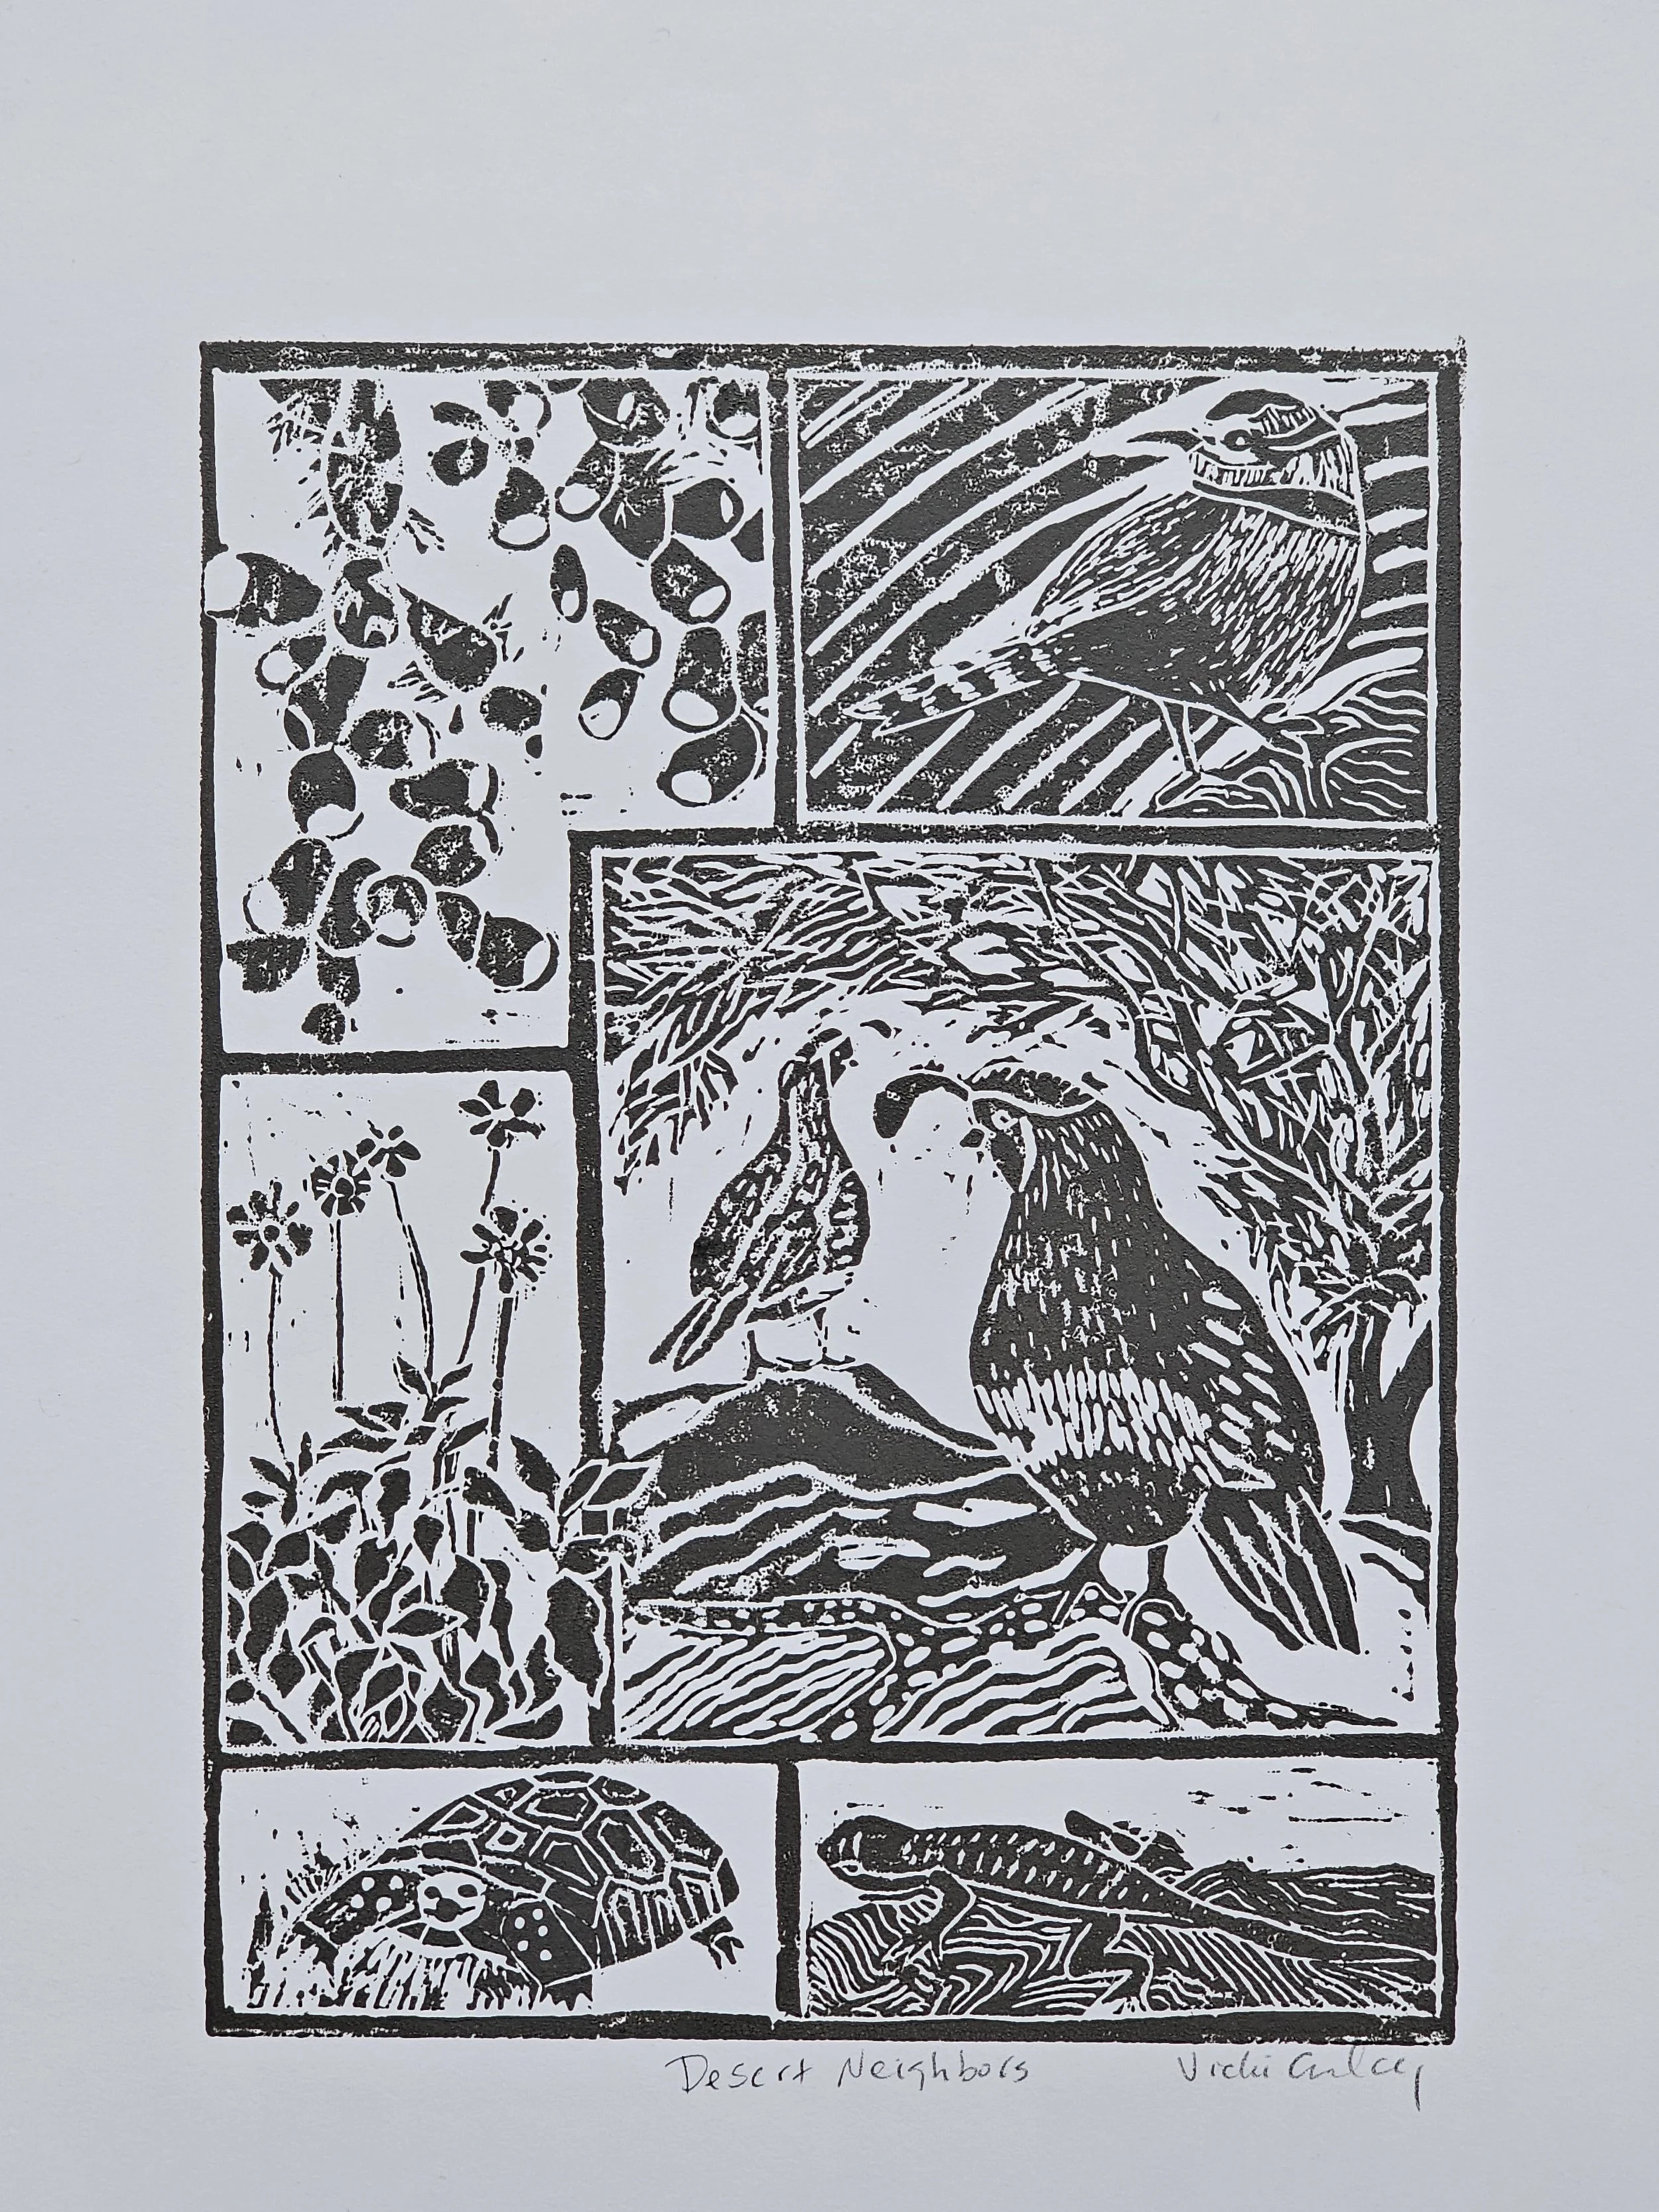
Desert Neighbors, image 8 x 6, Speedball paper 12 x 9, Caligo Safe Wash ink, mixed brown.
These prints are now available in my shop. Lino Prints — Vicki Conley
Printing at Home!
Now that I am home I tried printing all the blocks I carved in the RV. This time with Caligo Safe Wash Ink. It was much better than the water-based printing ink and went very smoothly. I got a lot of good prints to use in the edition. I learned how to be a little more careful with my fingerprints. By taking the gloves off and on, after inking the block before touching the paper, duh.
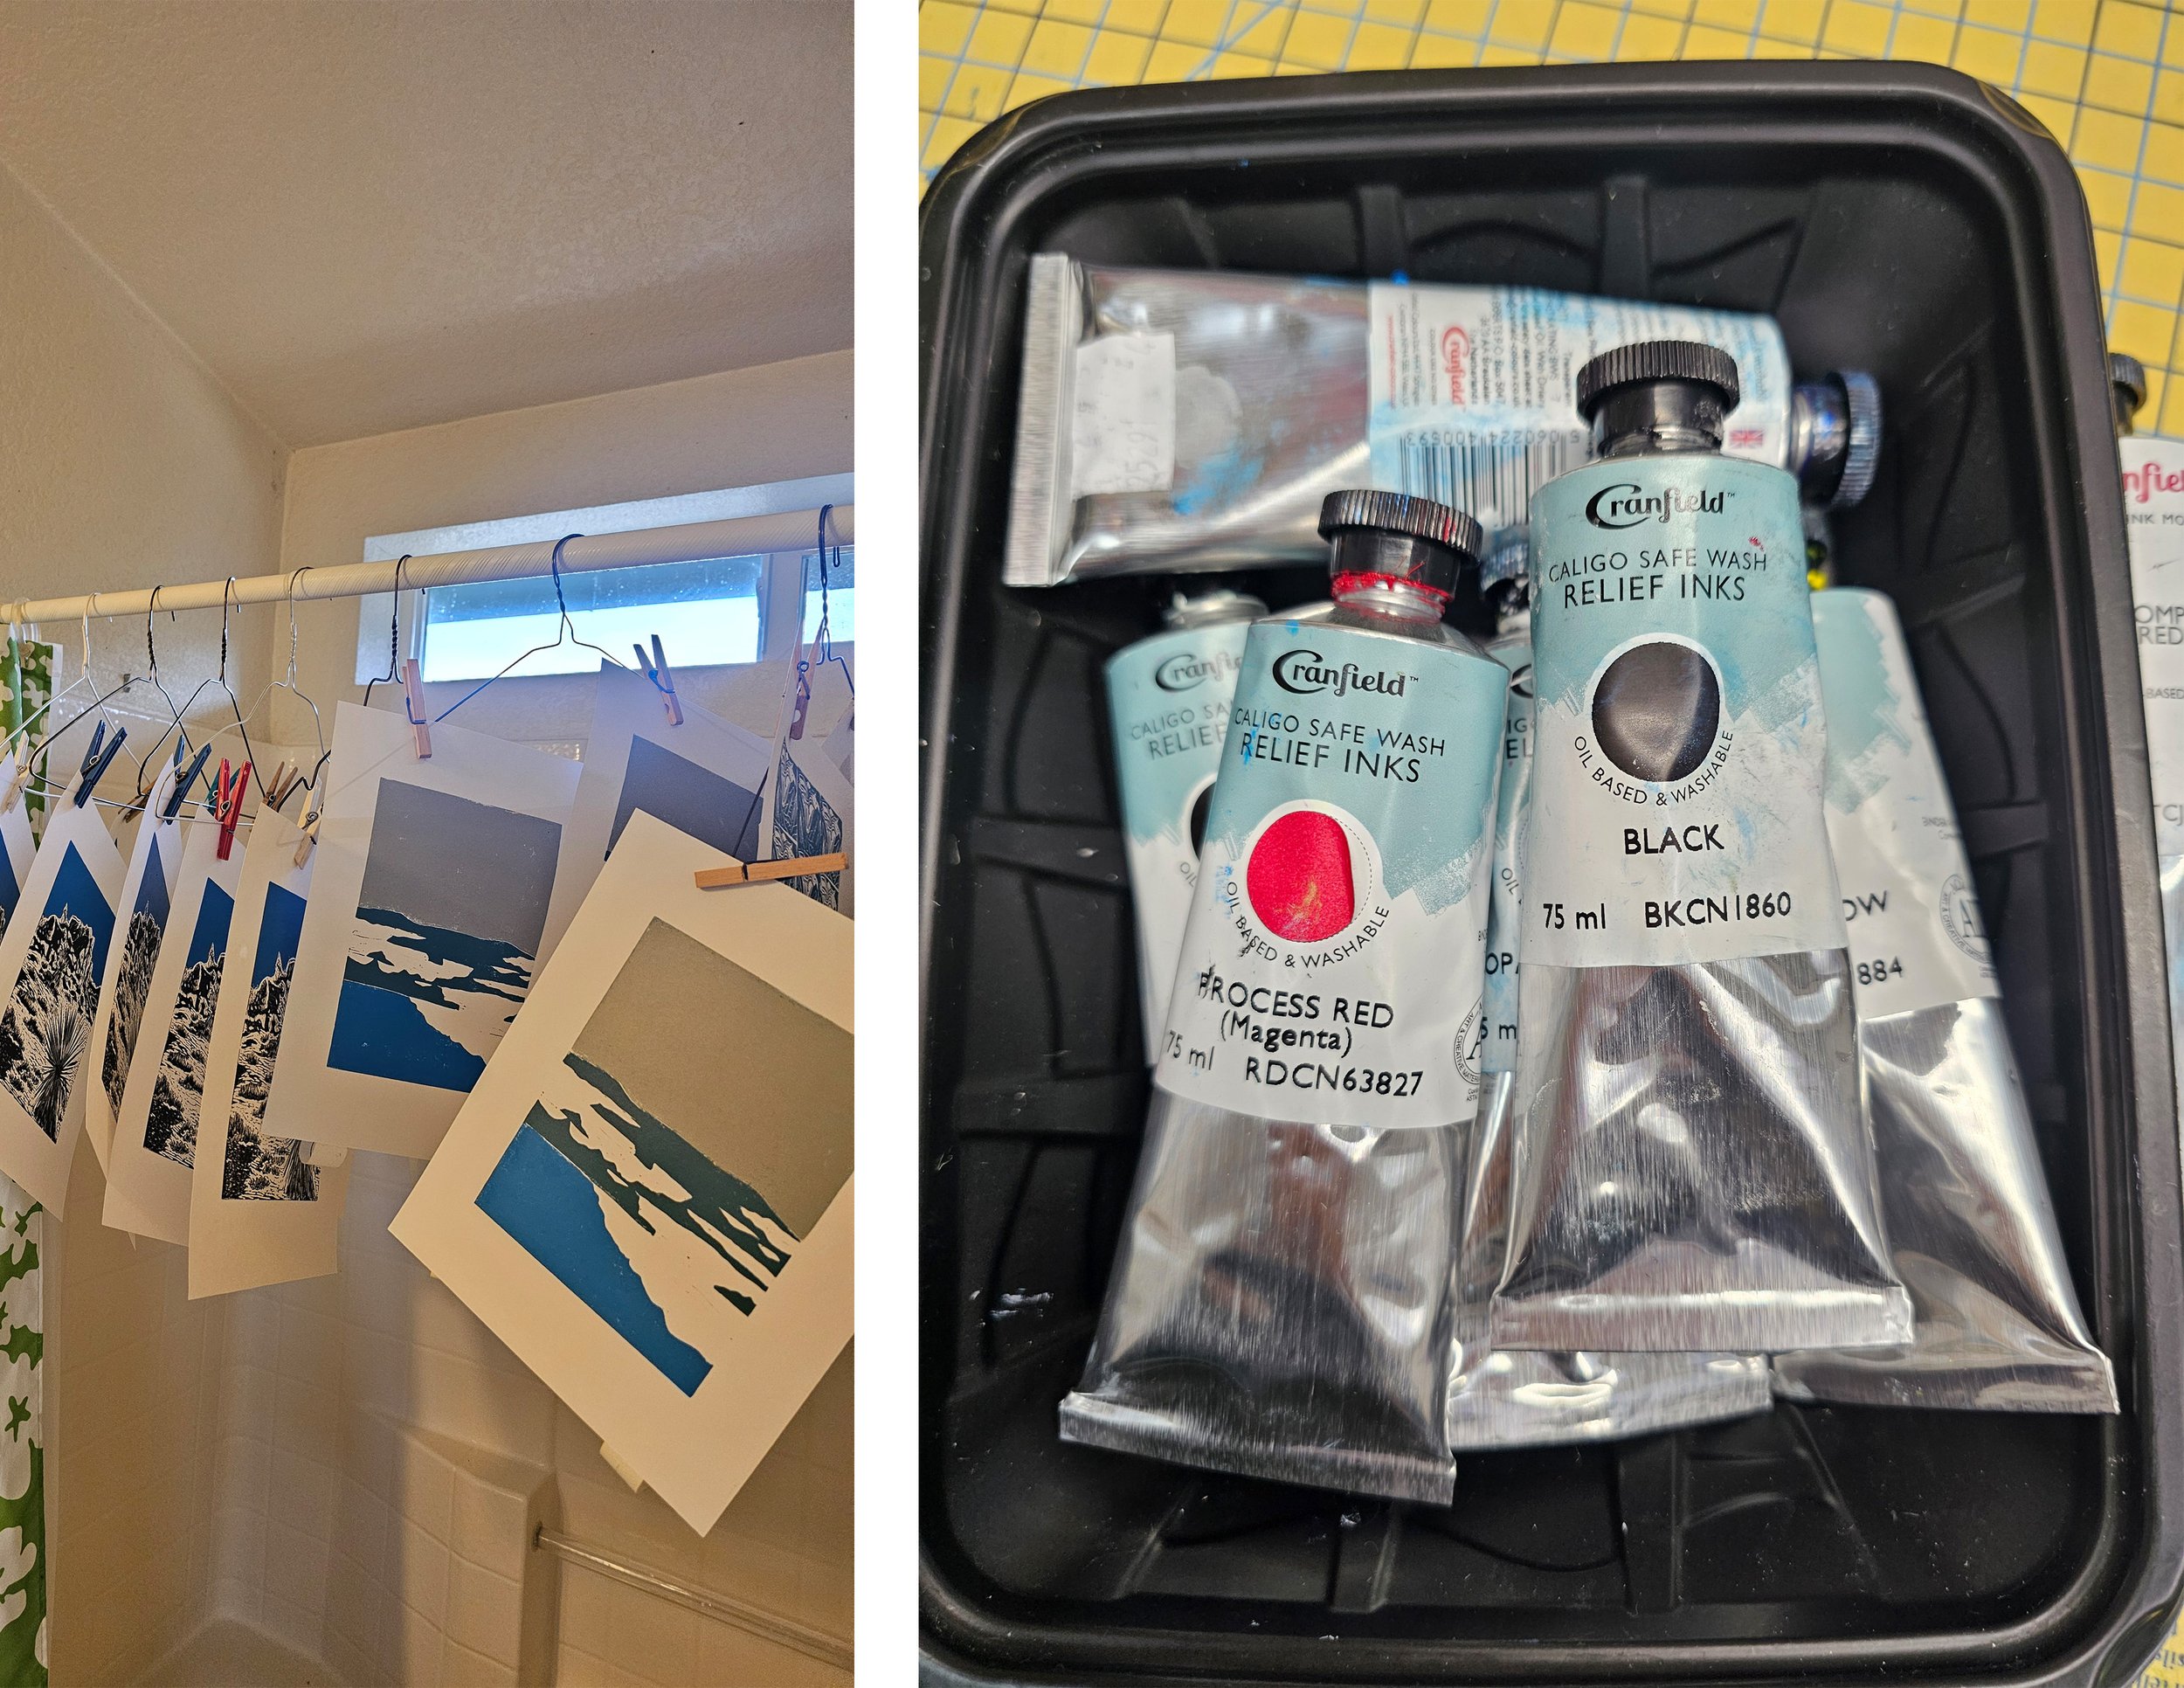
I hung them using clothespins on hangers to dry. Then eventually moved them to the big table. It took a good week for them to fully dry.
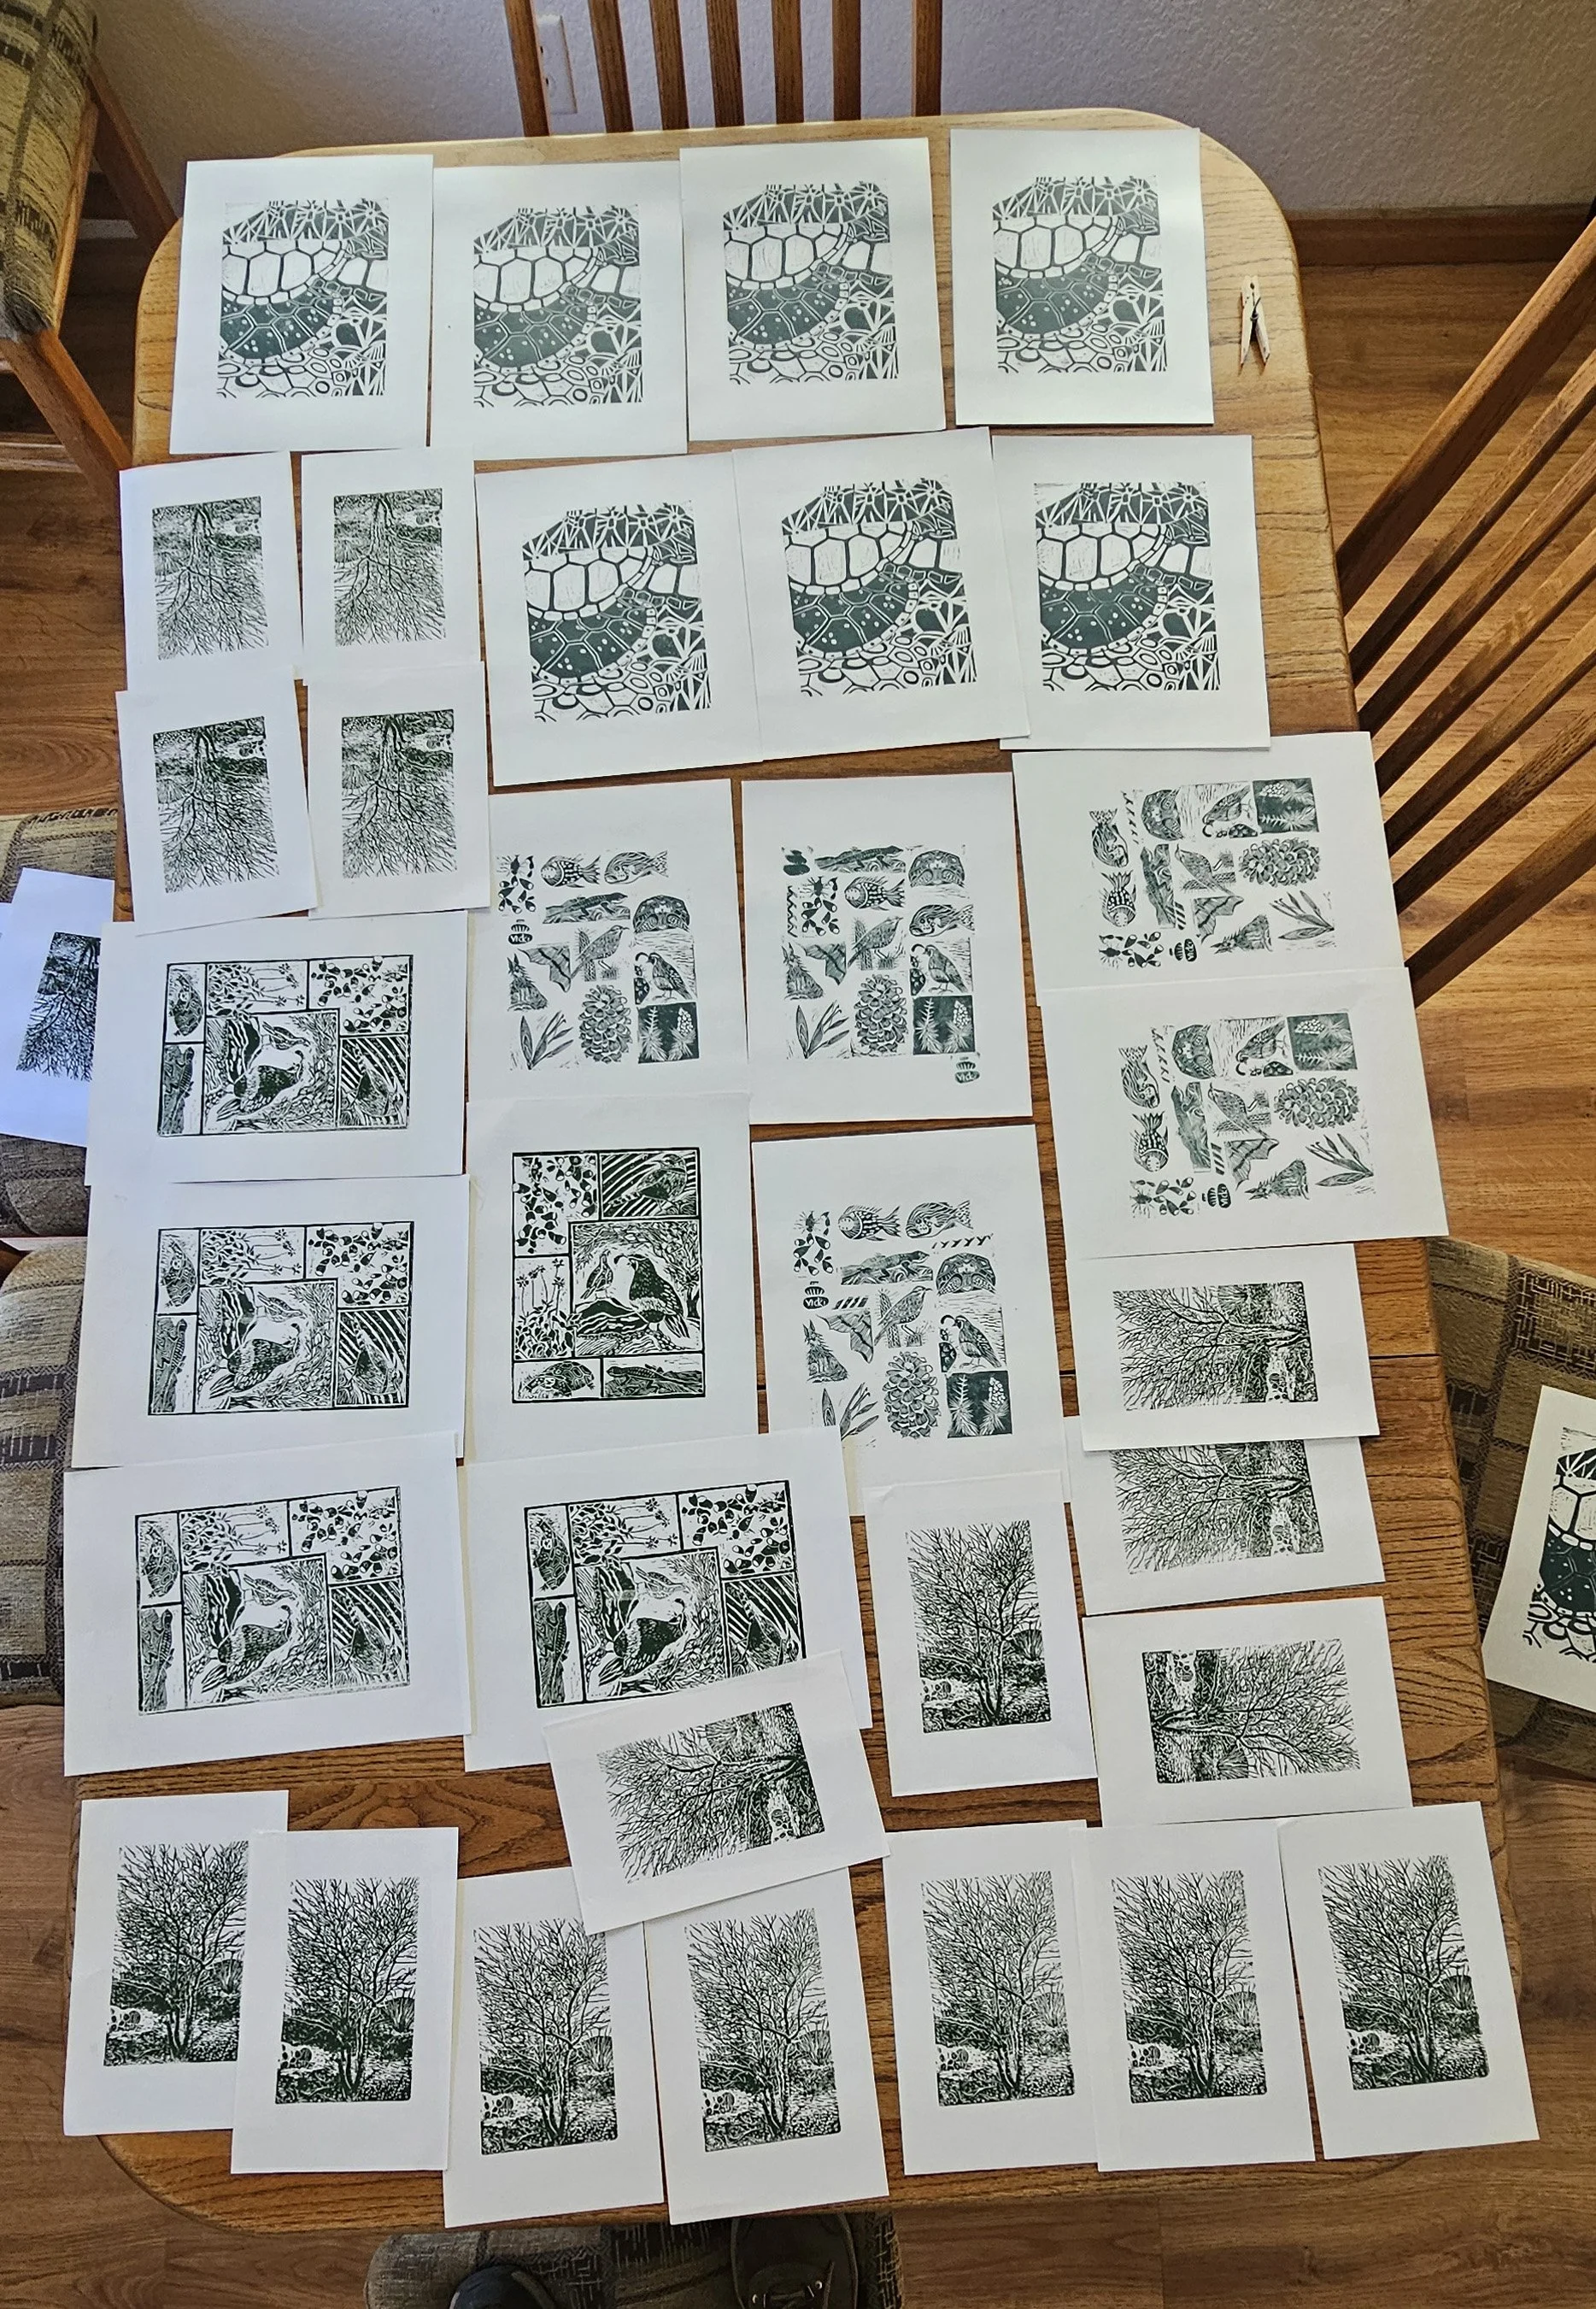
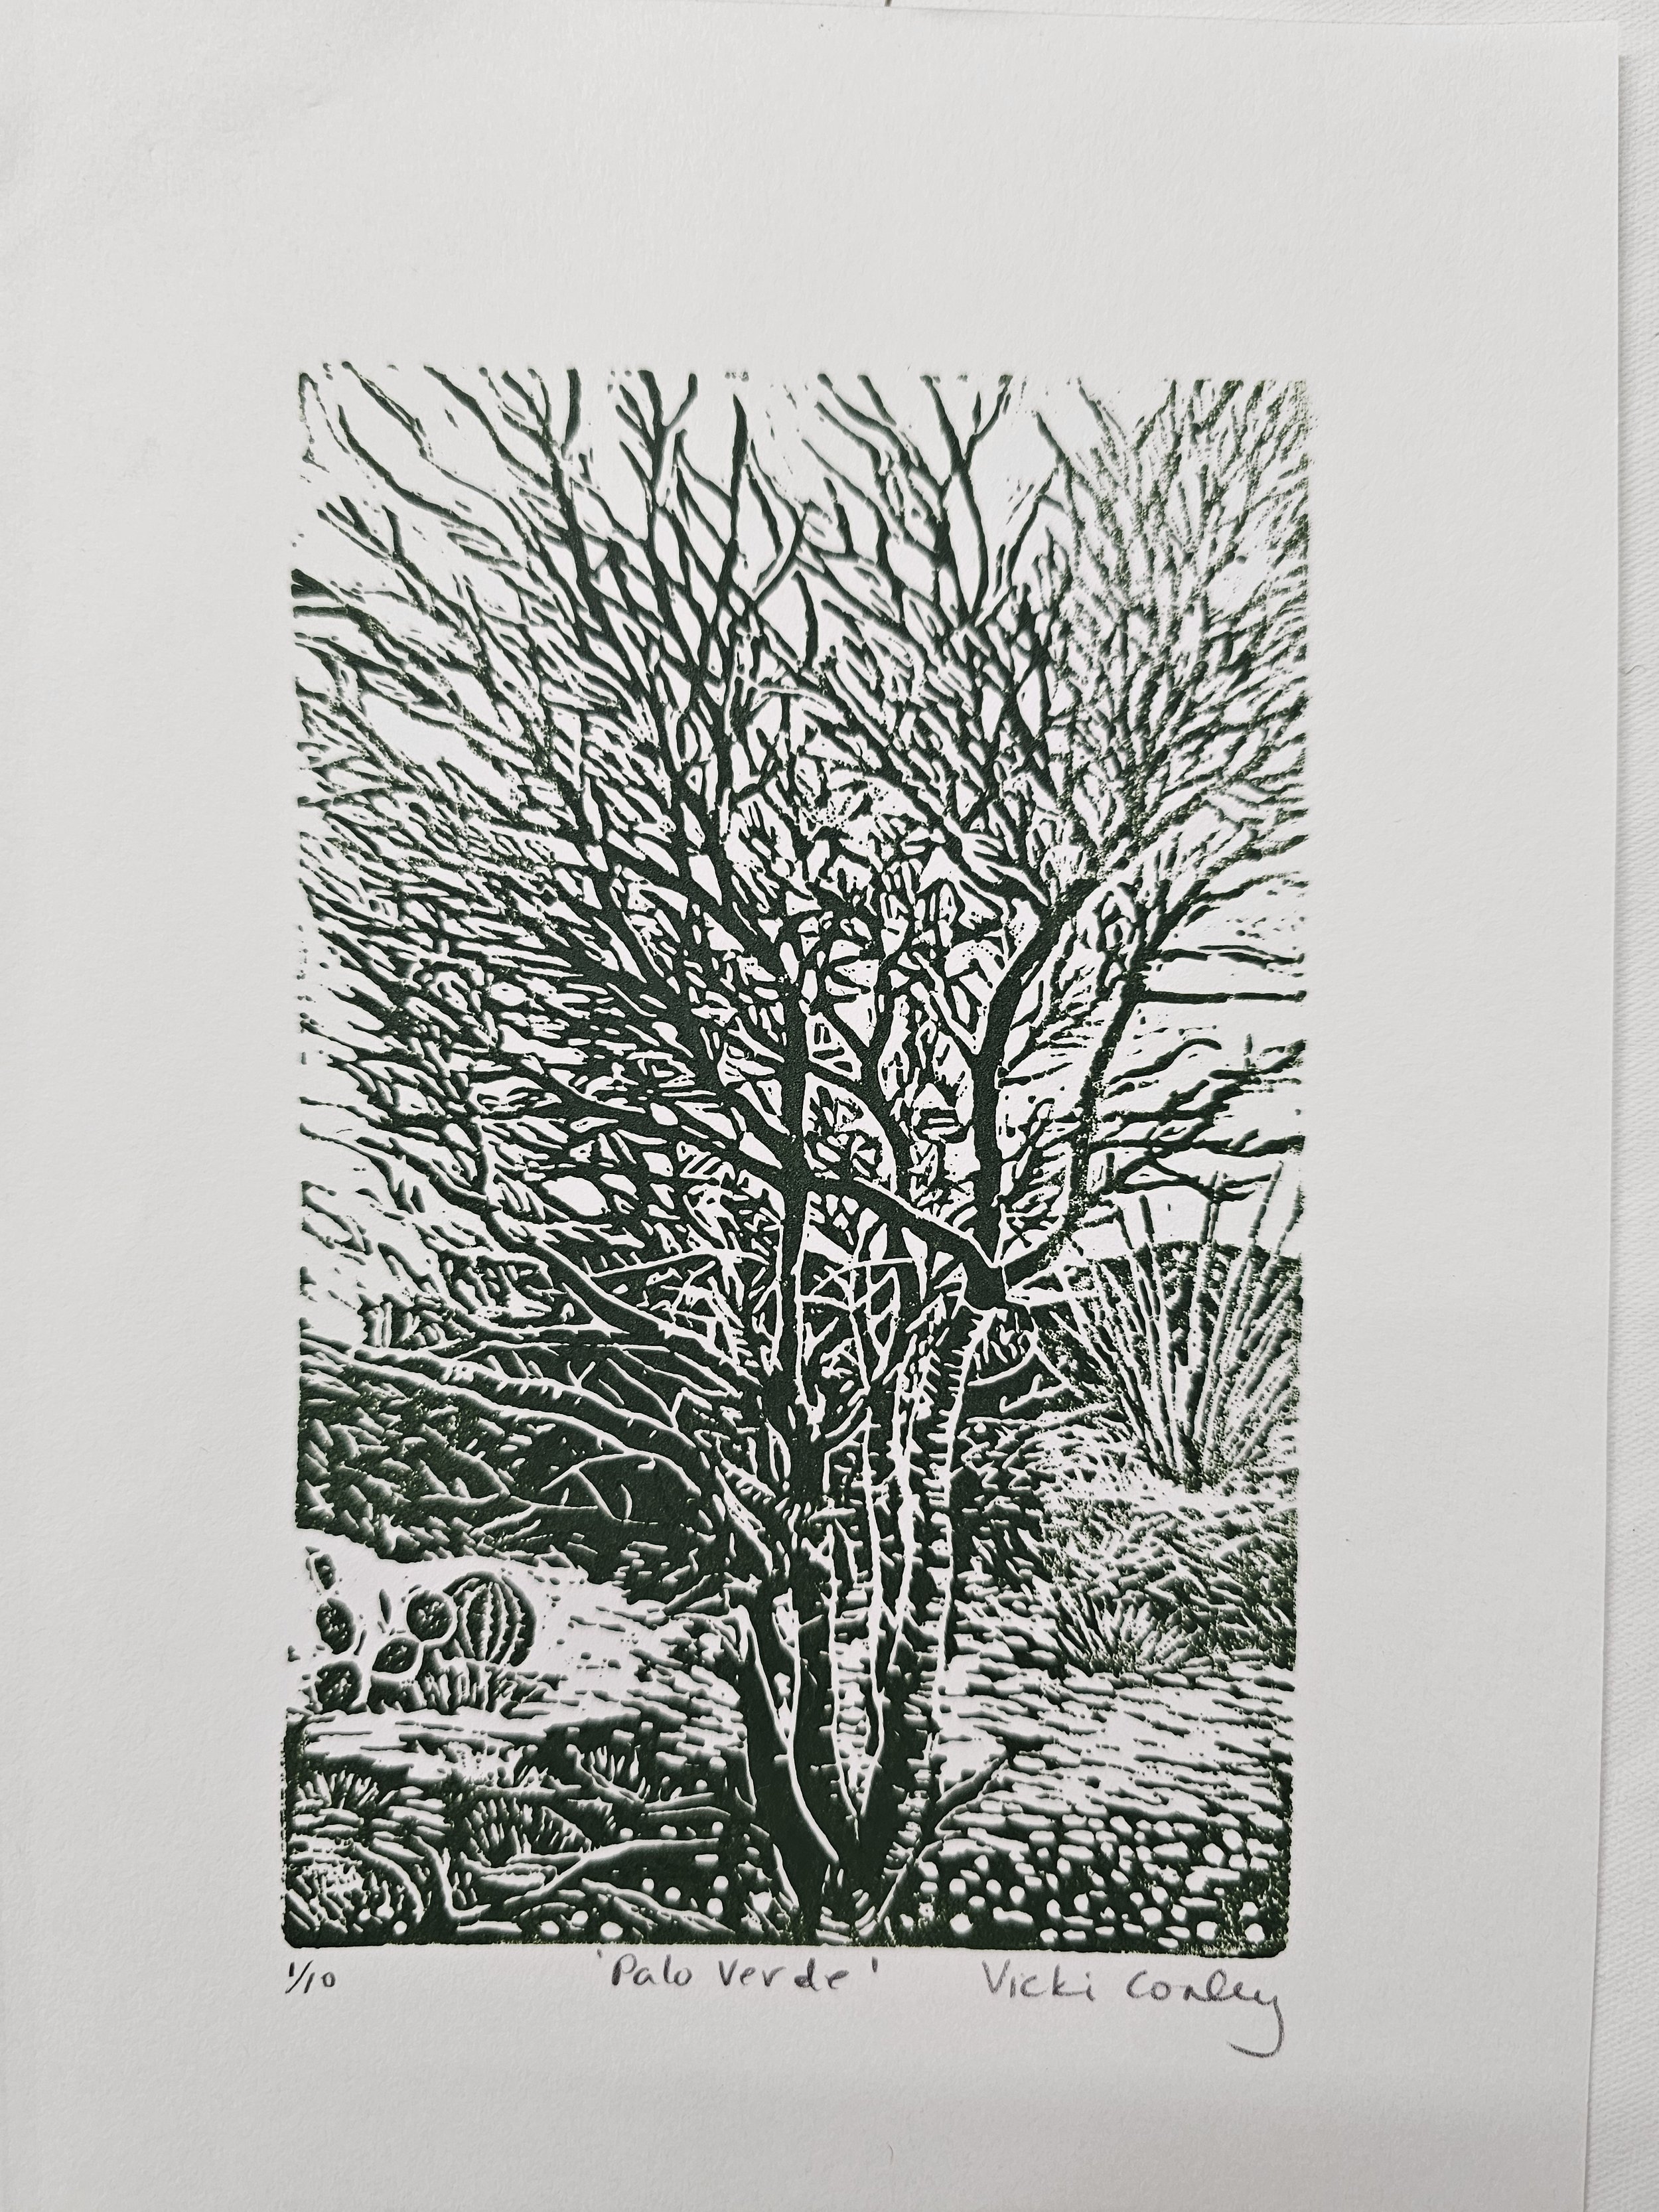
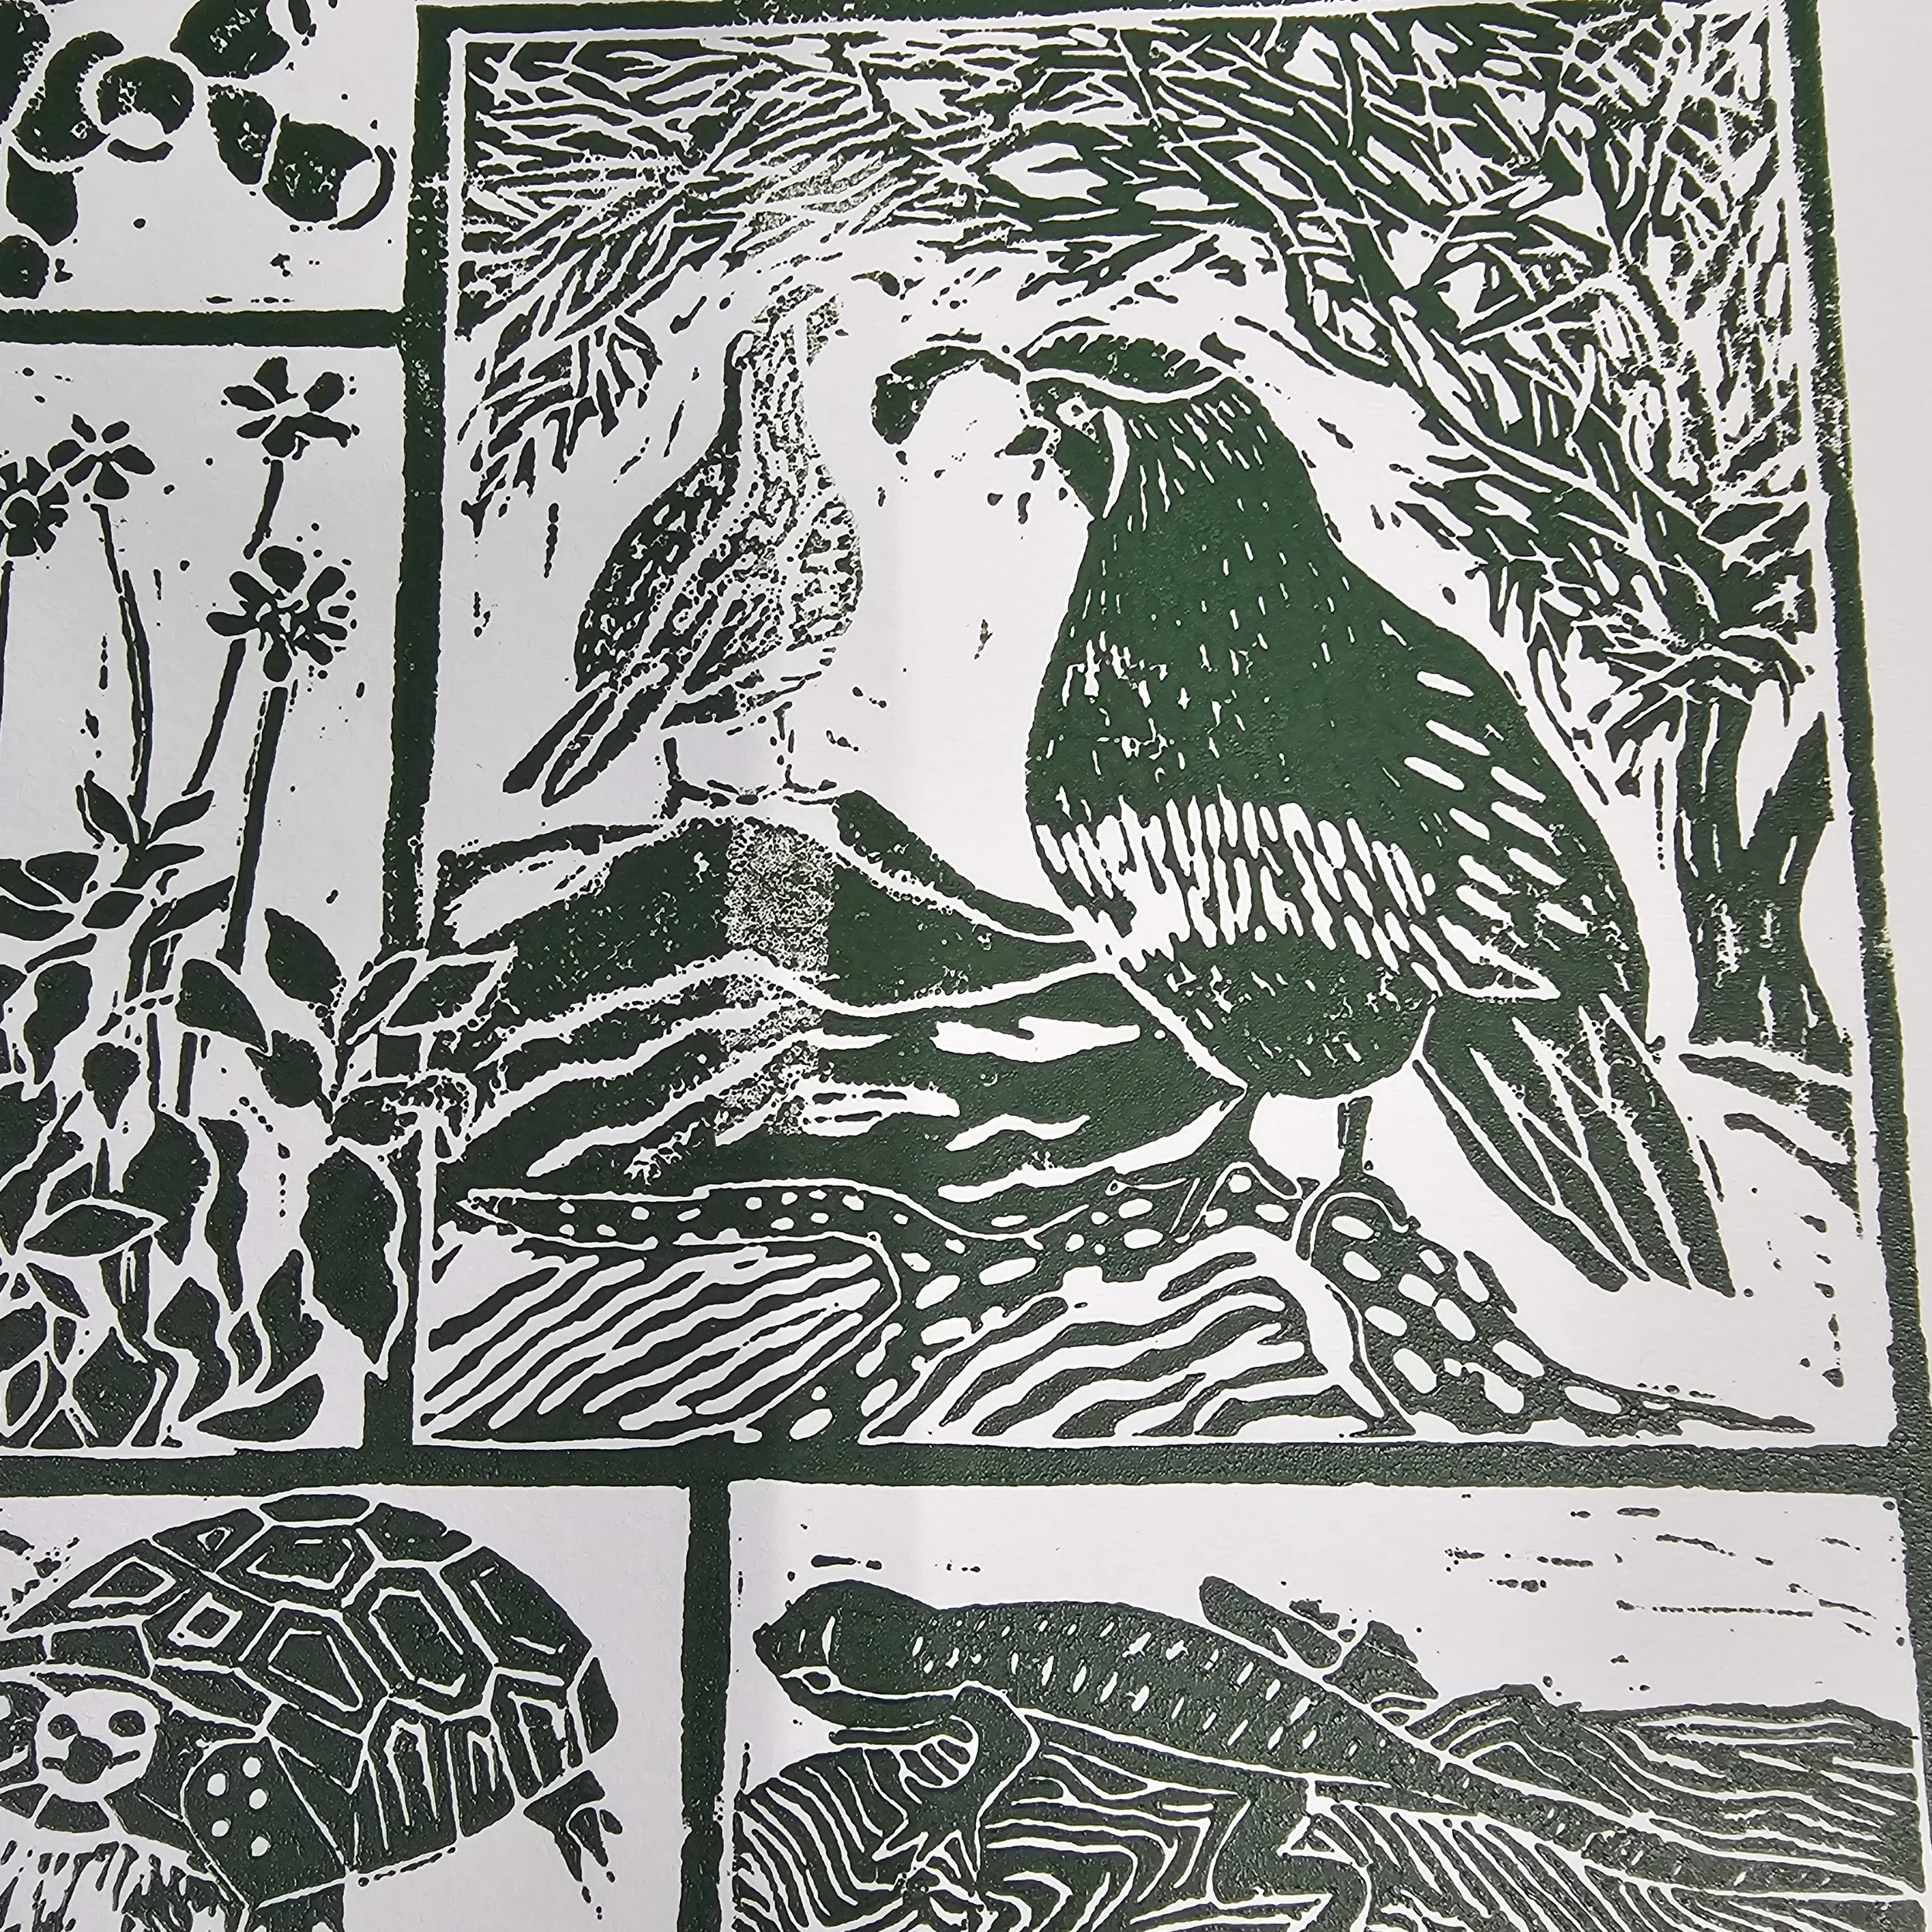
Some like the small Palo Verde Tree turned out great while others like the one with the desert flora and fauna will need to be printed again. Each of those Desert Neighbors prints has a problem. There is quite a learning curve to just getting the lino inked correctly! When printed correctly it should make a nice edition.
I don’t like waste and since I didn’t have enough ink for anymore lino prints, I used it up printing most of the small rubber blocks I had carved on the RV trip. After inking each one, I laid them out all together and pulled a print of them all at once.
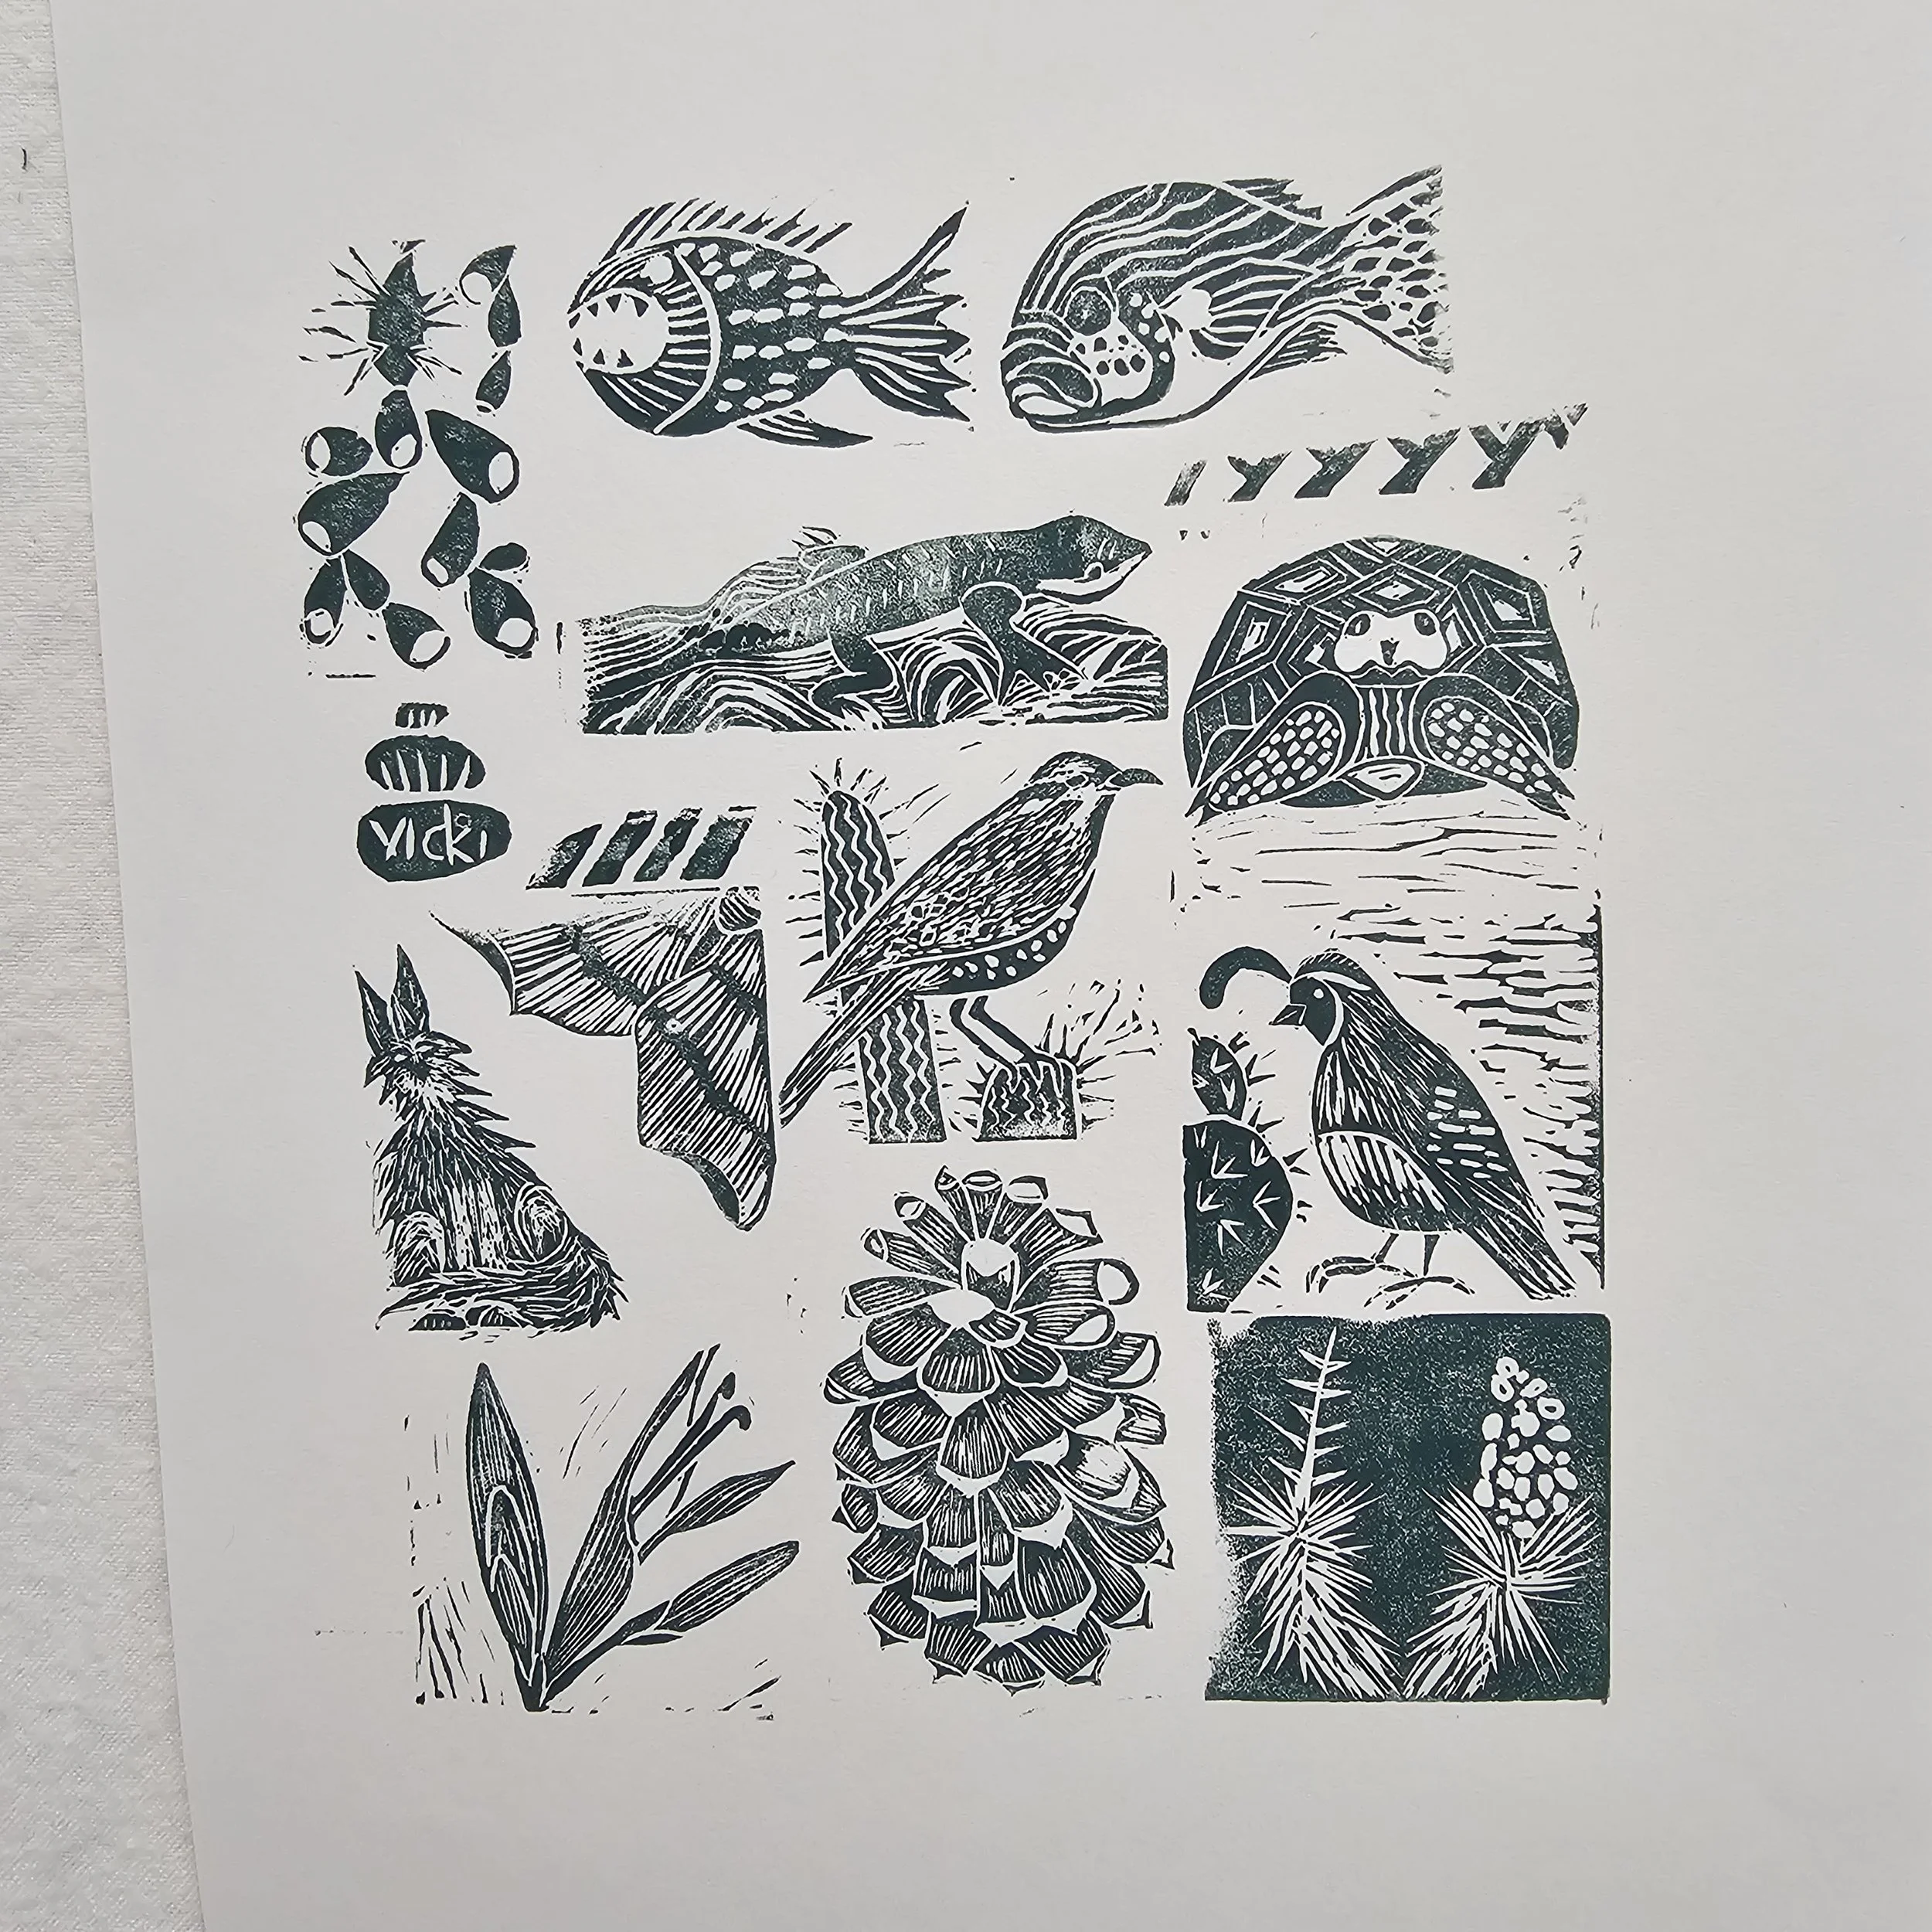
I think it looks great and is a nice record of the small blocks. I usually carve on both sides of the rubber so I may have to line them up in a different collection and print again.
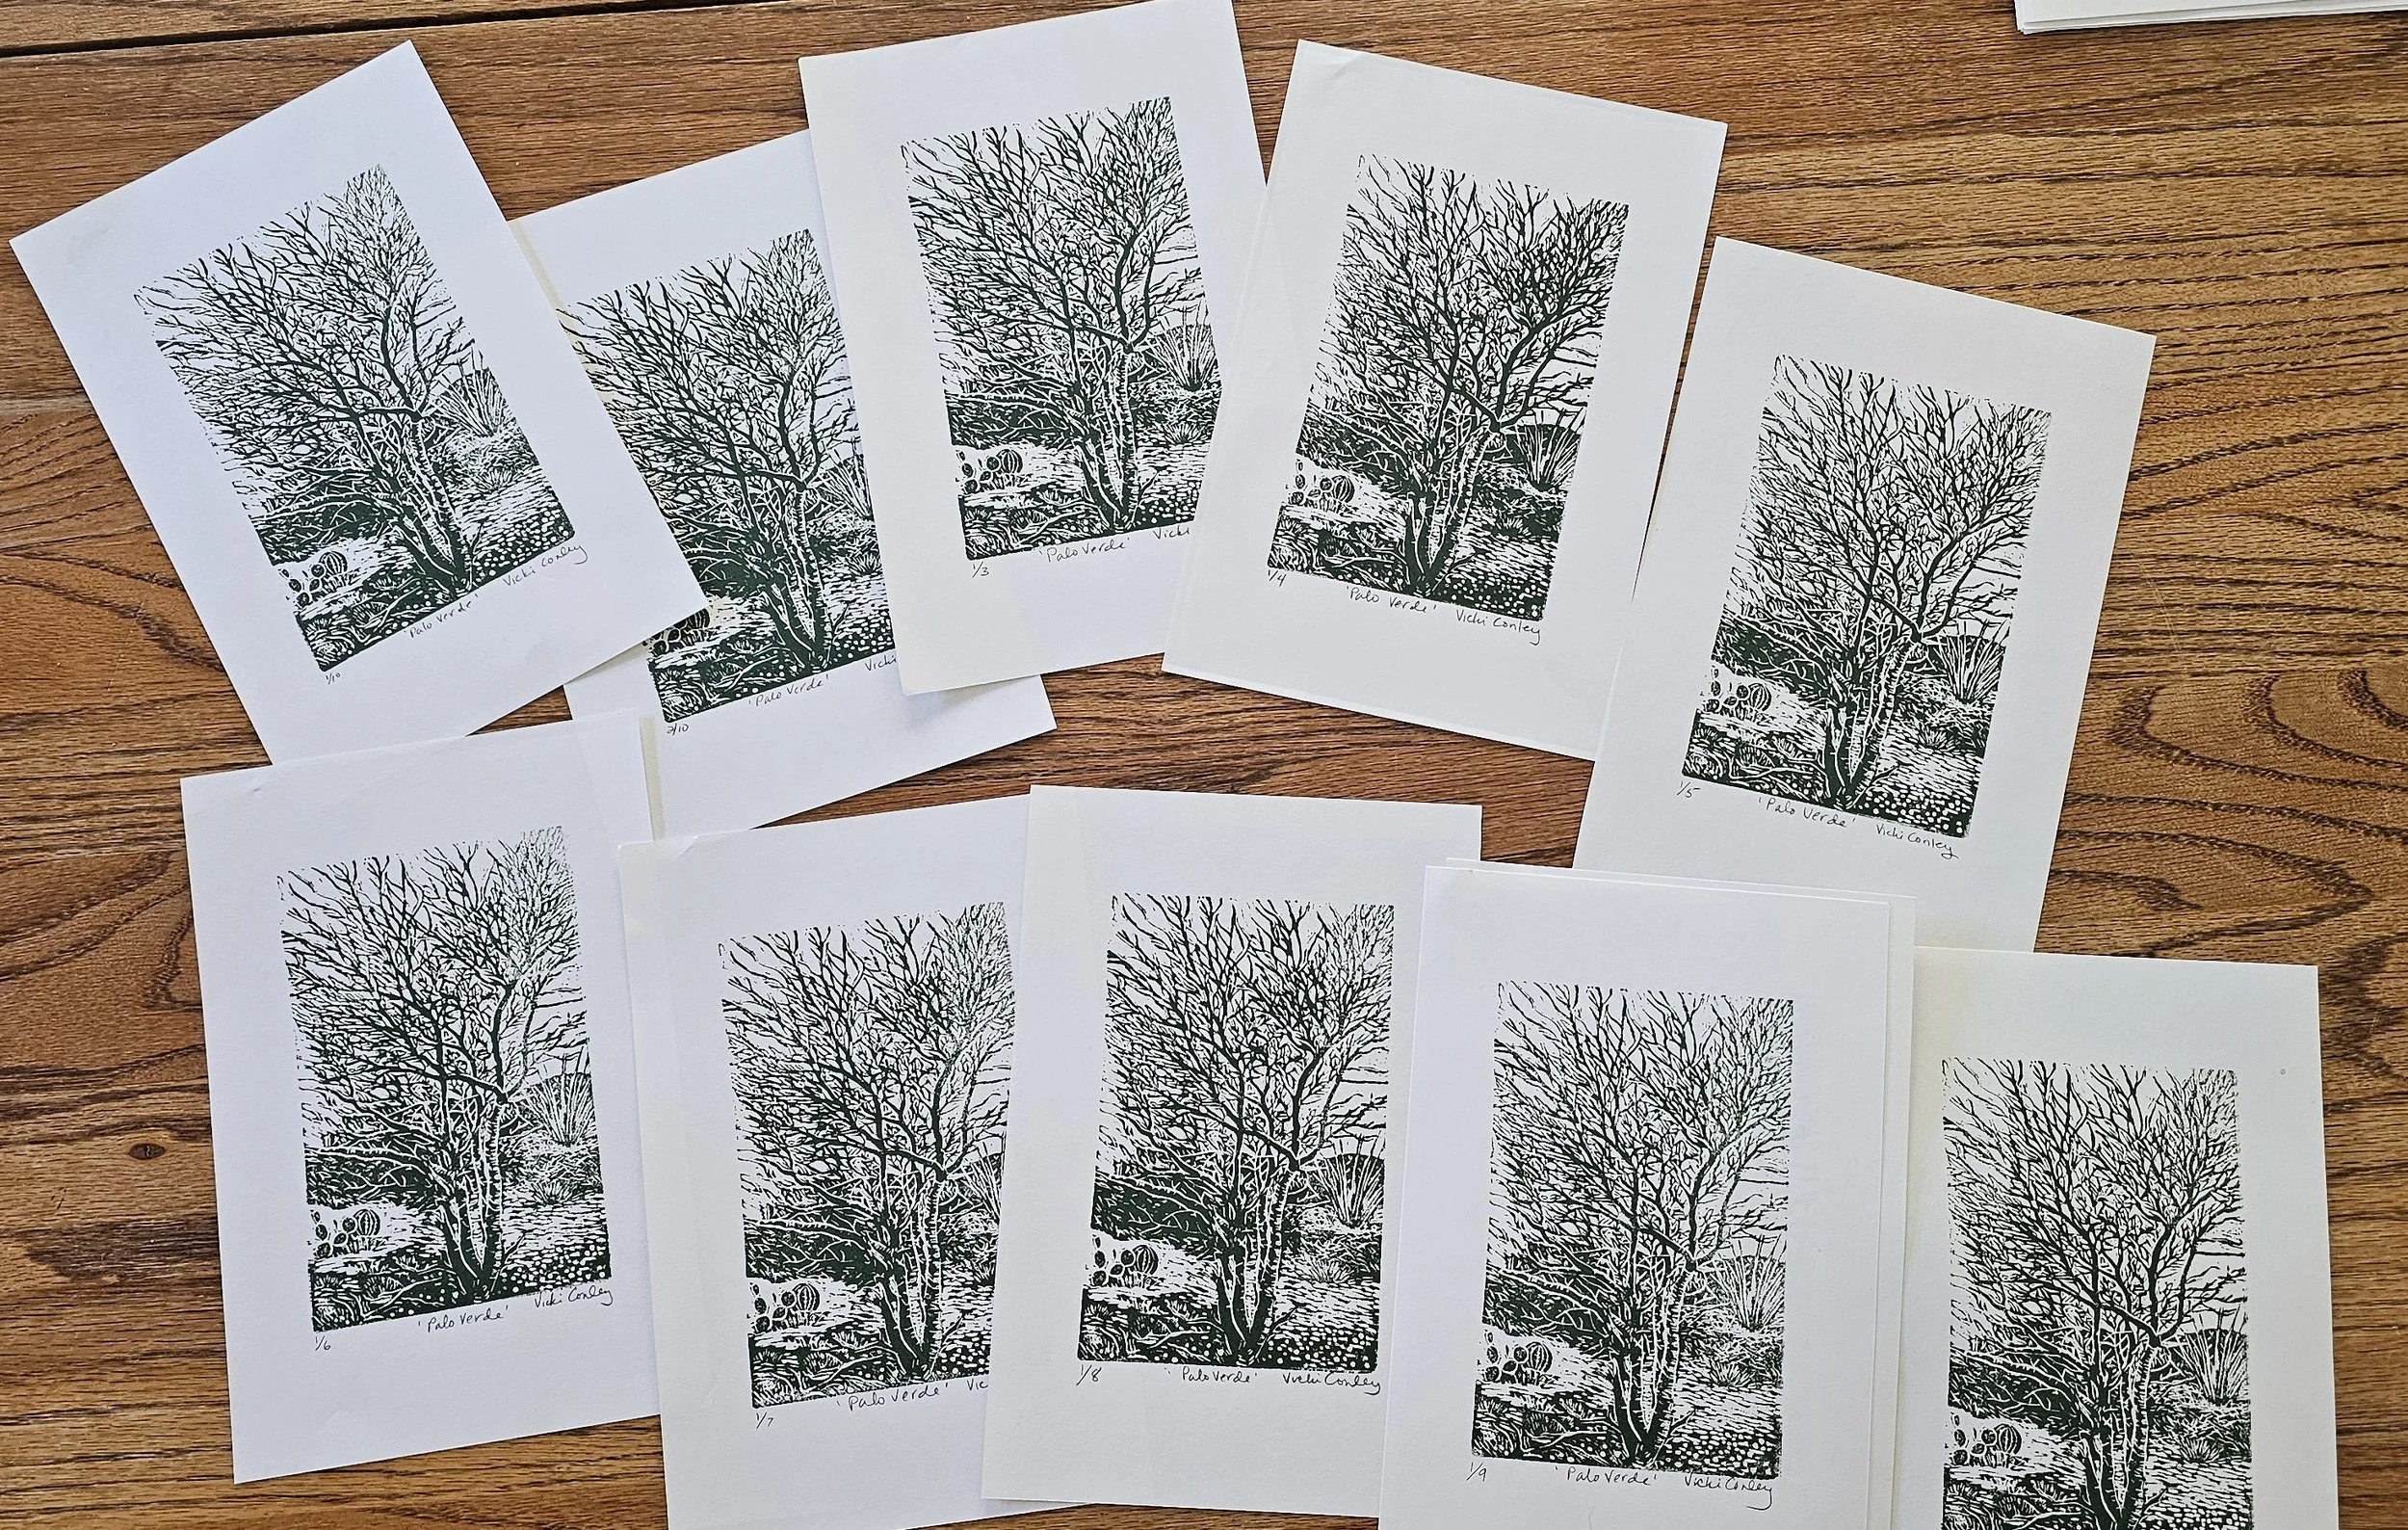
My first edition was the Palo Verde tree. It is an edition of 10! These are now for sale in my shop and I hope you will take a look. Hard Backs made an edition of 4.
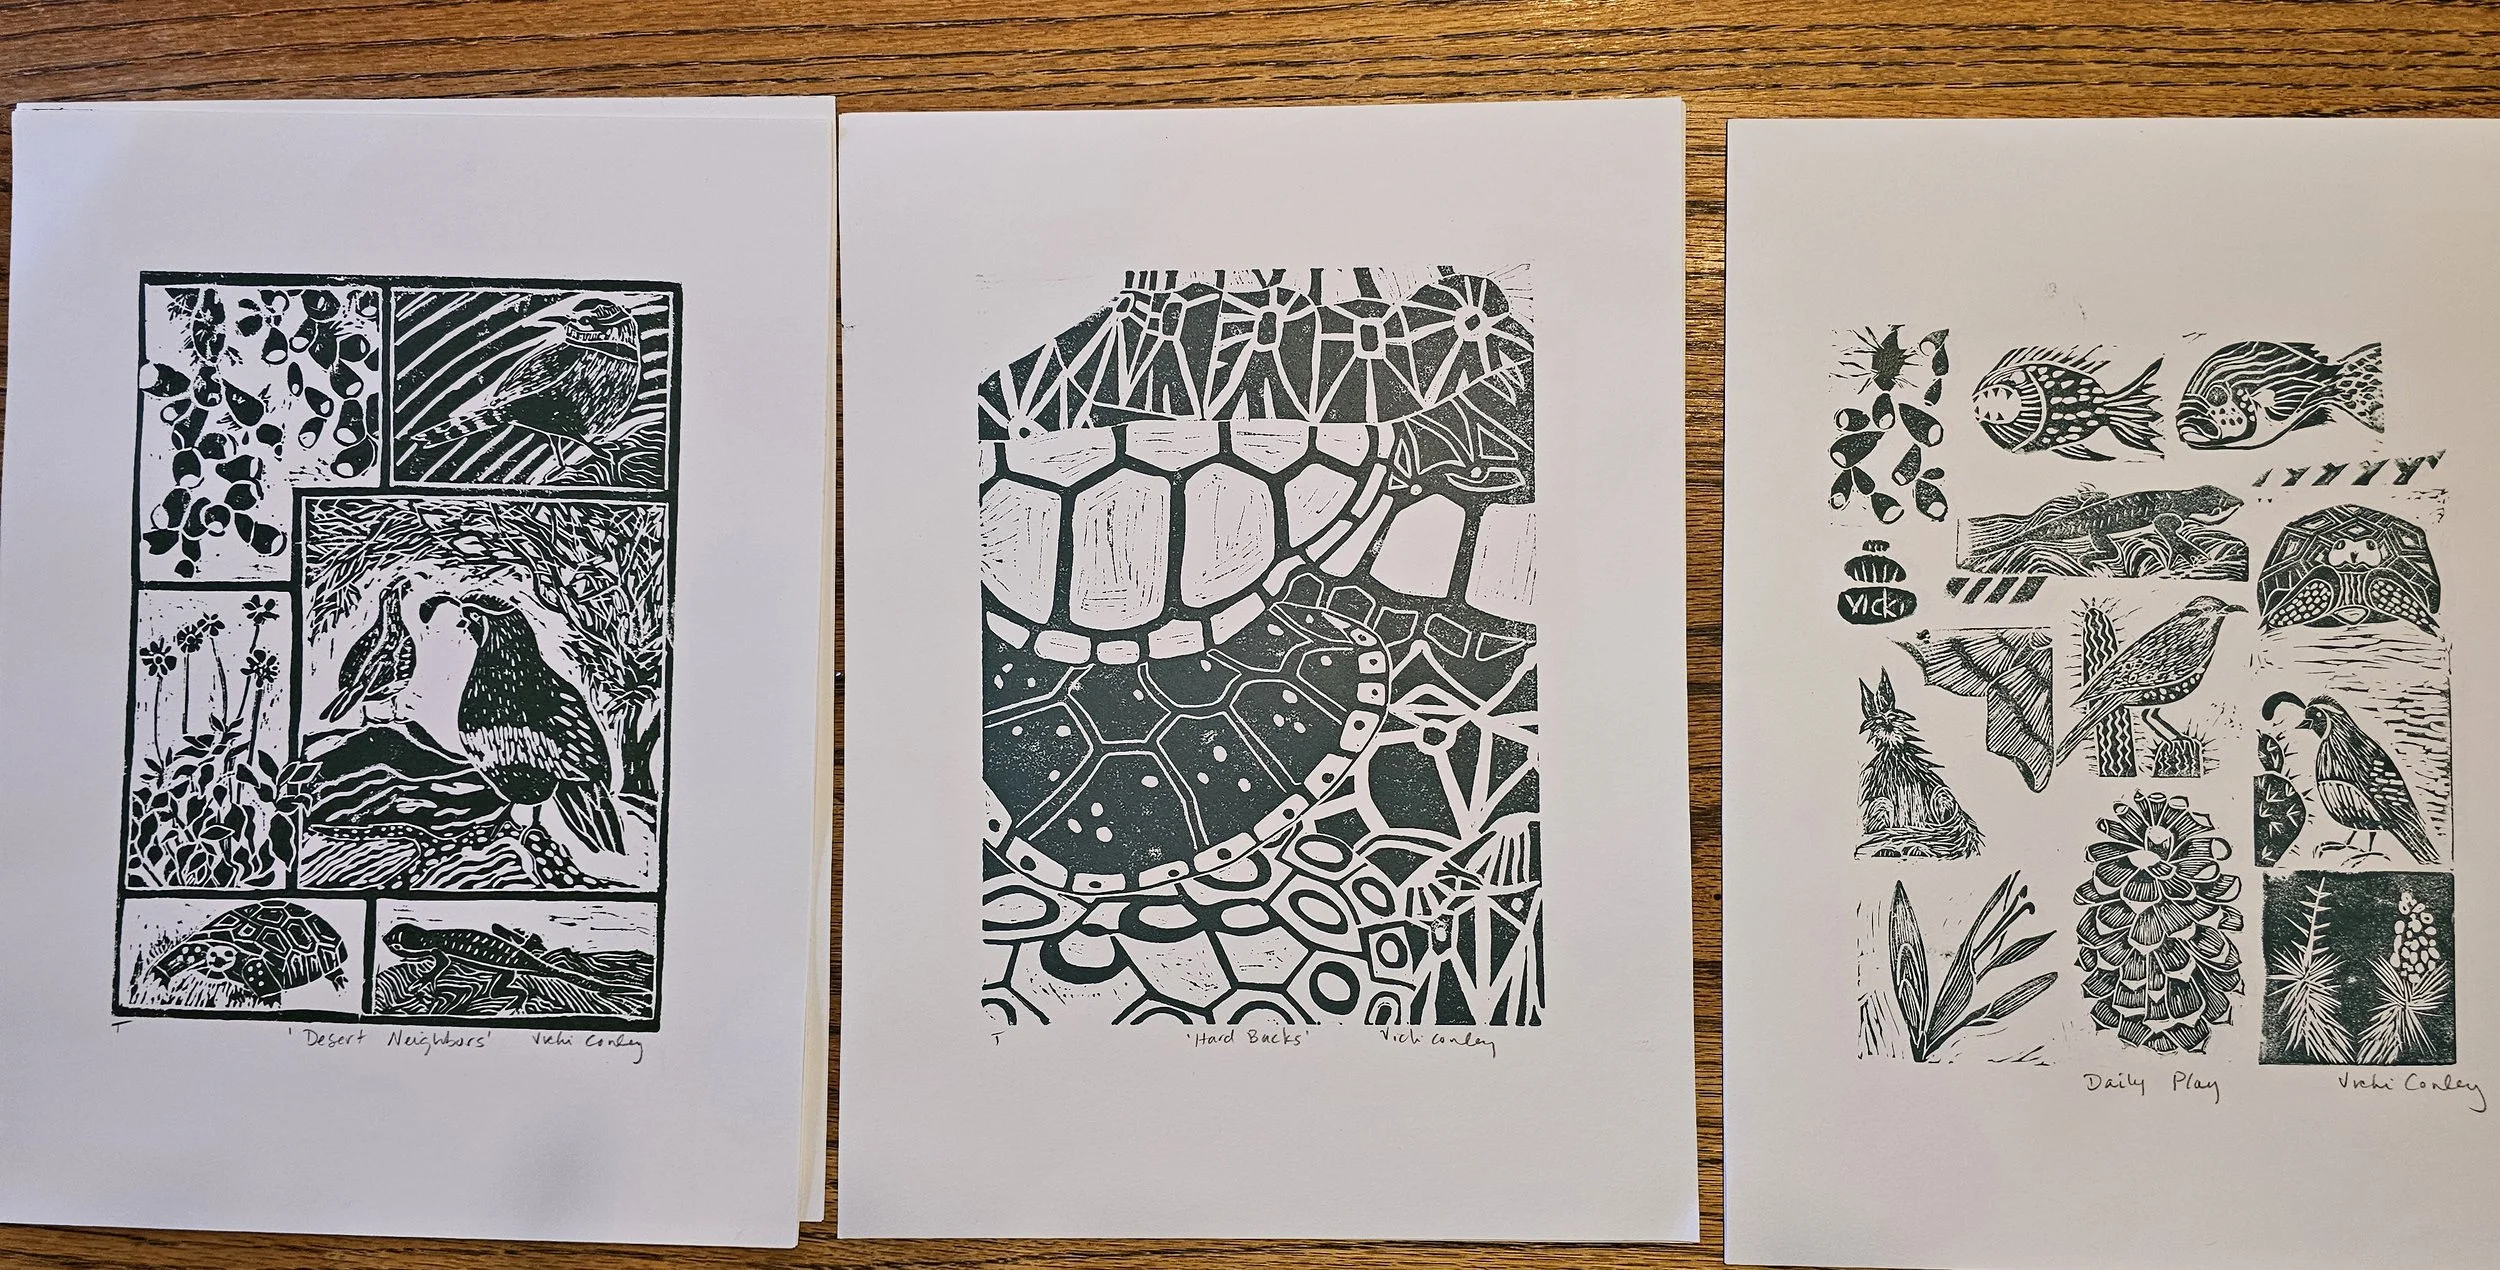
For any print purchased you may have one of the other not so perfect prints from another block for free. Choose from Desert Neighbors, Hard Backs, Daily Play or Palo Verde. (While supplies last.)
In quilting news I just finished another rock cairn quilt called Bates Cairn #2. To hear more about it please sign up for my newsletter.
The next post will follow a puzzle block printing to get a 2 color print.
Lino Carving and Printing in the RV
Lino carving while traveling in an RV turned out to be a wonderfully satisfying creative project. Printing, however, was another story. Limited space, less-than-ideal inks, and not enough water for easy cleanup all presented real challenges.
For the first couple of blocks, I traced my designs onto the linoleum using carbon paper—a process that was tedious and not very accurate. After those first two, I discovered a transfer technique that worked incredibly well. I printed the design on our laser printer and glued it onto the block using Mod Podge. Once dry, I gently rubbed away the paper with a damp cloth, leaving the design perfectly transferred to the surface. It was far easier and much more accurate than tracing, especially for complicated patterns.
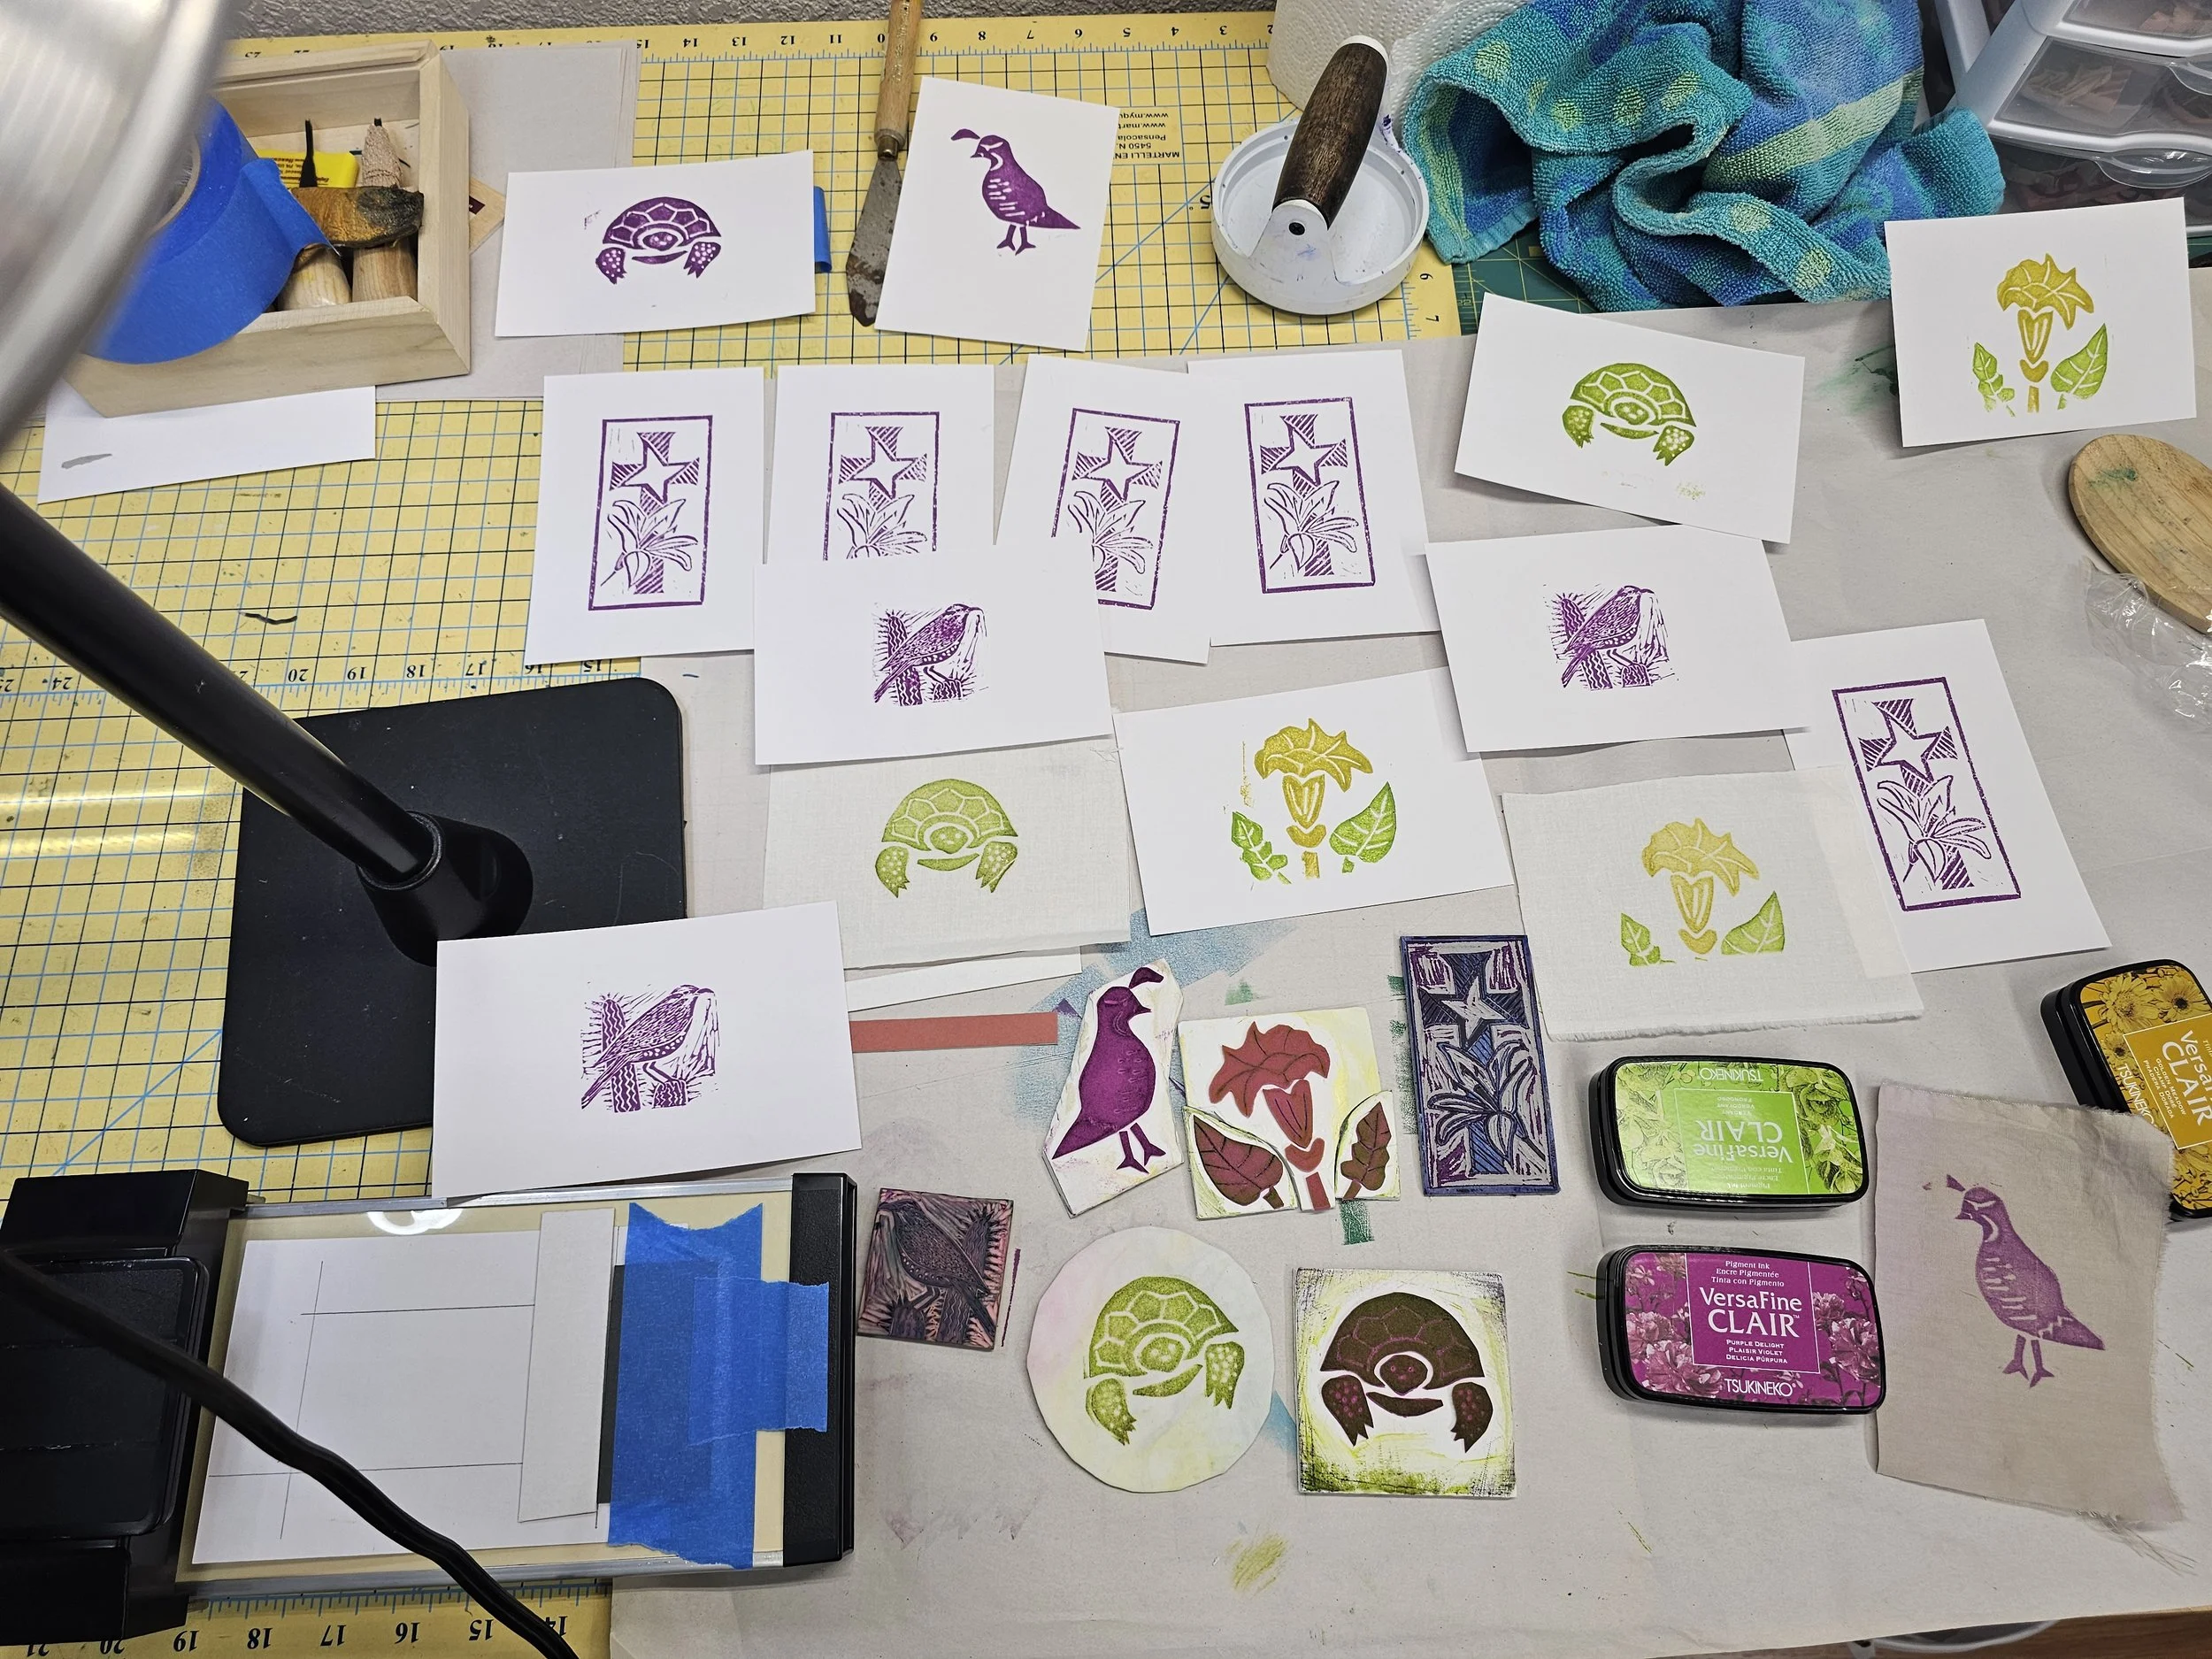
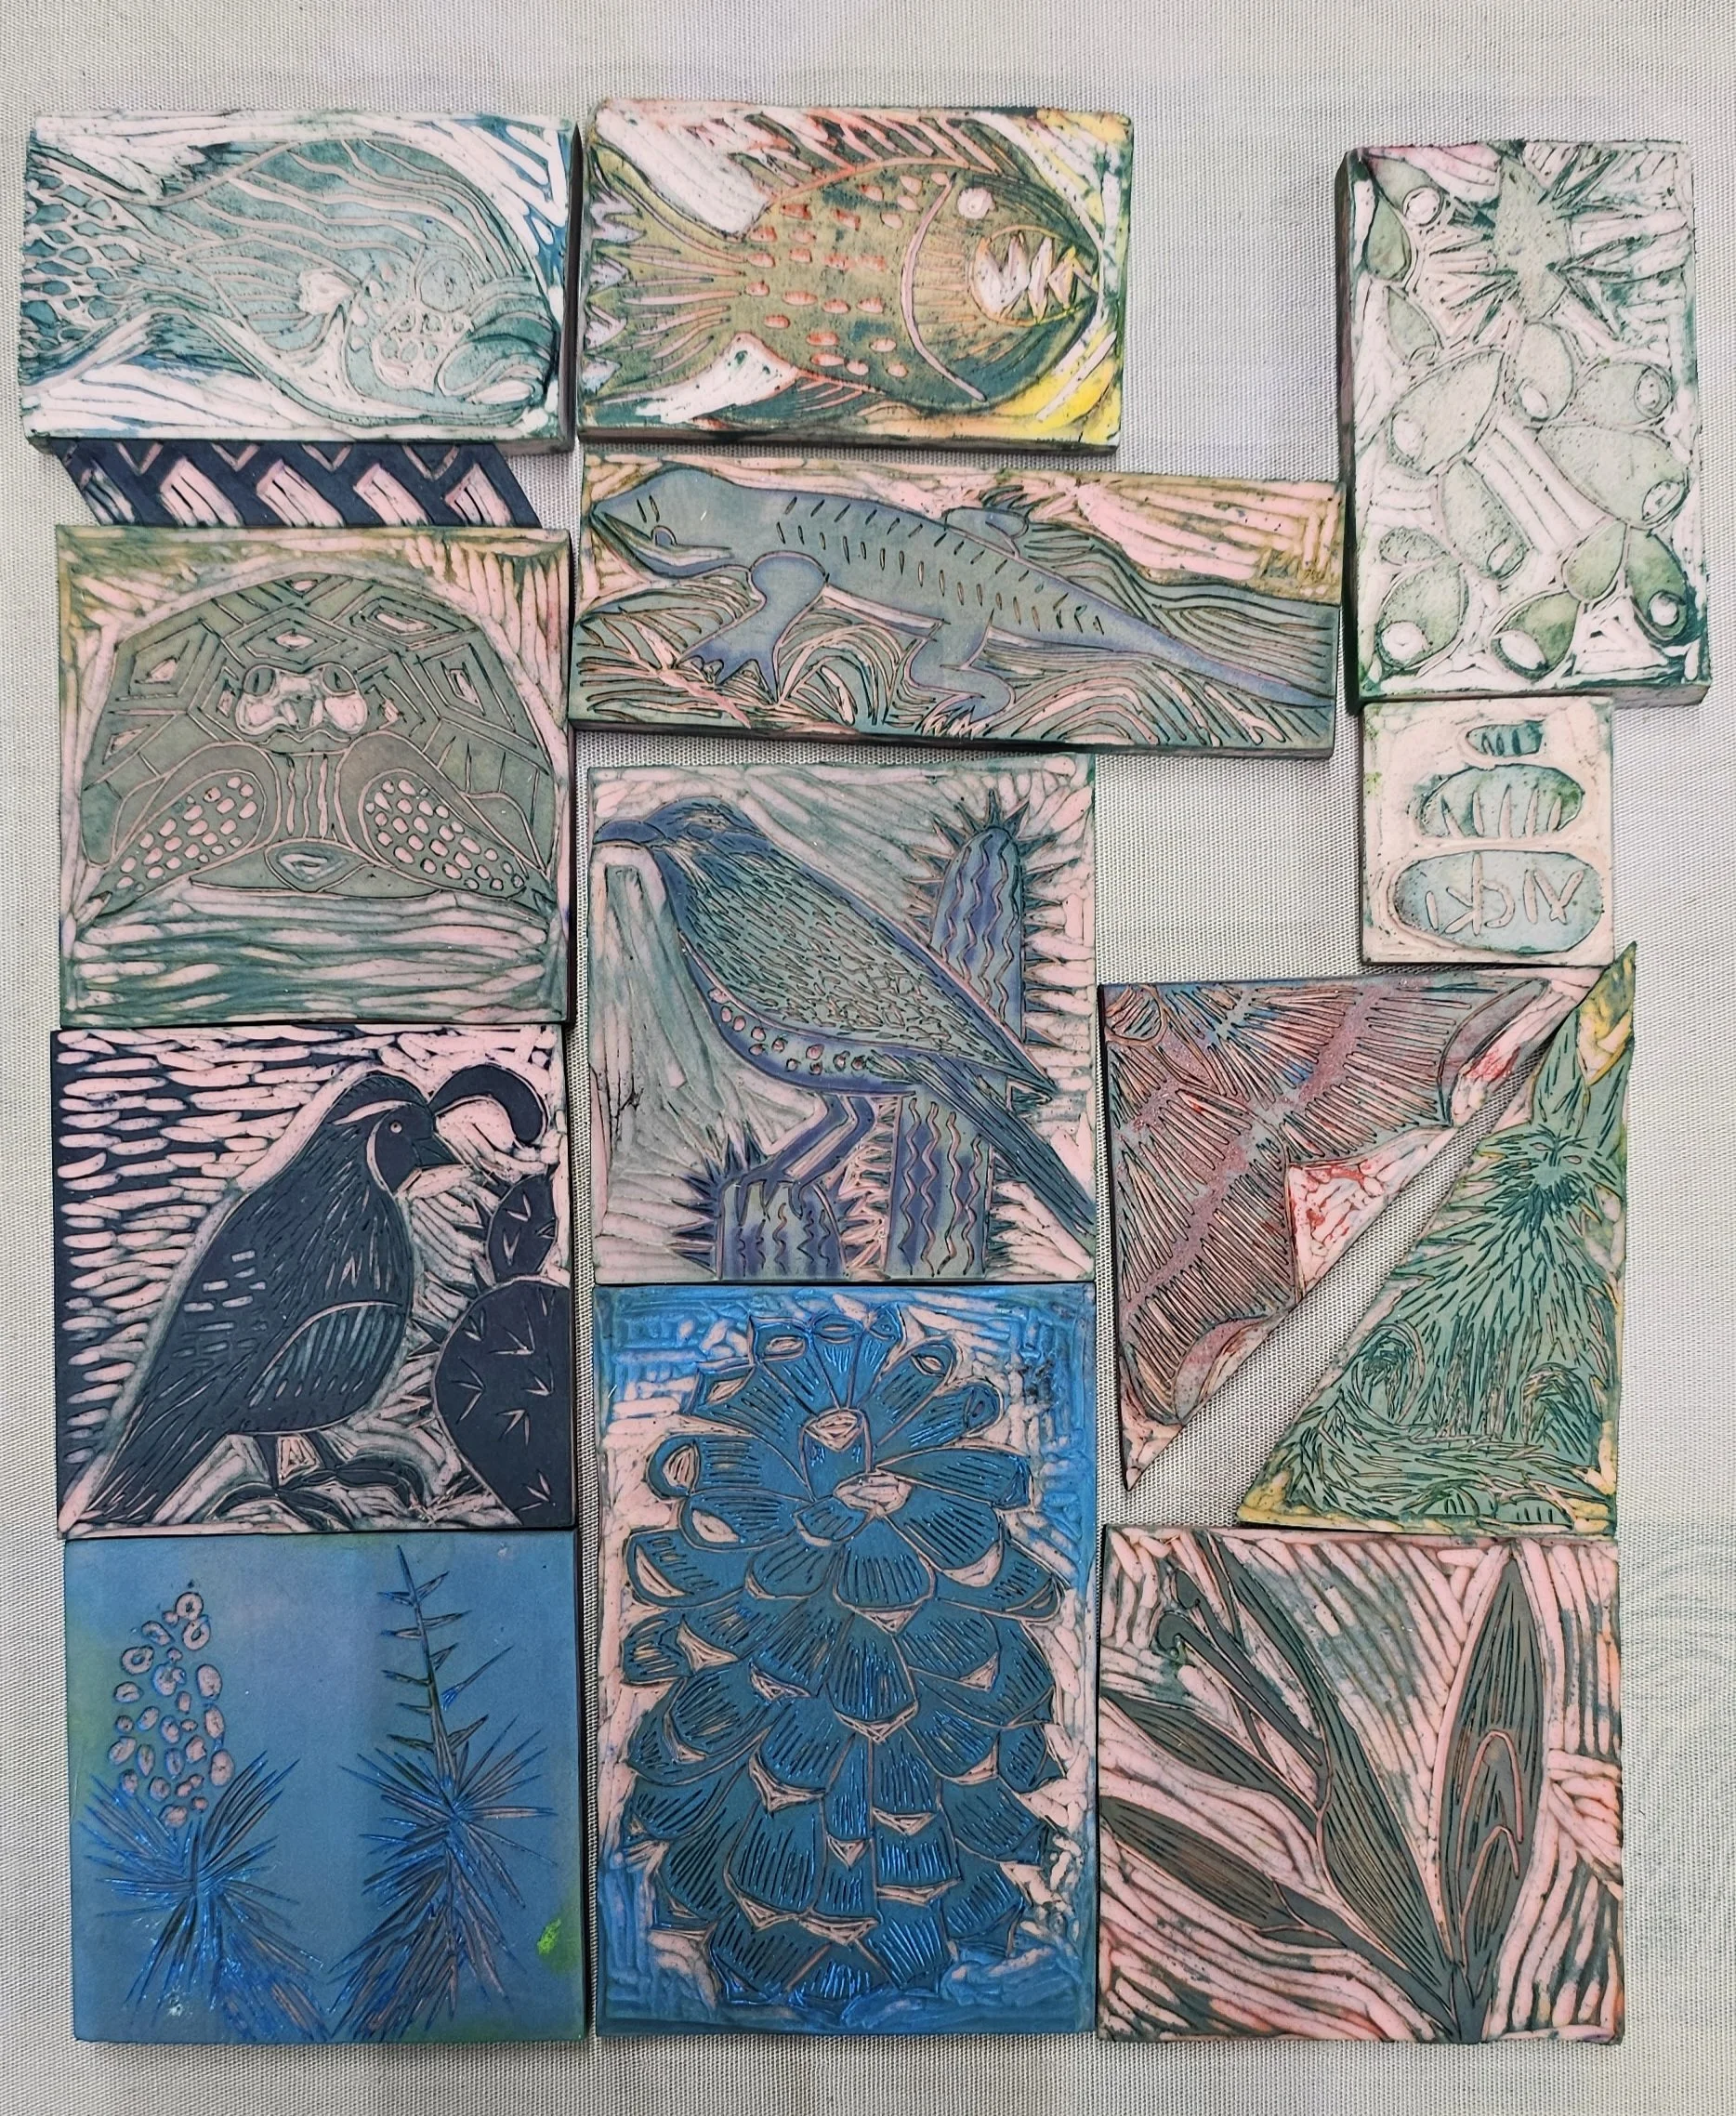
I really enjoyed carving both the linoleum blocks and my small rubber stamps throughout the entire month we were on the road. Carving the daily small stamp with Speedy Carve really helped refine my carving skills. Here are a few samples.
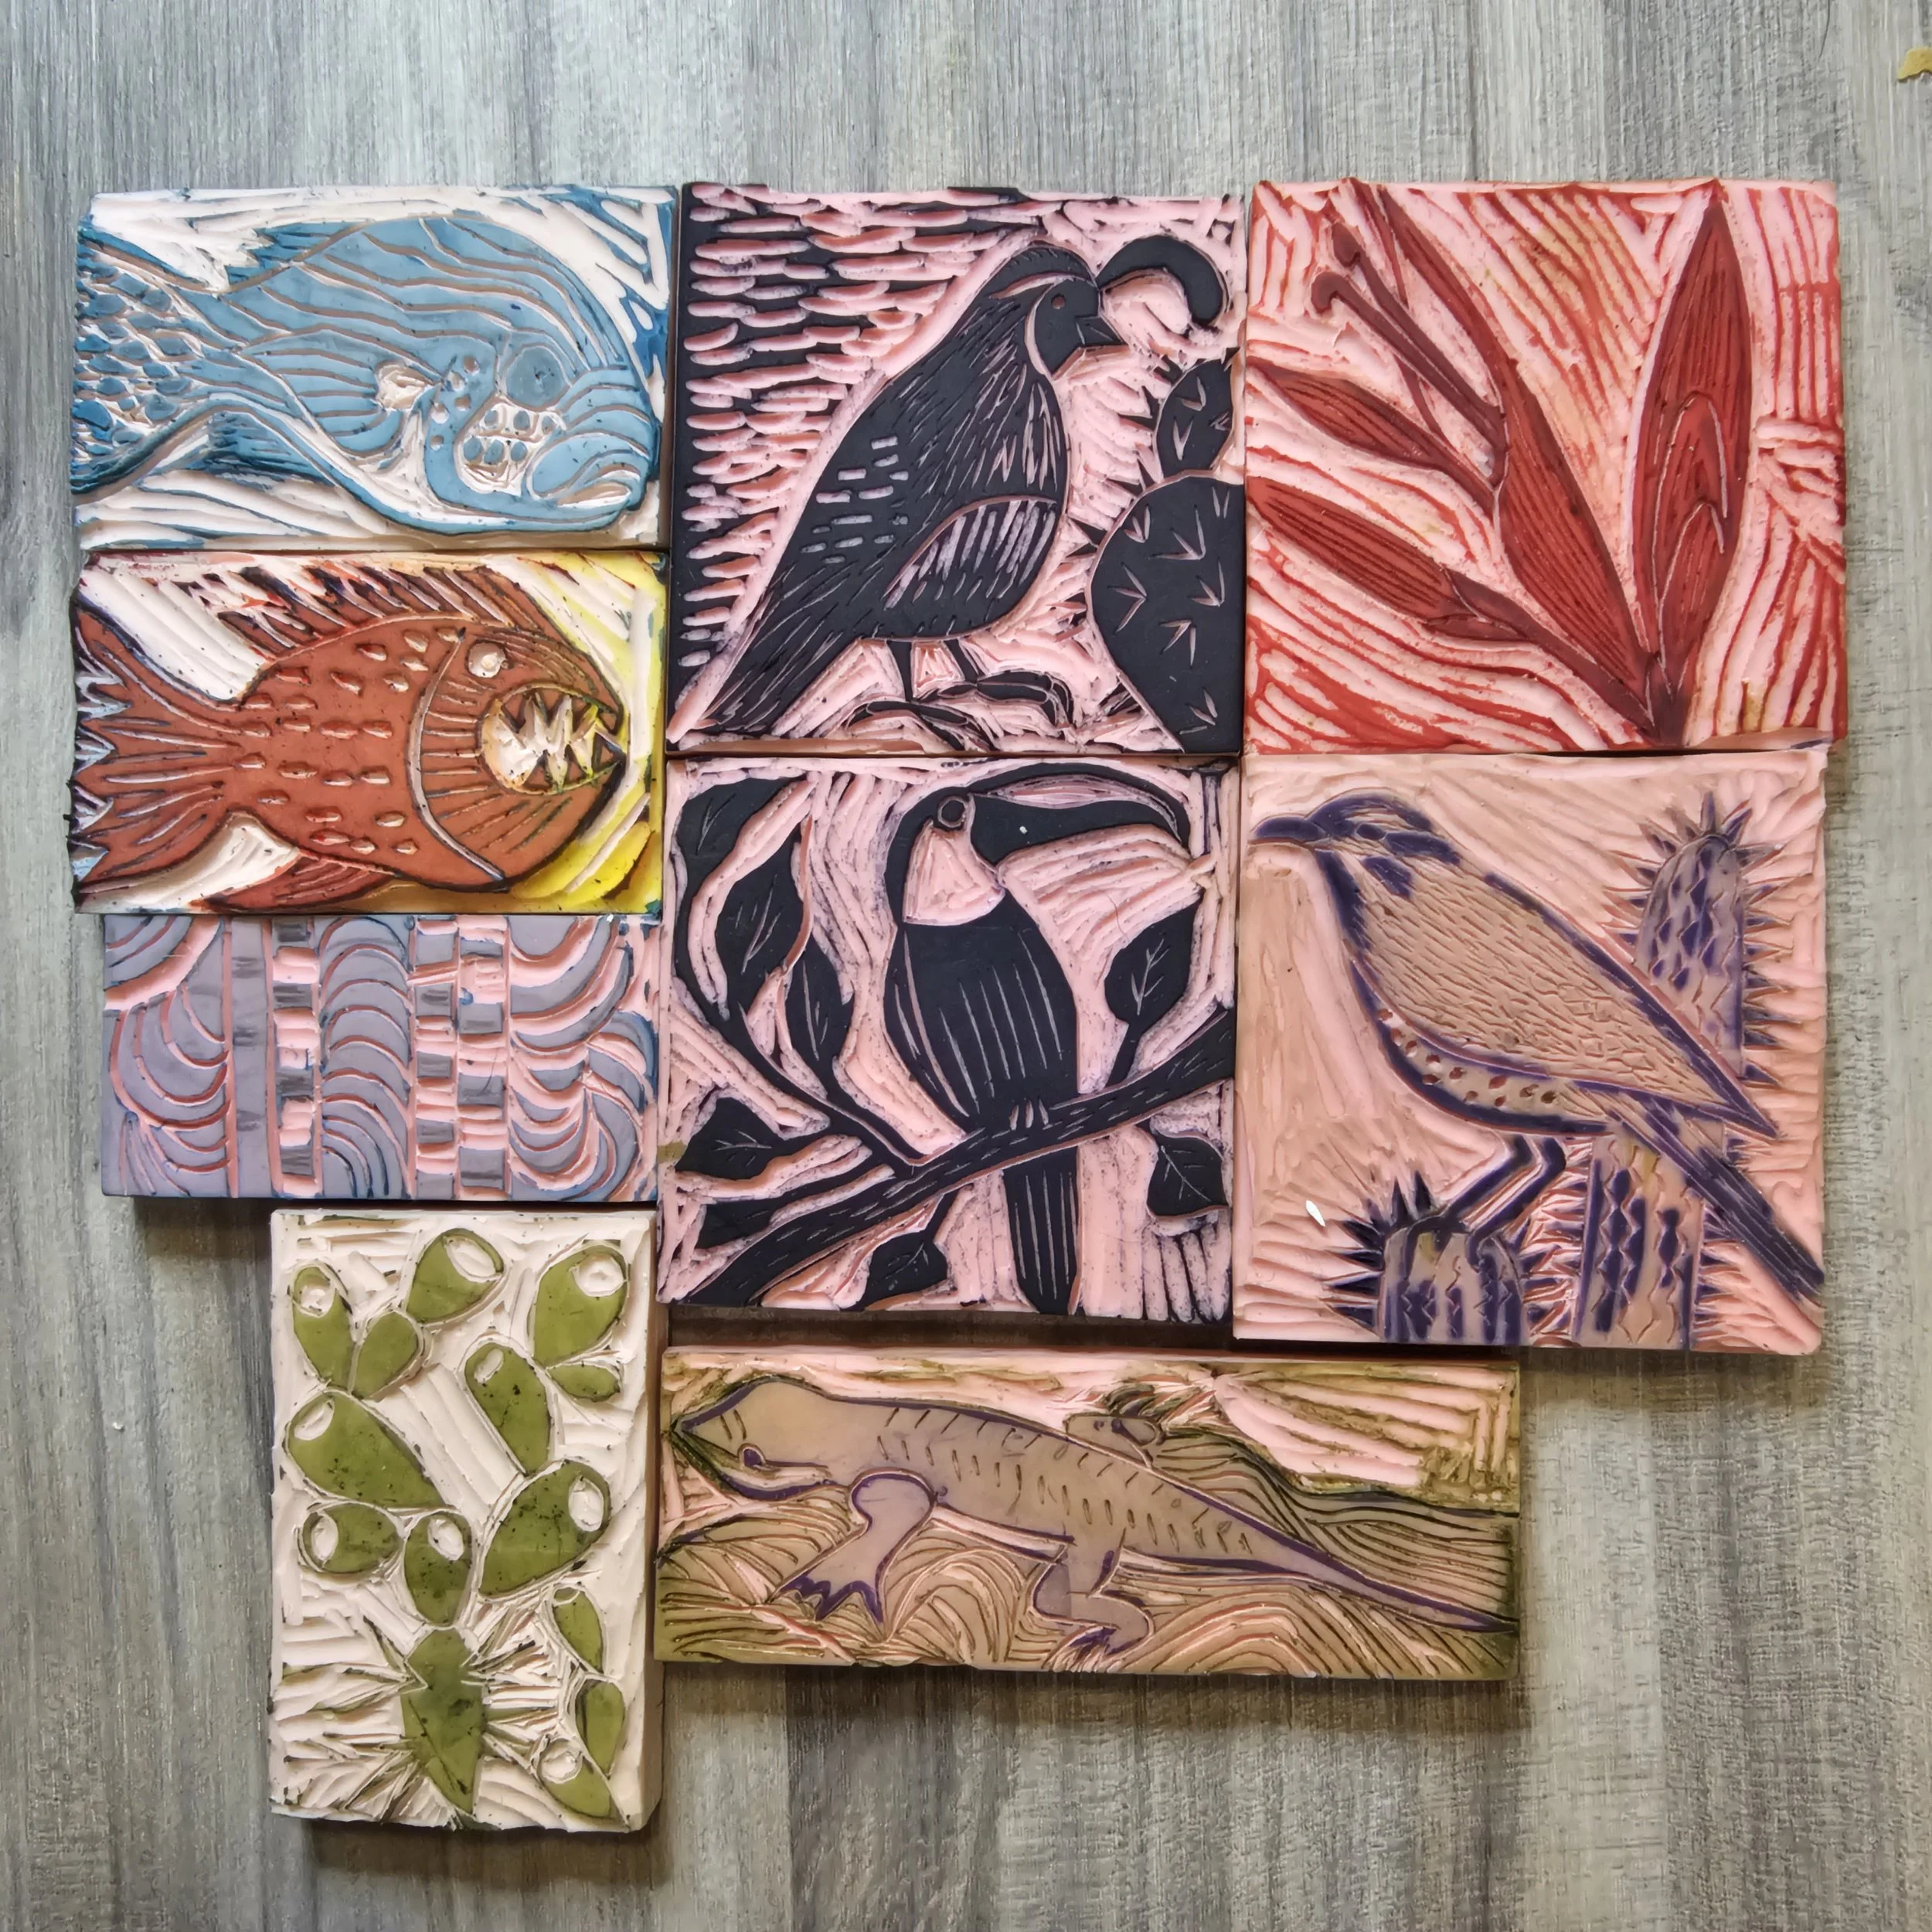
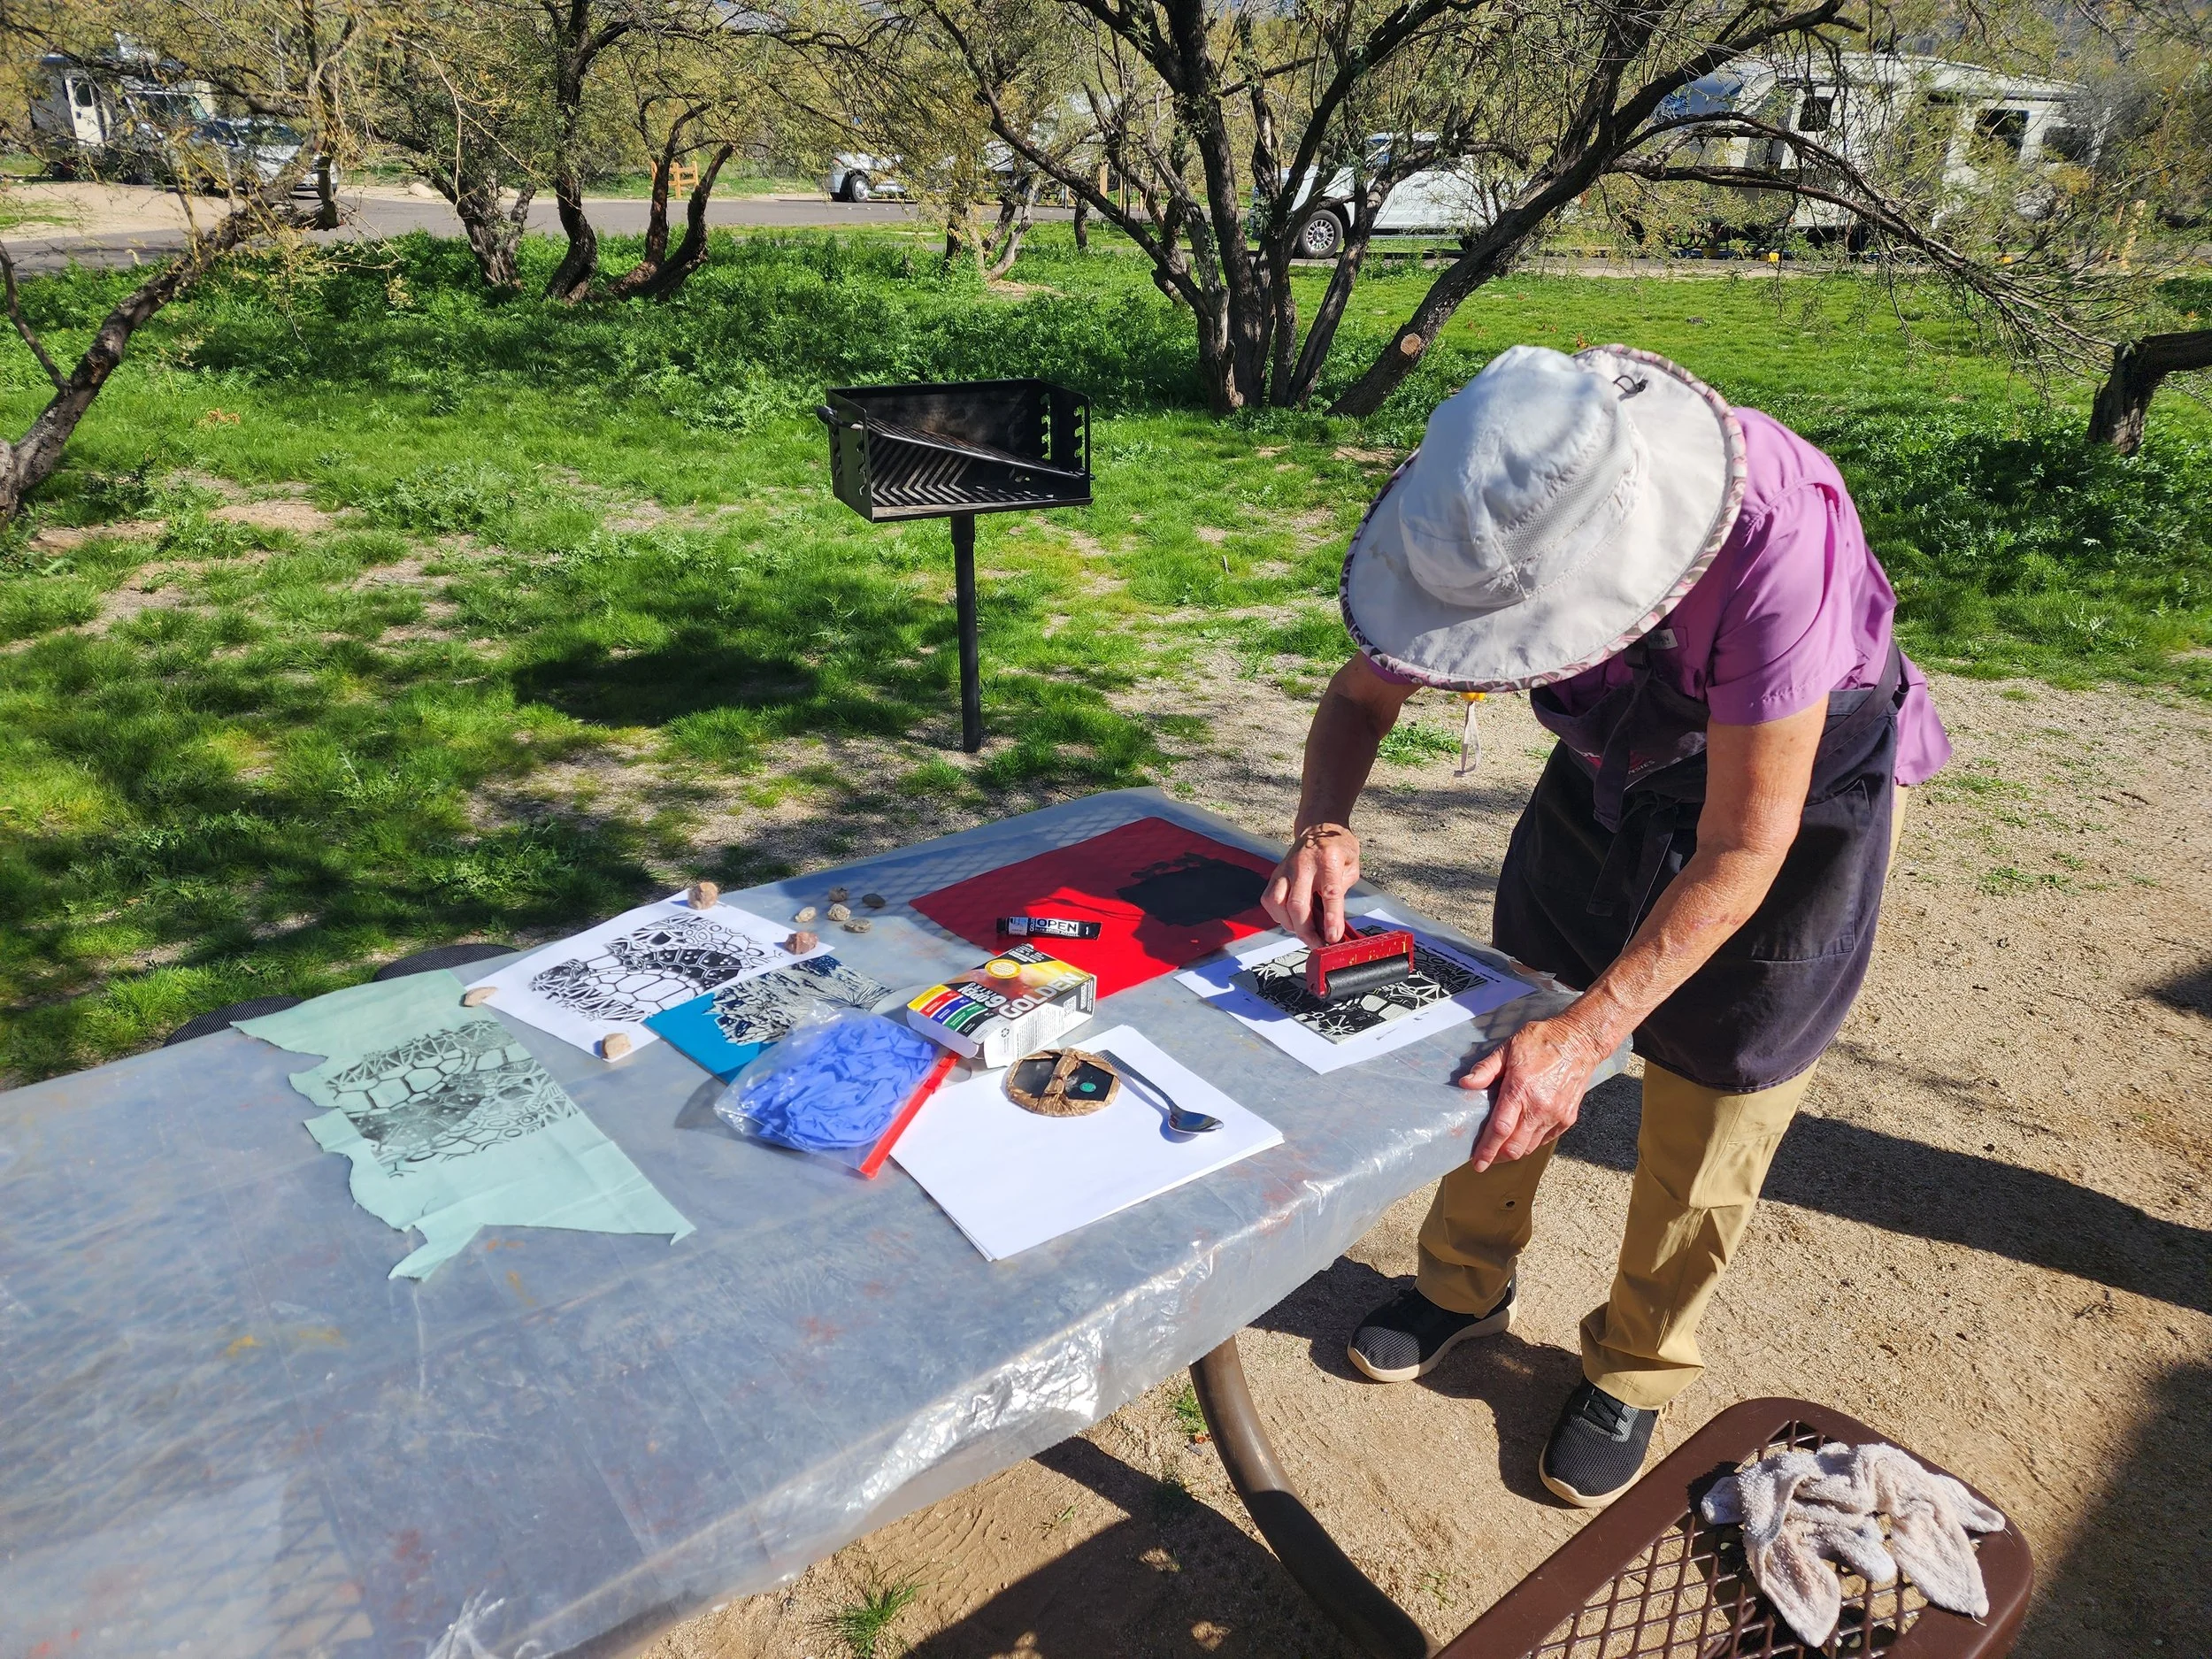
After spending so much time carefully carving the blocks, I wanted to do a few test prints. I had to make do with the supplies I had on hand, so these first prints were done outside using Golden Open Acrylic paint—the same paint I usually use for gel plate printing.
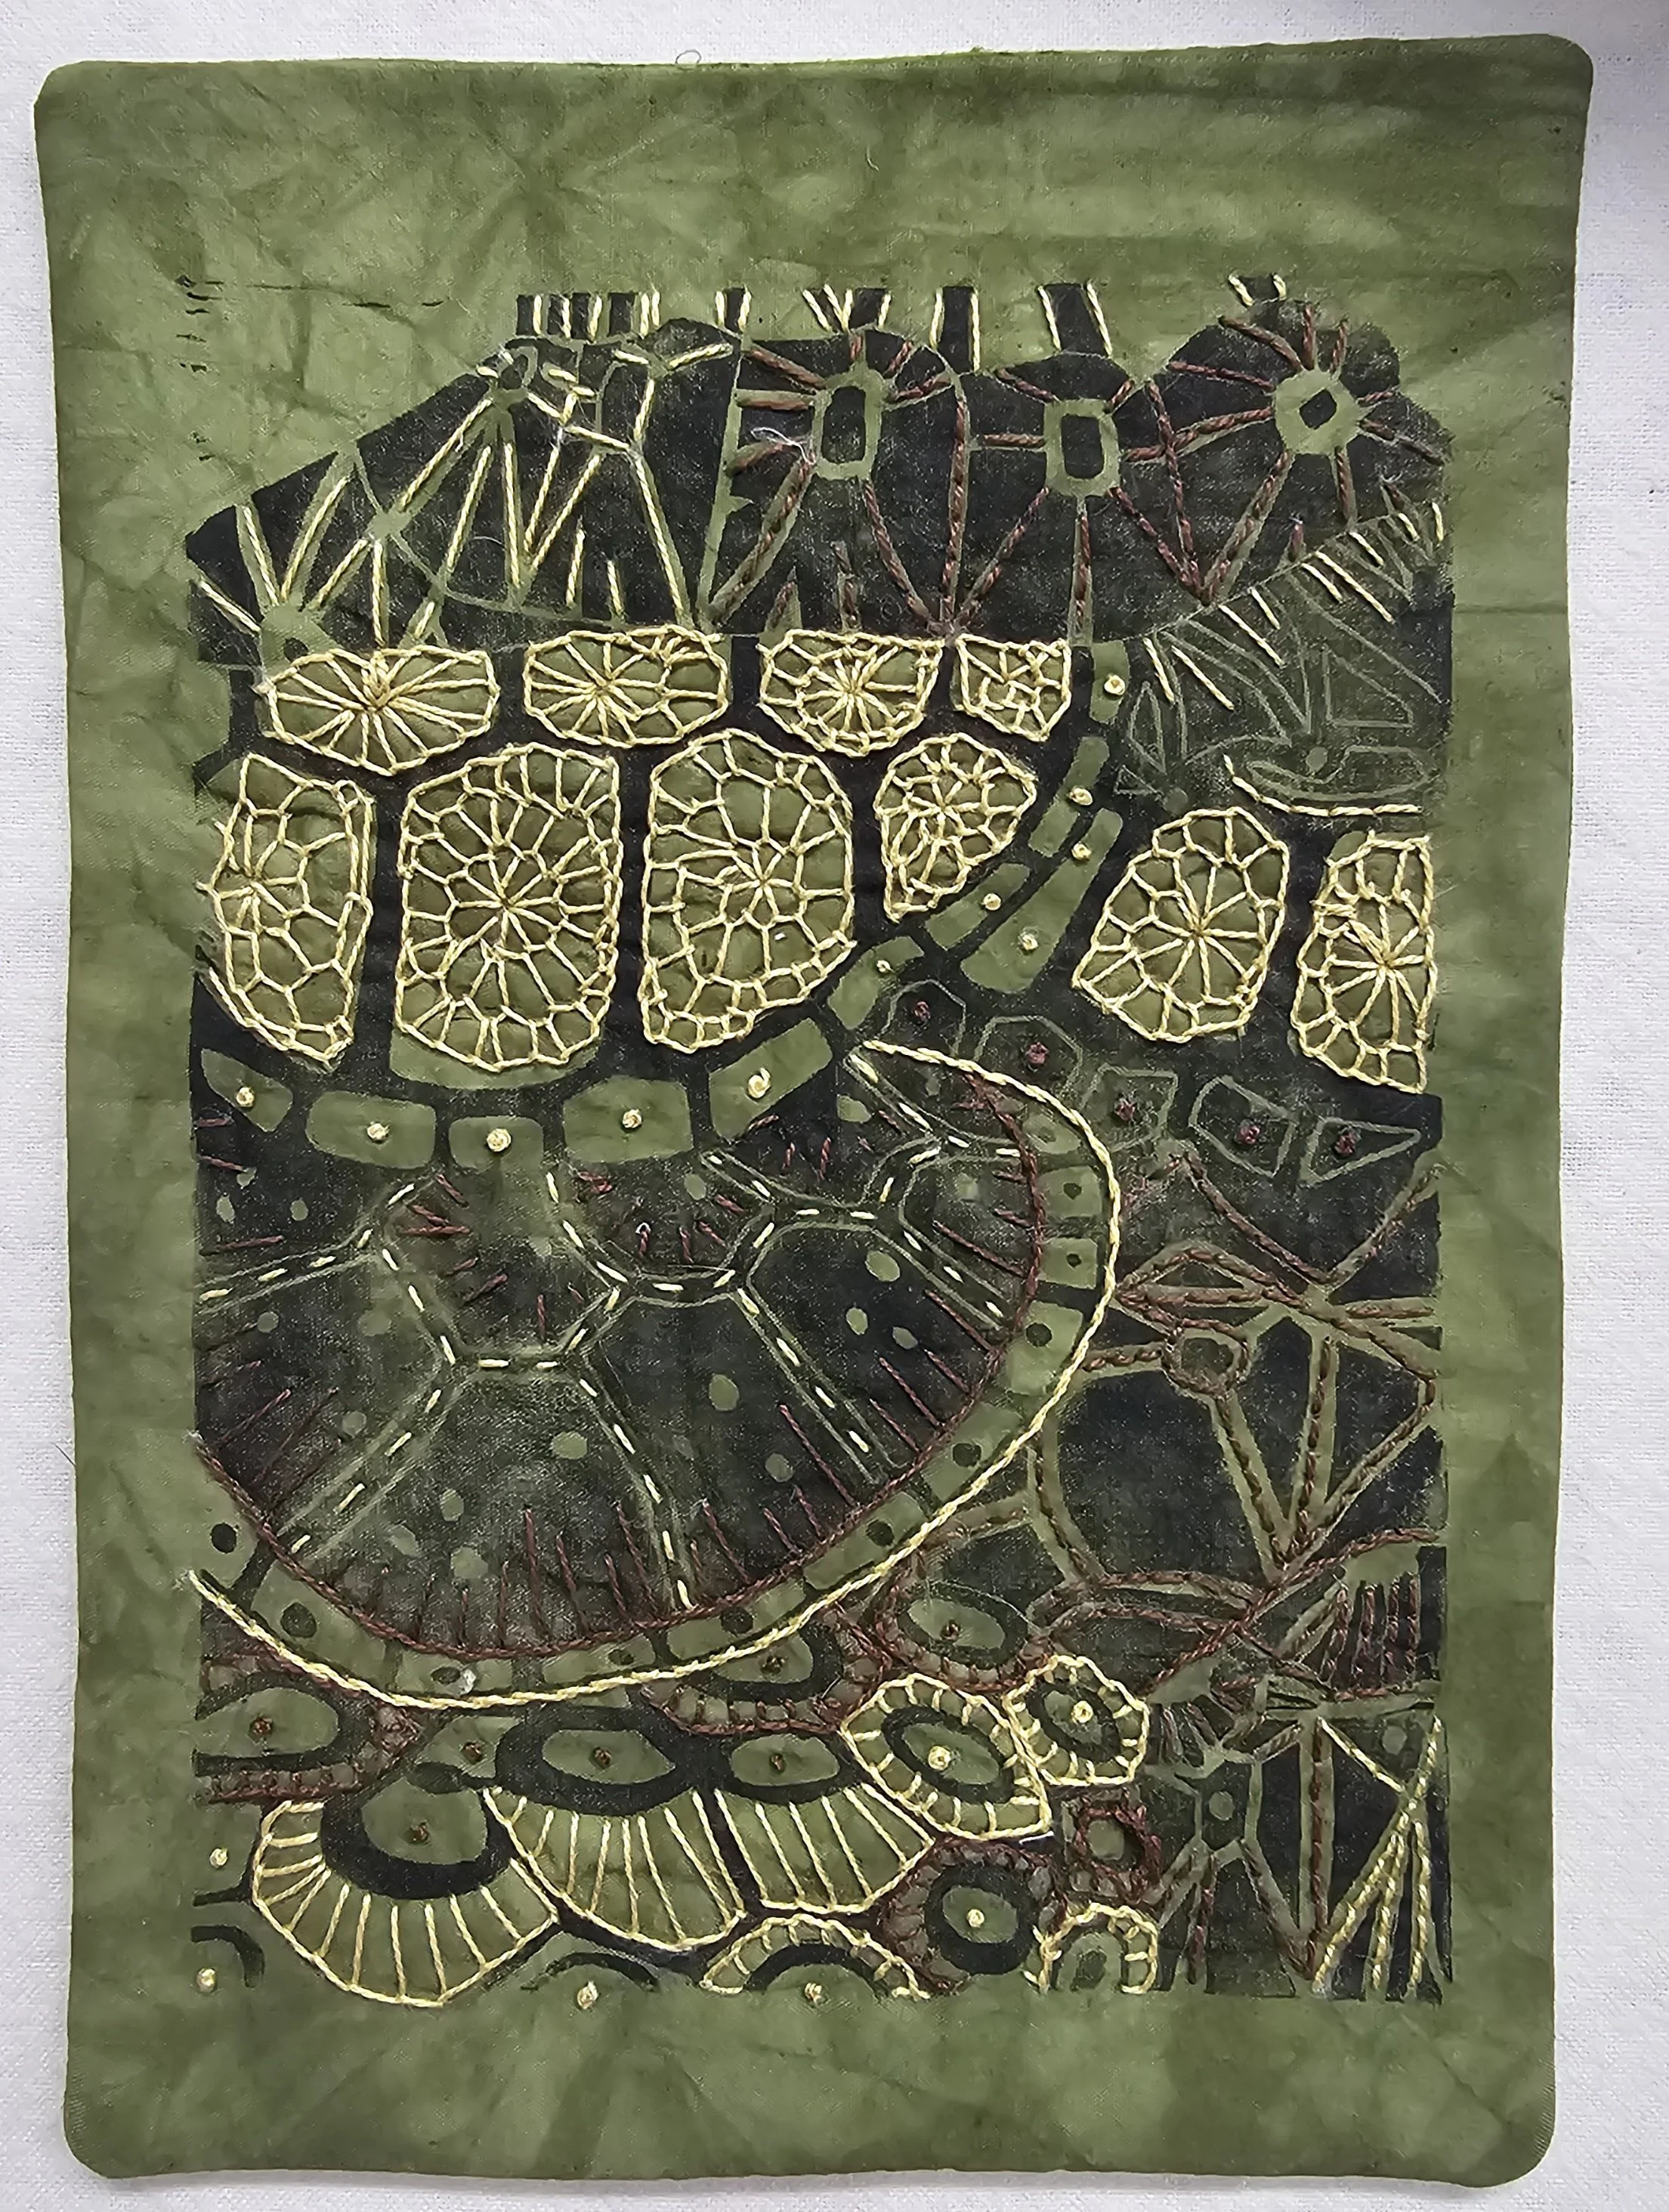
The paint didn’t dry too quickly, which was helpful, but it did require a lot of paint. I printed a few images on paper and also printed the turtle shell pattern on fabric. Those fabric prints were intended for small art quilts, which I plan to embellish with embroidery.
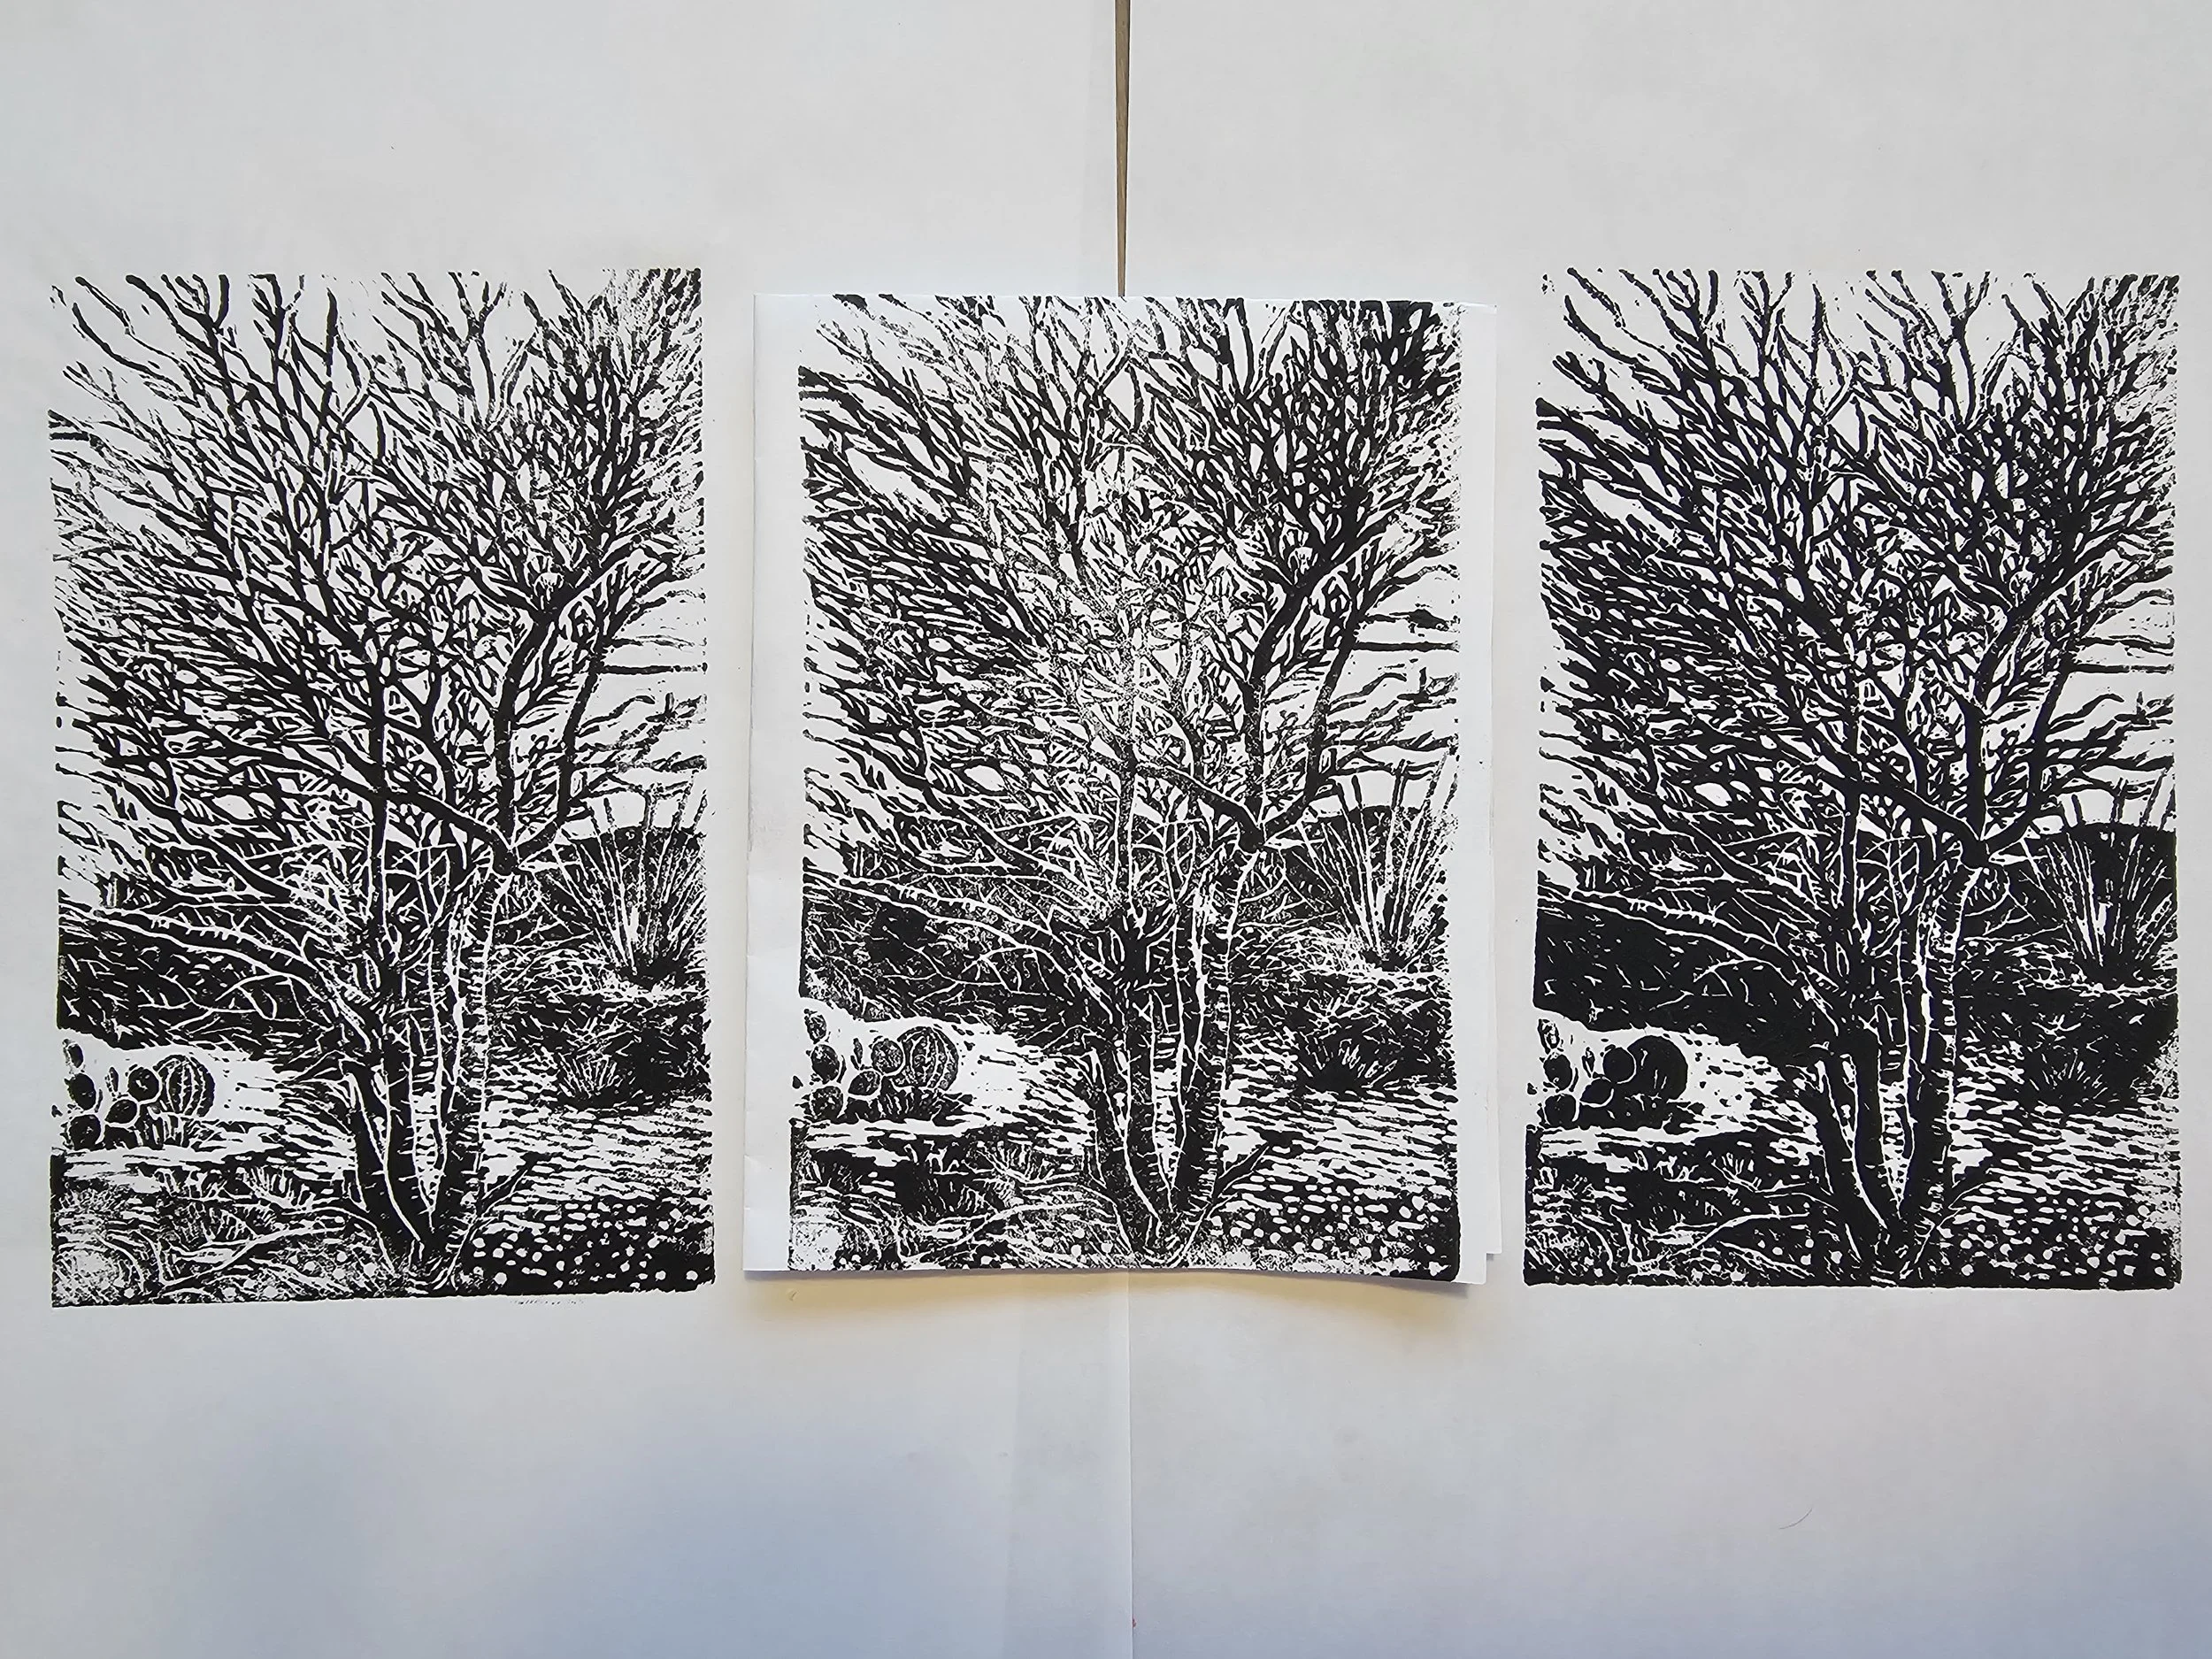
Before printing the next linoleum blocks, I stopped at Hobby Lobby and bought a tube of regular water-soluble block printing ink. I did some test prints, but I wasn’t happy with the results. The ink dried extremely fast, making it difficult to achieve a good print, and the finished images had a rough texture that I didn’t care for. Still, these test prints were useful—they helped me see where adjustments were needed in the blocks.
I’m really looking forward to getting home and printing proper editions using Safe Wash ink.
One additional block I carved was a Valentine design featuring my dog, Quark, bursting out of a paper heart. Using what I had available, I printed the red backgrounds on cards with the gel plate and Golden Open Acrylic paint. I then printed the heart image over the red base using black block printing ink. They turned out pretty cute, and I mailed them off to friends and family.
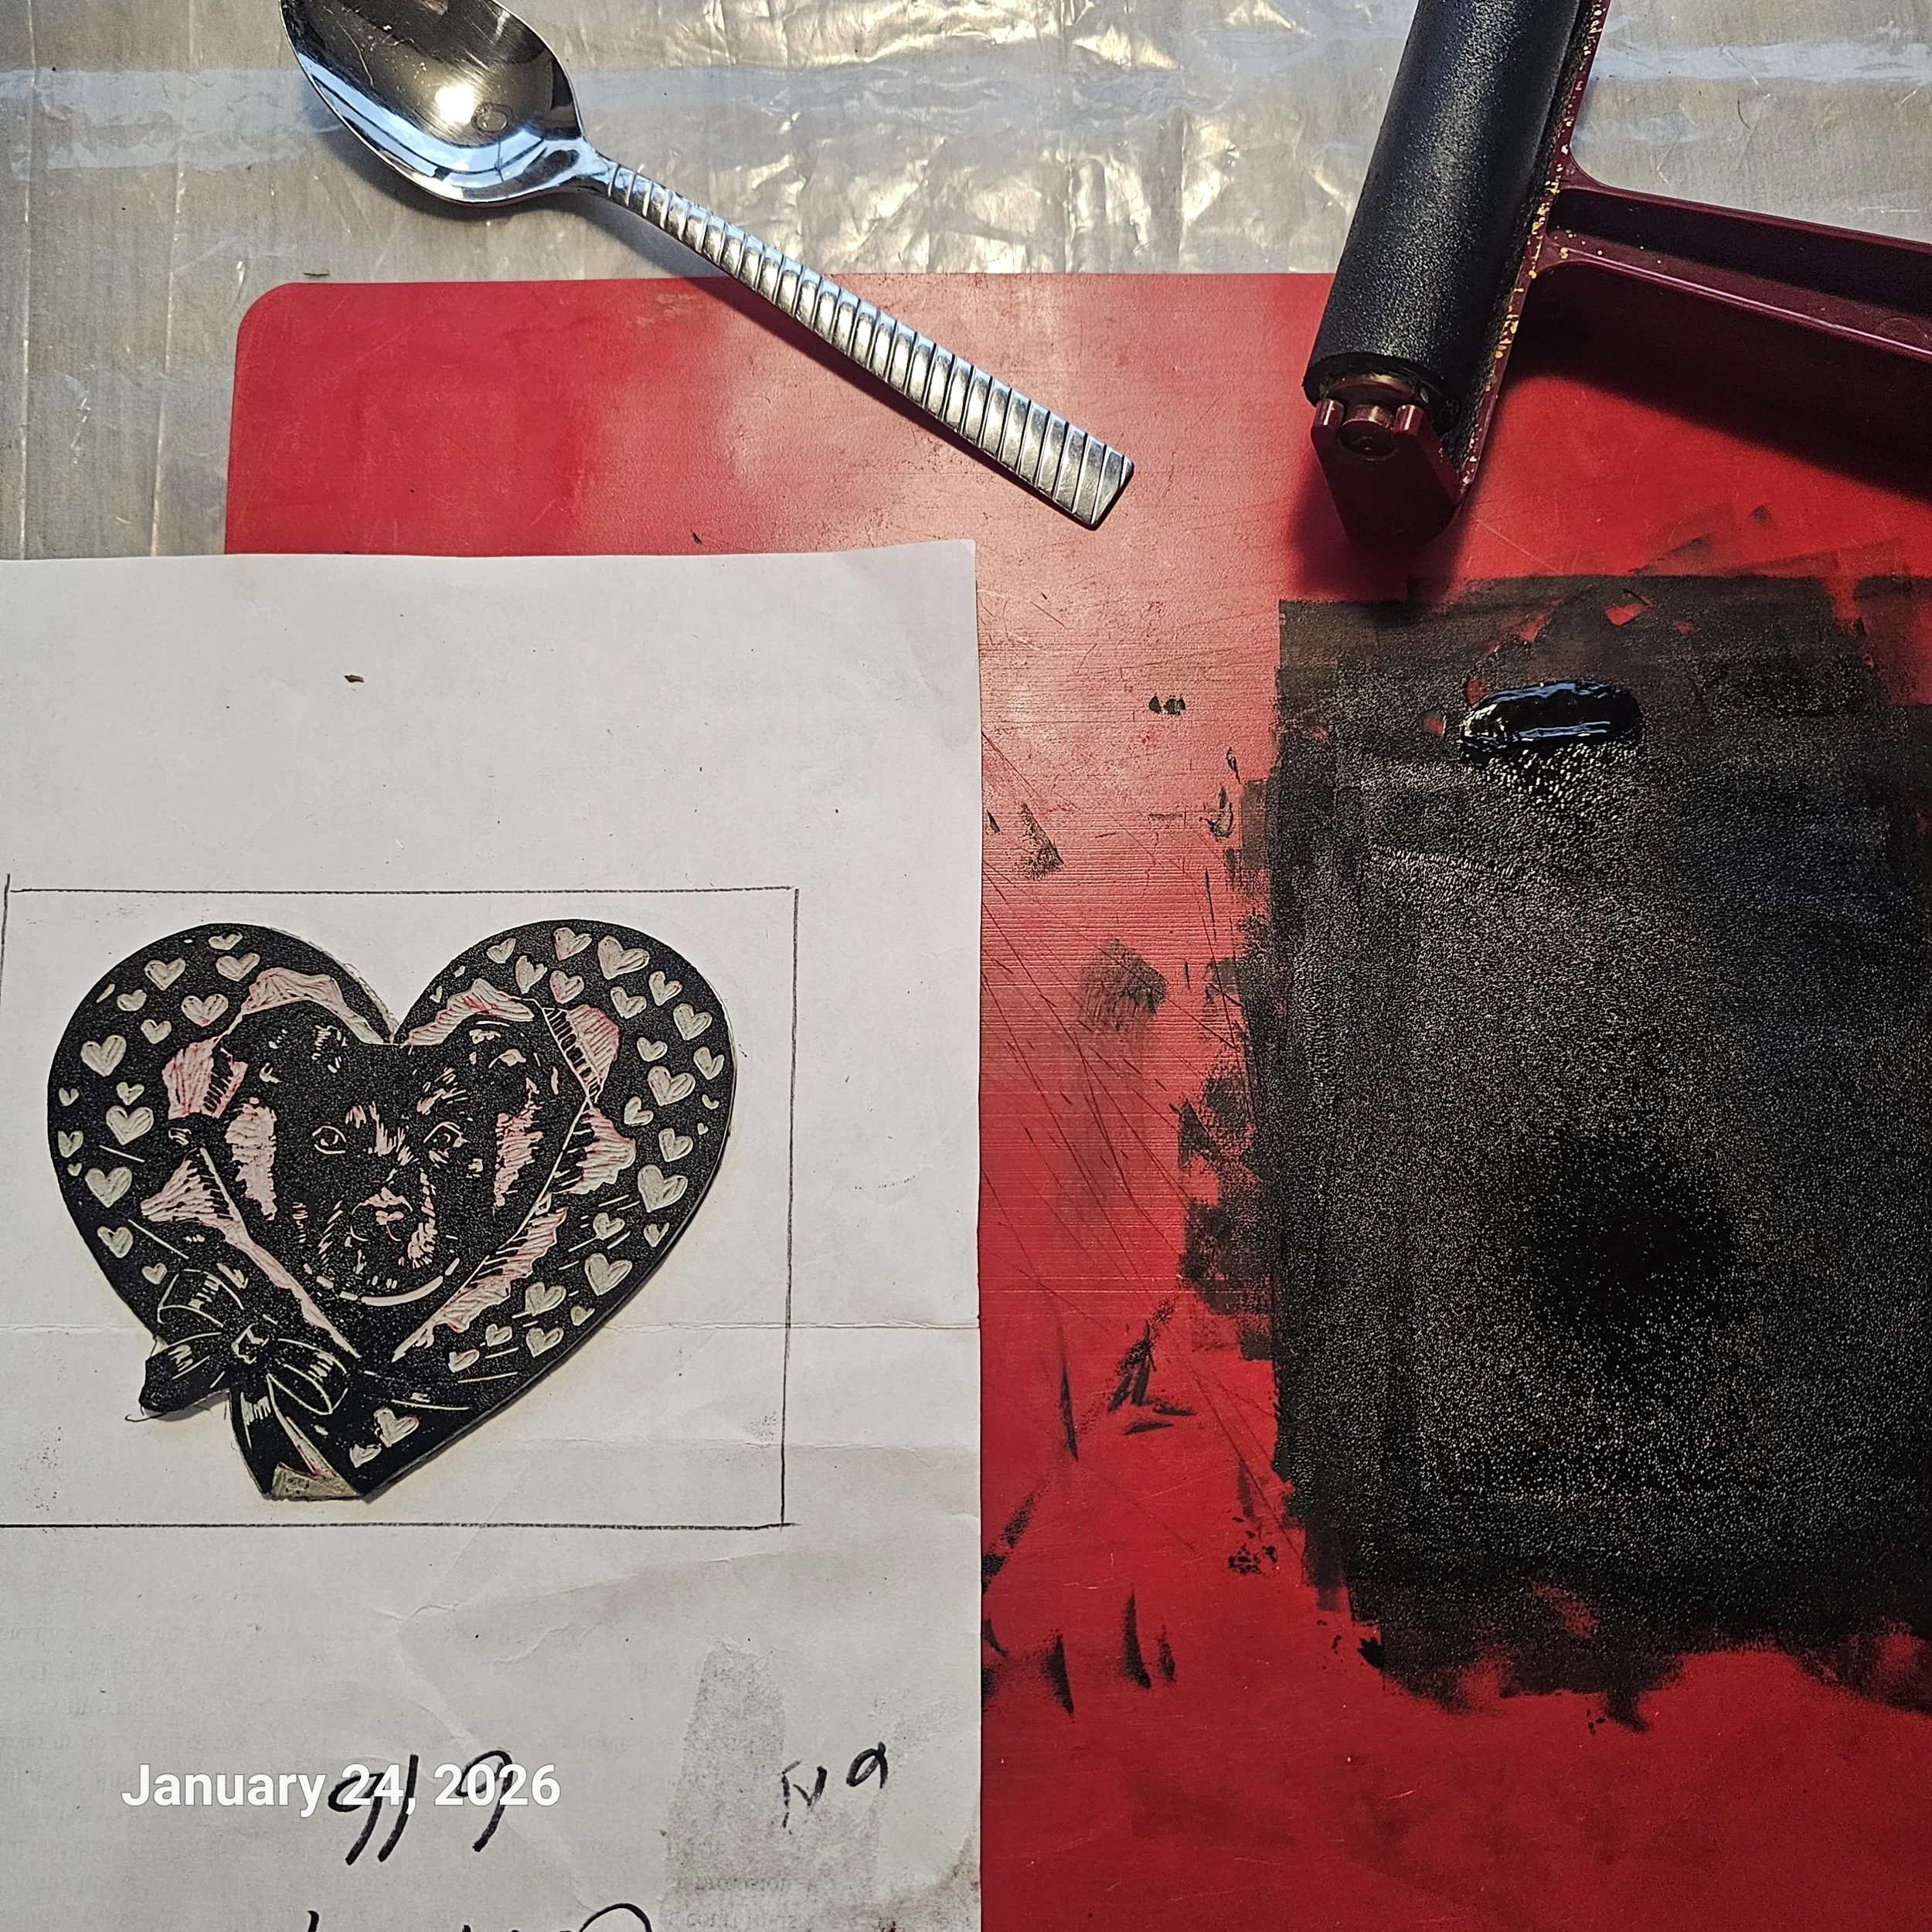
Happy Valentines Day
What I learned First Lino Prints
What I learned today, with my very first printing of my very first lino blocks. I've been taking an online class with AGI-Art Linocut course.
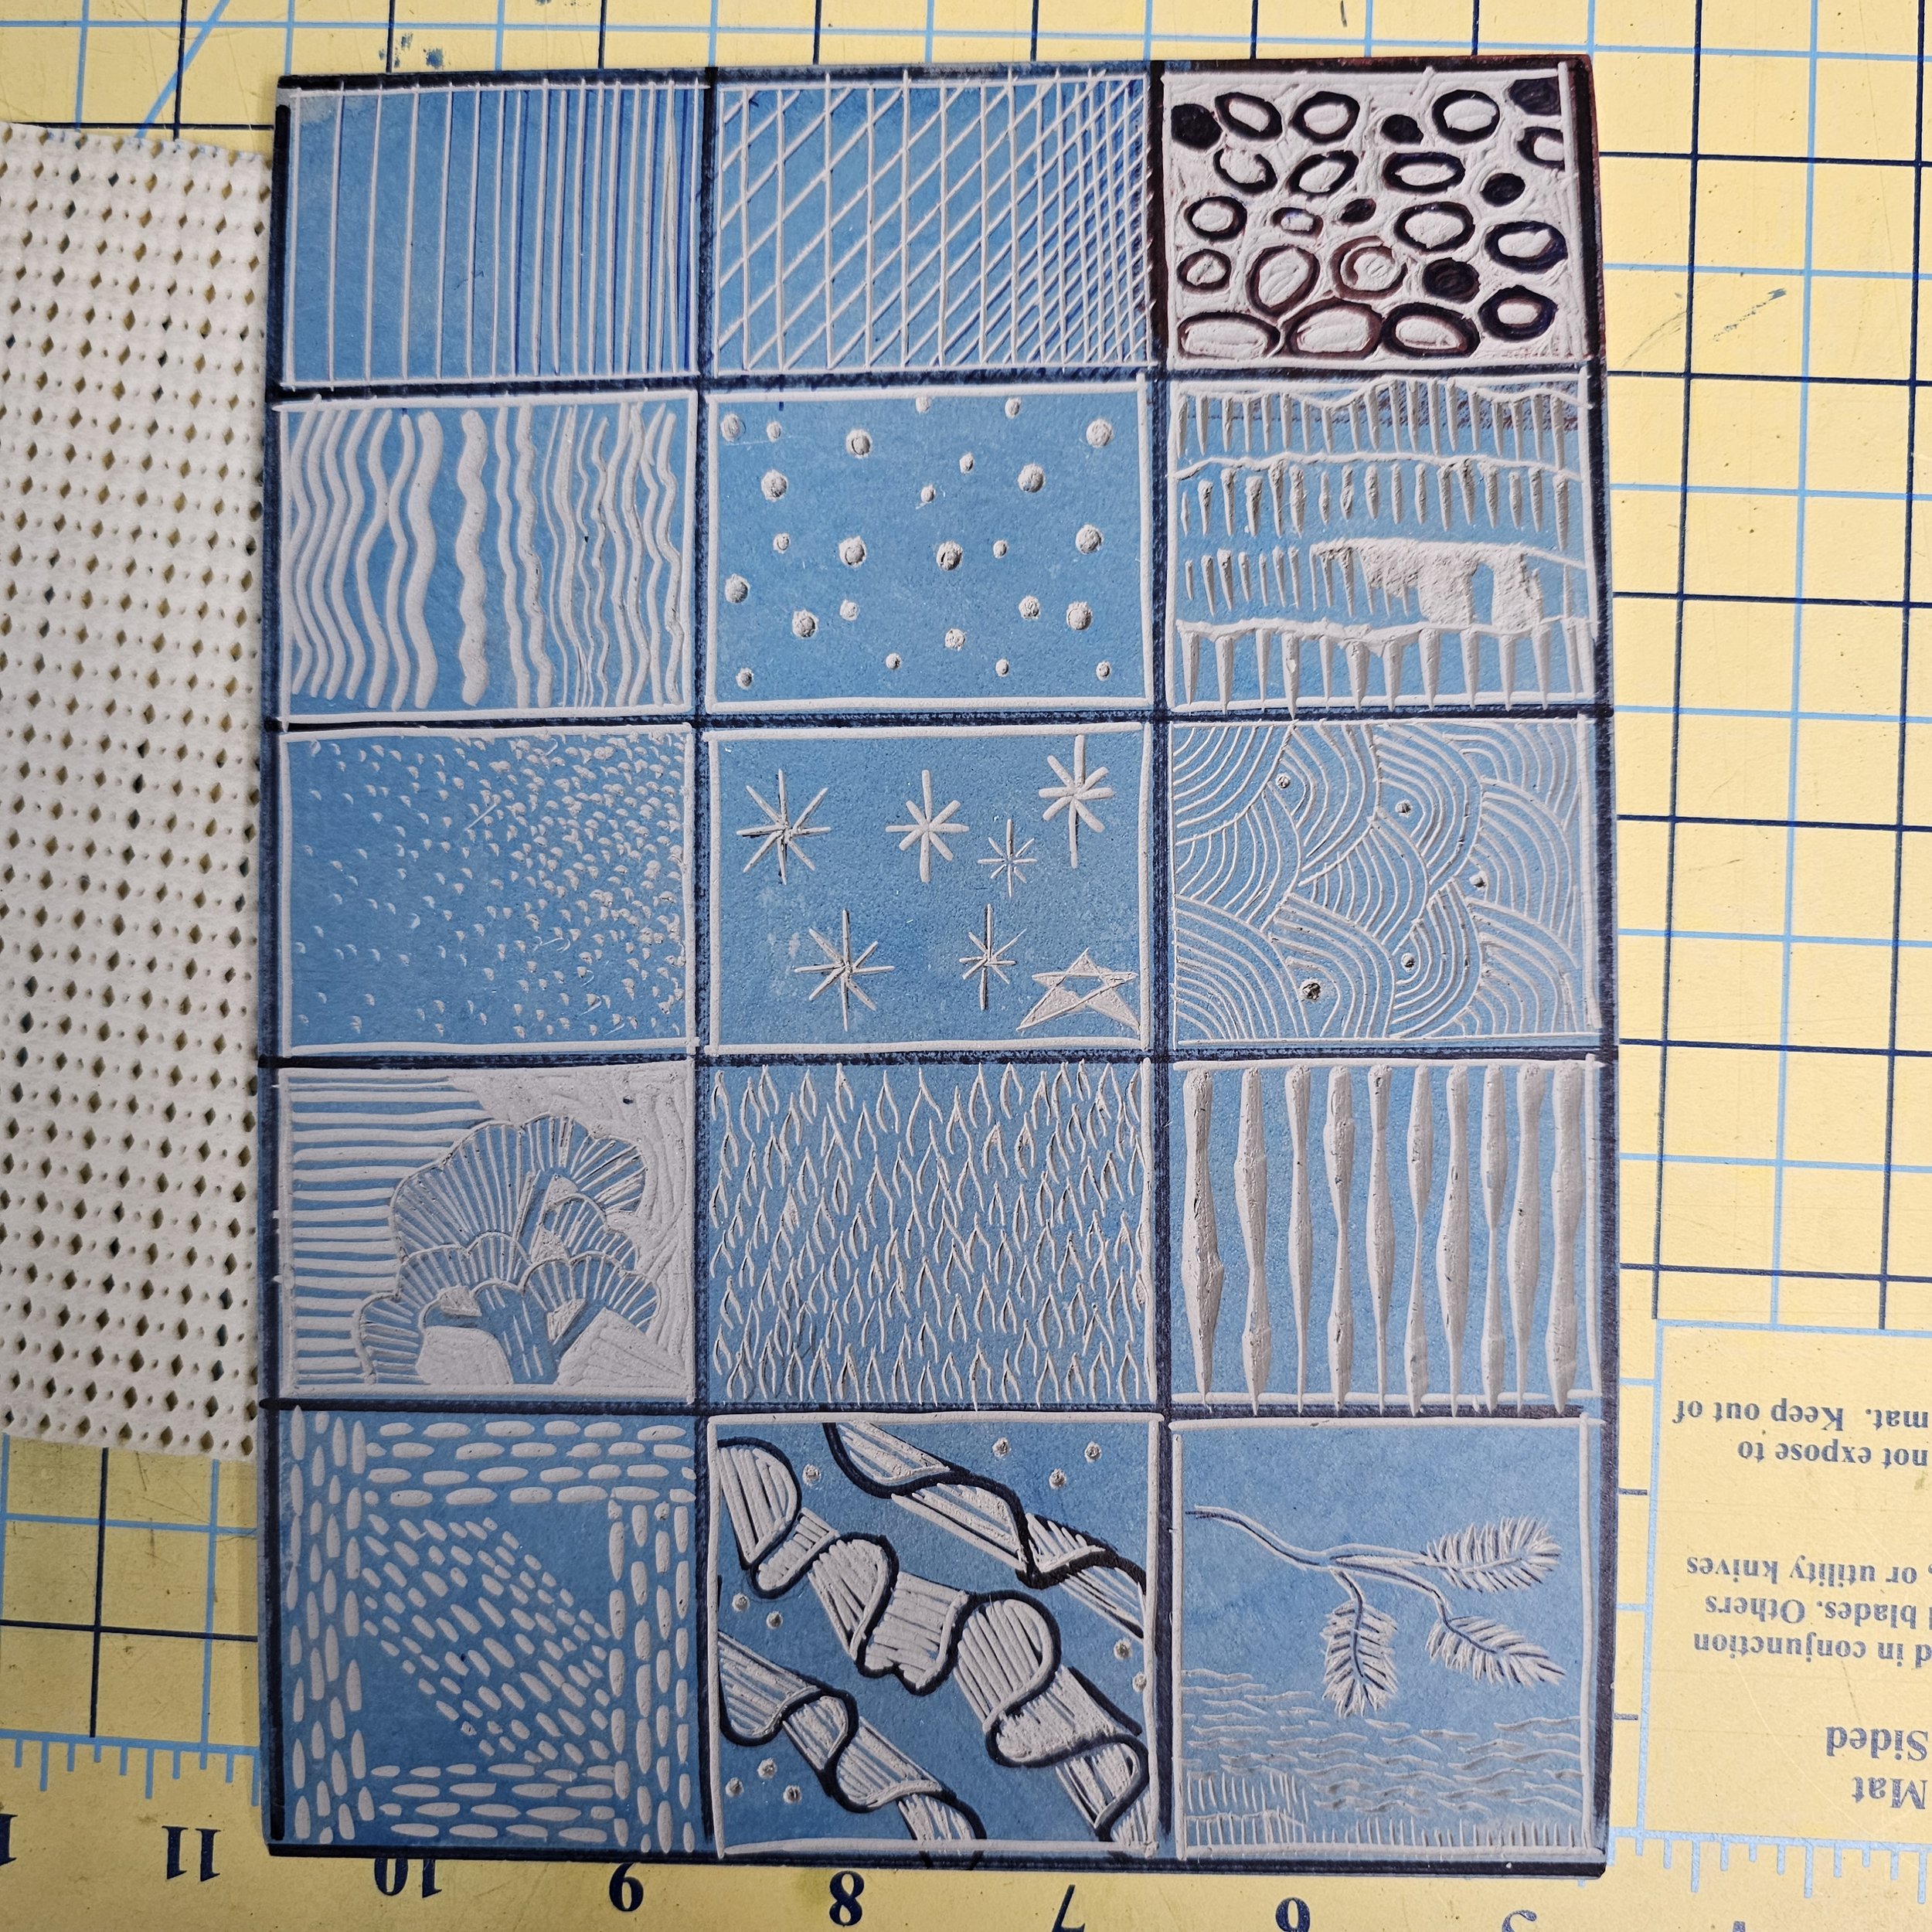
Sampler to try different patterns and tools.
Lino is much harder than Speedy-carve carving but much more detail can be achieved.
Lino printing is very messy and time consuming. I should have cleaned off a large area of the workspace and covered it with plastic. It is challenging to be clean when handling the paper and an inked block!
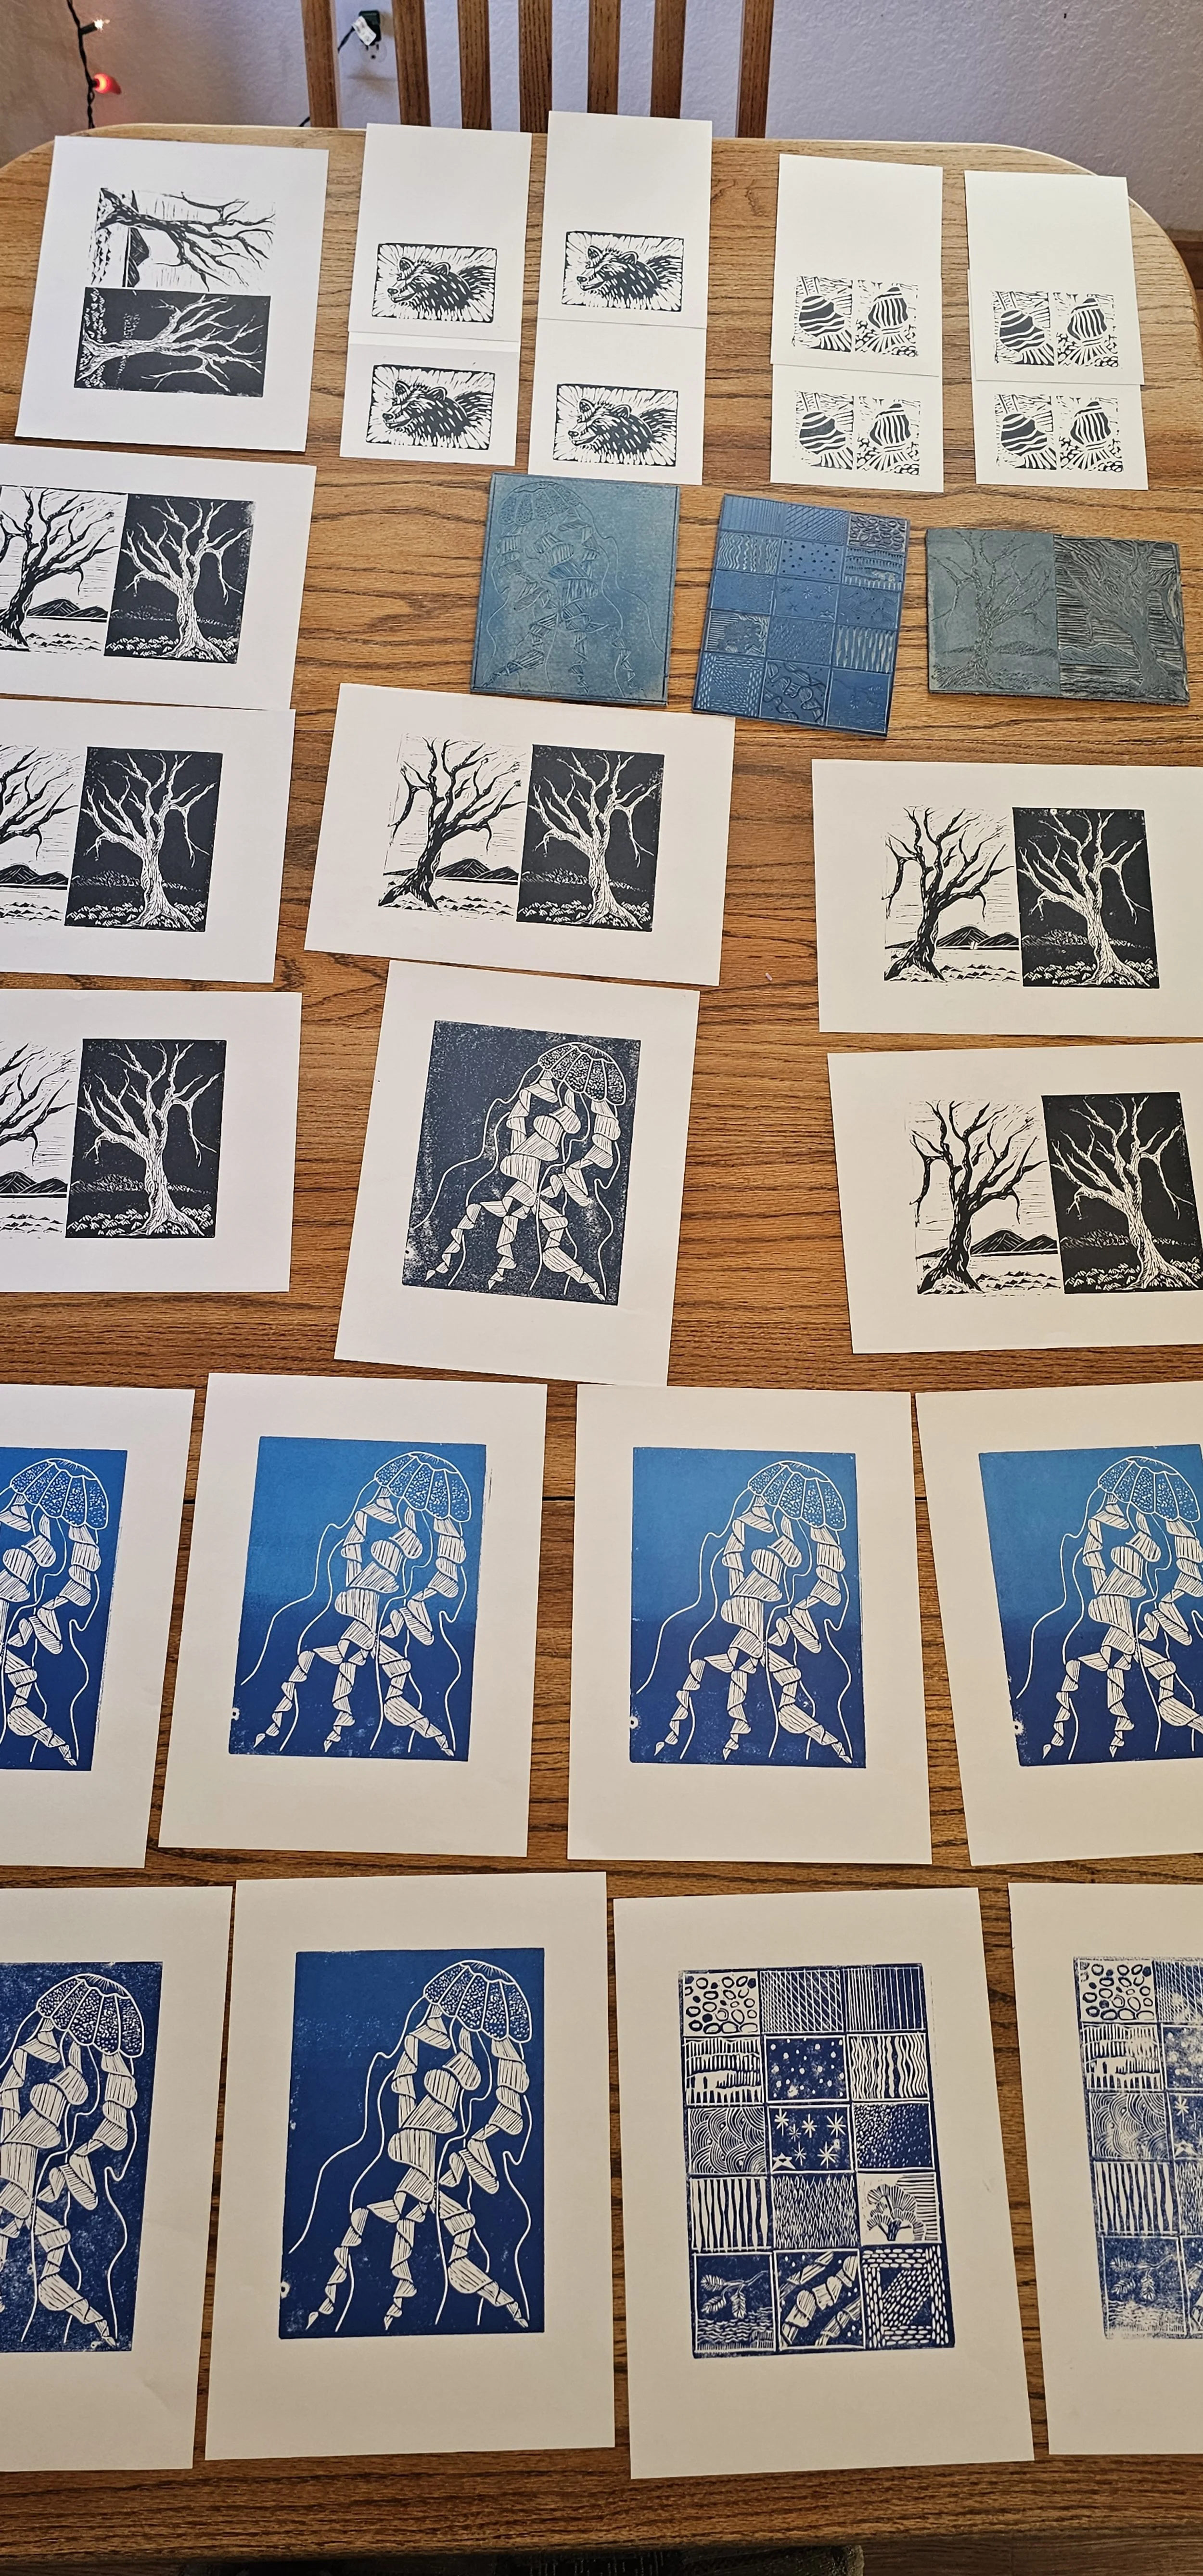
I'm glad I had three different blocks to print to make it more worthwhile to get into all this mess.

Carved Block
It is challenging to get a nice coating of ink on the block and to pick out any bits of dust or little bits of carved lino, as they always show on the print.
Inked Block
Pulling a print by hand requires a lot of pressure with a barren and a big wooden spoon. It is very hard to get a perfect print, transferring all the ink, especially from the large un-carved areas. Maybe I’ll get a press someday.
The registration of the paper went pretty well for just doing single inked prints. If doing multiple prints of different colors where registration is extremely important I will need a different system. Maybe a bench hook.
I need a good place to let them dry without stacking them so right now they are covering my dining room table.
Cleaning up was a real bear. The videos in the classes always make it look so easy. I used Cranfield Caligo, Safe Wash Ink that is an oil based ink, but cleans up with soap and water.
Still, it took a lot of soap and water and elbow grease to get the plates, the rollers, printing area etc. cleaned.
Don't use plastic palette knives. They break. One more thing I need to order.
Chatter and noise in the background of a print is both acceptable and non acceptable and totally up to the artist.
Right now, I find it adds an interesting texture and adds to the hand printed quality. So I'm not going to worry about it.
There is much ink left on the inking plate when you're done printing the larger lino prints. I used this to print a few of my Speedy-carve blocks and found that it took much less ink to ink up a Speedy-carve block than a lino block. After printing eight greeting cards, there was still quite a bit of ink on the plate, and I tried inking up a lino block again and could not get a good coating of ink for 1 final print.
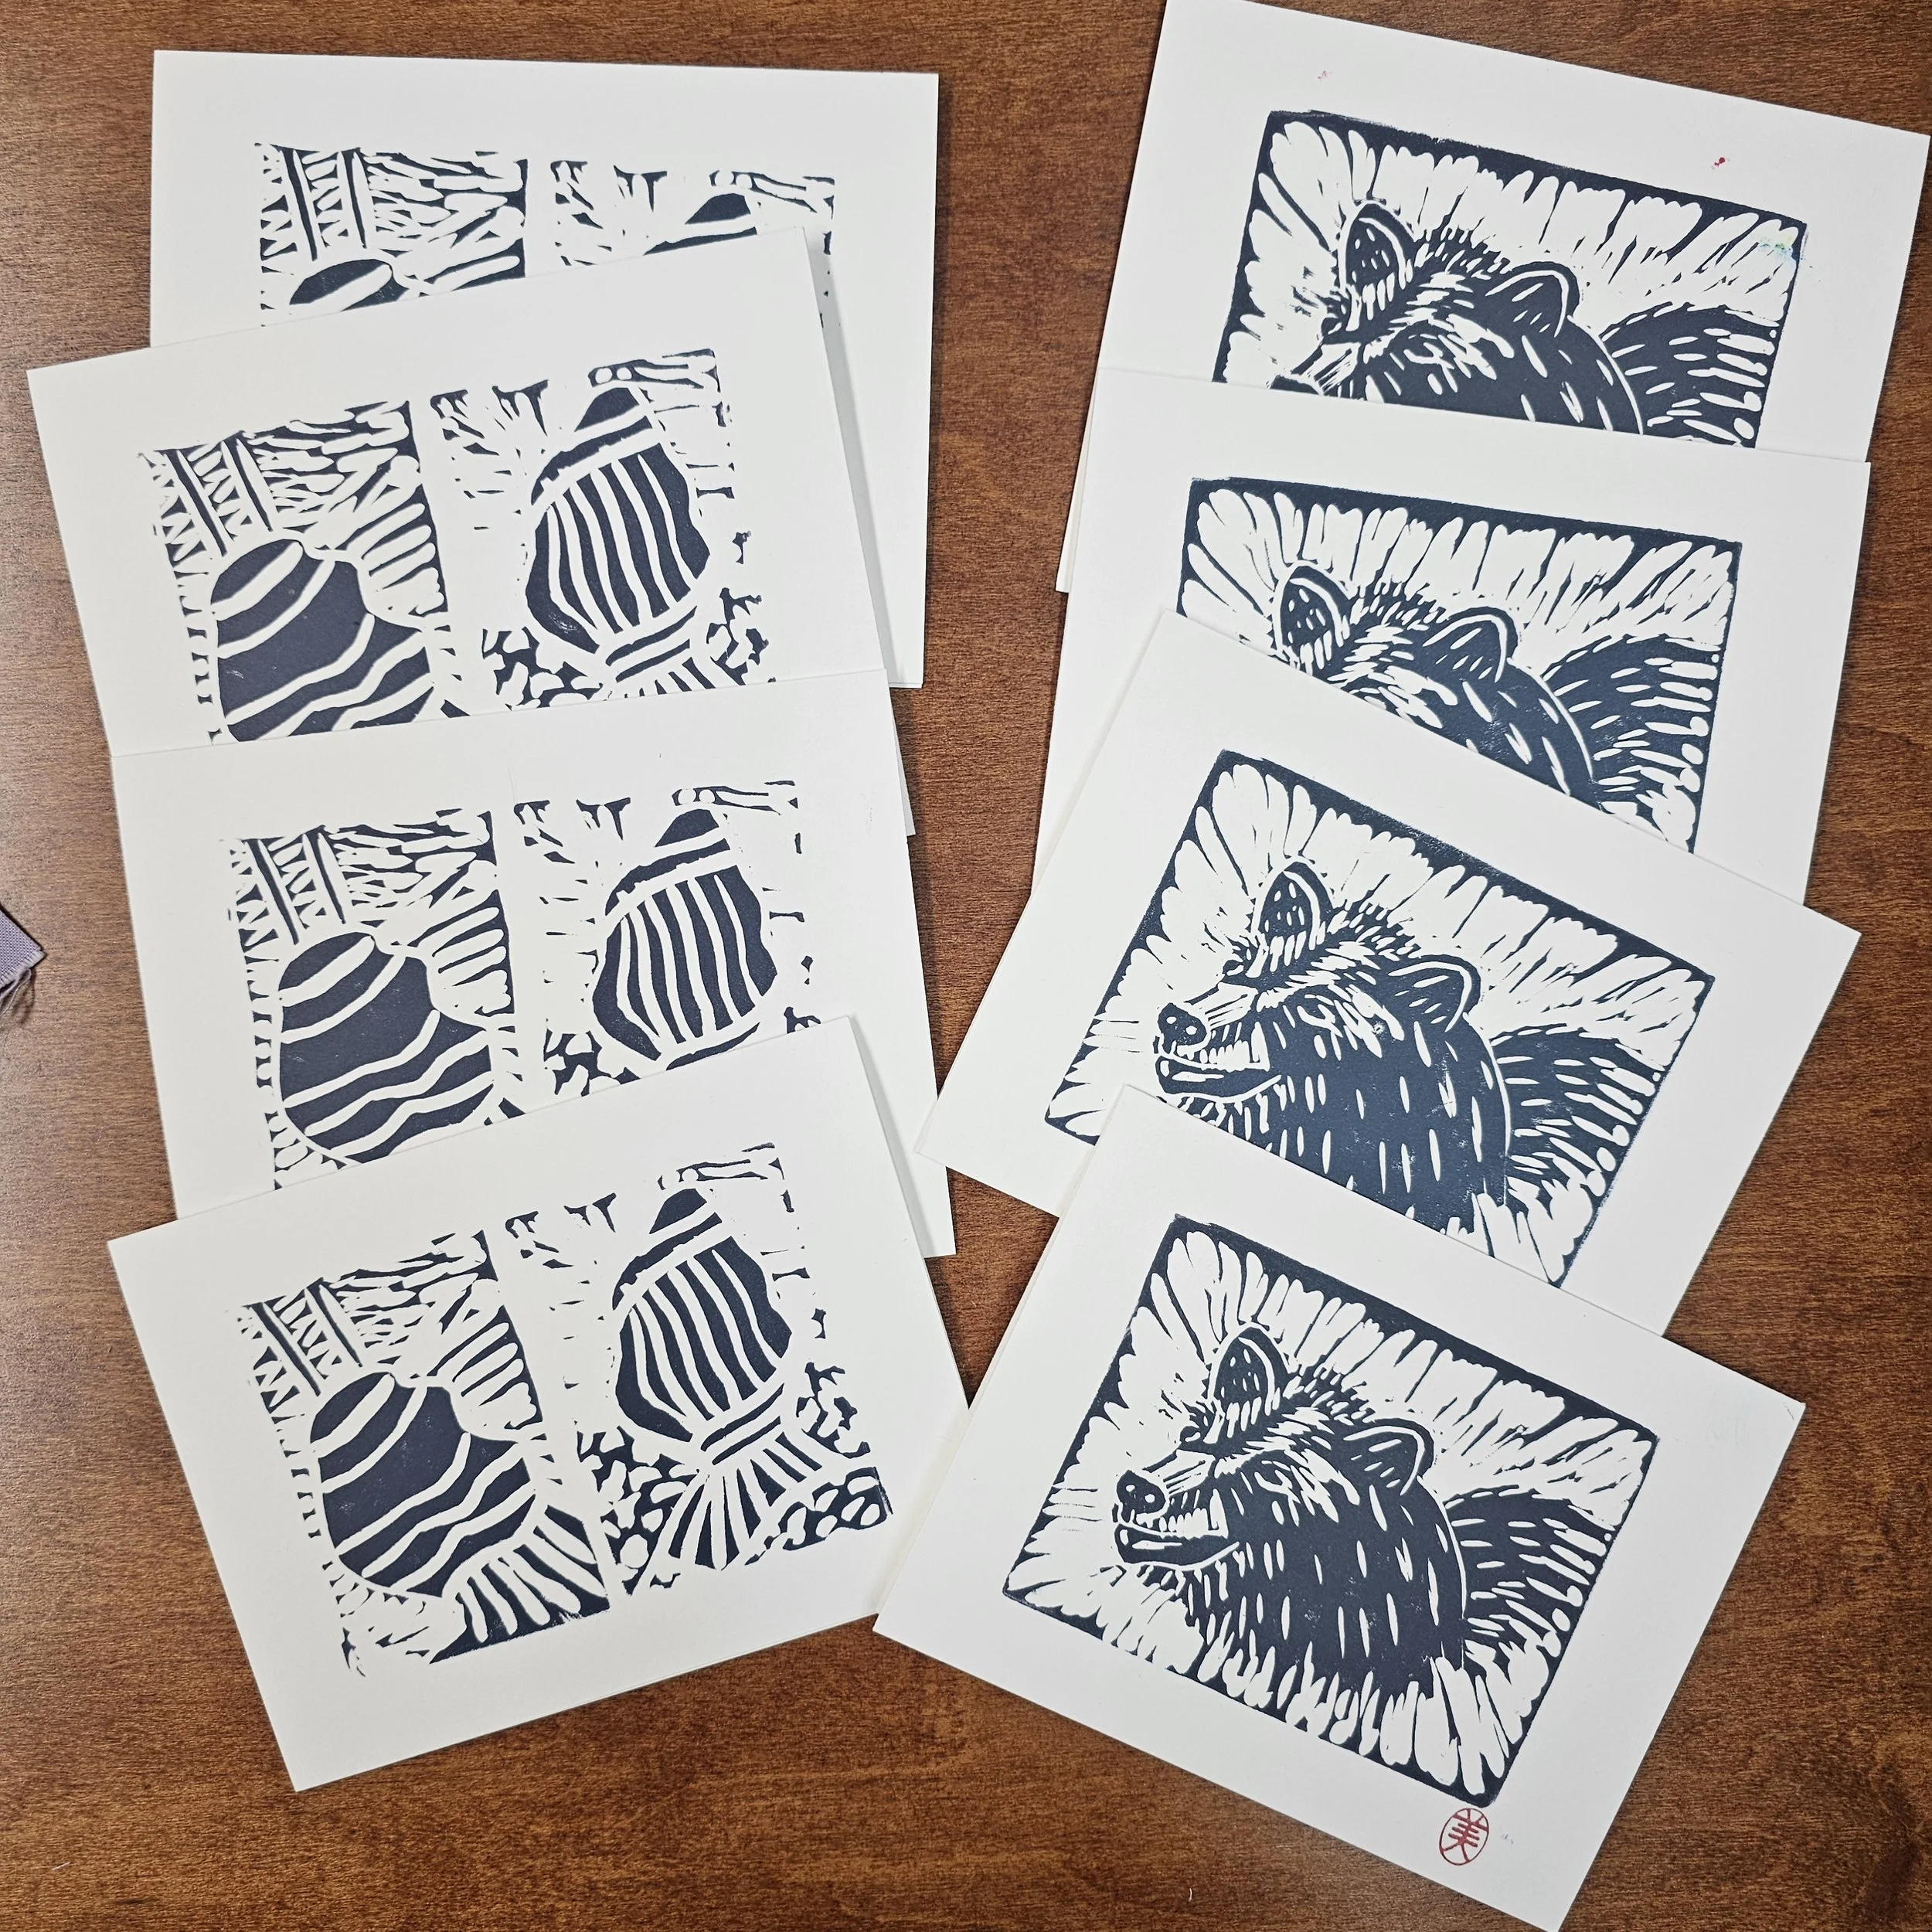
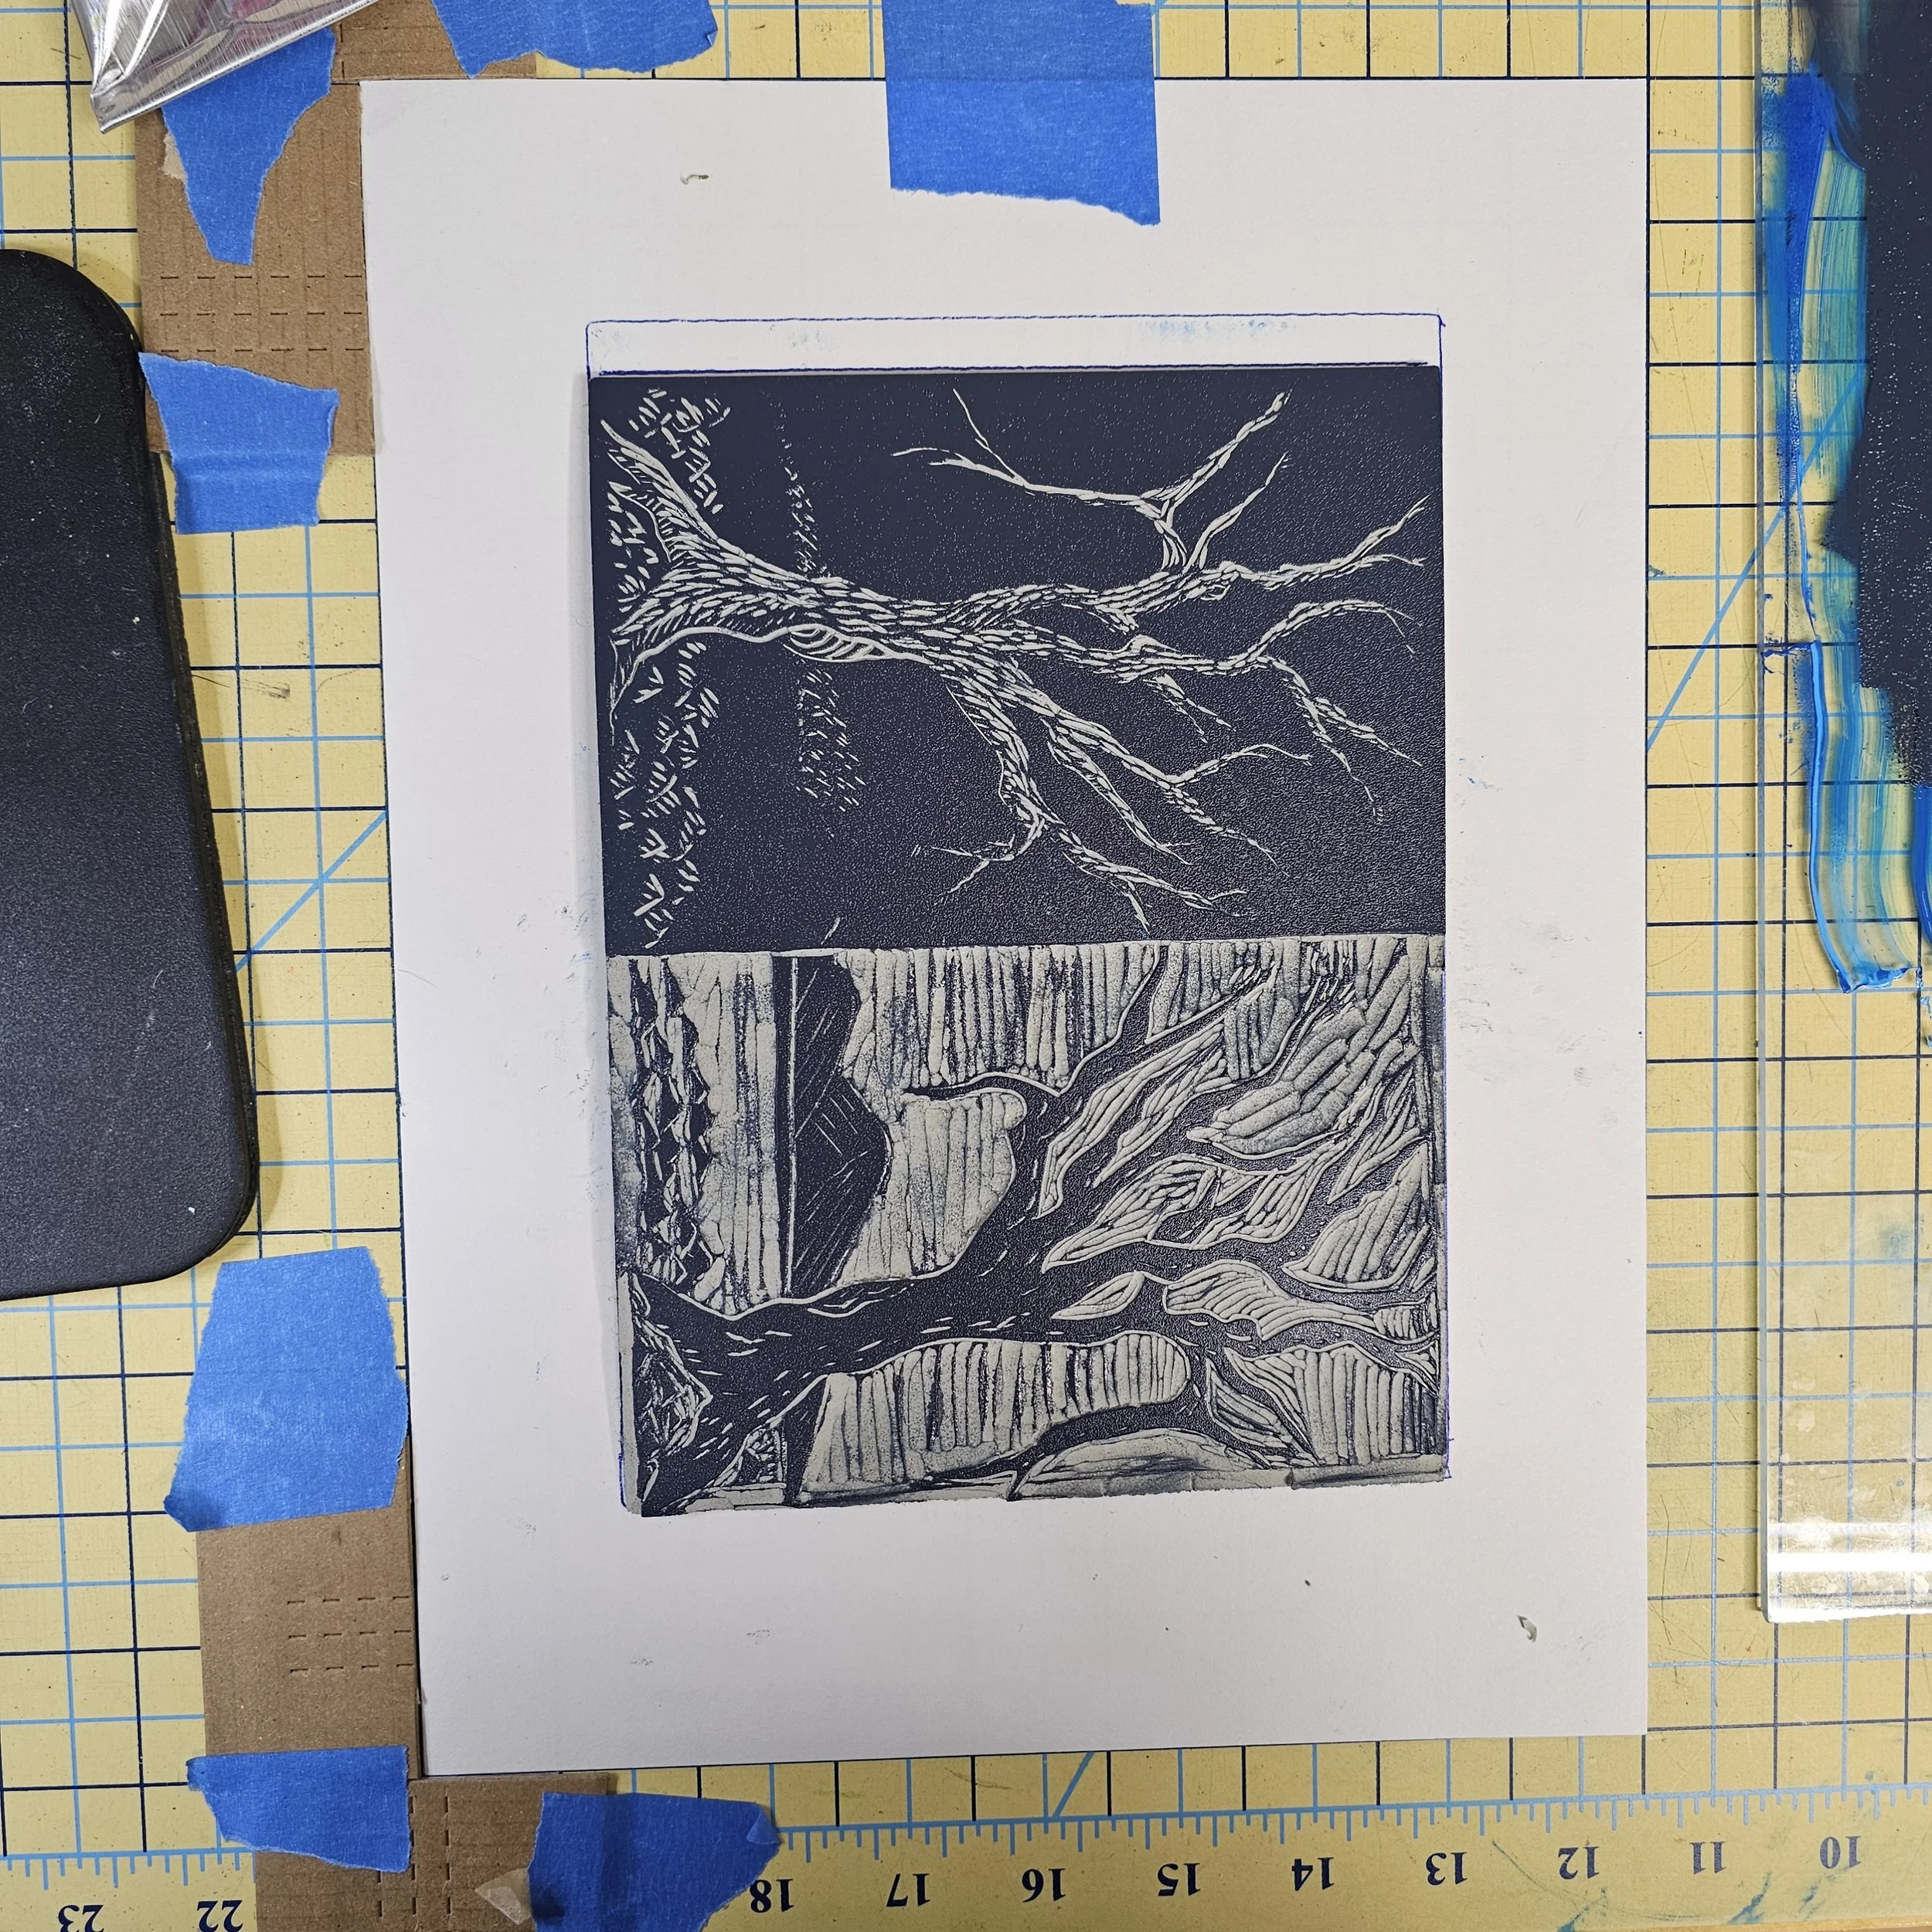
Sea Stacks from the Bay of Fundy and a bear I carved on the trip in the fall.